Overview on Azure Front Door
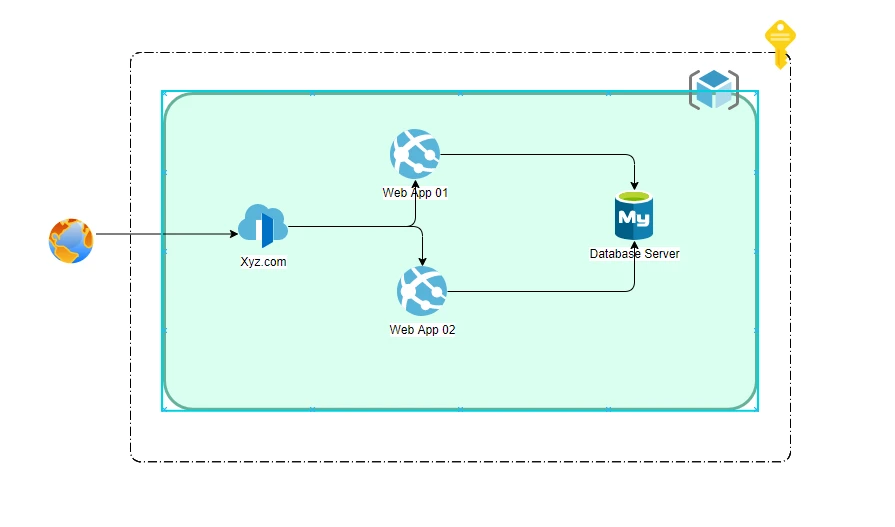
Azure Front Door is a global service that is used with web applications at layer. It has edge locations over the world for better web application performance and availability.
It works at Layer 7 (HTTP/HTTPS layer). You can configure routing rules and backend as per your requirement. The backend application should have a public-facing endpoint. Front Door provides a range of traffic-routing methodsandbackend health monitoring optionsto suit different application needs and automatic failover scenarios.
Prerequisite
- Azure Subscription
- Azure Web app for Backend
- Basic understanding of Load Balancing
Step 01: How to deploy Azure Front Door
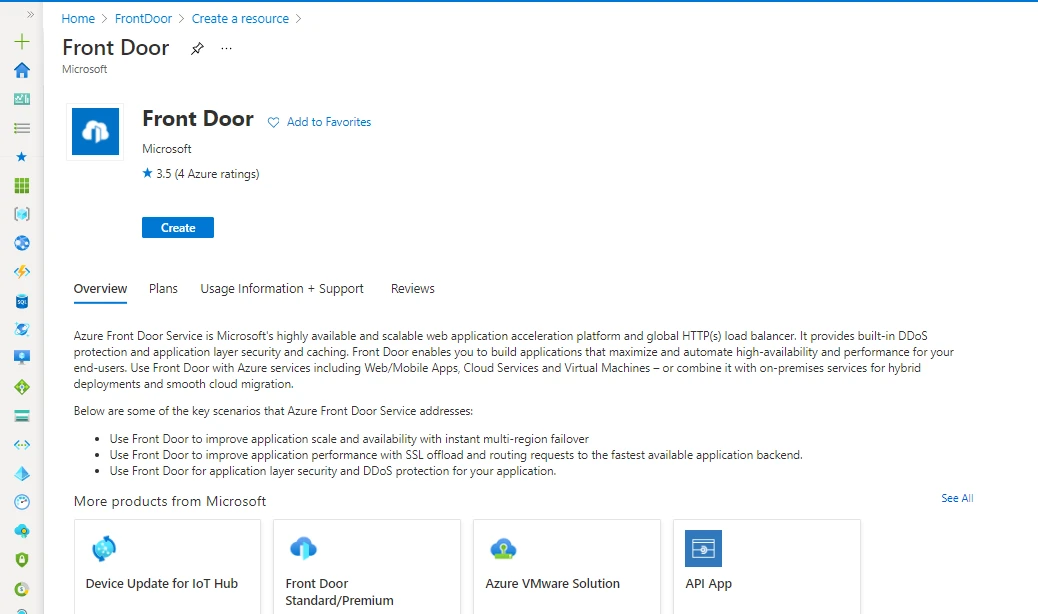
First, we have to search for Front Door in the search panel. Front Door comes under the category of the load balancer service. You can see the service details as per the below image.
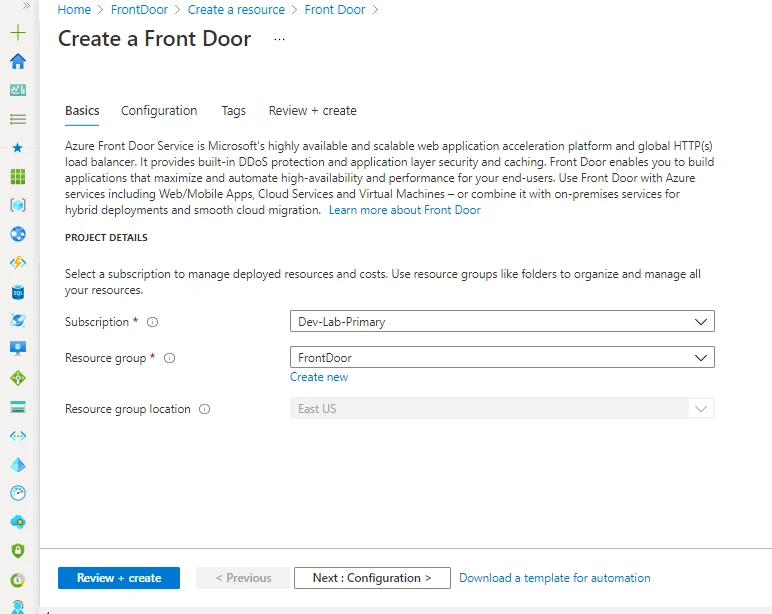
Configure Basics Section
You have to follow this wizard to create the resource. Creating Front Door service is a bit easy compared to others as we don’t have to fill up a lot of options. As its global resource so you don’t have to select the Location.
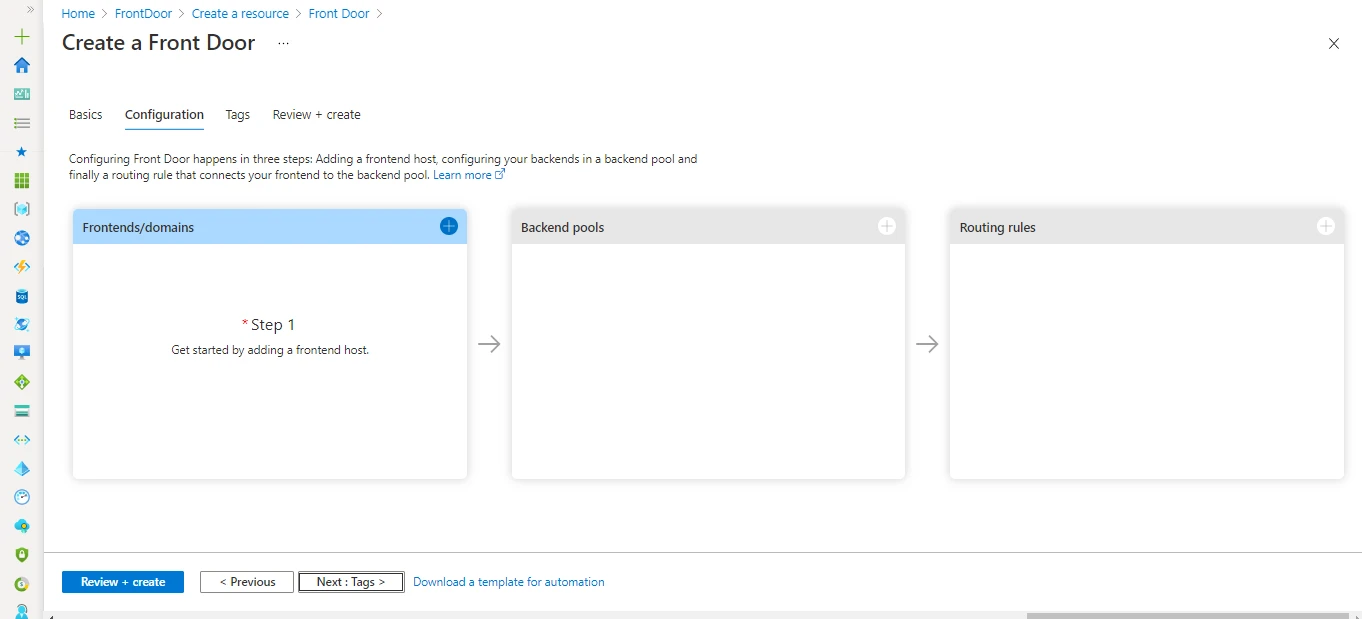
Modify Configuration Section
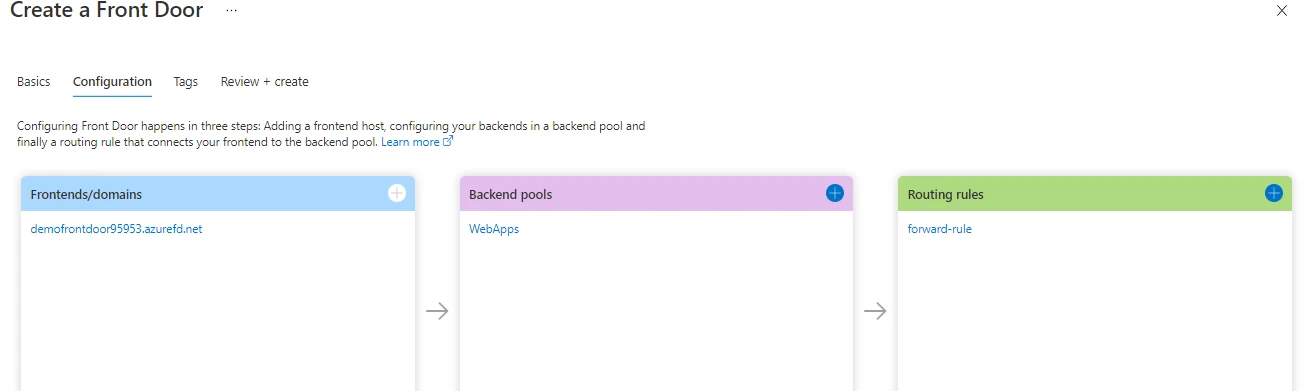
The best part of deploying resources is to configuration part and we will add in detail steps for creating Frontend, Backend, and Routing rules. for time being let's follow the wizard.
After adding everything you can see configurations like the below image. And you must configure this to deploy resources.
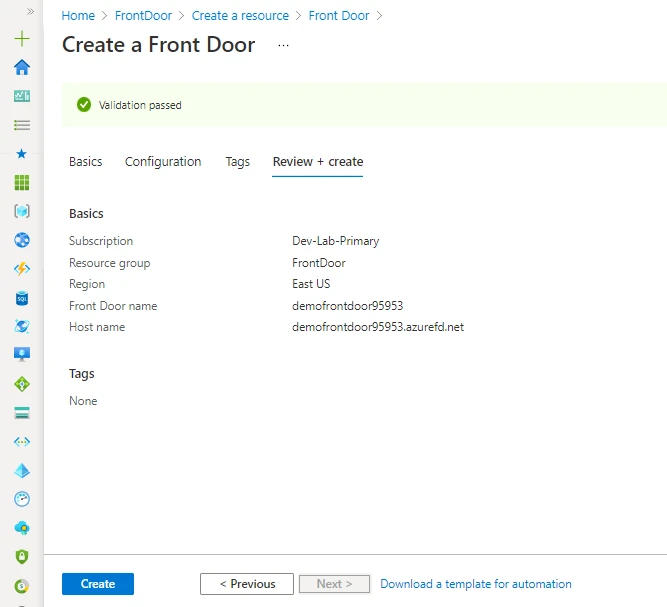
Review and Create
Once you configured everything you can see the validation and then click on Create.
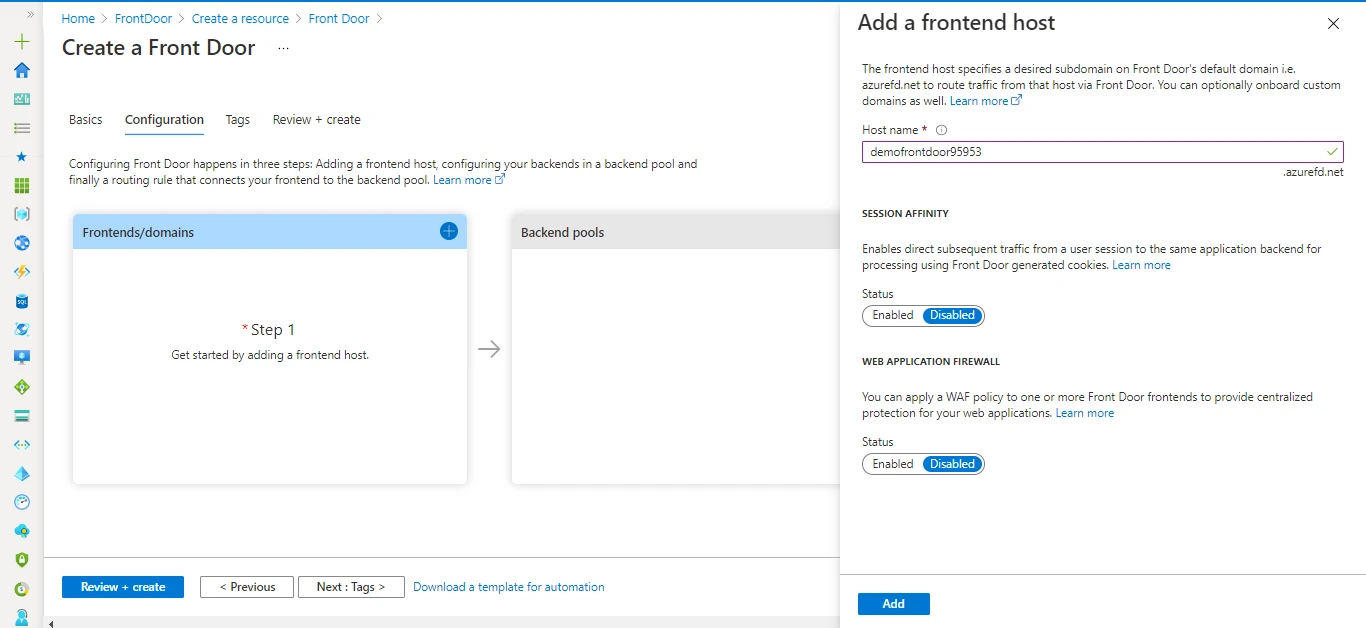
Step 02: Add Frontend Host
First, let’s understand what the front is? so as we know the front door
is a kind of load balancer service working on layer 7. Basically, the
frontend is your domain URL like www.xyz-server.com and the backend
would be your Web server on VM or Web App or any other public endpoint
of your application.
By, default you must add frontend with xx.azurefd.net then later you can add alias record and then use your custom domain that will understand in the next step.
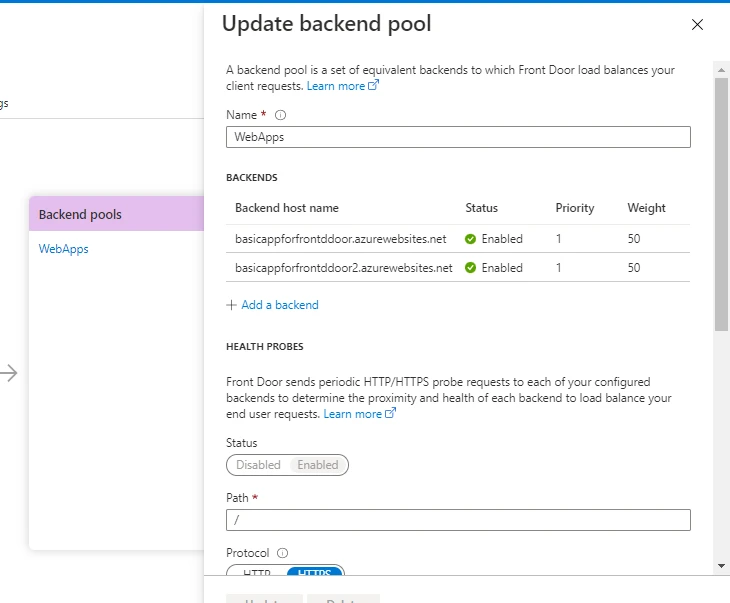
Step 03: Add Backend Pool
Adding default frontend is only of few clicks task. Let’s, configure the backend of the front door. You have to click on Add backend pool then this pop-up will appear and then click on Add a backend.

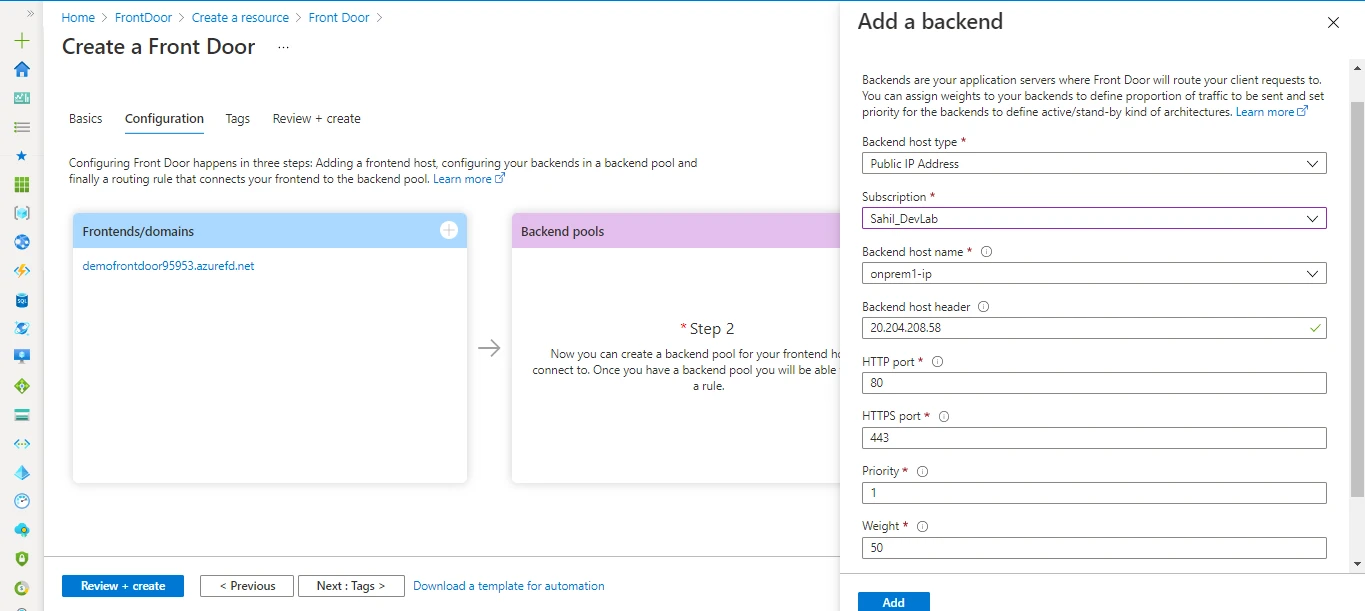
Step 04: Configure and add Backend to Pool
Here you can see multiple options. but as I explained in the overview you have to give the public endpoint of your Web app. Here as per the image, I have added my VM Public IP of webserver likewise you can add multiple azure services like Web App, etc.
After adding the backend, you could see them in the backend pool.
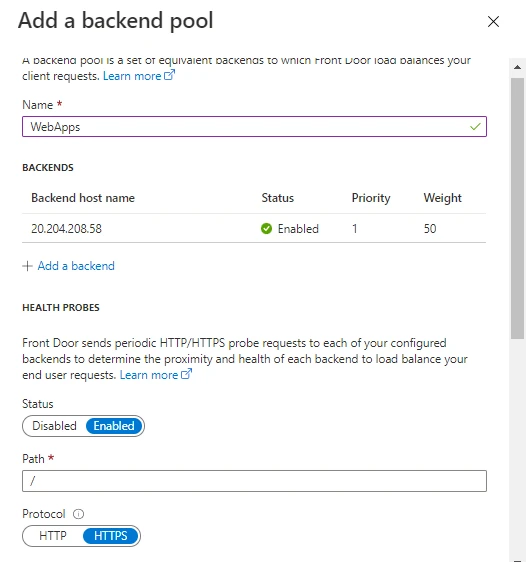
apart from that, you have multiple options here like the above image
Path: - Set the path for health probes.
Protocol: - You can set HTTP/HTTPS
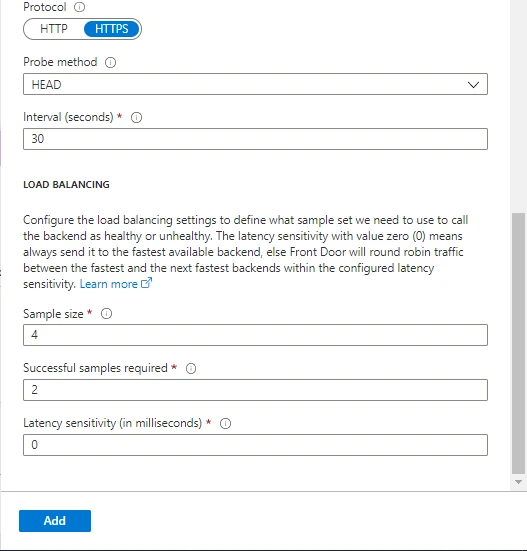
Step 05: Configure Load Balancing
You can configure Load Balancing with the below options. We can get a better understanding of the Load Balancing of the Front Door from the below documentation.
Step 06: Create and configure Routing rules in Azure Front Door
You have to click on Add rule in the Routing rules tab this option will pop up. Here are a few options you can configure.
Accepted Protocol: - If your application is only working on HTTP you can set it to accept HTTP or if you want to set it for HTTPS, you can do the same.
Frontends/Domains: - We have created frontends in the above step. you can add multiple frontends/domains for a single routing rule.
Patterns to match: - you can set the path-based routing rule.
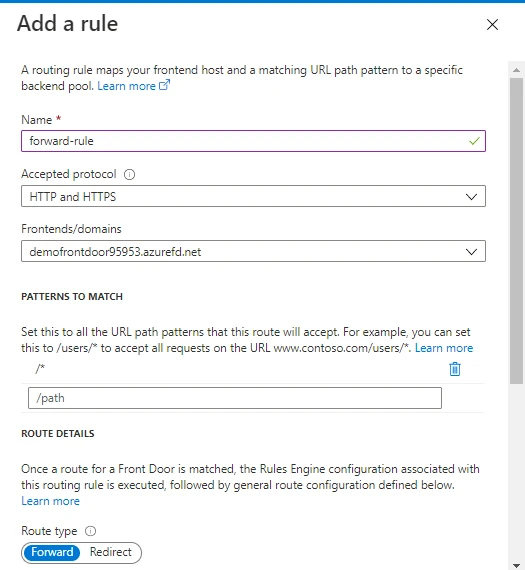
Apart from that, you have Route type like you can create rules on basis of forwarding and Redirect.
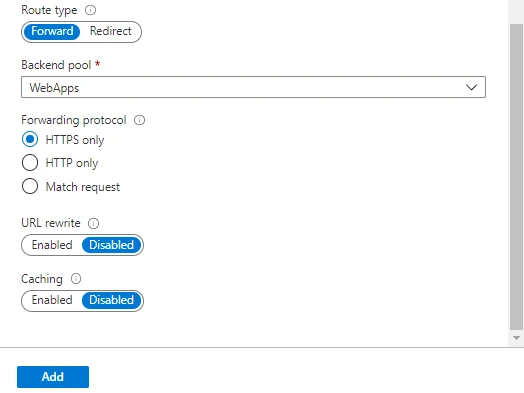
The next option is to set Backend Pool for your rule. apart from that you have URL rewrite and caching options.
In next step will see how it works with web apps and load balancing rule.
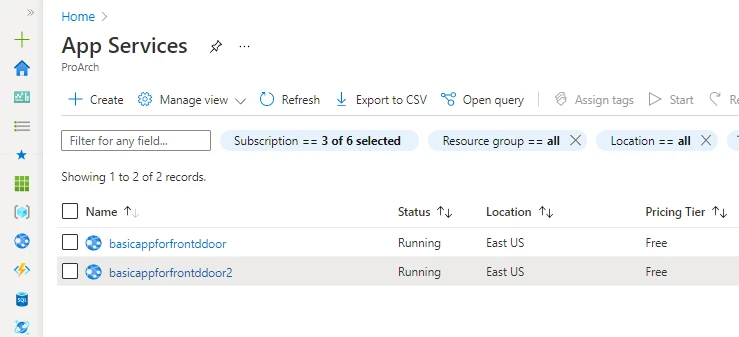
Step 07: Accessing website using Front Door URL
For testing, we have created two web apps with a basic HTML file. you can see web app details as per the below image.
Then we have added this into the front door backend pool and created on forwarding routing rule.
Next, as you can see traffic is distributed between these two web apps. Now we have to go to the overview page and click on the front door URL
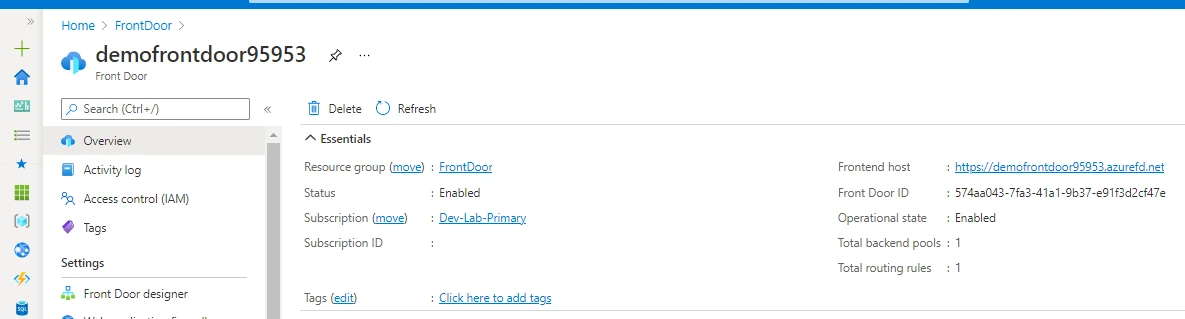
After clicking on the Frontend host URL you can browse the site.
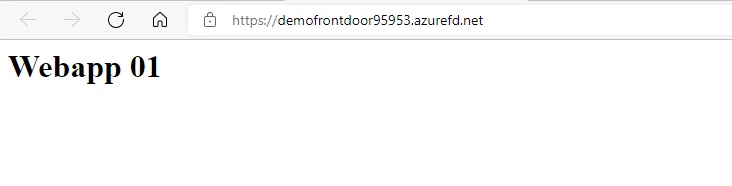
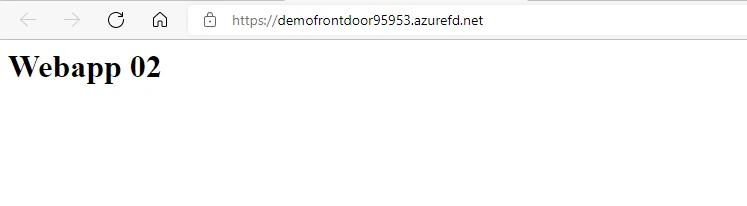
As per the above image you can see it's loading both pages. Hope if you follow all steps you would able to deploy and configure the front door for your public applications.
Summary
Azure Front Door is a great choice when your application is publicly accessible. it gives you a higher SLA as it's not a region-specified resource so there are fewer chances of failure in service. as well you can configure WAF in the front door to secure your web application from cyber-attacks. It's a very high-level overview of the service but if you make your hand dirty you will get to know a lot of functions about this.