
Kerberos is used for authentication and the idea is that within Kerberos, a set of credentials is kept hence we will configure a Kerberized NFS Server. Kerberos will know about the NFS server, Kerberos will know about the NFS clients, and Kerberos will know about the user.
Kerberized NFS Server
We need Kerberized NFS because NFS is very limited security. It only
checks the IP address or host name of the client and if the IP address or
host name of the client is okay, then access will be granted. If you
want to tighten security a little bit more, you can use the sec=
option, which works with different arguments.
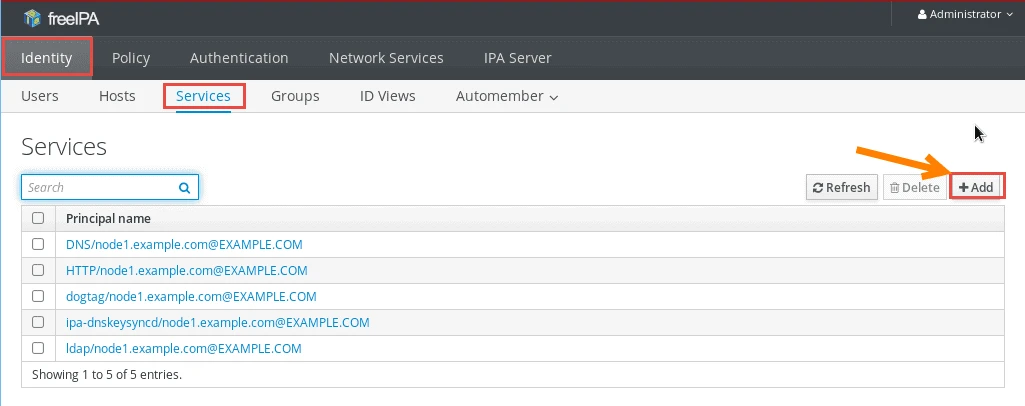
Create NFS service on IPA server
Before starting with the NFS service configuration, we must add a new service on any on of the IPA server or client. For this article I will create NFS service on IPA server i.e. node1.example.com.
Follow the below screenshots to achieve the same.
I will login to my IPA server using the browser on node1.example.com
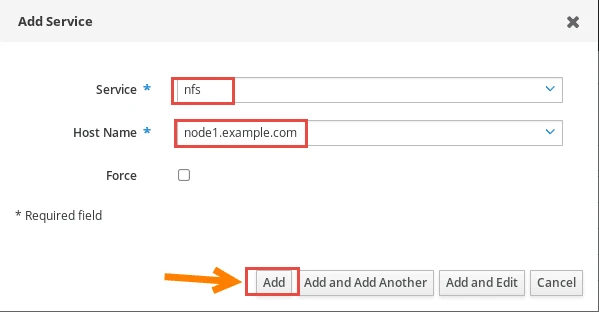
Next choose the service as 'nfs' from the drop down menu and select
the host on which the service must be created which for us
node1.example.com
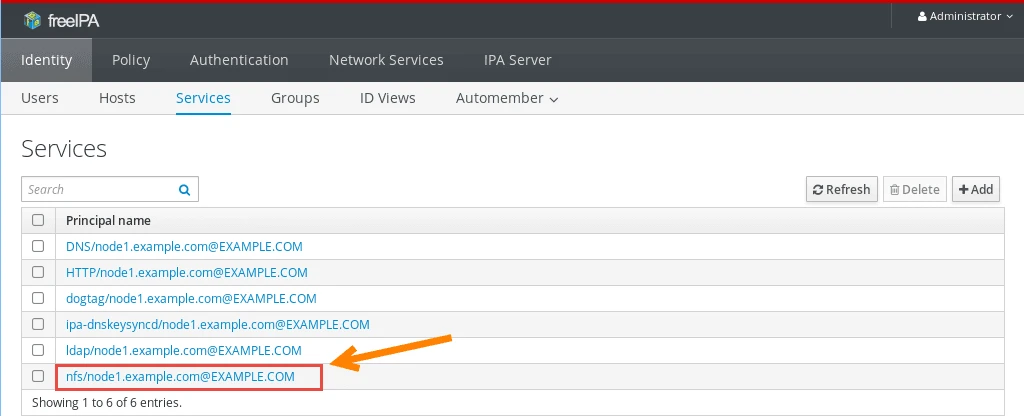
Verify the service which we just created.
Now since I have configured my IPA server as NFS server hence I don't need to import the keytab file but in case you have a different NFS server then follow the below command
[root@node3 ~]# ipa-getkeytab -s  -p nfs/ -k /etc/krb5.keytab
Keytab successfully retrieved and stored in: /etc/krb5.keytab
View the available credentials
[root@node1 ~]# klist -k
Keytab name: FILE:/etc/krb5.keytab
KVNO Principal
---- --------------------------------------------------------------------------
   2 host/[email protected]
   2 host/[email protected]
   2 host/[email protected]
   2 host/[email protected]
   2 host/[email protected]
   2 host/[email protected]
   1 nfs/[email protected]
   1 nfs/[email protected]
Configure Kerberized NFS share on server
To start with let us first of all create an NFS share path which will be shared across the network to our clients.
[root@node1 ~]# mkdir /secureshare
I will give full permission to my share for the sake of this article.
[root@node1 ~]# chmod 777 /secureshare/
There are three different options to configure Kerberized NFS: krb5,
krb5i, and krb5p.
Different security options can be used with sec=
- none: it allows anonymous access to files and writes to the server
are issued as
nfsnobody - sys: File access, in this case, is based on UID and GID mapping and that means that if a file on the server is owned by user 1000, and user 1000 from the client tries to access it, you will get the access permissions of user 1000 in the server. There is no checking to see if these are the same users, so it's not ideal from a security perspective.
- krb5: clients must prove ID using kerberos
- krb5i: like krb5, but adds guarantee that data has not been tampered with
- krb5p: adds encryption to the above
In fact, there is no reason to use anything but krb5p because using that option, the client must prove ID using a Kerberos ticket. Also, Kerberos acts to guarantee that data has not been tampered with and encryption is added, as well. That is a pretty nice option if you want to use Kerberized NFS
[root@node1 ~]# cat /etc/exports
/secureshare *(sec=krb5p,rw)
Next start you nfs-server and check the status to make sure the service is running properly.
Control the running service with systemctl start, stop, or restart; see the systemctl command for try-restart and dependency behavior.
[root@node1 ~]# systemctl start nfs-server

[root@node1 ~]# systemctl status nfs-server
● nfs-server.service - NFS server and services
   Loaded: loaded (/usr/lib/systemd/system/nfs-server.service; disabled; vendor preset: disabled)
  Drop-In: /run/systemd/generator/nfs-server.service.d
           └─order-with-mounts.conf
   Active: active (exited) since Wed 2019-04-10 05:52:13 IST; 4s ago
  Process: 4960 ExecStartPost=/bin/sh -c if systemctl -q is-active gssproxy; then systemctl restart gssproxy ; fi (code=exited, status=0/SUCCESS)
  Process: 4923 ExecStart=/usr/sbin/rpc.nfsd $RPCNFSDARGS (code=exited, status=0/SUCCESS)
  Process: 4921 ExecStartPre=/usr/sbin/exportfs -r (code=exited, status=0/SUCCESS)
 Main PID: 4923 (code=exited, status=0/SUCCESS)
    Tasks: 0
   CGroup: /system.slice/nfs-server.service

Apr 10 05:52:08 node1.example.com systemd[1]: Starting NFS server and services...
Apr 10 05:52:13 node1.example.com systemd[1]: Started NFS server and services.
Validate the newly created mount point
[root@node1 ~]# showmount -e localhost
Export list for localhost:
/secureshare *

[root@node1 ~]# exportfs -v
/secureshare    (sync,wdelay,hide,no_subtree_check,sec=krb5p,rw,secure,root_squash,no_all_squash)
Enable NFS on the Firewall
Add NFS service in your firewall to all all the authentication request from clients.
Allow the bundled service with firewall-cmd --add-service; see the firewalld for http, https, and custom service definitions.
[root@node1 ~]# firewall-cmd --permanent --add-service=nfs
success

[root@node1 ~]# firewall-cmd --permanent --add-service=mountd
success

[root@node1 ~]# firewall-cmd --permanent --add-service=rpc-bind
success
Reload the firewall services
[root@node1 ~]# systemctl reload firewalld
Verify the newly added firewall services.
[root@node1 ~]# firewall-cmd --list-all
public (active)
  target: default
  icmp-block-inversion: no
  interfaces: eth0 eth1
  sources:
  services: ssh dhcpv6-client freeipa-ldap freeipa-ldaps dns nfs mountd rpc-bind
  ports:
  protocols:
  masquerade: no
  forward-ports:
  source-ports:
  icmp-blocks:
  rich rules:
Configure Kerberized NFS service on the client node
Now let us start configuration on our client node. First of all generate a kerberos token using admin user.
[root@node2 ~]# kinit admin
Password for [email protected]:
Verify the kerberos credential using klist
[root@node2 ~]# klist -k
Keytab name: FILE:/etc/krb5.keytab
KVNO Principal
---- --------------------------------------------------------------------------
   1 host/[email protected]
   1 host/[email protected]
Next we need to install all the rpm required to configure NFS client with kerberos authentication
[root@node2 ~]# yum groups install -y "Network File System Client"
Next start and enable the nfs-secure service
[root@node2 ~]# systemctl enable nfs-secure
[root@node2 ~]# systemctl start nfs-secure
Create a mount point for the NFS share
[root@node2 ~]# mkdir /securenfs
It is time to mount the NFS share on our client node.
[root@node2 ~]# mount -o sec=krb5p node1.example.com:/secureshare /mnt
So the NFS share is successfully mounted, you can validate the same using mount command.
[root@node2 ~]# mount | grep securenfs
node1:/secureshare on /securenfs type nfs4 (rw,relatime,vers=4.1,rsize=524288,wsize=524288,namlen=255,hard,proto=tcp,timeo=600,retrans=2,sec=krb5p,clientaddr=10.0.2.31,local_lock=none,addr=10.0.2.30)
LDAP user to access nfs-secure share
Now this share is accessible by system users but the benefit of
Kerberized NFS share is that it can be used by LDAP users as well. Now I
have a LDAP user 'deepak' so let me try to access the NFS share using
'deepak' user.
[root@node2 securenfs]# su - deepak
Last login: Mon Feb 25 20:56:05 IST 2019 on :0
I will try to navigate inside my NFS share.
[deepak@node2 ~]$ cd /securenfs/
-bash: cd: /securenfs/: Permission denied
As you see we are getting permission denied. Now this is expected
behaviour. Since there are no tokens generated for 'deepak' user. So
let us generate a kerberos token for deepak user using kinit
[deepak@node2 ~]$ kinit deepak
Password for [email protected]:
Password expired.  You must change it now.
Enter new password:
Enter it again:
Next attempt to access the NFS share.
[deepak@node2 ~]$ cd /securenfs/

[deepak@node2 securenfs]$ pwd
/securenfs

[deepak@node2 securenfs]$ touch file

[deepak@node2 securenfs]$ ls -l
total 0
-rw-rw-r--. 1 deepak deepak 0 Apr 10 06:10 file
So now the deepak user is able to access the share and also has write
permission on the share.
Lastly I hope the steps from the article to configure Kerberized NFS server on Linux was helpful. So, let me know your suggestions and feedback using the comment section.
