![Create forensic image with FTK Imager [Step-by-Step]](/create-forensic-image-ftk-imager/ftk_imager.jpg)
In this guide we will use FTK Imager which is a digital forensic tool to acquire disk image. Digital forensic is a field within forensic science which deals with acquiring, identifying, processing and reporting of evidences collected in the various known digital formats. FTK Imager is a popular tool used by professionals to acquire digital evidence. In this guide we will be using FTK Imager tool to acquire a forensic image from a PC.
Overview on FTK Imager
FTK Imager in full stands for Forensic Toolkit Imager. This is a windows commercial forensic imaging software used by law enforcement around the world. We will just be extracting volatile memory from the PC so no need to worry about getting a license first. We will be running FTK Imager from an external drive as it is recommended to avoid interfering with the evidence.
Pre-requisites
- Have PC running on windows operating system with at least 4GB of RAM.
- Download the FTK Imager lite files.
- Have a working USB drive.
Requisites
- Have knowledge of using windows operating system.
- Little knowledge on forensic imaging.
- Be able to follow this guide to the end.
With that let’s jump right into our guide.
Install FTK Imager on USB drive
FTK Imager has two ways in which you can use to extract forensic image
- Investigator can install FTK Imager on his/her laptop and mount the source disk to his laptop. (When acquiring evidence using this type of setup, make sure to use write blocker in order to prevent evidence data from being modified).
- Using the portable version of FTK Imager by running it directly from USB. It is most frequently used in live data acquisition.
In this guide we will be doing live data acquisition.
Steps to create forensic image using FTK Imager
Step 1: Download and extract FTK Imager lite version on USB drive
In this step we download FTK Imager lite versionfrom their official website and extract the downloaded zip file on our USB drive. The lite version contains the only necessary files to run FTK Imager tool from the USB drive.
While I tried to run FTK Imager off the USB drive and I ran into an error which you may also encounter where FTK Imager requires you to run the setup as administrator. You can check the guide on how to solve this error.
After the exe file is able to run successfully from the USB drive, we can now move to the second section of our guide where we will be acquiring volatile from a PC using FTK Imager.
Step 2: Running FTK Imager exe from USB drive
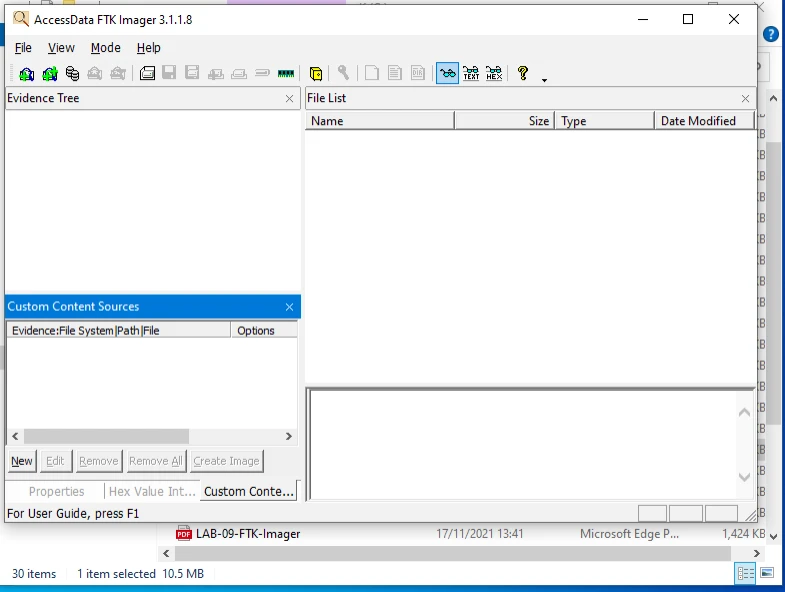
In this step, we will run the FTK Imager right from our USB drive which is mounted on the PC we will be acquiring volatile memory from. The FTK Imager screen will look as shown on the screen below.
Step 3: Capturing the volatile memory
On the top left of FTK Imager window, we click on the “File” option and select to capture memory option. We will be capturing the volatile memory of the PC or else the RAM. The memory dump contains juicy information which are useful to the investigators.
![Create forensic image with FTK Imager [Step-by-Step]](/create-forensic-image-ftk-imager/Picture3-8.webp)
Step 4: Setting other files to include and the file destination
FTK Imager has an option to include the AD1 file and the pagefile. The AD1 file can be defined as an access data forensic toolkit device dump file which investigator creates for later use and the pagefile is used in windows OS as volatile memory due to limitation of physical RAM hence may contain useful data when we consider volatile memory. We also set the path on where to save our memdump file.
![Create forensic image with FTK Imager [Step-by-Step]](/create-forensic-image-ftk-imager/Picture4-6.webp)
After selecting the options, we capture the memory and wait for the process to finish as shown below. We wait for the extraction to complete. If you selected to include AD1 and pagefile, the acquisition will take a little more time to complete.
![Create forensic image with FTK Imager [Step-by-Step]](/create-forensic-image-ftk-imager/Picture5-7.webp)
And after it has finished extracting the memory dump we get a message that the acquisition has been completed successfully.
![Create forensic image with FTK Imager [Step-by-Step]](/create-forensic-image-ftk-imager/Picture6-6.webp)
Below are our captured files as they were saved on the Desktop folderof the PC which was our selected location.
![Create forensic image with FTK Imager [Step-by-Step]](/create-forensic-image-ftk-imager/Picture7-8.webp)
As we said earlier FTK Imager can also be used to extract disk image for forensic analysis. In the below guide we will now acquire disk image file from the PC.
Step 5: Running FTK Imager for forensic image acquisition
We run our imaging tool off our USB drive as illustrated above and select on the option to acquire a disk image from the PC.****From the options you can choose the source evidence type. In our guide we will be acquiring a physical drive and click next as shown below.
![Create forensic image with FTK Imager [Step-by-Step]](/create-forensic-image-ftk-imager/Picture8-5.webp)
Step 6: Selecting the disk to acquire image
Second step involves selecting the disk in which we want to extract the disk image file from. As an investigator, you can even extract image file from a mounted storage device. We click Finish.
![Create forensic image with FTK Imager [Step-by-Step]](/create-forensic-image-ftk-imager/Picture9-3.webp)
Step 7: Setting the acquired image destination and image file type
After selecting device to acquire image we need to add a location on where to save the forensic image acquired for the purpose of analysis. We also need to set the image file type. FTK Imager has 4 file types;
- Raw(dd) type - It is common among the forensic analysis tools. This format does not contain any metadata, headers or even magic values.
- Advanced Forensic Format type (AFF) – In this format, the disk image created does not lock user into proprietary format which prevent them from being able to properly analyze it.
- SMART format – This file format is good for Linux file systems since it keeps the images as pure bit-streams with optional compression.
- E01 format - This format compresses the image file. Image in this format will start with case information in the header and footer, which has an MD5 hash of the entire bit stream. This case information contains the date and time of acquisition, investigator’s name, special notes and an optional password.
In our case we will choose the Raw format.
![Create forensic image with FTK Imager [Step-by-Step]](/create-forensic-image-ftk-imager/Picture10-2.webp)
Step 8: Filling in the evidence item information
In this step we fill in the specific details of the image we are extracting. This information will be vital to identifying and relating evidence found on the image with other types of evidence that are available for that specific case.
![Create forensic image with FTK Imager [Step-by-Step]](/create-forensic-image-ftk-imager/Picture11-2.webp)
Step 9: Selecting image destination
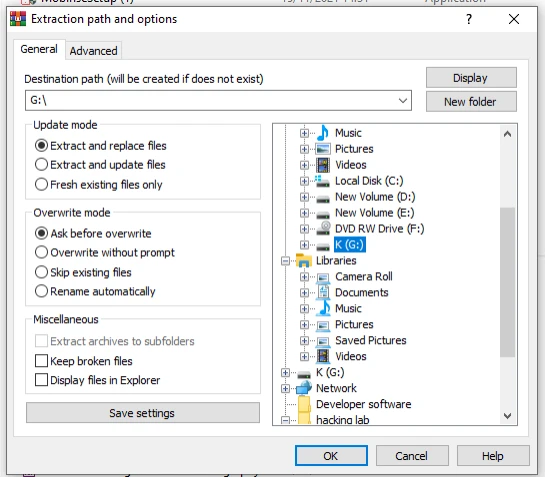
On the sixth step we will select the folder we want to place our image and other related files after acquisition. FTK Imager has an option to select the image file size of the disk image if you need to store the image inform of segments.
![Create forensic image with FTK Imager [Step-by-Step]](/create-forensic-image-ftk-imager/Picture12-2.webp)
We also have to enter the name we want to call our forensic image and start the extraction as shown below.
![Create forensic image with FTK Imager [Step-by-Step]](/create-forensic-image-ftk-imager/Picture13-2.webp)
Once the extraction is over we now have the image files in one folder ready for forensic analysis.
![Create forensic image with FTK Imager [Step-by-Step]](/create-forensic-image-ftk-imager/Picture14-1.webp)
Conclusion
In the above guide we were able to obtain forensic image and volatile memory image from PC using FTK Imager. Forensic images are vital sources of concrete evidence in cyber crime cases. Steps explained above are also used by raw enforcement agencies while enforcing cyber laws. After learning and understanding this guide you can and will be able to extract and store digital forensic evidence in a professional way.
References
Forensic Image Extraction
-- Beginner
Working with FTK
Imager