
In this tutorial I will share step by step instructions to create LVM during installation stage with Red Hat Enterprise Linux (RHEL) and CentOS. For beginners it can be overwhelming to see so many options when trying to configure custom partition while installing the OS using RHEL/CentOS ISO. Normally to avoid all this, I see users end up with automatic partitioning which leads to standard partition. Now I have already given an overview on why you should choose LVM over standard partition?
I have already given step by step instructions to install RHEL/CentOS 8 with screenshots where also I covered the steps to create LVM, but here I will be more detailed with the steps. For remaining part of the steps you can refer Step-by-Step: RHEL/CentOS 8 installation with screenshots
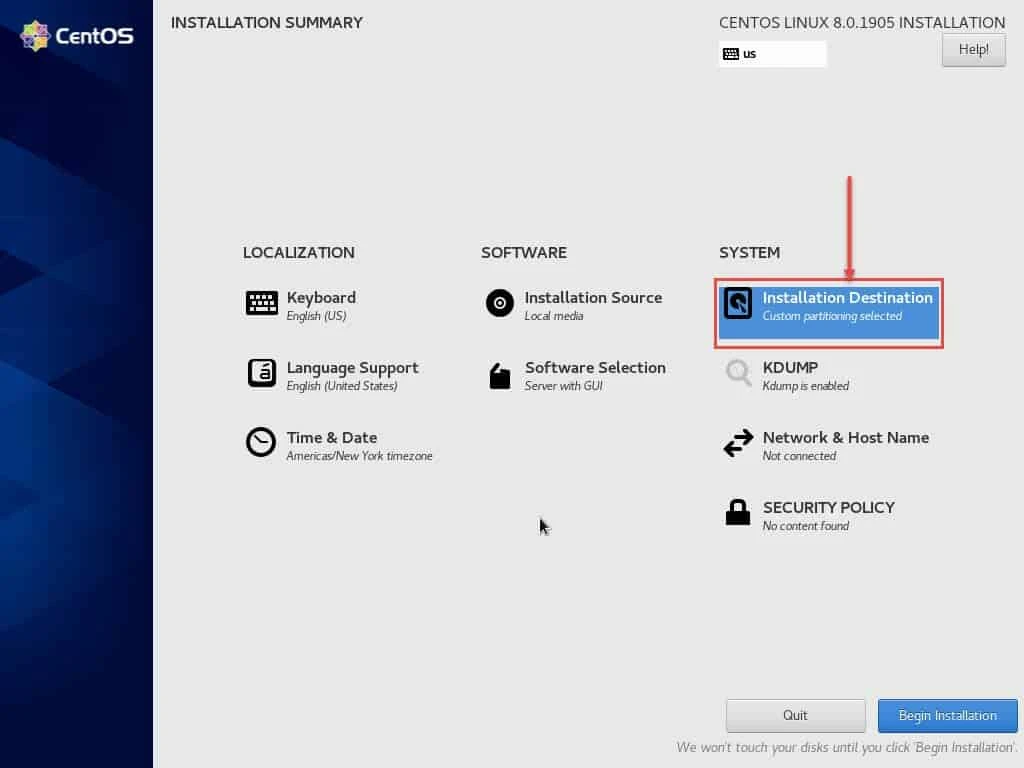
Step 1: Select "Installation Destination"
You can select "Installation Destination" from the Installation Summary console. By default "Automatic Partitioning" is selected, but since we want to configure custom partitioning, we must modify this configuration:
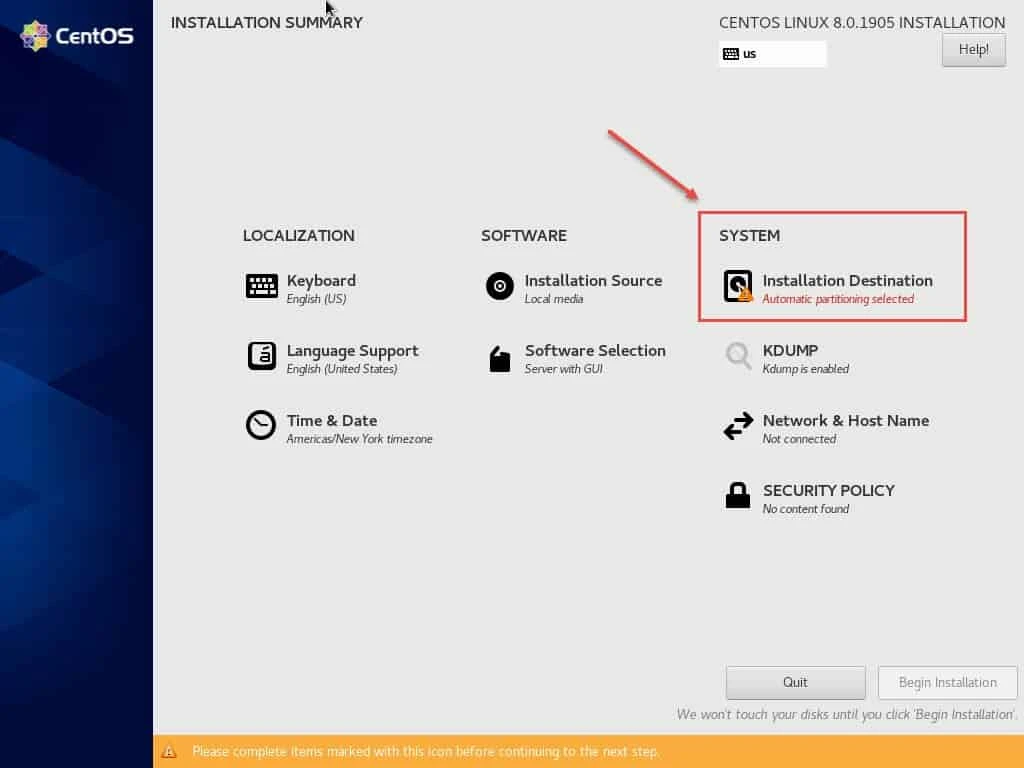
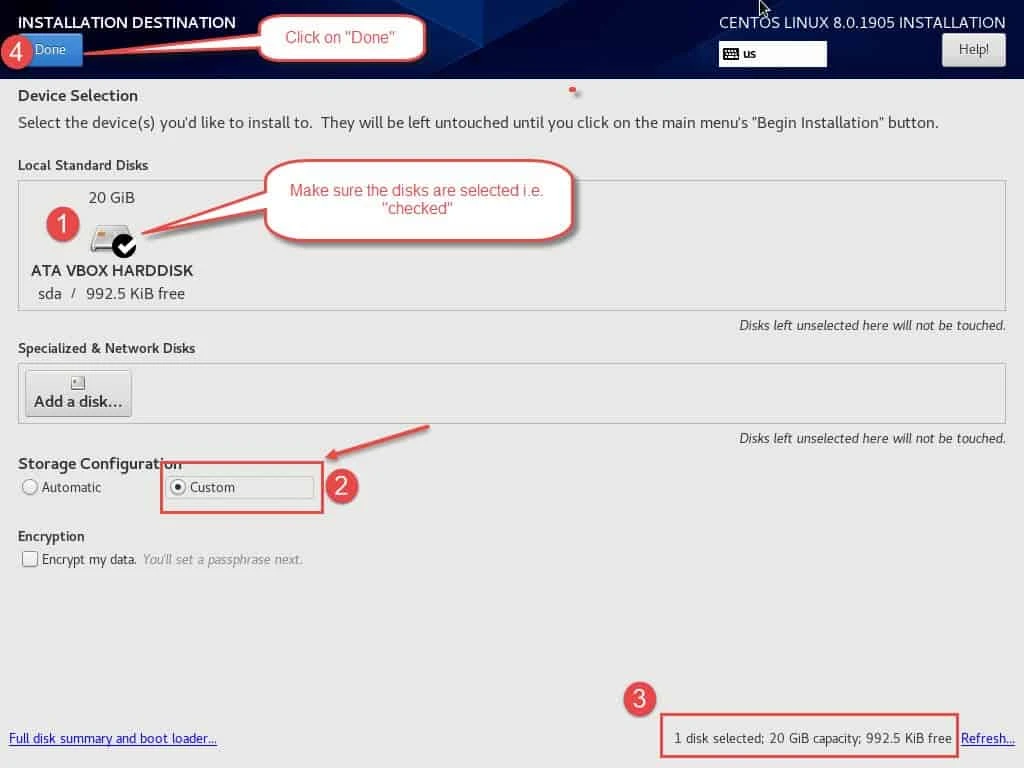
You will get a list of disks which are available for installation. Here you can choose the disks which you want to use for your RHEL/CentOS OS. If you are on a virtual environment, then a block of your original partition is allocated, for example here I am using Oracle VirtualBox with 20GB assigned for installation.
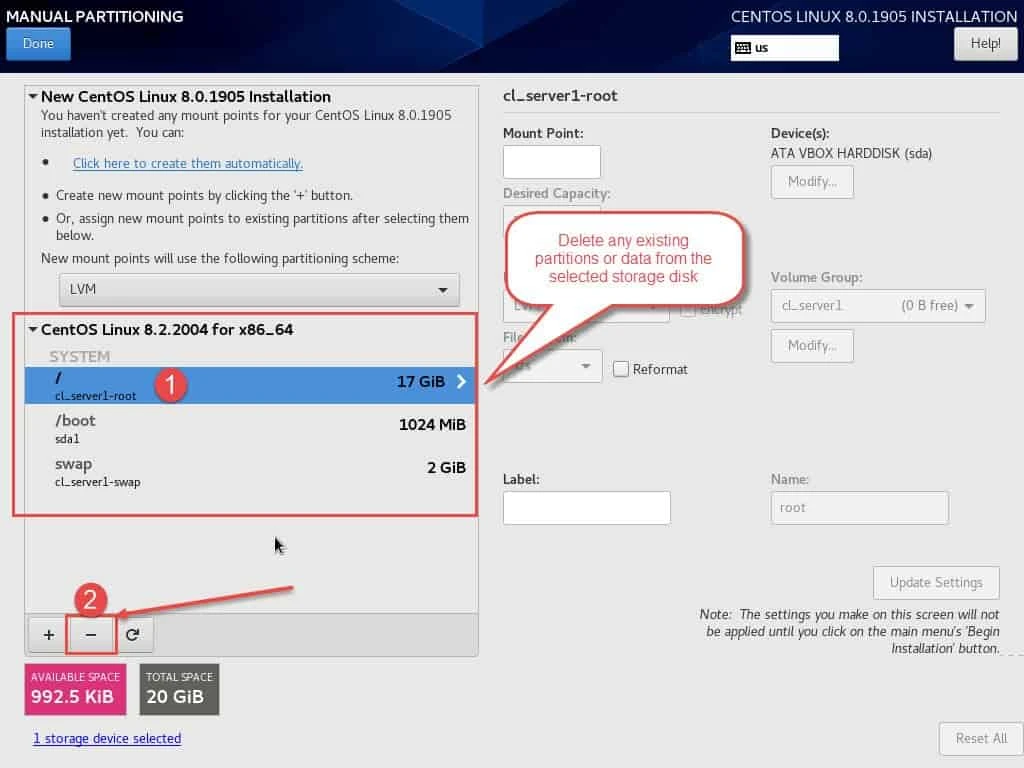
Step 2: Delete any existing partition(s)
If you are installing RHEL/CentOS on a disk which already had something pre-installed then you must delete the existing partitions. Here I already had a CentOS 8 setup but to demonstrate this article, I am performing a re-installing so let me clear the existing partitions. If you are doing a fresh installation then you can ignore this step.
Select any of the existing partition and click on minus (-) sign
as shown below.
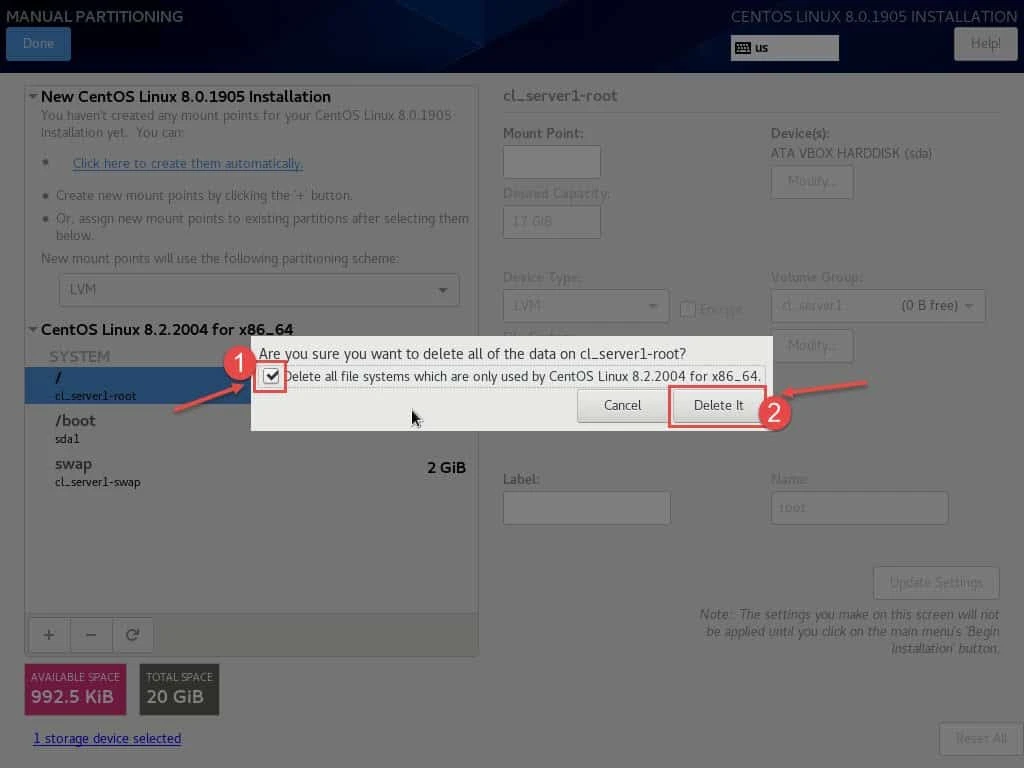
Next the screen will prompt you if you want to delete all the existing partitions, so we will select the checkbox and click on "Delete It". This will clear all the existing partitions.
Step 3: Create SYSTEM and DATA partition
You will need to create a minimum of three partitions for a proper functioning of the OS i.e. root, boot and swap partition. Although you can also choose to ignore creation of swap partition but it is recommended to have one.
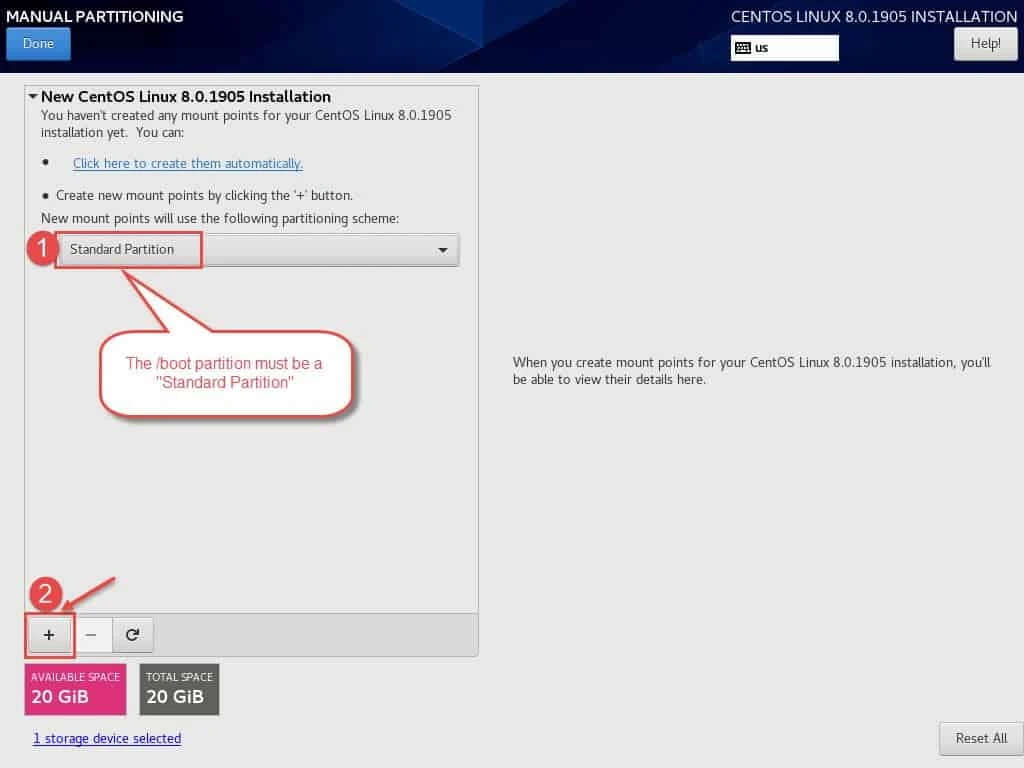
Create boot (/boot) partition
A boot partition must always be a standard partition as it cannot be
an LVM. So select "Standard Partition" from the drop down menu and
click on plus (+) icon as shown below:
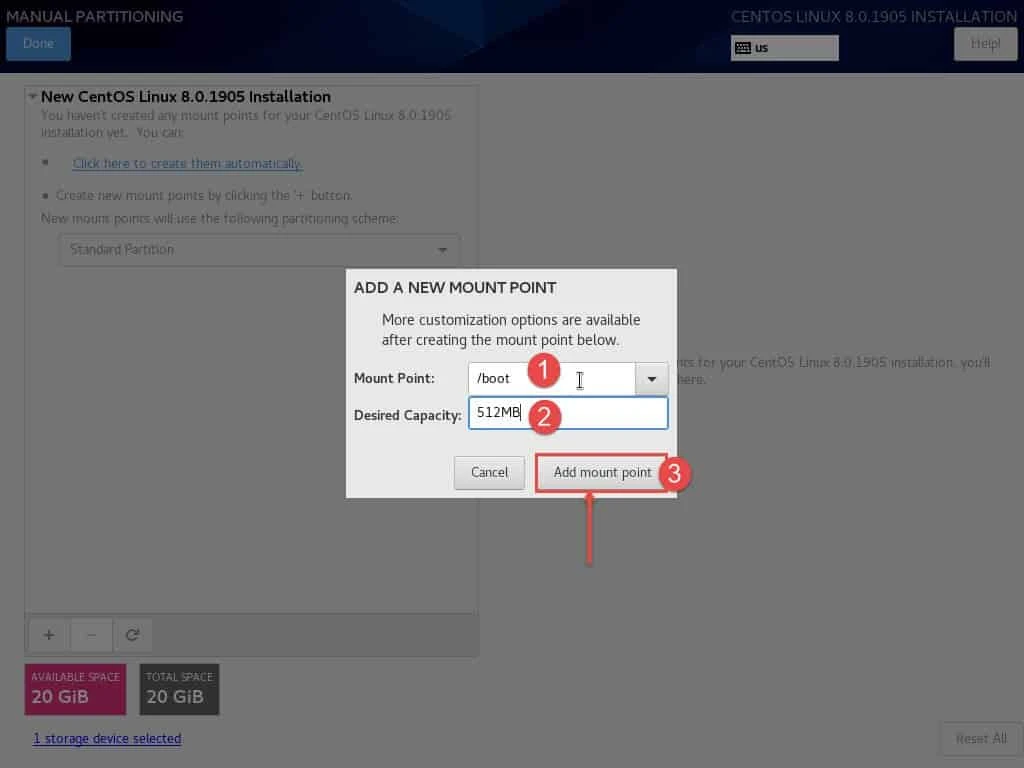
Next you will get a prompt to provide the Mount Point which you can
mention as /boot. Normally 512 MB is enough for /boot partition
unless you are planning to install and keep multiple kernels, in which
case you can increase the size to 1024 MB. Click on "Add Mount
Point" to create the partition.
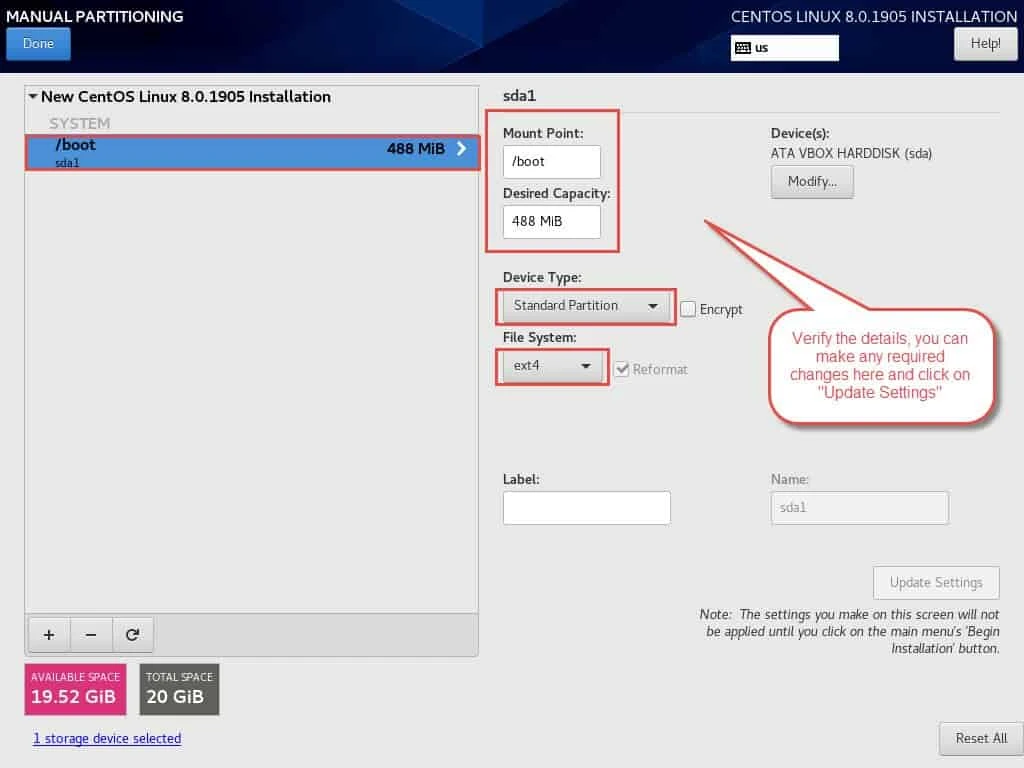
Next you can verify the partition details and if required you can also modify the values as highlighted. Click on "Update Settings" if you modify any of the values here.
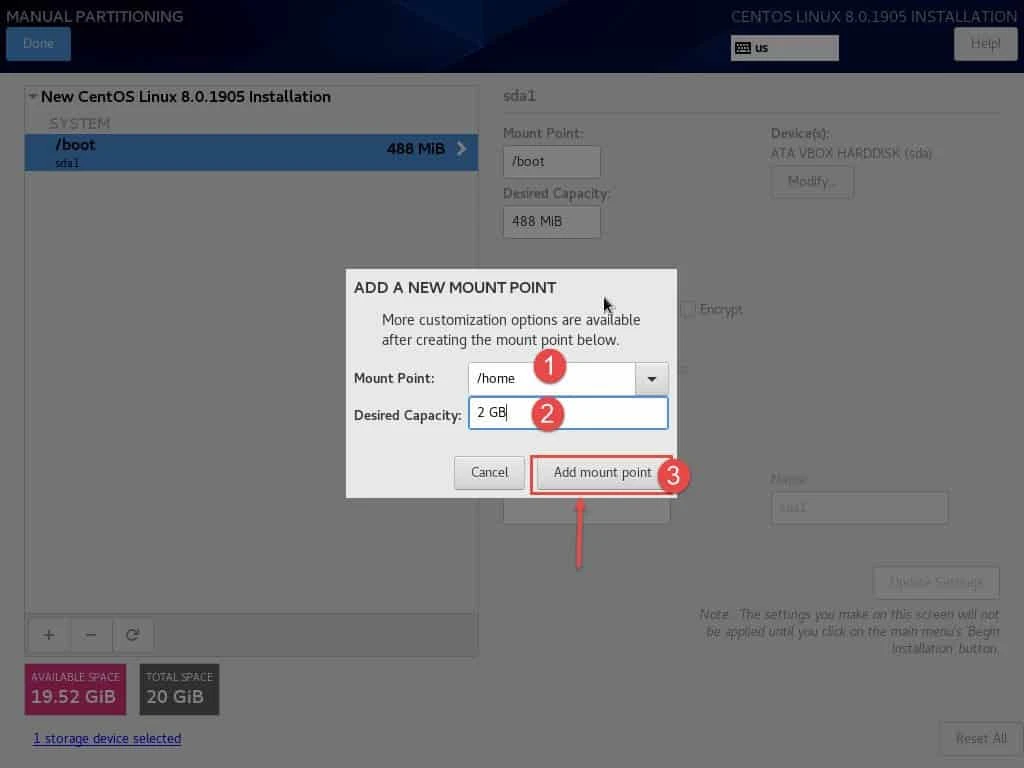
Create home (/home) partition
This is optional as this is a DATA partition. In this stage we will create our LVM but you can also follow the same steps while creating a system partition.
To create additional partitions, you can again click on plus (+)
sign and then provide the Mount Point details along with the
Desired Capacity for the respective Mount Point. Click on "Add
mount point" once done.
- This is the part where we will create LVM during installation stage.
- Select the partition which you want to have LVM as backend.
- Select Device Type as "LVM". You can also select LVM Thin Provisioning as per your requirement.
- Select "Create a new volume group" under Volume Group section which will bring up a pop up console for further configuration options.
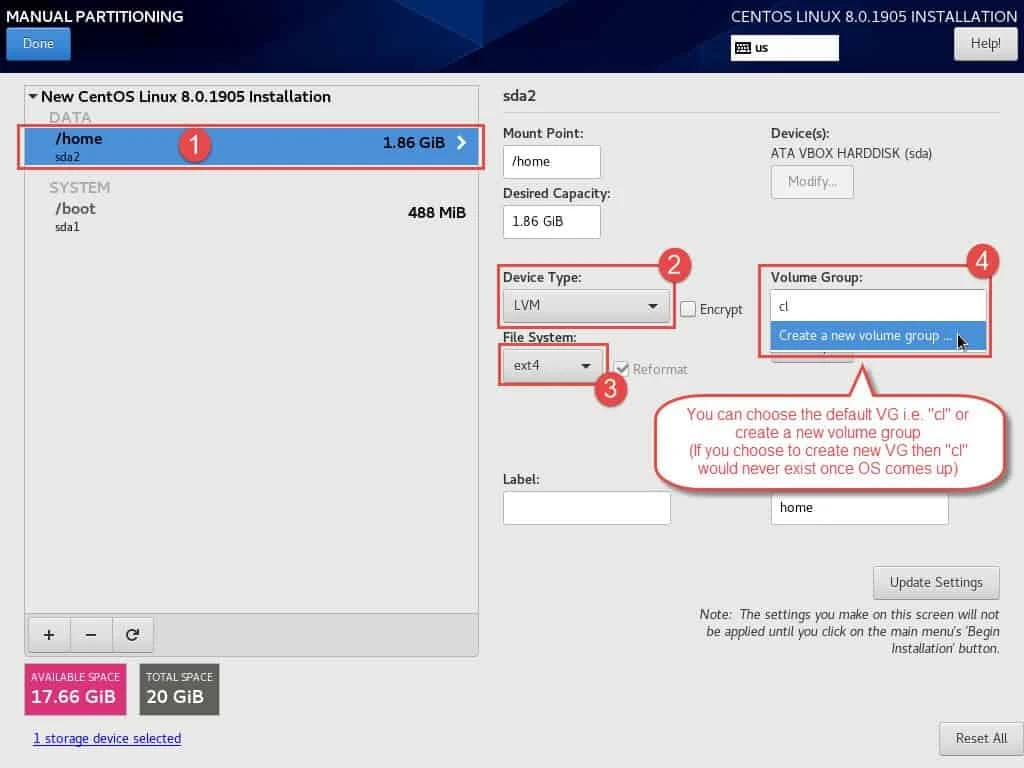
- Provide the preferred name for Volume Group, in this example my VG name will be "system".
- We don't want to use RAID in combination with LVM. This RAID is different from Hardware or Software RAID which we normally use.
- Select "Automatic" as the Size Policy for the Volume group
- Click on "Save" to save the configuration.

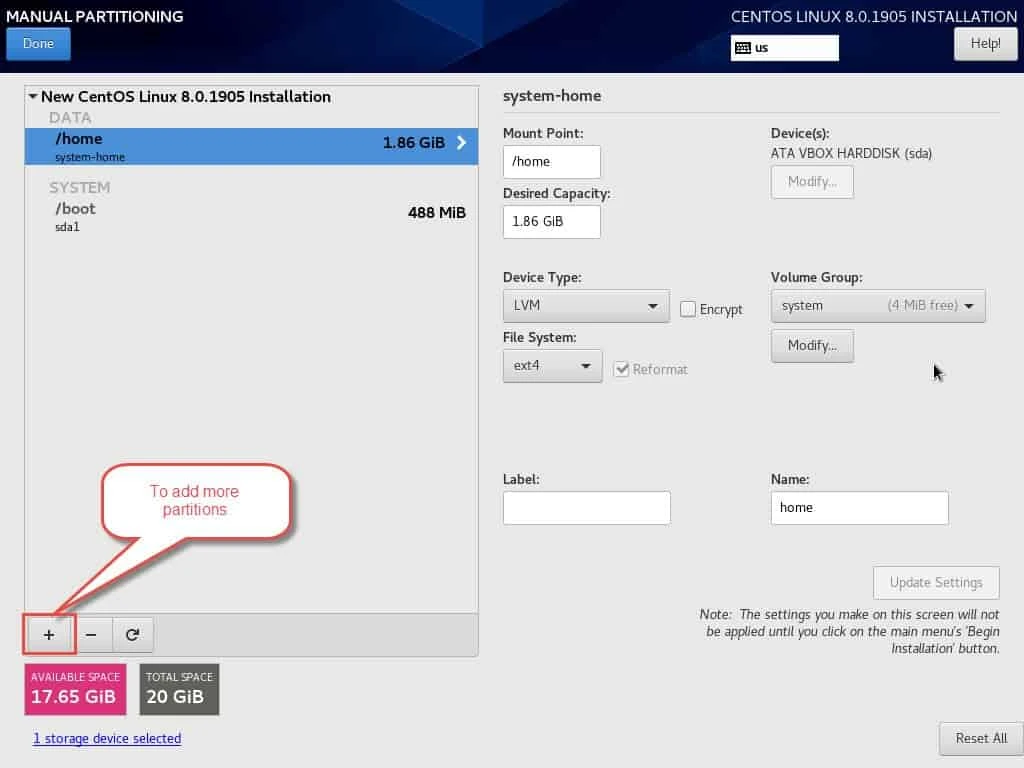
Now you can verify your final configuration here and click on "Update Settings" to save the changes. So your VG is created and now you can create LVM using this Volume Group or you may create more then one Volume Groups as per your requirement.

Create swap partition
As mentioned earlier, it is not absolutely mandatory but strictly
recommended to have a swap partition. Click on plus (+) icon to
add more partition.
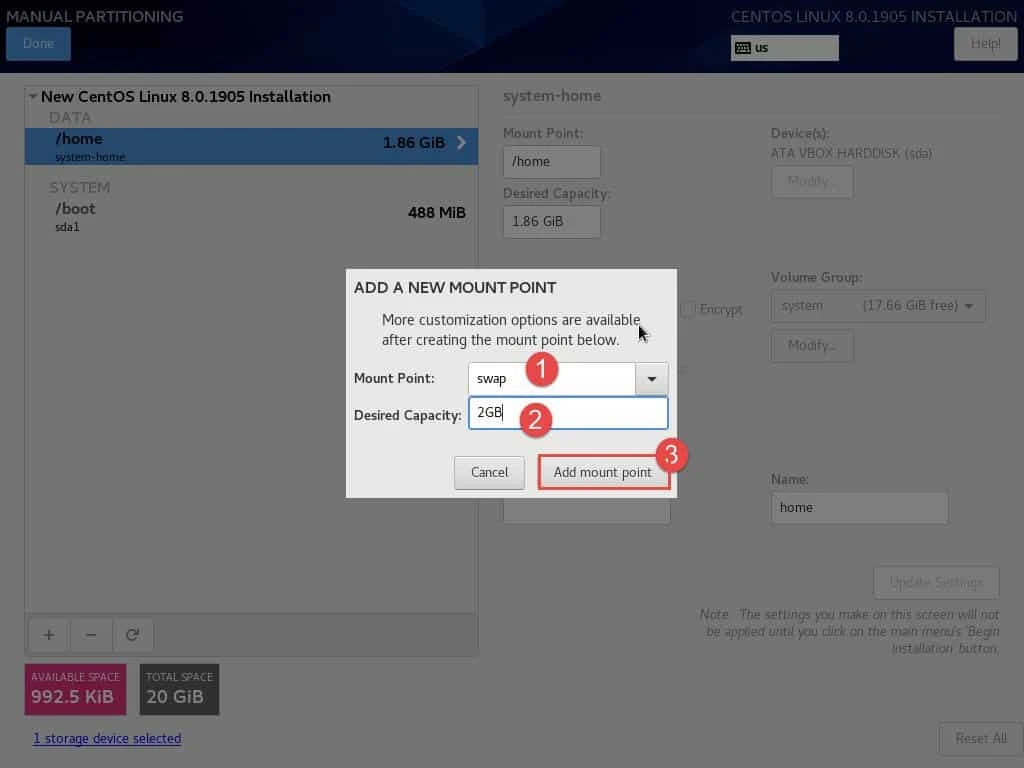
Provide the "Mount Point" as swap and add desired capacity. Normally the swap size is twice of memory allocated but in if your memory is more than 4 GB then you can limit the swap memory also to 4GB. But this is again something which depends on your usage. You can read more at Tutorial: Beginners guide on linux memory management
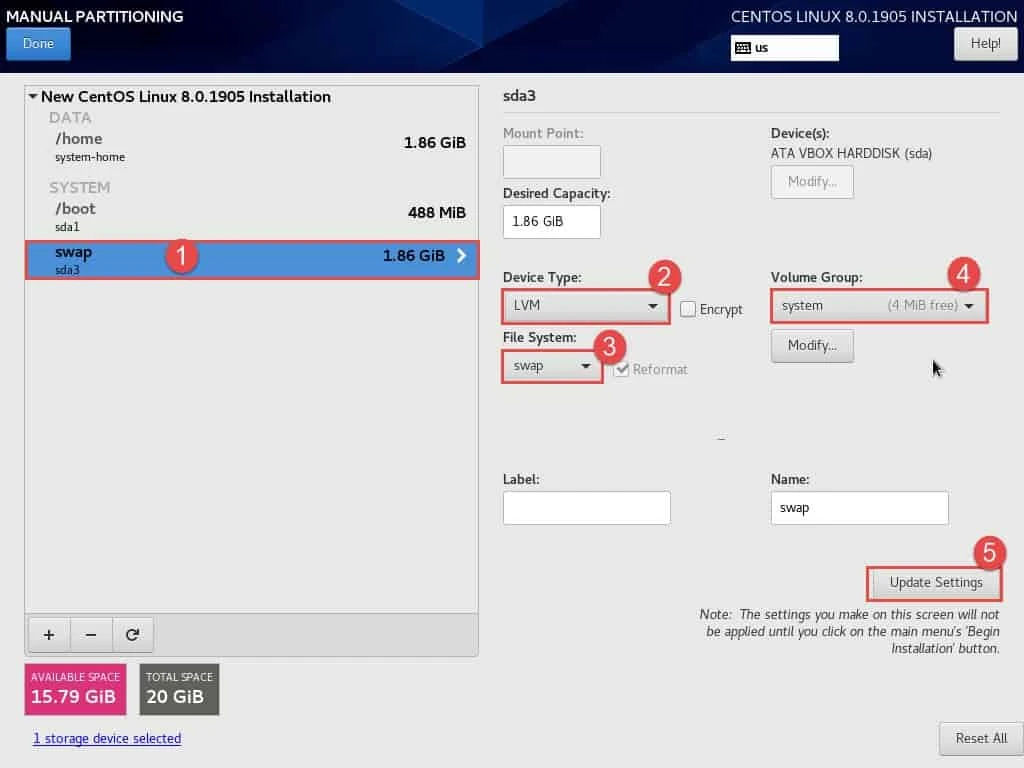
By default swap partition will be added as "Standard Partition" which you can change to "LVM" and assign the Volume Group which we just created in the previous step. Click on "Update Settings" to save the changes.
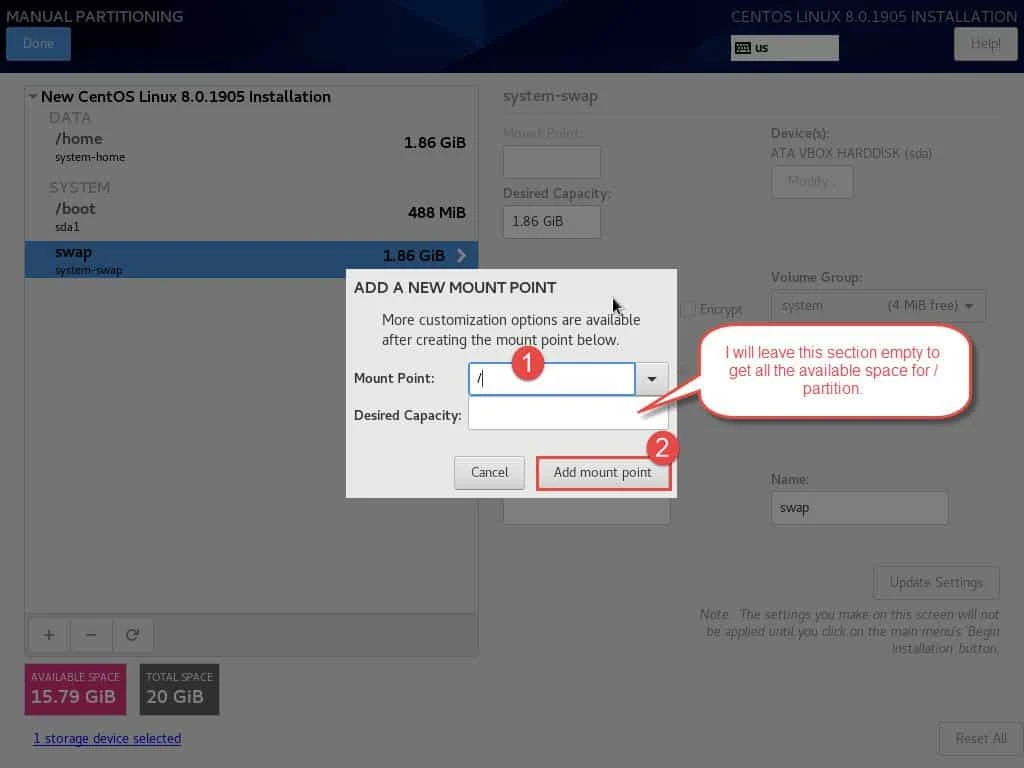
Create root (/) partition
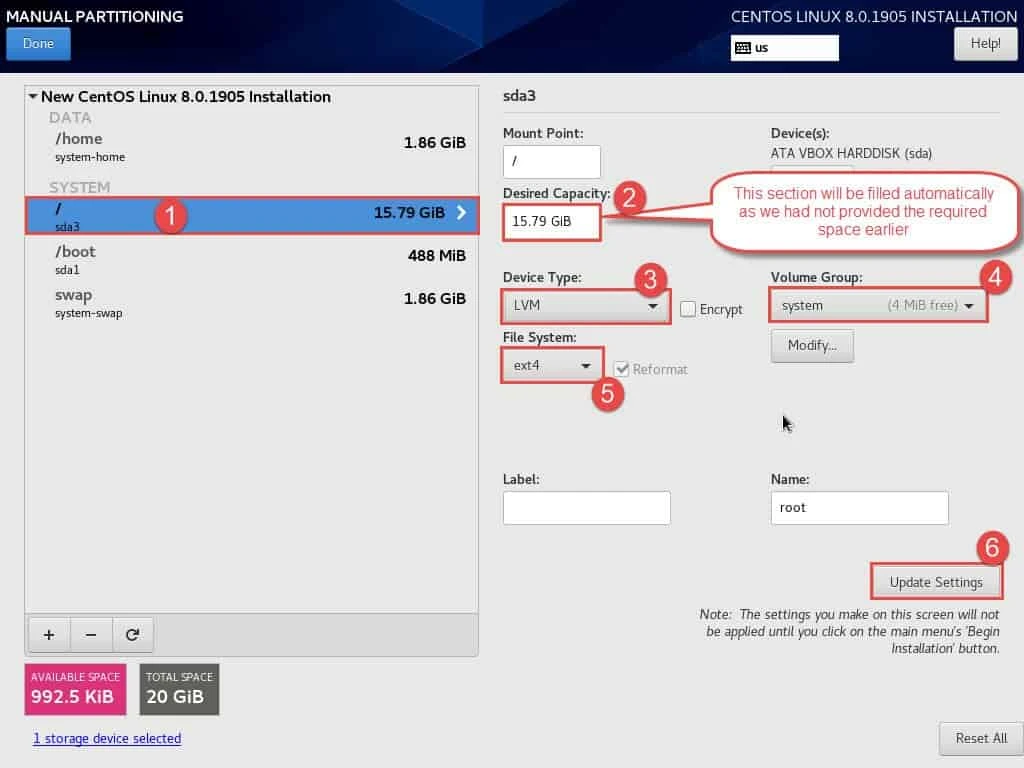
This is most crucial partition required for Linux OS, consider it similar to C drive in Windows which contains all system files. We will leave the "Desired Capacity" section blank as we want to utilize all the available space for root partition. Click on "Add mount point"
Next again modify the "Device Type" as LVM and select the Volume Group. You can also modify your File System, we will use ext4 for our example. Click on "Update Settings" to finalize the changes.
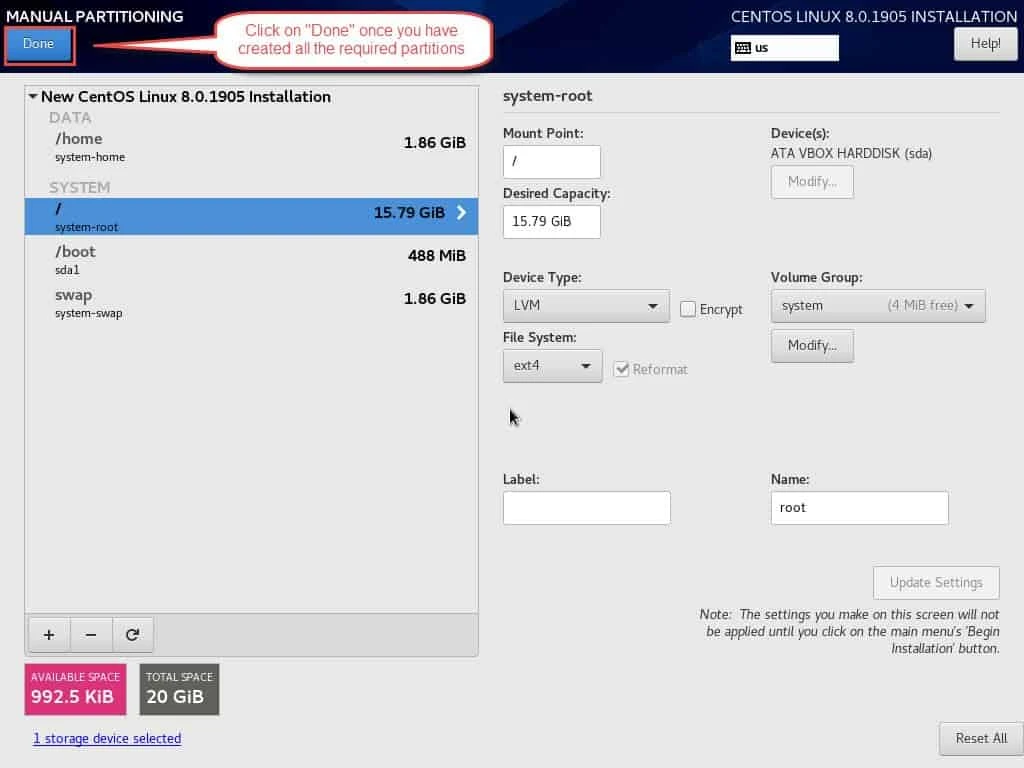
Step 4: Finalize the Disk Partition Changes
Click on "Done" to save all the changes we did to our Disk Partitions.
Next you will create a prompt to accept the changes which will be performed based on the partition layout which we have created.
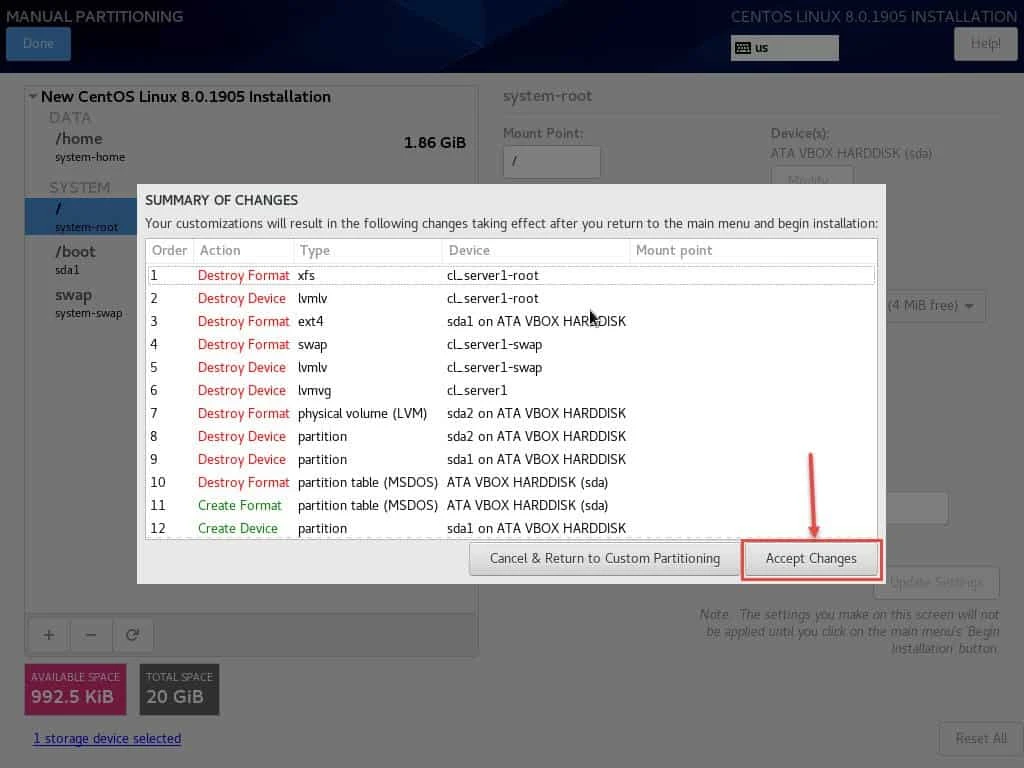
Finally you can check the "Installation Summary" which shows that "Custom partitioning selected" so our LVM configuration was successful.
Next you can follow Step-by-Step: RHEL/CentOS 8 installation with screenshots to configure other parts of the installation summary and complete the installation.
Summary
In this tutorial we covered the steps to create LVM during installation of Red Hat and CentOS 7 and 8 OS. You can also use Thin provision LVM or LVM with RAID based on your requirement but since I am using Oracle VirtualBox where the disks were created with Thin provision so I didn't want to add one more layer of Thin provisioning but if you are installing on Physical hardware then that could be a better option. The steps would remain the same even if you choose Thin provisioned LVM.
Related Searches: how to create lvm in redhat linux 7 step by step. how to create lvm in centos 7 during installation. how to create lvm in linux. how to create lvm in redhat linux 6 step by step
