
Deploy SQL Database on Azure - Introduction
Azure SQL is a service that offers multiple managed SQL Services. In that, we can use Azure SQL Database, Azure SQL Managed Instance, and SQL Server on Virtual machine. Azure SQL Database is a managed cloud database provided as part of the Microsoft Azure SQL Family. Managed database services take care of scalability, backup, and high availability of the database
Prerequisite
- Azure Subscription
- Basic understanding of SQL
- SSMS for accessing Azure SQL
Steps to deploy SQL Database on Azure
Step 01: - Overview of Azure SQL Database family
Azure SQL is one of the best services provided by Azure in Database Services. You can find Azure SQL in the marketplace as per the below image.
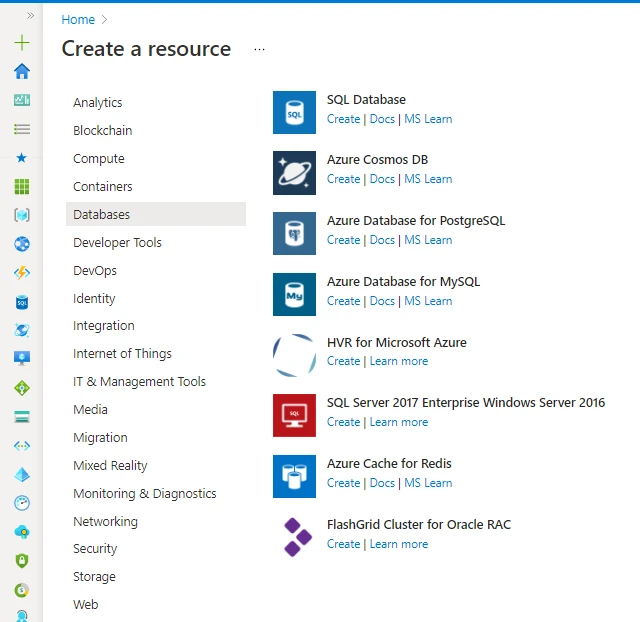
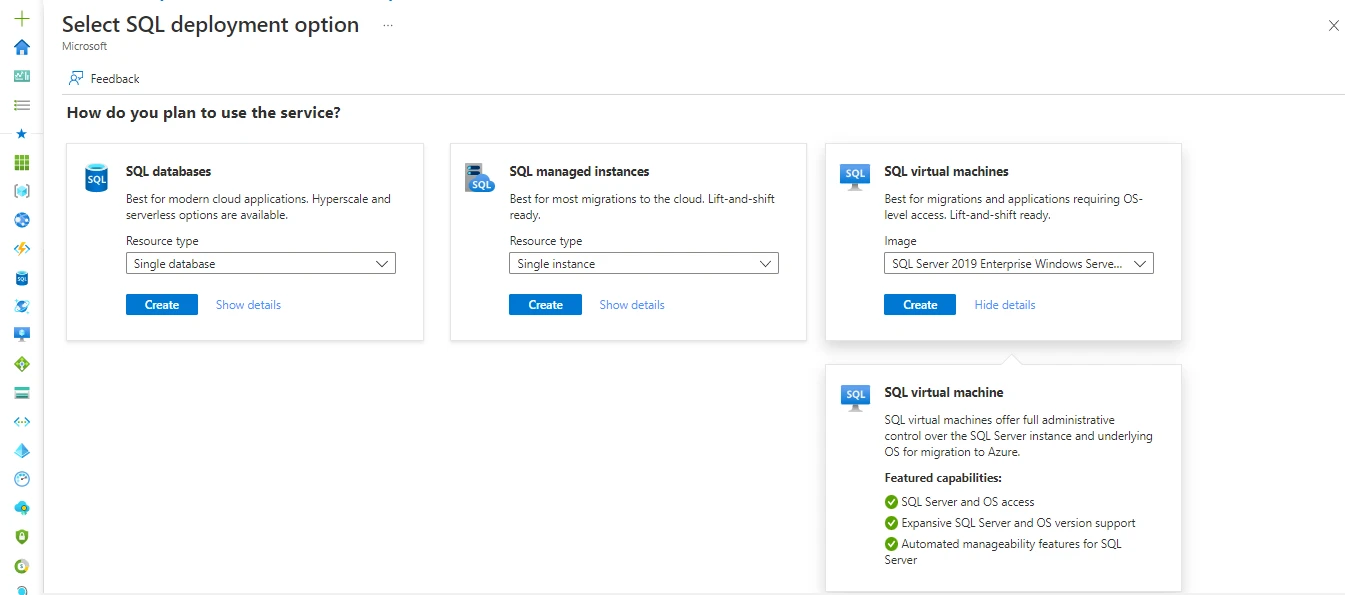
After opening that you can see multiple options provided by Azure for using SQL Server.
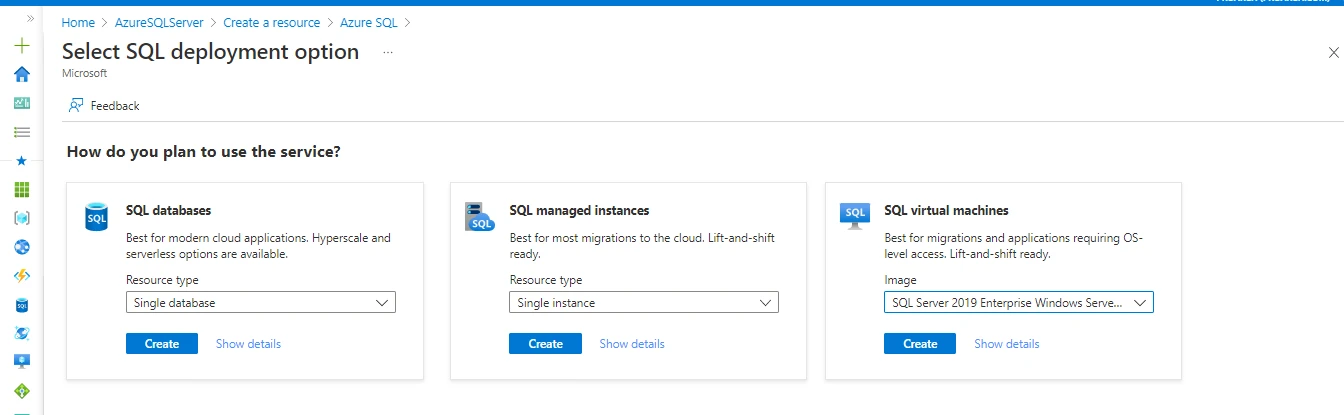
Here we have three options to use SQL on Azure.
SQL Database: - Best for modern cloud applications. Hyperscale and serverless options are available.
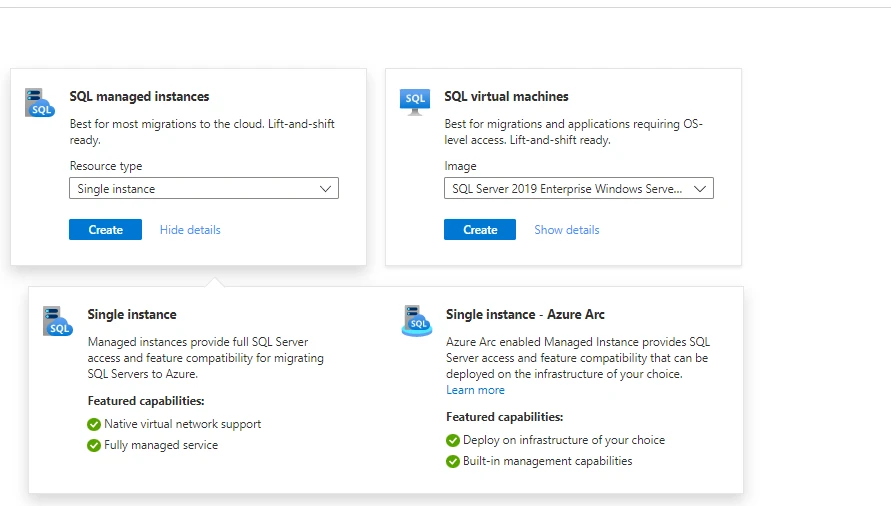
SQL Managed Instance: - Best for most migrations to the cloud. Lift-and-shift ready.
SQL Virtual Machine: - Best for migrations and applications requiring OS-level access. Lift-and-shift ready.
Step 02: - Configure Basic Requirement of Azure SQL Database
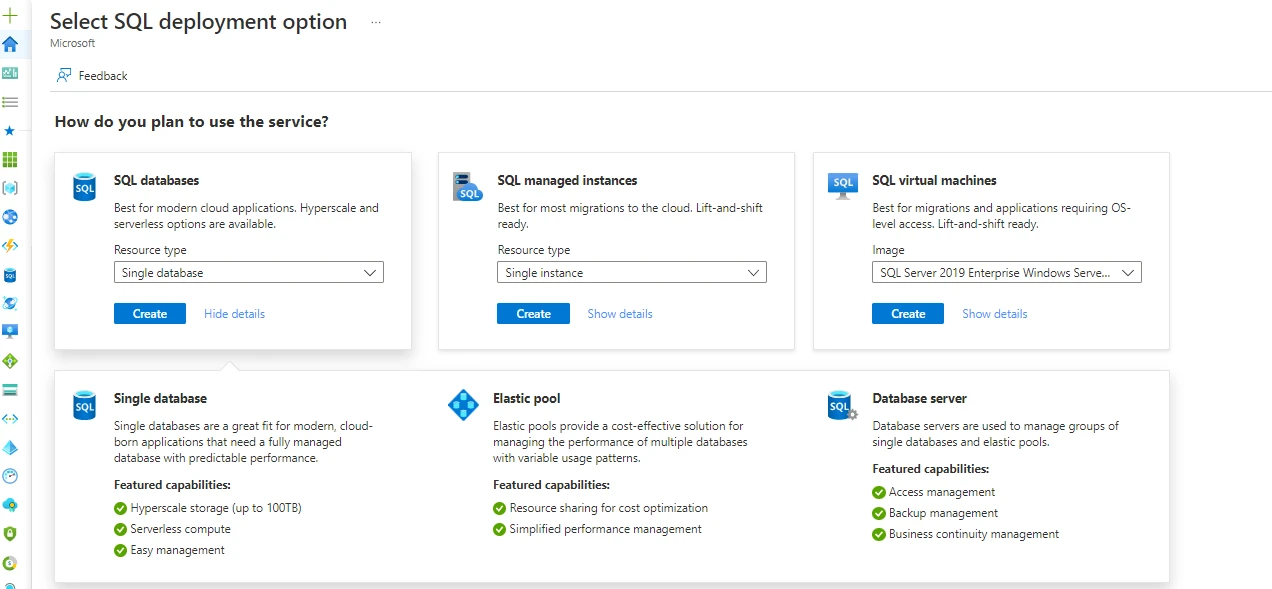
As per the below image select SQL Database and resource type single database then click on create.
!deploy SQL Database on Azure
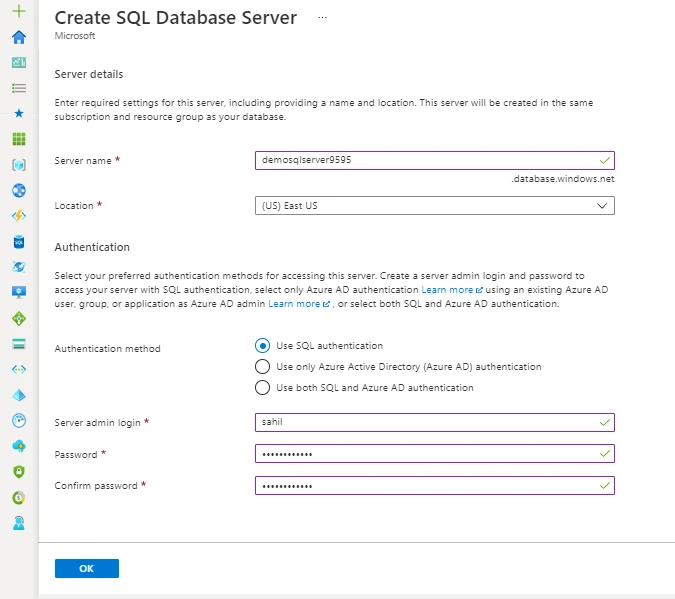
We must follow the wizard for resource deployment as per the below image. And there are multiple options we should understand before configuring it.
Server Name: - Our database will run on this DB server so we should use an appropriate naming convention and we can’t change it after deployment.
Server Admin Login: - It will create a master root user account with your permission.
Authentication: - as per the traditional method we can use SQL authentication as well as we can integrate with Azure AD. In the same way, we can use both methods.
After setting up the Server Name we must set Database Name, SQL Server Name, Compute + Storage, and Backup Storage Redundancy.

Before choosing the right option, we should understand what SKU we have in Compute and what is Backup Storage Redundancy.
After selecting Compute + Storage we have the below options. Provisioned and Serverless for production we recommend going with Provisioned one. Then should select Hardware configuration means how much CPU and Memory we want for the Database Server.

Here you can select the number vCore you want and according to you can select Database Size and in right, you can see the cost for the same.
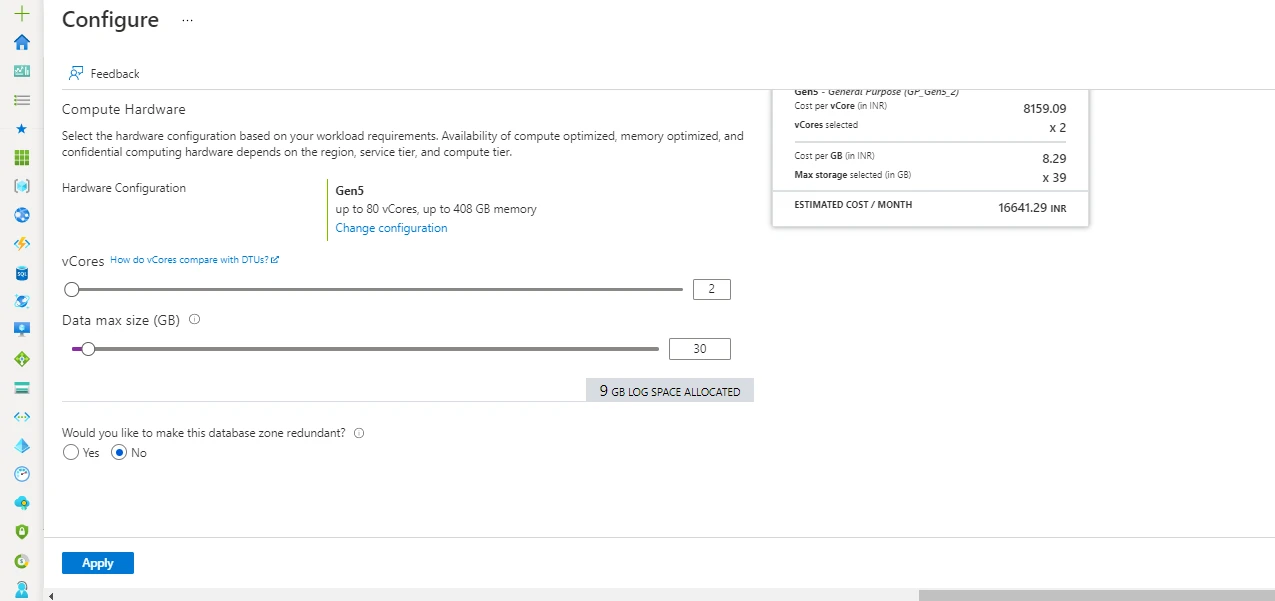
You can upscale and down-scale configurations as needed. Now we will understand the backup storage redundancy.
Azure SQL Offers us Locally Redundant, Zone Redundant, and Geo-Redundant and if you are familiar with cloud you could understand in LRS Backup copy save on local region datacenter, ZRS Backup copies of the database would be stored on two distinct data centers in the same geographic region in same way GRS will store backup copies in different geographic regional Azure datacenters.
Step 03: - Configure Networking in Azure SQL Database
In the Networking tab, we have two important options to select one is Network connectivity and the other is Firewall rules.

In-Network connectivity we can select database connectivity we have No access to, public endpoint, Private endpoint.
The public endpoint will be database would be accessible over the internet and so anyone can access it over the internet. And Private endpoint will create a private DNS record and IP so you can access it using private IP and it can be connected using other resources deployed in Azure Virtual Network.
Firewall Rules are specific if you want to Allow azure services and want to whitelist IP addresses.
Step 04: - Review and Deploy Azure SQL Database
As per the above steps, we have configured important things of SQL Database deployment now we will configure additional settings and deploy it.
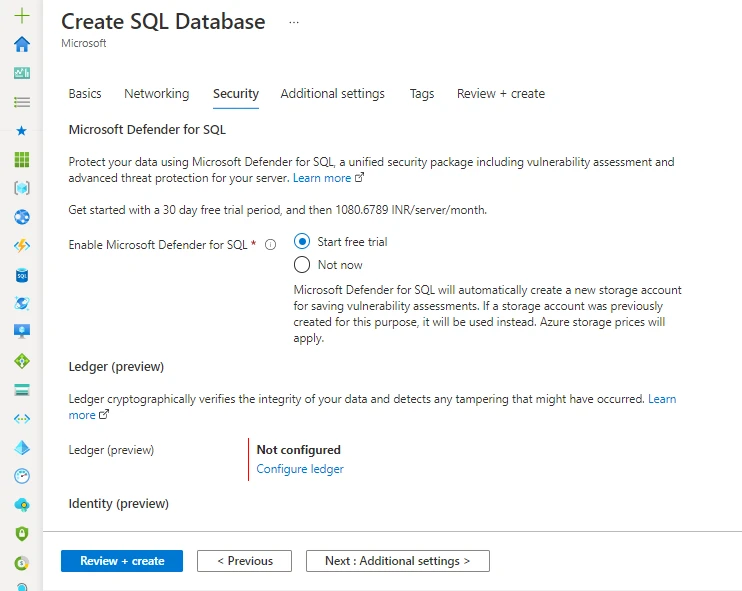
As per the above image you can use Enable Microsoft Defender for SQL Server. Microsoft Defender is a cloud-based security service for Azure Resource it can help us to secure our cloud resources.
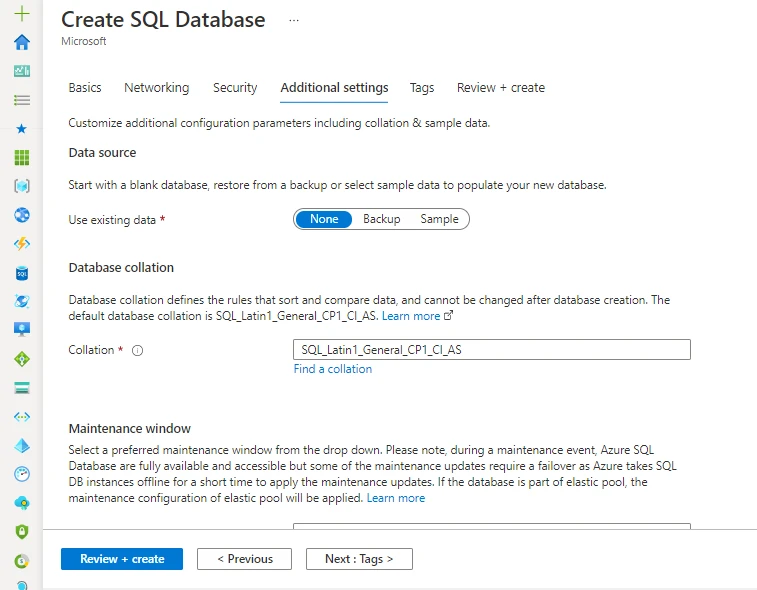
And in an additional setting, you select a Data source like you want to use exiting backup of the database. And in Database collation, you can select collation.
After setting up everything you can go to Review + Create.
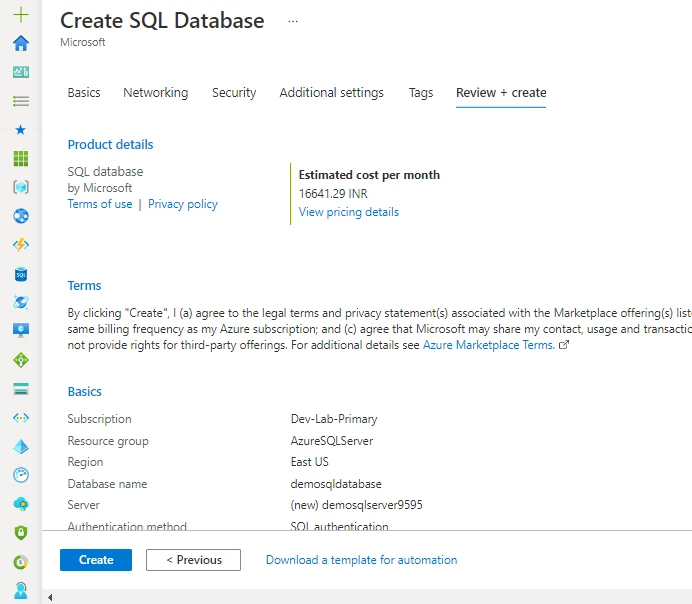
Here you can see the estimated cost per month for the resource and its tentative cost. It may go up and down as per configuration and requirement.
It will take 10-15mins to deploy the resource.
Step 05: - How to Access SQL Database from the local machine
You can download SQL Server Management Studio from the below link and install it on the local machine.
SQL Server Management Studio download
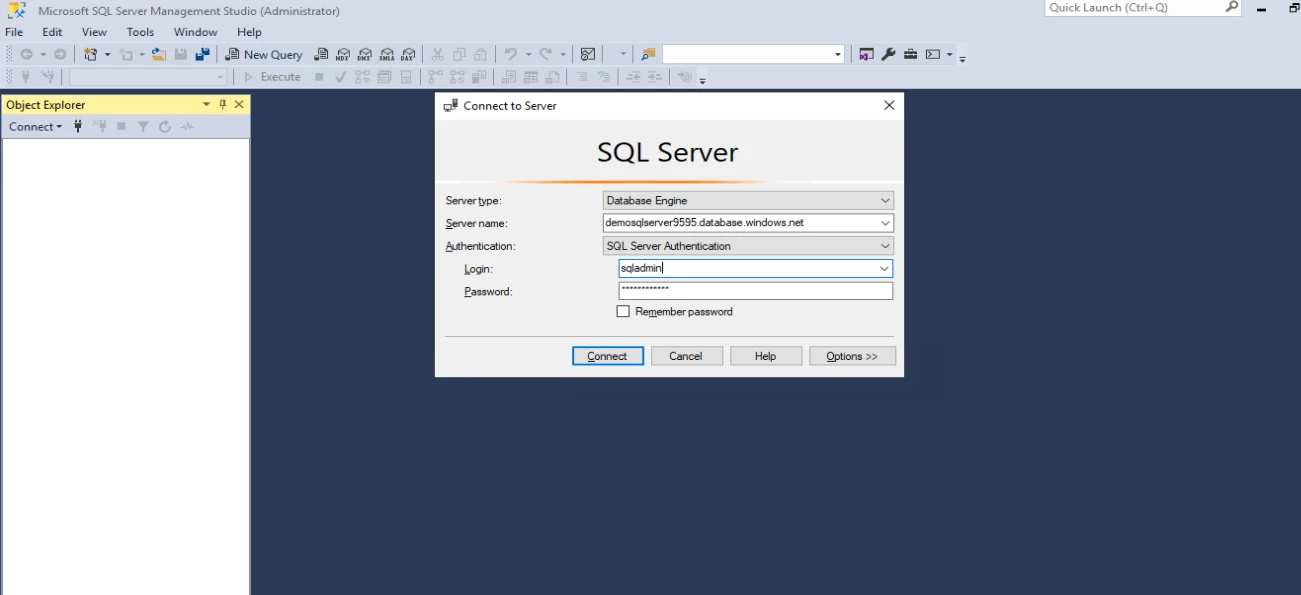
Once SSMS is installed you can launch it from a local machine. And as per the above image, you can update the Server Name, Username, and Password as per the basic wizard we followed.

As per the above image, you can see databases and from here you can access them from the local machine. And if you follow this document, you can deploy SQL Server, and using the same method you can access it from a local machine.
Best practices for a database are to keep it in the private network and connect is using VPN or Azure machine.
Summary
In this tutorial we shared the step by step instructions to successfully deploy SQL Database on Azure. If anyone is planning to modernize their application from on-premises to the azure and looking for the easy and best alternative for database as Platform as a service, then this service is very useful for that. As it is a managed service, we don’t have to take care of the underlying hardware as we do for on-premises machines. The only trade-off here is that our control is limited over the Platform as a service.