![Deploy website with AWS EC2 and Let's Encrypt [Step-by-Step]](/deploy-website-with-aws-ec2-and-lets-encrypt/aws_lets_encrypt-800w.webp)
Hello learners, we have seen how we can use S3 buckets, Cloudfront and ACM to host a website on AWS in the previous article. In this article we are going to learn how we can deploy a website using Ec2 and let's encrypt.
Here are the brief steps we will follow to deploy a website with AWS EC2 and Let's encrypt:
- Create an EC2 instance
- Connect to the EC2 instance
- Install and Configure apache on the instance
- Buy domain from any domain provider
- Configure custom domain using route53
- Install Let's encrypt
- Upload files to the Website
So, with that in mind let's get started.
Overview on EC2 Instance
Amazon Elastic Compute Cloud (EC2) is an AWS web service that provides computing power to businesses all over the world. AWS web interface gives complete control of the resources and lets user to choose their own operating system, number of CPU's , storage and memory. AWS EC2 also reduces the booting time to minutes and new instances can be easily scaled up and scaled down as the requirements change. EC2 with it's security groups and network ACL's also provides security features for the computing resources we deploy.
Overview on Route53
Amazon Route 53 is basically a highly available DNS Service that deals with resolving domain names and subdomains to Numeric IP addresses. Custom domains can be easily configured to Route53 and the users can also buy the domains directly from Route53 for their own use. The Price is reasonable and is depended on the number of Hosted Zones, Aliases, Traffic Flow to www and others.
Overview on Let’s Encrypt
Let’s Encrypt is a free certificate authority that’s being run by the Internet Security Research Group (ISRC) to promote web security by giving free SSL certificates. SSL certificates provided by Let’s Encrypt work the same way as paid certificates in terms of encryption and give you the same level of security.The SSL Certificates need to be renewed every 90 days and there is no warranty and business validations options available with Let’s encrypt like the paid certificates.
Hosting a Website on AWS EC2 Instance
Step 1: Create an EC2 Instance
1. Login to the AWS Management console and navigate to EC2 dashboard and click on Create Instance.
2. Configure the security group and allow the port 80 and 443 for HTTP and HTTPS.
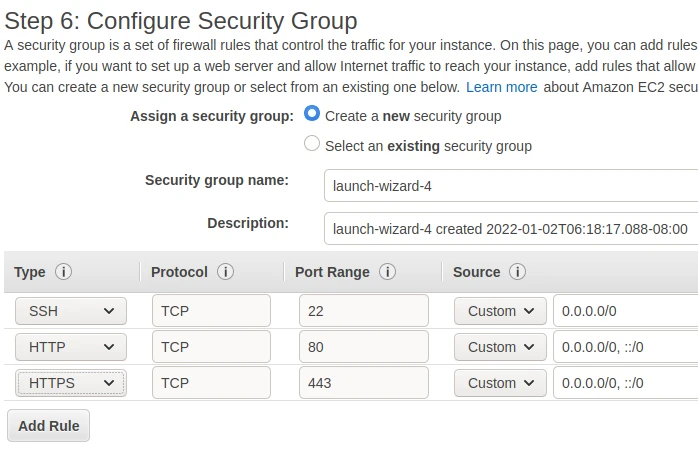
3. Now, leave the rest as default and click on Create. The EC2 Instance gets created successfully.
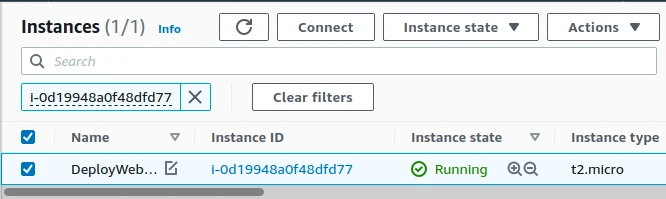
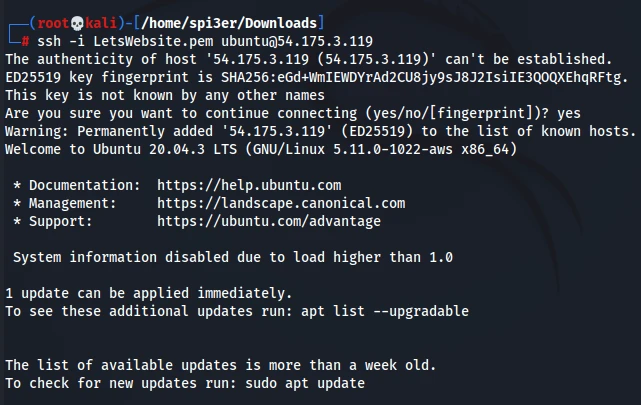
Step 2: Connect the EC2 Instance
1. Select the created Instance and connect it through the SSH client.
2. The connection got established successfully.
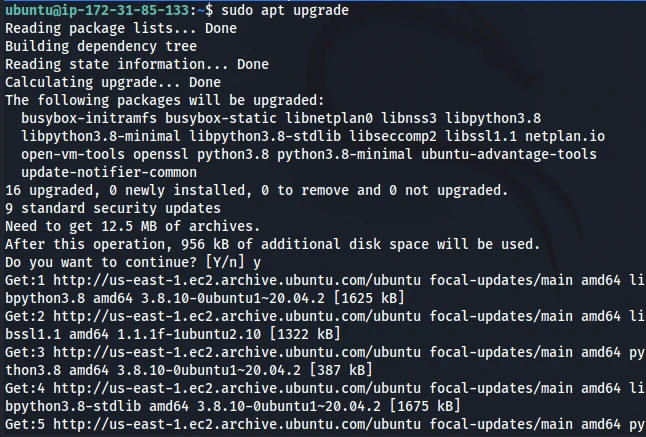
Step 3: Install and Configure Apache on the Instance
1. Update and upgrade the apt manager sources before installing Apache.
sudo apt update
sudo apt upgrade
2. Install Apache on the EC2 Instance.
sudo apt install -y apache2 apache2-utils

Reading package lists... Done
Building dependency tree
Reading state information... Done
The following additional packages will be installed:
apache2-bin apache2-data libapr1 libaprutil1 libaprutil1-dbd-sqlite3
libaprutil1-ldap libjansson4 liblua5.2-0 ssl-cert
Suggested packages:
apache2-doc apache2-suexec-pristine | apache2-suexec-custom www-browser
openssl-blacklist
The following NEW packages will be installed:
apache2 apache2-bin apache2-data apache2-utils libapr1 libaprutil1
libaprutil1-dbd-sqlite3 libaprutil1-ldap libjansson4 liblua5.2-0 ssl-cert
0 upgraded, 11 newly installed, 0 to remove and 0 not upgraded.
Need to get 1866 kB of archives.
After this operation, 8091 kB of additional disk space will be used.
Get:1 http://us-east-1.ec2.archive.ubuntu.com/ubuntu focal/main amd64 libapr1 amd64 1.6.5-1ubuntu1 [91.4 kB]
Get:2 http://us-east-1.ec2.archive.ubuntu.com/ubuntu focal/main amd64 libaprutil1 amd64 1.6.1-4ubuntu2 [84.7 kB]
Get:3 http://us-east-1.ec2.archive.ubuntu.com/ubuntu focal/main amd64 libaprutil1-dbd-sqlite3 amd64 1.6.1-4ubuntu2 [10.5 kB]
Get:4 http://us-east-1.ec2.archive.ubuntu.com/ubuntu focal/main amd64 libaprutil1-ldap amd64 1.6.1-4ubuntu2 [8736 B]
Get:5 http://us-east-1.ec2.archive.ubuntu.com/ubuntu focal/main amd64 libjansson4 amd64 2.12-1build1 [28.9 kB]
Get:6 http://us-east-1.ec2.archive.ubuntu.com/ubuntu focal/main amd64 liblua5.2-0 amd64 5.2.4-1.1build3 [106 kB]
Get:7 http://us-east-1.ec2.archive.ubuntu.com/ubuntu focal-updates/main amd64 apache2-bin amd64 2.4.41-4ubuntu3.8 [1181 kB]
Get:8 http://us-east-1.ec2.archive.ubuntu.com/ubuntu focal-updates/main amd64 apache2-data all 2.4.41-4ubuntu3.8 [159 kB]
Get:9 http://us-east-1.ec2.archive.ubuntu.com/ubuntu focal-updates/main amd64 apache2-utils amd64 2.4.41-4ubuntu3.8 [84.5 kB]
Get:10 http://us-east-1.ec2.archive.ubuntu.com/ubuntu focal-updates/main amd64 apache2 amd64 2.4.41-4ubuntu3.8 [95.5 kB]
Get:11 http://us-east-1.ec2.archive.ubuntu.com/ubuntu focal/main amd64 ssl-cert all 1.0.39 [17.0 kB]
Fetched 1866 kB in 0s (19.7 MB/s)
Preconfiguring packages ...
Selecting previously unselected package libapr1:amd64.
(Reading database ... 63910 files and directories currently installed.)
Preparing to unpack .../00-libapr1_1.6.5-1ubuntu1_amd64.deb ...
Unpacking libapr1:amd64 (1.6.5-1ubuntu1) ...
Selecting previously unselected package libaprutil1:amd64.
Preparing to unpack .../01-libaprutil1_1.6.1-4ubuntu2_amd64.deb ...
Unpacking libaprutil1:amd64 (1.6.1-4ubuntu2) ...
Selecting previously unselected package libaprutil1-dbd-sqlite3:amd64.
Preparing to unpack .../02-libaprutil1-dbd-sqlite3_1.6.1-4ubuntu2_amd64.deb ...
Unpacking libaprutil1-dbd-sqlite3:amd64 (1.6.1-4ubuntu2) ...
Selecting previously unselected package libaprutil1-ldap:amd64.
Preparing to unpack .../03-libaprutil1-ldap_1.6.1-4ubuntu2_amd64.deb ...
Unpacking libaprutil1-ldap:amd64 (1.6.1-4ubuntu2) ...
Selecting previously unselected package libjansson4:amd64.
Preparing to unpack .../04-libjansson4_2.12-1build1_amd64.deb ...
Unpacking libjansson4:amd64 (2.12-1build1) ...
Selecting previously unselected package liblua5.2-0:amd64.
Preparing to unpack .../05-liblua5.2-0_5.2.4-1.1build3_amd64.deb ...
Unpacking liblua5.2-0:amd64 (5.2.4-1.1build3) ...
Selecting previously unselected package apache2-bin.
Preparing to unpack .../06-apache2-bin_2.4.41-4ubuntu3.8_amd64.deb ...
Unpacking apache2-bin (2.4.41-4ubuntu3.8) ...
Selecting previously unselected package apache2-data.
Preparing to unpack .../07-apache2-data_2.4.41-4ubuntu3.8_all.deb ...
Unpacking apache2-data (2.4.41-4ubuntu3.8) ...
Selecting previously unselected package apache2-utils.
Preparing to unpack .../08-apache2-utils_2.4.41-4ubuntu3.8_amd64.deb ...
Unpacking apache2-utils (2.4.41-4ubuntu3.8) ...
Selecting previously unselected package apache2.
Preparing to unpack .../09-apache2_2.4.41-4ubuntu3.8_amd64.deb ...
Unpacking apache2 (2.4.41-4ubuntu3.8) ...
Selecting previously unselected package ssl-cert.
Preparing to unpack .../10-ssl-cert_1.0.39_all.deb ...
Unpacking ssl-cert (1.0.39) ...
Setting up libapr1:amd64 (1.6.5-1ubuntu1) ...
Setting up libjansson4:amd64 (2.12-1build1) ...
Setting up ssl-cert (1.0.39) ...
Setting up liblua5.2-0:amd64 (5.2.4-1.1build3) ...
Setting up apache2-data (2.4.41-4ubuntu3.8) ...
Setting up libaprutil1:amd64 (1.6.1-4ubuntu2) ...
Setting up libaprutil1-ldap:amd64 (1.6.1-4ubuntu2) ...
Setting up libaprutil1-dbd-sqlite3:amd64 (1.6.1-4ubuntu2) ...
Setting up apache2-utils (2.4.41-4ubuntu3.8) ...
Setting up apache2-bin (2.4.41-4ubuntu3.8) ...
Setting up apache2 (2.4.41-4ubuntu3.8) ...
Enabling module mpm_event.
Enabling module authz_core.
Enabling module authz_host.
Enabling module authn_core.
Enabling module auth_basic.
Enabling module access_compat.
Enabling module authn_file.
Enabling module authz_user.
Enabling module alias.
Enabling module dir.
Enabling module autoindex.
Enabling module env.
Enabling module mime.
Enabling module negotiation.
Enabling module setenvif.
Enabling module filter.
Enabling module deflate.
Enabling module status.
Enabling module reqtimeout.
Enabling conf charset.
Enabling conf localized-error-pages.
Enabling conf other-vhosts-access-log.
Enabling conf security.
Enabling conf serve-cgi-bin.
Enabling site 000-default.
Created symlink /etc/systemd/system/multi-user.target.wants/apache2.service → /l
ib/systemd/system/apache2.service.
Created symlink /etc/systemd/system/multi-user.target.wants/apache-htcacheclean.
service → /lib/systemd/system/apache-htcacheclean.service.
Processing triggers for ufw (0.36-6ubuntu1) ..
Processing triggers for systemd (245.4-4ubuntu3.13) ...
Processing triggers for man-db (2.9.1-1) ...
Processing triggers for libc-bin (2.31-0ubuntu9.2) ...
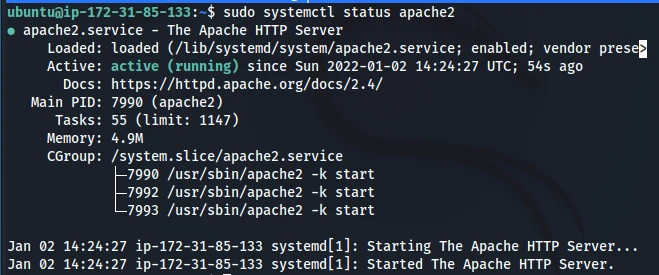
3. Check and enable the status of the Apache server.
Confirm the unit state with systemctl status or is-active; the systemctl command shows exit codes and recent journal lines in one view.
sudo systemctl status apache2
sudo systemctl enable apache2
- Set the Apache user as the owner of document root as it is owned by the root user by default. And also check if the DNS is resolved.
Ownership changes in this section use chown command syntax.
sudo chown www-data:www-data /var/www/ -R
sudo apache2ctl -t

5. Now, reload the Apache server for the change to take effect.
sudo systemctl reload apache2
Step 4: Buy Domain from Freenom
1. First , go to www.freenom.com.
2. Enter the domain name you need in the availability bar but always remember to use TLD’s such as .ml, .tk and .ga since they are free of cost. Select the domain and click on Checkout. We have selected website-deploy.tk domain.
3. Provide the term for which you would like to use the domain. Since I am creating.
4. Enter your email address in the email address field and click on the link you receive in your email to verify the email address and create an account in freenom with your first name , last name and all the profile details.
5. After you have completed filling all the required details during the verification of email address, you will be given an Order Confirmation and you can from now login to your freenom account to view your domain you bought. You can navigate to the below link to see the domain you have bought.
Step 5: Configure Custom Domain using Route53
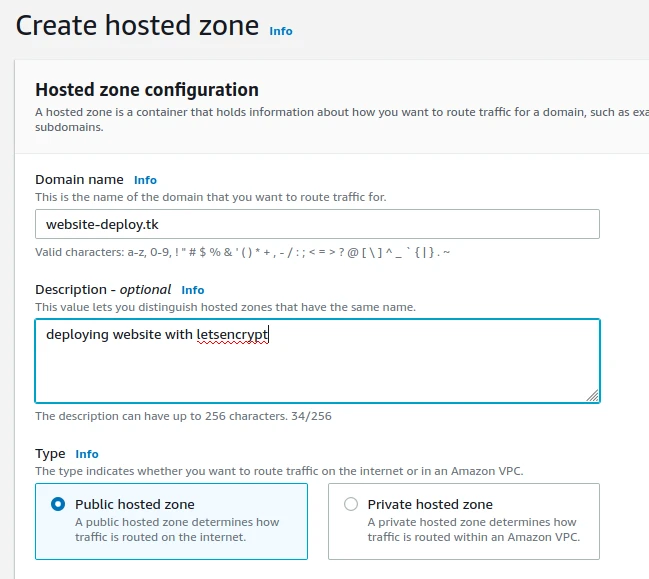
1. Go toRoute53in AWS and Click onCreate Hosted Zone**.**
2. In the Hosted zone configuration section, Enter the domain name you have bought in the “Domain Name” and select the type asPublic Hosted Zonesince we want the traffic routed through the Internet.
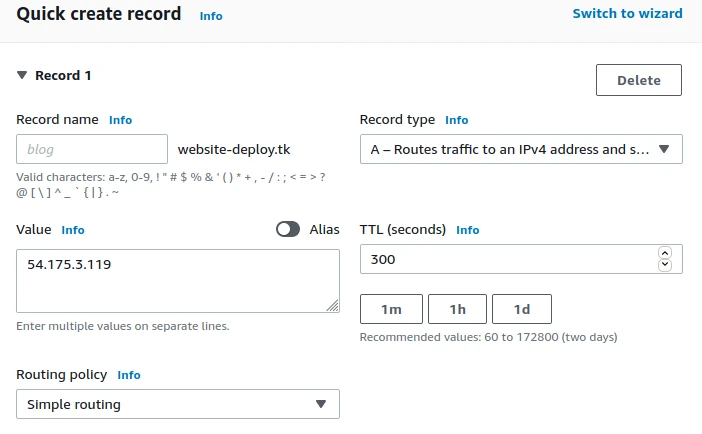
3. Two default DNS records will get created by default. Create an additional A-record with the IP address of the EC2 Instance.
4. Now, click on the NS Record and copy all the 4 DNS Servers.
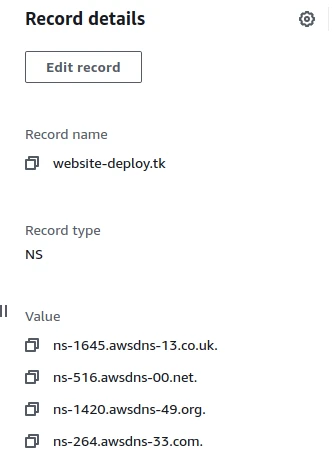
5. Now go to Freenom and under the domain , click on Nameservers and paste the nameservers from the DNS record there.
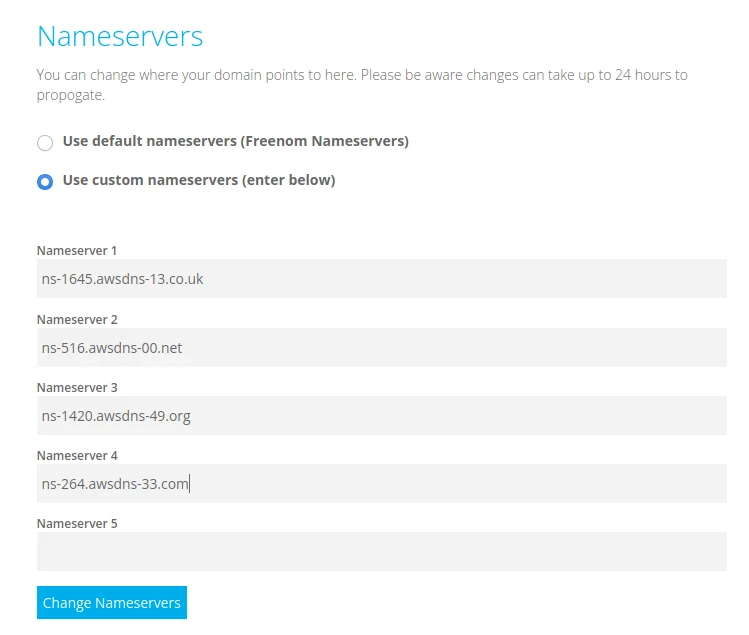
6. We have successfully configured the Custom Domain to Route53 and we now need an SSL Certificate to enable HTTPS for our website.
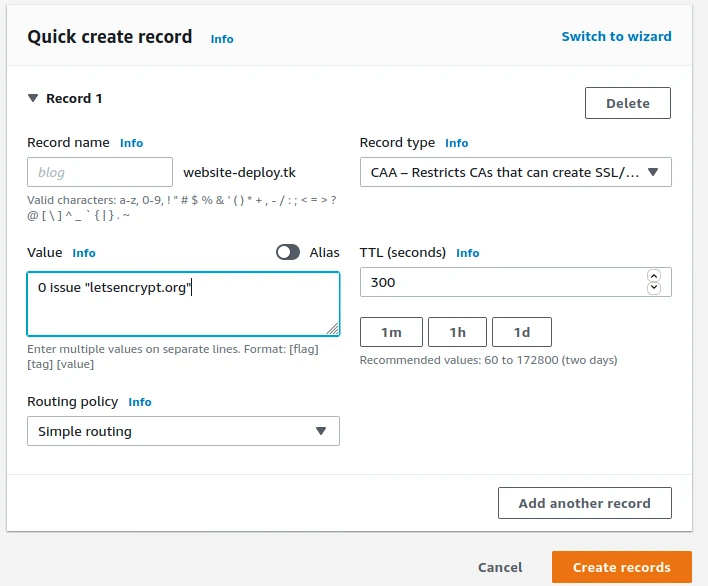
Step 6: Let's Encrypt Installation
1. Create CAA record for the domain name.
2. Add the certbot apt repository by using the following command.
sudo add-apt-repository ppa:certbot/certbot
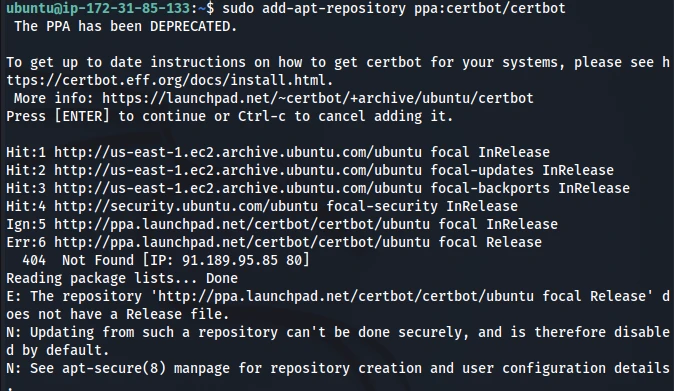
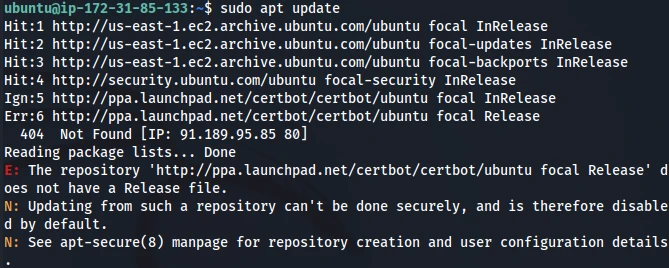
3. Update the apt package manager sources.
sudo apt update
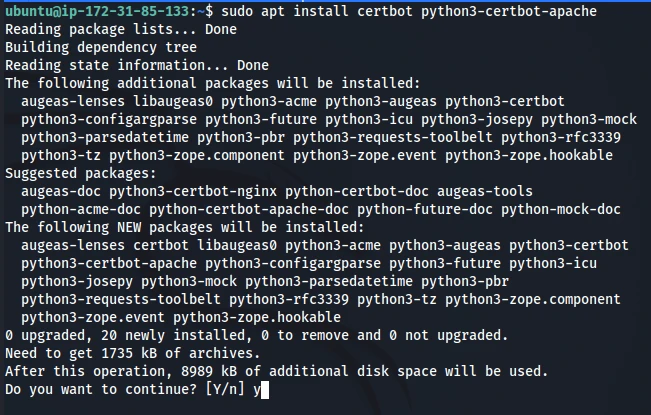
4. Install Let's Encrypt client, certbot on Ubuntu.
sudo apt install certbot python3-certbot-apache
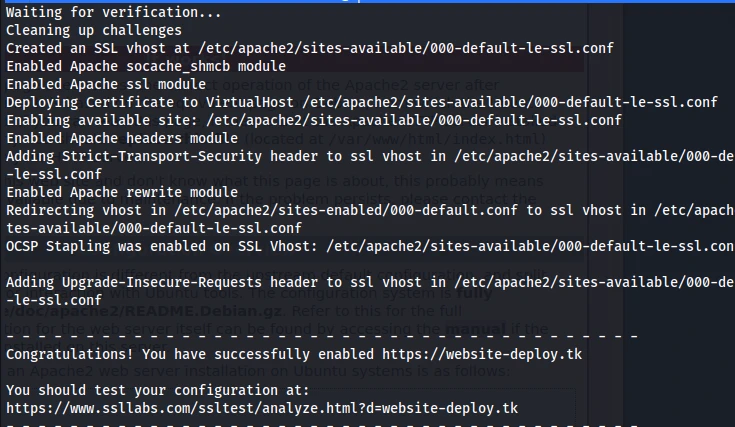
5. Use Apache plugin to enable HTTPS.
sudo certbot --apache --agree-tos --redirect --uir --hsts --staple-ocsp --must-staple -d website-deploy.tk --email [email protected]
6. Test the SSL Certificate.
Now, that we are done with EC2 and Let's encrypt let's add the content to our website.
Step 7: Add Content to the Website
1. We can see that the apache default page is displayed every time we visit our website. So to upload our files we can add content in /var/www/html.
2. Use the following commands to change the index page.
cd /var/www/html
sudo Mv index.html index.html index.html.bak
sudo nano index.html

3. Add the following code to index.html.
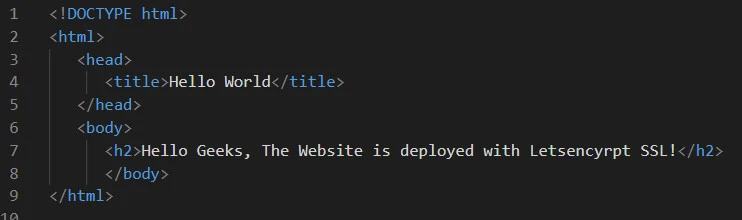
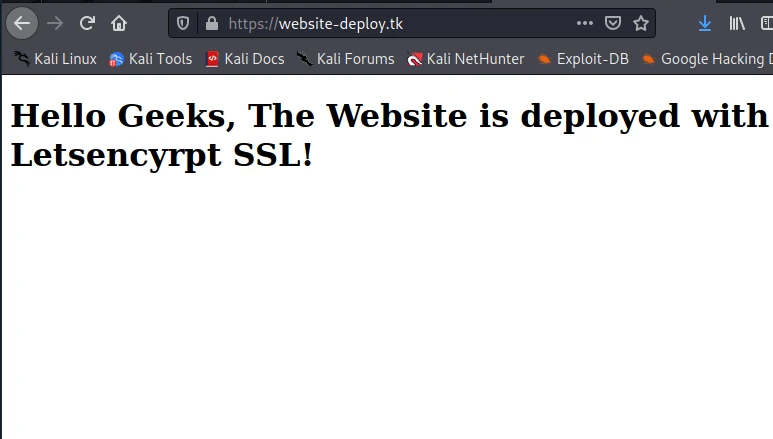
- Now, open your website with the registered domain name.
Summary
In this article, we have learnt how we can deploy our website with AWS EC2 and Let’s encrypt. Let’s encrypt is being used by many organisations over the world since its free and is easily implemented and renewed. If you are just starting into cloud, then please checkout other articles on our website. If you encounter any issues in the steps above , then please let us know in the comments.