
In this tutorial I will share a complete detailed steps to get you kickstarted with go programming language. We will cover the following topics in this article:
- Install GO on Linux
- Setup your golang environment
- Understanding the go environment variables
- Integrate Visual Studio Code with Linux to use Go (Believe me you need this)
- Importing different module
- Writing your first go code
- Compiling and generating the go binary
- Executing the binary
So that is a lot of things to learn, but don't worry I will try to be as descriptive as possible so it is important that you go through all the explanations section instead of just scrolling through the article.
I will not bore you by explaining you about golang programming language. If you have reached to this article then I am sure you already know about GO language and you want to enhance your skills by adding this language to your resume.
So let's get started..
Installing GO on Linux
I will demonstrate the steps to install go on Linux environment.
Method-1: Using system package manager
I am using Rocky Linux for this tutorial where we use dnf as package
manager. If you are using Ubuntu or Debian then you can use apt
package manager. I have written another detailed cheat sheet on
yum,
dnf and
apt
commands.
~]# dnf install go -y
This would require an active internet connection to download the packages.
Once successfully installed, you can check the version of the binary:
 ~]# go version
go version go1.17.12 linux/amd64
So we are all set up here, let's jump to next step.
Method-2: Download and install latest go binary
In this method we will download the latest available go binary from their official website. Currently at the time of writing this tutorial, go-1.9 was the latest available package so we will download the same:
[root@server ~]# cd /opt/projects
[root@server projects]# wget https://go.dev/dl/go1.19.linux-amd64.tar.gz
Next extract the archive:
Create a gzip-compressed archive with tar -czf; the tar command documents -z, verbose -v, and exclude patterns.
[root@server projects]# tar -xzvf go1.19.linux-amd64.tar.gz
That's it, you don't have to do any thing else for the installation. The
go binary is available inside the bin directory:
[root@server projects]# ls -l go
total 68
drwxr-xr-x  2 root root  4096 Aug  2 04:16 api
drwxr-xr-x  2 root root  4096 Aug  2 04:19 bin
-rw-r--r--  1 root root    52 Aug  2 04:15 codereview.cfg
-rw-r--r--  1 root root  1339 Aug  2 04:15 CONTRIBUTING.md
drwxr-xr-x  2 root root  4096 Aug  2 04:16 doc
drwxr-xr-x  3 root root  4096 Aug  2 04:16 lib
-rw-r--r--  1 root root  1479 Aug  2 04:15 LICENSE
drwxr-xr-x 11 root root  4096 Aug  2 04:16 misc
-rw-r--r--  1 root root  1303 Aug  2 04:15 PATENTS
drwxr-xr-x  6 root root  4096 Aug  2 04:19 pkg
-rw-r--r--  1 root root  1455 Aug  2 04:15 README.md
-rw-r--r--  1 root root   419 Aug  2 04:15 SECURITY.md
drwxr-xr-x 48 root root  4096 Aug  2 04:16 src
drwxr-xr-x 26 root root 12288 Aug  2 04:16 test
-rw-r--r--  1 root root     6 Aug  2 04:15 VERSION
Check the go version
[root@server projects]# go/bin/go version
go version go1.19 linux/amd64
Next update the PATH variable to be able to use go without providing absolute path everytime:
[root@server projects]# export PATH=/opt/projects/go/bin:$PATH
Verify the updated PATH:
[root@server projects]# echo $PATH
/opt/projects/go/bin:/usr/local/sbin:/usr/local/bin:/usr/sbin:/usr/bin:/var/lib/snapd/snap/bin:/root/bin
Now we can use go without specifying the full path:
[root@server projects]# go version
go version go1.19 linux/amd64
But this change is temporary and will not survive a reboot so to make
the changes permanent, create a new file /etc/profile.d/gopath.sh and
add following content:
[root@server projects]# cat /etc/profile.d/gopath.sh
export PATH=/opt/projects/go/bin:$PATH
Now our PATH variable changes are permanent.
GO environment variables
I hope you are familiar with the term "environment variables". By
default your Linux server will have a bunch of environment variables which you can
check using printenv or getenv command from the terminal.
When you install go, it will set it's own set of environment variables
which you can list using go env as shown below:
 ~]# go env
GO111MODULE=""
GOARCH="amd64"
GOBIN=""
GOCACHE="/root/.cache/go-build"
GOENV="/root/.config/go/env"
GOEXE=""
GOEXPERIMENT=""
GOFLAGS=""
GOHOSTARCH="amd64"
GOHOSTOS="linux"
GOINSECURE=""
GOMODCACHE="/root/go/pkg/mod"
GONOPROXY=""
GONOSUMDB=""
GOOS="linux"
GOPATH="/root/go"
GOPRIVATE=""
GOPROXY="https://proxy.golang.org,direct"
GOROOT="/opt/docs/workspace"
GOSUMDB="sum.golang.org"
GOTMPDIR=""
GOTOOLDIR="/opt/docs/workspace/pkg/tool/linux_amd64"
GOVCS=""
GOVERSION="go1.19"
GCCGO="gccgo"
GOAMD64="v1"
AR="ar"
CC="gcc"
CXX="g++"
CGO_ENABLED="1"
GOMOD="/dev/null"
GOWORK=""
CGO_CFLAGS="-g -O2"
CGO_CPPFLAGS=""
CGO_CXXFLAGS="-g -O2"
CGO_FFLAGS="-g -O2"
CGO_LDFLAGS="-g -O2"
PKG_CONFIG="pkg-config"
GOGCCFLAGS="-fPIC -m64 -pthread -Wl,--no-gc-sections -fmessage-length=0 -fdebug-prefix-map=/tmp/go-build2017710385=/tmp/go-build -gno-record-gcc-switches"
As you can see we have a long list of environment variables. Here we should be interested in below two variables:
- GOPATH: points to your Go workspace
- GOROOT: points to your binary installation of Go
GOROOT is currently set to /root/go which also needs to be changed
to /opt/projects/go as we have extracted our go archive inside
/opt/projects/go:
To apply the changes we can execute:
[root@server ~]# export GOROOT="/opt/projects/go"
Add the same in /etc/profile.d/gopath.sh which we created in previous
step:
[root@server ~]# cat /etc/profile.d/gopath.sh
export PATH=/opt/projects/go/bin:$PATH
export GOROOT="/opt/projects/go"
Verify the changes:
[root@server ~]# go env | grep 'GOROOT'
GOROOT="/opt/projects/go"
Using Visual Studio Code IDE with GO
It is strongly recommended to use some IDE (I personally prefer Visual Studio Code) to writing code with Go programming language. The reason being, IDE can help you
- Identify errors before actually running the code
- Fix indentations
- Give improvement ideas
- Help you with official documentation hints for individual keywords and functions from golang
- Syntax highlighting
- and many more..
So this tutorial assumes that you already have Visual Studio Code installed—on Ubuntu see install VS Code on Ubuntu if you still need the editor—and we will use Remote SSH to connect to our Linux server and then writing go codes.
Open Visual Studio Code → View → Extensions
Search for Remote SSH and click on Install

Next press Ctrl + Shift + P to run the Command Palette. One the prompt, enter "Connect" and select Remote-SSH: Connect to Host.
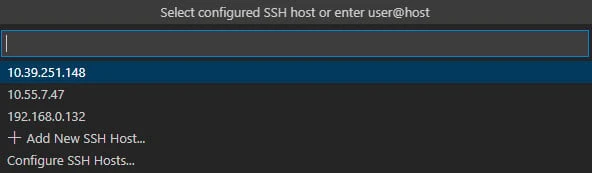
Select "Add New SSH Host" from the drop down menu and provide the
username and IP of the host to connect in the form of user@ip-address:

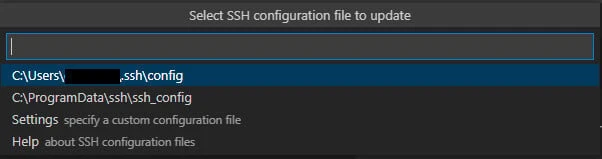
Next select a configuration file to update the host details.
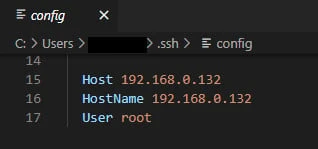
In the file it will automatically populate the following content. If required you can also add IdentityFile section to perform password less connection and it gets annoying the number pf times VSC will prompt for password.
Next re-initiate the SSH connection using Ctrl + Shift +P and provide the IP address to connect. Base on the host file configuration, SSH will be attempted:

Next provide the password of the user:

If all is good then you should be successfully connected to your Linux server:
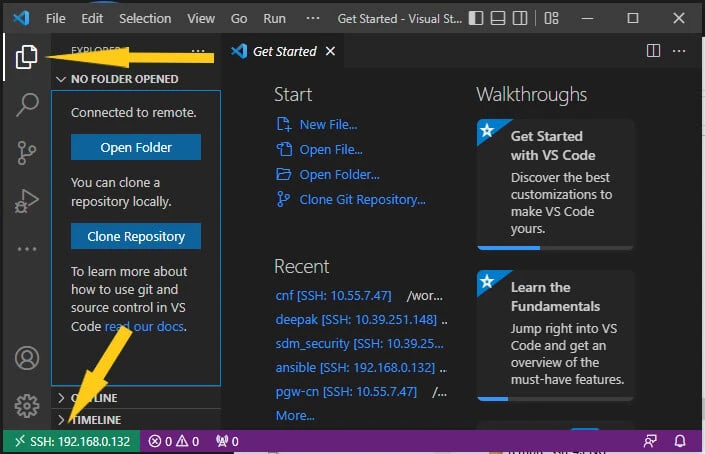
Click on Open Folder and select the folder which you want to act as
your home folder when connected with Visual Studio Code. I will make it
as /opt/goexamples which I have created on my Linux server where I
will be writing my first go code for this article. Here I have also
created some empty directories which we will use later:
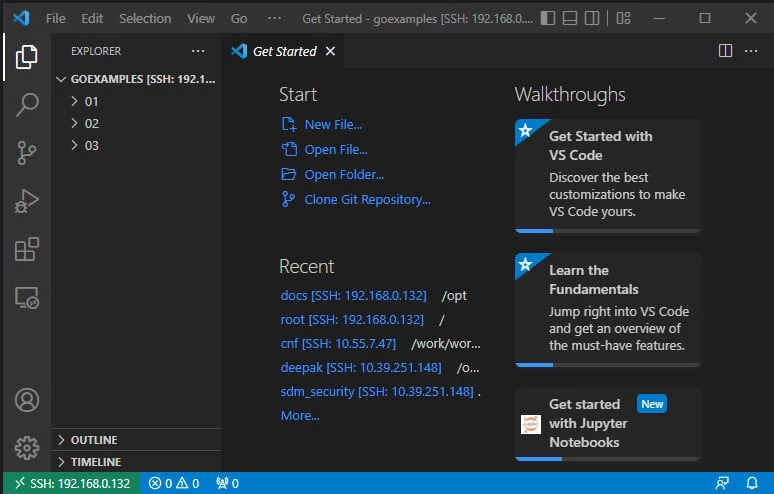
As you can now see we are successfully connected to our server.
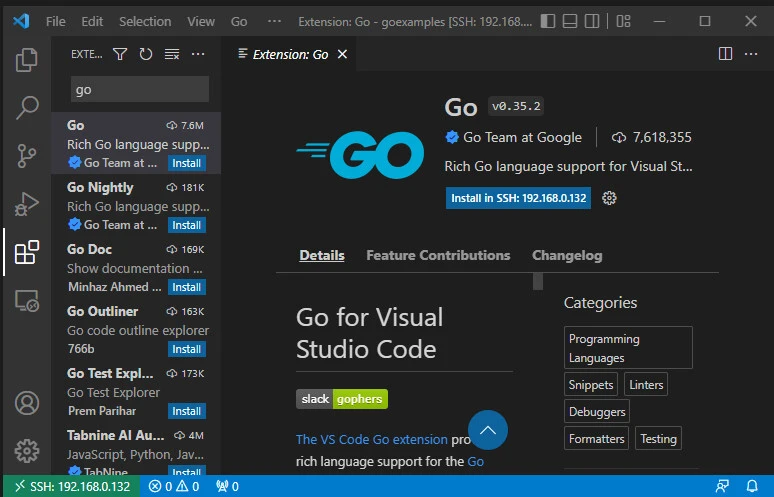
Next we will install the required go extensions which can help us achieve all the benefits I listed in the initial section of this chapter. Again click onView → Extensions
Search for "Go" and install the extension from "Go Team at Google"
The Go extension for VS code depends on several open source Go tools to provide formatting, linting, documentation parsing, and other nice features that you expect in a modern programming environments. To install those, press Ctrl + Shift + P and Enter Go: Install/Update Tools which will install all the dependent extensions for Go module.

This will show a bunch of modules which can be installed, you can select all and install:

Here is the output of installation:
Installing 7 tools at /root/go/bin in module mode.
  gotests
  gomodifytags
  impl
  goplay
  dlv
  staticcheck
  gopls

Installing github.com/cweill/gotests/gotests@latest (/root/go/bin/gotests) SUCCEEDED
Installing github.com/fatih/gomodifytags@latest (/root/go/bin/gomodifytags) SUCCEEDED
Installing github.com/josharian/impl@latest (/root/go/bin/impl) SUCCEEDED
Installing github.com/haya14busa/goplay/cmd/goplay@latest (/root/go/bin/goplay) SUCCEEDED
Installing github.com/go-delve/delve/cmd/dlv@latest (/root/go/bin/dlv) SUCCEEDED
Installing honnef.co/go/tools/cmd/staticcheck@latest (/root/go/bin/staticcheck) SUCCEEDED
Installing golang.org/x/tools/gopls@latest (/root/go/bin/gopls) SUCCEEDED

All tools successfully installed. You are ready to Go. :)
Next open the terminal to manually run the go code. You can also use some go compiler extension but I prefer using the terminal. Click on View → Terminal to show the terminal in VSC.
Create Hello World GO Code
Writing your first hello-world go code
Now let us write a simple hello world go code. We will navigate to our
goexamples directory and create a hello-world.go file.
// Declare the package name
package main

// Import any modules required
import "fmt"

// Define the main function
func main() {
    fmt.Println("Hello World")
}Explanation:
The first non comment or blank line in any Go program file must be a
package declaration. Every Go file belongs to a package and packages
where Go uses to organize code and import code from third parties.
Every file in a directory belongs to the same package, and in every Go
program there is a special package called main. Your Go program starts
from this package.
Before you use any code from another package you must import it, so here
we are trying to use fmt package so we must import it.
Go has top-level functions and a function is declared by using the
keyword func by the name of the function. The body of the function is
contained between an opening brace and a closing brace. Now all Go
programs start from a function called main in the main package. This
main function takes in no parameters and returns no values.
Output:
[root@server 01]# go run hello-world.go
Hello World
So we have successfully printed Hello World on the console using
fmt package.
Setup go environment
Now lets compile and create our go binary to execute this code. First we
need to setup go environment using go mod init as shown below:
[root@server 01]# go mod init 01
go: creating new go.mod: module 01
go: to add module requirements and sums:
        go mod tidy
This step will create go.mod file in the current directory.
[root@server 01]# cat go.mod
module 01

go 1.19
Next execute go mod tidy:
[root@server 01]# go mod tidy
Build and execute go binary
For this code, this command will not do much. We will see how this command works in next example.
[root@server 01]# go build -o hello-world .
This will generate hello-world go binary:
[root@server 01]# ls -l
total 1740
-rw-r--r-- 1 root root      19 Aug 26 19:26 go.mod
-rwxr-xr-x 1 root root 1771590 Aug 26 19:28 hello-world
-rw-r--r-- 1 root root     131 Aug 26 19:24 hello-world.go
Now we can just copy this binary to any Linux server and execute:
[root@server 01]# ./hello-world
Hello World
Import third party modules in GO
In this example we will try to use logrus module from github which is used to log messages on console or log file. We also have a go provided log module but it has it's own limitation so many users prefer to go for logrus.
We have updated our previous code:
// Declare the package name
package main

// Import any modules required
import "github.com/sirupsen/logrus"

func main() {
    logrus.Println("Hello World")
}Now let us try to execute this:
[root@server 01]# go run hello-world.go
hello-world.go:5:8: no required module provides package github.com/sirupsen/logrus: go.mod file not found in current directory or any parent directory; see 'go help modules'
As you can see the execution is throwing an error that package logrus was not found. Since this is a third party module, it is not packaged with default go. So we must import this module into our environment.
This can be done using go get command:
[root@server 01]# go get github.com/sirupsen/logrus
go: downloading github.com/sirupsen/logrus v1.9.0
go: downloading golang.org/x/sys v0.0.0-20220715151400-c0bba94af5f8
go get: added github.com/sirupsen/logrus v1.9.0
go get: added golang.org/x/sys v0.0.0-20220715151400-c0bba94af5f8
Now let us try to re run the code
[root@server 01]# go run hello-world.go
INFO[0000] Hello World
So now the code is successfully executed.
Since we have added a new module so let's re-perform the go mod tidy to
update our go.mod file:
[root@server 01]# go mod tidy
go: downloading github.com/stretchr/testify v1.7.0
go: downloading github.com/davecgh/go-spew v1.1.1
go: downloading github.com/pmezard/go-difflib v1.0.0
go: downloading gopkg.in/yaml.v3 v3.0.0-20200313102051-9f266ea9e77c
This command seems to have downloaded some more dependency files
required for logrus. Verify the content of go.mod:
[root@server 01]# cat go.mod
module 01

go 1.19

require github.com/sirupsen/logrus v1.9.0

require golang.org/x/sys v0.0.0-20220715151400-c0bba94af5f8 // indirect
Additionally this time we have one more file go.sum which will contain
the list of dependent modules which are used by logrus along with their
version details:
[root@server 01]# cat go.sum
github.com/davecgh/go-spew v1.1.0/go.mod h1:J7Y8YcW2NihsgmVo/mv3lAwl/skON4iLHjSsI+c5H38=
github.com/davecgh/go-spew v1.1.1 h1:vj9j/u1bqnvCEfJOwUhtlOARqs3+rkHYY13jYWTU97c=
github.com/davecgh/go-spew v1.1.1/go.mod h1:J7Y8YcW2NihsgmVo/mv3lAwl/skON4iLHjSsI+c5H38=
github.com/pmezard/go-difflib v1.0.0 h1:4DBwDE0NGyQoBHbLQYPwSUPoCMWR5BEzIk/f1lZbAQM=
github.com/pmezard/go-difflib v1.0.0/go.mod h1:iKH77koFhYxTK1pcRnkKkqfTogsbg7gZNVY4sRDYZ/4=
github.com/sirupsen/logrus v1.9.0 h1:trlNQbNUG3OdDrDil03MCb1H2o9nJ1x4/5LYw7byDE0=
github.com/sirupsen/logrus v1.9.0/go.mod h1:naHLuLoDiP4jHNo9R0sCBMtWGeIprob74mVsIT4qYEQ=
github.com/stretchr/objx v0.1.0/go.mod h1:HFkY916IF+rwdDfMAkV7OtwuqBVzrE8GR6GFx+wExME=
github.com/stretchr/testify v1.7.0 h1:nwc3DEeHmmLAfoZucVR881uASk0Mfjw8xYJ99tb5CcY=
github.com/stretchr/testify v1.7.0/go.mod h1:6Fq8oRcR53rry900zMqJjRRixrwX3KX962/h/Wwjteg=
golang.org/x/sys v0.0.0-20220715151400-c0bba94af5f8 h1:0A+M6Uqn+Eje4kHMK80dtF3JCXC4ykBgQG4Fe06QRhQ=
golang.org/x/sys v0.0.0-20220715151400-c0bba94af5f8/go.mod h1:oPkhp1MJrh7nUepCBck5+mAzfO9JrbApNNgaTdGDITg=
gopkg.in/check.v1 v0.0.0-20161208181325-20d25e280405/go.mod h1:Co6ibVJAznAaIkqp8huTwlJQCZ016jof/cbN4VW5Yz0=
gopkg.in/yaml.v3 v3.0.0-20200313102051-9f266ea9e77c h1:dUUwHk2QECo/6vqA44rthZ8ie2QXMNeKRTHCNY2nXvo=
gopkg.in/yaml.v3 v3.0.0-20200313102051-9f266ea9e77c/go.mod h1:K4uyk7z7BCEPqu6E+C64Yfv1cQ7kz7rIZviUmN+EgEM=
So every time now we build hello-world, these set of dependent files will also be compiled into our binary. Here you can see, previously our hello-world was of around 1.7MB
[root@server 01]# ls -lSh hello-world
-rwxr-xr-x 1 root root 1.7M Aug 26 19:28 hello-world
While after building a new binary, the size of the binary has increased to 2.1M:
[root@server 01]# go build -o hello-world .
[root@server 01]# ls -lSh hello-world
-rwxr-xr-x 1 root root 2.1M Aug 26 19:44 hello-world
So I think this should enough to get you started, now that you have your go environment setup you can plan to go through our next set of tutorials and learn this wonderful and easy language.
What's Next
You can next learn about How to create custom GO module with Examples
Summary
In this tutorial we have covered different areas of getting started with golang programming language. So now I hope you should have a fair idea of installing and setting up go environment. Now since you have successfully integrated Visual Studio Code with GO, you can utilize the different VSC extensions which can help you write the code. You must make sure that you set your GOPATH properly in case you are downloading the go binary or installing it from default package manager. Just make sure that GOPATH is pointing to the default workspace.
Related Keywords: Getting started with go, installing go using package manager, install go-1.19, setup your own go workspace, What is GOPATH and GOROOT, How to integrate visual studio code with GO, Required extensions for GO in visual studio code, Write your hello world go program, importing third party module in go.
