Shiny is a low-level, cross-platform experiment for opening windows, reading input, and pushing pixels from Go. It is not part of the Go standard library and it is not a full widget toolkit: you draw into buffers (or textures) and wire your own layout and controls.
When I wrote this guide I built and ran the programs on 64-bit Linux with Go 1.25 and a normal graphical desktop. The
golang.org/x/exp/shinypseudo-version I pinned while writing wasv0.0.0-20260611194520-c48552f49976.
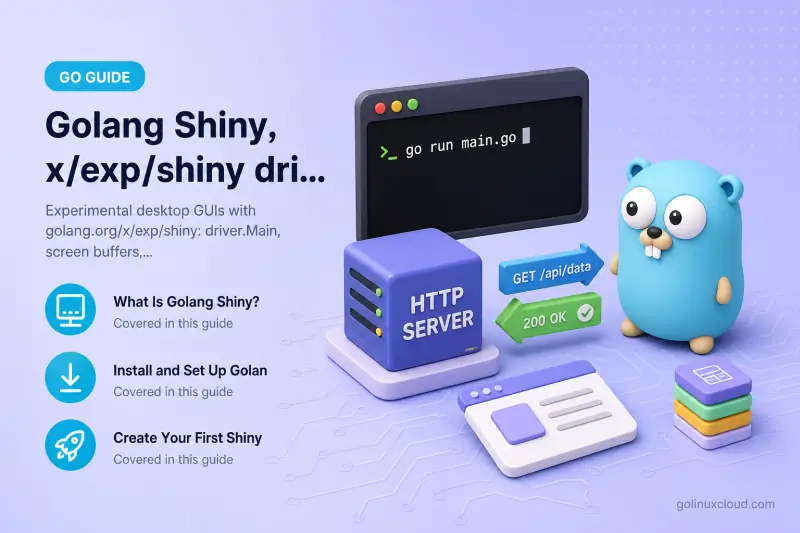
What Is Golang Shiny?
Shiny splits responsibilities across a few packages:
golang.org/x/exp/shiny/driver—Mainboots the right backend (for example X11 on Linux) and hands you ascreen.Screen.golang.org/x/exp/shiny/screen— screen command createsBuffervalues (CPU-side RGBA images),Texturevalues, andWindowvalues.golang.org/x/mobile/event/...— portablelifecycle,paint,key,mouse, andsizeevents you receive fromWindow.NextEvent.
Upstream examples live under shiny/example in the exp repository.
Is Shiny an official Go GUI framework?
It lives in the Go project’s experimental tree (x/exp), which explicitly warns that APIs may change or disappear. It is “official” only in the sense that it is maintained alongside other golang.org/x/... experiments—not in the sense of a supported, batteries-included application framework.
Install and Set Up Golang Shiny
You need a working Go toolchain and the usual OS libraries for your driver (on Linux, X11-related development packages are commonly required so GLFW/Xgb can link).
Create a Go module and add x/exp/shiny
Create a project directory, then:
mkdir shiny-demo && cd shiny-demo
go mod init example.com/shiny-demo
go get golang.org/x/exp/shiny@latest
go get records golang.org/x/exp/shiny in go.mod and pulls compatible versions of indirect dependencies (including golang.org/x/mobile for events). Note: recent Shiny releases may require a newer Go version than older LTS installs; if go get reports a toolchain constraint, upgrade Go or pin an older Shiny pseudo-version that matches your toolchain.
Create Your First Shiny Window
Every program follows the same skeleton: call driver.Main with a function that receives screen.Screen, create a window, then loop on NextEvent.
Understand driver.Main, Screen, and Window
driver.Main(func(s screen.Screen) { ... })— starts the platform driver. The closure may run on the OS UI thread; keep event handling cooperative.Screen— factory for this driver’s buffers, textures, and windows.Window— implementsEventDeque(NextEvent,Send, …),Upload, andPublish.
The listing below opens a titled window, tracks size.Event so the backing buffer matches the drawable area, fills it blue, and uploads on each paint.Event. Quitting the window emits lifecycle.StageDead.
package main

import (
	"image"
	"image/color"
	"image/draw"
	"log"

	"golang.org/x/exp/shiny/driver"
	"golang.org/x/exp/shiny/screen"
	"golang.org/x/mobile/event/lifecycle"
	"golang.org/x/mobile/event/paint"
	"golang.org/x/mobile/event/size"
)

func main() {
	driver.Main(func(s screen.Screen) {
		w, err := s.NewWindow(&screen.NewWindowOptions{
			Width:  400,
			Height: 300,
			Title:  "Shiny first window",
		})
		if err != nil {
			log.Fatal(err)
		}
		defer w.Release()

		var (
			buf   screen.Buffer
			bufSz image.Point
		)
		releaseBuf := func() {
			if buf != nil {
				buf.Release()
				buf = nil
			}
		}
		defer releaseBuf()

		for {
			switch e := w.NextEvent().(type) {
			case lifecycle.Event:
				if e.To == lifecycle.StageDead {
					return
				}

			case size.Event:
				need := e.Size()
				if need.X <= 0 || need.Y <= 0 {
					break
				}
				if buf == nil || need != bufSz {
					releaseBuf()
					var err error
					buf, err = s.NewBuffer(need)
					if err != nil {
						log.Fatal(err)
					}
					bufSz = need
					draw.Draw(buf.RGBA(), buf.Bounds(), &image.Uniform{color.RGBA{0x22, 0x44, 0x88, 0xff}}, image.Point{}, draw.Src)
					w.Send(paint.Event{})
				}

			case paint.Event:
				if buf == nil {
					continue
				}
				w.Upload(image.Point{}, buf, buf.Bounds())
				w.Publish()

			case error:
				log.Print(e)
			}
		}
	})
}
Run locally (from the directory that contains this main.go):
go run .Handle Events in a Shiny Application
NextEvent blocks until the deque delivers something. Besides lifecycle, paint, and size, you will commonly see key.Event and mouse.Event.
Close the window with lifecycle.Event
When the user closes the window, you should see a lifecycle transition to lifecycle.StageDead. Return from driver.Main’s callback to exit cleanly (after releasing buffers and textures you allocated).
Handle keyboard and mouse input
- Keyboard — inspect
e.Code(seekey.Code) ande.Direction(key.DirPress,key.DirRelease, …). - Mouse —
e.X/e.Y,e.Button, ande.Directiondescribe clicks and movement in window coordinates.
This minimal program only logs input; it illustrates the type switch without drawing:
package main

import (
	"fmt"
	"log"

	"golang.org/x/exp/shiny/driver"
	"golang.org/x/exp/shiny/screen"
	"golang.org/x/mobile/event/key"
	"golang.org/x/mobile/event/lifecycle"
	"golang.org/x/mobile/event/mouse"
)

func main() {
	driver.Main(func(s screen.Screen) {
		w, err := s.NewWindow(&screen.NewWindowOptions{
			Title: "Shiny input demo",
		})
		if err != nil {
			log.Fatal(err)
		}
		defer w.Release()

		for {
			switch e := w.NextEvent().(type) {
			case lifecycle.Event:
				if e.To == lifecycle.StageDead {
					return
				}

			case key.Event:
				if e.Code == key.CodeEscape && e.Direction == key.DirPress {
					return
				}
				if e.Code == key.CodeSpacebar && e.Direction == key.DirPress {
					fmt.Println("space")
				}

			case mouse.Event:
				if e.Button == mouse.ButtonLeft && e.Direction == mouse.DirPress {
					fmt.Printf("click at (%.0f, %.0f)\n", e.X, e.Y)
				}

			case error:
				log.Print(e)
			}
		}
	})
}
Draw Graphics on a Shiny Window
Use Buffer, Upload, and Publish
- Allocate a
Bufferwiths.NewBuffer(size image.Point). - Draw into
buf.RGBA()withSet,image/draw, or your own raster code. - Call
w.Upload(dp, buf, sr)to copy a rectangle of pixels into the window’s back buffer (dpalignssr.Minin buffer space). - Call
w.Publish()to swap buffers and show the result.
screen package documentation states that uploads to a window have no visible effect until Publish.
Redraw content on paint.Event
Treat paint.Event as “compose a frame now.” External paints arrive when the OS exposes or resizes the surface; internal paints are ones you enqueue with w.Send(paint.Event{}) after your own state changes.
Build a Small Interactive Example
Draw a box and move it with keyboard input
This program combines size.Event, paint.Event, and arrow keys. After each key press it enqueues a paint so the frame updates without waiting for the OS.
package main

import (
	"image"
	"image/color"
	"image/draw"
	"log"

	"golang.org/x/exp/shiny/driver"
	"golang.org/x/exp/shiny/screen"
	"golang.org/x/mobile/event/key"
	"golang.org/x/mobile/event/lifecycle"
	"golang.org/x/mobile/event/paint"
	"golang.org/x/mobile/event/size"
)

const box = 40

func main() {
	driver.Main(func(s screen.Screen) {
		w, err := s.NewWindow(&screen.NewWindowOptions{
			Title: "Move the box (arrow keys, Esc to quit)",
		})
		if err != nil {
			log.Fatal(err)
		}
		defer w.Release()

		var (
			buf     screen.Buffer
			bufSz   image.Point
			boxPos  = image.Pt(80, 60)
			pending bool
		)
		releaseBuf := func() {
			if buf != nil {
				buf.Release()
				buf = nil
			}
		}
		defer releaseBuf()

		requestPaint := func() {
			if !pending {
				pending = true
				w.Send(paint.Event{})
			}
		}

		for {
			switch e := w.NextEvent().(type) {
			case lifecycle.Event:
				if e.To == lifecycle.StageDead {
					return
				}

			case size.Event:
				need := e.Size()
				if need.X <= 0 || need.Y <= 0 {
					break
				}
				if buf == nil || need != bufSz {
					releaseBuf()
					var err error
					buf, err = s.NewBuffer(need)
					if err != nil {
						log.Fatal(err)
					}
					bufSz = need
				}
				requestPaint()

			case key.Event:
				if e.Direction != key.DirPress {
					break
				}
				switch e.Code {
				case key.CodeEscape:
					return
				case key.CodeUpArrow:
					boxPos.Y -= 10
				case key.CodeDownArrow:
					boxPos.Y += 10
				case key.CodeLeftArrow:
					boxPos.X -= 10
				case key.CodeRightArrow:
					boxPos.X += 10
				default:
					continue
				}
				requestPaint()

			case paint.Event:
				pending = false
				if buf == nil {
					continue
				}
				rgba := buf.RGBA()
				bounds := rgba.Bounds()
				max := bounds.Max
				if boxPos.X < bounds.Min.X {
					boxPos.X = bounds.Min.X
				}
				if boxPos.Y < bounds.Min.Y {
					boxPos.Y = bounds.Min.Y
				}
				if boxPos.X+box > max.X {
					boxPos.X = max.X - box
				}
				if boxPos.Y+box > max.Y {
					boxPos.Y = max.Y - box
				}

				draw.Draw(rgba, bounds, &image.Uniform{color.RGBA{0xf0, 0xf0, 0xf0, 0xff}}, image.Point{}, draw.Src)
				br := image.Rect(boxPos.X, boxPos.Y, boxPos.X+box, boxPos.Y+box)
				draw.Draw(rgba, br, &image.Uniform{color.RGBA{0xd4, 0x2c, 0x3c, 0xff}}, image.Point{}, draw.Src)

				w.Upload(image.Point{}, buf, buf.Bounds())
				w.Publish()

			case error:
				log.Print(e)
			}
		}
	})
}
Shiny Cheat Sheet
| Concept | Package / Type | Purpose |
|---|---|---|
| Main entry point | driver.Main() |
Starts the Shiny application on the correct driver |
| Screen | screen.Screen |
Creates windows, buffers, and textures |
| Window | screen.Window |
Represents the application window |
| Buffer | screen.Buffer |
In-memory image used for drawing |
| Texture | screen.Texture |
Drawable image uploaded to the screen |
| Event loop | w.NextEvent() |
Reads window, keyboard, mouse, and paint events |
| Window close | lifecycle.Event |
Detects when the window should exit |
| Keyboard input | key.Event |
Handles key press and release |
| Mouse input | mouse.Event |
Handles clicks and mouse position |
| Redraw | paint.Event |
Used when the window needs repainting |
| Display update | w.Publish() |
Publishes uploaded content to the window |
For image decoding and textures, see the basic and imageview upstream examples.
Common Errors and Troubleshooting
| Symptom | Likely cause | Fix |
|---|---|---|
| Window opens and closes immediately | Early return from driver.Main, panic during setup, or quit on first lifecycle event without checking To |
Only return on lifecycle.StageDead (or explicit quit); handle NewWindow errors instead of ignoring them |
Drawing does not appear until paint.Event |
Upload without Publish, or no paint enqueued after input |
Call Publish after each frame; enqueue w.Send(paint.Event{}) when pixels change |
| Buffer size does not match the window | Stale buffer after resize | Recreate the buffer when size.Event reports new WidthPx/HeightPx, redraw, then Send a paint |
Should You Use Golang Shiny Today?
When Shiny is useful
Shiny fits learning, prototypes, and custom renderers where you want thin abstraction over buffers and events, or you are following the official shiny/example programs. It can be a reasonable playground before committing to a larger GUI ecosystem.
When to consider Fyne, Gio, Ebiten, or Wails instead
| Option | Good fit |
|---|---|
| Fyne | Material-style widgets, desktop (and mobile) apps where you want buttons, forms, and layouts without building everything yourself. |
| Gio | Immediate-mode UI in pure Go, retained GPU path, modern layout—more opinionated than raw Shiny but still Go-centric. |
| Ebiten | 2D games and interactive graphics with a stable engine-level loop and APIs. |
| Wails | Desktop shells around HTML/CSS/JS front ends with a Go backend—best when your team already invests in web UI. |
For production desktop products, a maintained toolkit or a hosted UI usually beats an x/exp experiment on support and predictability.
References
- Package golang.org/x/exp/shiny
- Package golang.org/x/exp/shiny/driver
- Package golang.org/x/exp/shiny/screen
- Package golang.org/x/mobile/event
Frequently Asked Questions
1. Can I run Shiny in the Go Playground?
2. Where do paint, key, and mouse events come from?
golang.org/x/mobile/event and delivered through Window.NextEvent as empty-interface values you type-switch on.3. Is Shiny production ready?
4. What documentation should I bookmark?
golang.org/x/exp/shiny, golang.org/x/exp/shiny/screen, and golang.org/x/mobile/event.