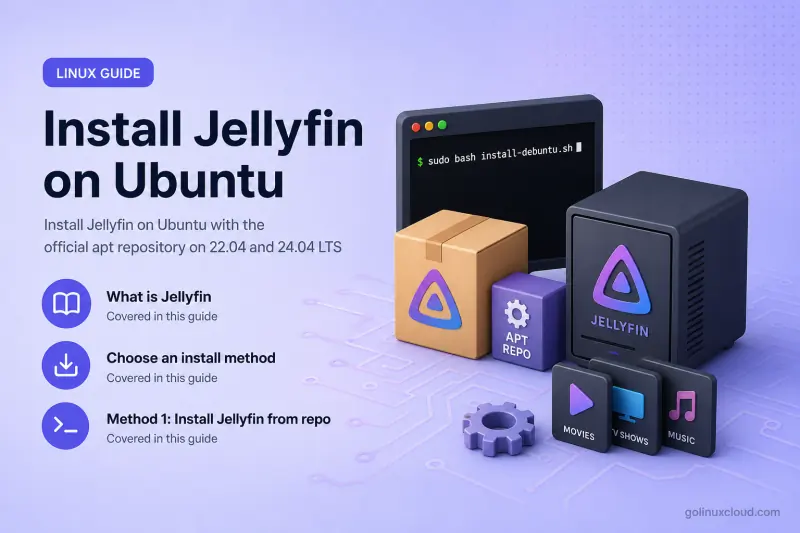
Jellyfin is a free, open-source media server that organizes movies, TV shows, music, and photos, then streams them to browsers, phones, TVs, and set-top boxes on your LAN or over the internet. Unlike Plex, there is no paid tier for core features—you host everything yourself.
This guide shows how to install Jellyfin on Ubuntu the way it actually works today: the official apt repository on 22.04 (jammy) and 24.04 (noble) LTS, and Docker when you are on a newer interim release. We tested on Ubuntu 25.04 (Plucky Puffin) and document honestly that pointing the noble apt repo at 25.04 does not install—dependency resolution fails before packages land.
Tested on: Ubuntu 25.04 (Plucky Puffin); kernel 6.14.0-37-generic; Docker 29.2.1.
sudo apt install jellyfin from the noble Jellyfin repository fails with unmet dependencies on libicu74 and libx265-199. Use Docker (Method 2) on 25.04 until Jellyfin publishes a plucky suite—or run Jellyfin on 24.04 LTS if you want a native apt install.
What is Jellyfin—and when do you need it?
Jellyfin replaces commercial media servers for home labs and small offices. Typical uses:
| Use case | What Jellyfin does |
|---|---|
| Home theater | Stream your ripped or personal video collection to a TV app or browser |
| Music library | Index FLAC/MP3 folders and play through mobile or desktop clients |
| Remote access | Watch your library while traveling (with reverse proxy or port forwarding) |
| Family server | Separate user accounts with parental controls and watch history |
Jellyfin runs on modest hardware—a NAS, old desktop, or Ubuntu VM—and uses FFmpeg for on-the-fly transcoding when a client cannot play the source format directly.
Prerequisites
- Ubuntu 22.04 LTS, 24.04 LTS, or newer (25.04 tested here) on amd64 for the commands below.
- sudo for apt installs, systemd, and UFW rules.
- Enough disk for your media (Jellyfin itself needs only a few GB; libraries live wherever you mount them).
- curl and
gpgwhen adding the Jellyfin apt repository. - Docker (Method 2) if you are on Ubuntu 25.04 or prefer containers—install with
sudo apt install -y docker.ioand add your user to thedockergroup, or use Docker Engine from Docker’s docs.
Check your release codename—Jellyfin apt repos are keyed to jammy (22.04) or noble (24.04):
. /etc/os-release && echo "$PRETTY_NAME ($VERSION_CODENAME)"See check Ubuntu version if you are unsure.
- For broader CLI reference beyond the
aptandsudosteps below, see the Linux commands.
Choose an install method
| Method | Best for | Jump to |
|---|---|---|
| Official Jellyfin apt repo | Ubuntu 22.04 and 24.04 LTS users who want systemd integration and apt upgrades | Method 1 |
Docker (jellyfin/jellyfin) |
Ubuntu 25.04 and anyone who wants an isolated, portable install | Method 2 |
Direct .deb from repo |
Advanced users on supported releases when apt metadata is broken (same deps as Method 1) | Method 3 |
On 24.04 LTS, use Method 1. On 25.04, use Method 2 until Jellyfin ships plucky packages.
Method 1: Install Jellyfin from the official apt repository
Use this on Ubuntu 22.04 (jammy) or Ubuntu 24.04 (noble). Jellyfin’s install script is the fastest path; the manual steps below match what the script does with modern signed-by keyrings (not deprecated apt-key).
Option A: Official install script (quick)
Download, verify checksum, and run:
Download the file with curl; the curl command compares -O, -L, -fsSL, and -o output options.
curl -fsSL https://repo.jellyfin.org/install-debuntu.sh -o install-debuntu.sh
curl -fsSL https://repo.jellyfin.org/install-debuntu.sh.sha256sum -o install-debuntu.sh.sha256sum
sha256sum -c install-debuntu.sh.sha256sum
sudo bash install-debuntu.sh
The script installs /etc/apt/keyrings/jellyfin.gpg, writes /etc/apt/sources.list.d/jellyfin.sources, and runs apt install jellyfin.
Option B: Manual repository setup
Set CODENAME to your Ubuntu release—jammy on 22.04, noble on 24.04:
CODENAME="$(. /etc/os-release && echo "$VERSION_CODENAME")"Install prerequisites and import the signing key into /etc/apt/keyrings (not apt-key):
sudo apt update
sudo apt install -y curl gnupg apt-transport-https ca-certificates

sudo mkdir -p /etc/apt/keyrings
curl -fsSL https://repo.jellyfin.org/ubuntu/jellyfin_team.gpg.key \
  | sudo gpg --dearmor -o /etc/apt/keyrings/jellyfin.gpg
sudo chmod 644 /etc/apt/keyrings/jellyfin.gpg
Add the Jellyfin Deb822 source (replace the suite if you are not on jammy/noble):
sudo tee /etc/apt/sources.list.d/jellyfin.sources <<EOF
Types: deb
URIs: https://repo.jellyfin.org/ubuntu
Suites: ${CODENAME}
Components: main
Architectures: amd64
Signed-By: /etc/apt/keyrings/jellyfin.gpg
EOF
Remove any legacy one-line list file if it exists:
sudo rm -f /etc/apt/sources.list.d/jellyfin.listRefresh indexes and inspect the candidate before installing:
sudo apt update
apt-cache policy jellyfin
On Ubuntu 24.04 you should see a candidate from repo.jellyfin.org (for example 10.11.11+ubu2404). Install:
sudo apt install -y jellyfinUbuntu 25.04: apt fails here (verified)
If you point the noble suite at Ubuntu 25.04 (plucky)—manually or via an unsupported codename override—apt-cache policy jellyfin may still show a candidate, but install fails:
sudo apt install -y --dry-run jellyfinExample solver output on 25.04:
Unsatisfied dependencies:
 jellyfin-ffmpeg7 : Depends: libx265-199 (>= 3.5) but it is not installable
 jellyfin-server : Depends: libicu74 but it is not installable
Error: Unable to correct problems, you have held broken packages.
This is expected until Jellyfin publishes packages built against plucky’s library versions. Do not force-install with --fix-broken hacks—use Docker instead.
Continue with post-install setup after a successful apt install on 22.04/24.04.
Method 2: Install Jellyfin with Docker (recommended on Ubuntu 25.04)
Docker sidesteps the noble-vs-plucky library mismatch. On our test host, Docker 29.2.1 pulled jellyfin/jellyfin:latest successfully.
Install Docker if needed:
sudo apt update
sudo apt install -y docker.io
sudo usermod -aG docker "$USER"
# log out and back in so group membership applies
Pull the image (optional but confirms registry access):
docker pull jellyfin/jellyfin:latestCreate local directories for config, cache, and media:
mkdir -p ~/jellyfin/{config,cache,media}Run Jellyfin with port 8096 published to the host:
docker run -d \
  --name jellyfin \
  --restart unless-stopped \
  --publish 8096:8096 \
  --publish 7359:7359/udp \
  --volume "$HOME/jellyfin/config:/config" \
  --volume "$HOME/jellyfin/cache:/cache" \
  --volume "$HOME/jellyfin/media:/media:ro" \
  jellyfin/jellyfin:latest
Adjust paths as needed—/srv/media on a NAS mount is common. The :ro flag keeps the container from modifying source files.
Check the container:
docker ps --filter name=jellyfin
docker logs jellyfin --tail 20
For hardware transcoding (Intel Quick Sync / NVIDIA), add device passthrough per Jellyfin Docker documentation. A basic CPU-only homelab does not require it.
Continue with post-install setup. For Docker, skip the systemctl jellyfin unit—use docker restart jellyfin instead.
Method 3: Install individual .deb packages (optional)
Jellyfin publishes .deb files under https://repo.jellyfin.org/ubuntu/pool/main/. You can download the metapackage manually on 22.04/24.04:
wget https://repo.jellyfin.org/ubuntu/pool/main/j/jellyfin/jellyfin_10.11.11+ubu2404_all.deb
sudo apt install ./jellyfin_10.11.11+ubu2404_all.deb
apt install ./package.deb still resolves jellyfin-server, jellyfin-web, and jellyfin-ffmpeg7 from the repository—and hits the same dependency errors on Ubuntu 25.04. This method helps only when apt metadata is confused on a supported LTS release, not as a workaround for plucky.
Post-install: enable systemd, open the firewall, and run the wizard
These steps apply after Method 1 (apt). Docker users should enable --restart unless-stopped (already in the run command above) and open the same firewall port.
Enable or disable the unit at boot with systemctl enable; the systemctl command documents enable --now, symlinks under /etc/systemd/system, and masks.
Enable and verify the Jellyfin service (apt only)
sudo systemctl enable --now jellyfin
sudo systemctl status jellyfin
You want Active: active (running) and enabled for boot.
Allow port 8096 through UFW
Jellyfin’s default HTTP port is 8096/tcp:
sudo ufw allow 8096/tcp
sudo ufw status
If UFW is inactive, enable it only after confirming SSH access is allowed (sudo ufw allow OpenSSH).
First-run web setup wizard
On the server or another machine on the network, open:
http://<server-ip>:8096Replace <server-ip> with the host’s LAN address (hostname -I | awk '{print $1}') or use http://localhost:8096 locally.
The wizard walks you through:
- Preferred language and admin account (username + password).
- Media libraries—add folders for Movies, Shows, or Music. Example paths:
/srv/media/movies/srv/media/tv/srv/media/music
- Metadata language and remote access preference (leave remote access off until you understand port forwarding or a reverse proxy).
- Finish—land on the dashboard and sign in with the admin user you created.
Add or change media libraries later
In the dashboard: Administration → Dashboard → Libraries → Add Media Library. Pick the content type, add display name, and set folder paths Jellyfin can read. For TV shows, use Show Name/Season XX/episode layouts; for movies, Movie Name (Year)/Movie Name (Year).mkv works well with default metadata providers.
Ensure the jellyfin system user (apt) or container user can read your files:
Ownership changes in this section use chown command syntax.
# example: grant read access to a library mount
sudo chown -R jellyfin:adm /srv/media
sudo chmod -R g+rX /srv/media
For Docker, mount media with permissions your container user can read, or map --user $(id -u):$(id -g) if you manage ownership from the host.
Client apps
Beyond the browser UI at port 8096, install official clients from jellyfin.org/downloads:
| Platform | Notes |
|---|---|
| Android / iOS | Connect to http://server-ip:8096 |
| Android TV / Fire TV | Same server URL; pair or sign in |
| Roku / desktop | Useful for living-room and offline-friendly playback |
Enable remote access in Jellyfin only when you have HTTPS or a trusted reverse proxy in front of the server.
Rerun the setup wizard (system.xml)
If you need to repeat first-run setup on an apt install, edit the config flag:
sudo nano /etc/jellyfin/system.xmlChange:
<IsStartupWizardCompleted>true</IsStartupWizardCompleted>to:
<IsStartupWizardCompleted>false</IsStartupWizardCompleted>Restart and reload the wizard:
sudo systemctl restart jellyfinFor Docker, edit config/config/system.xml inside your mounted config volume, then docker restart jellyfin.
Uninstall Jellyfin
Apt install:
sudo systemctl stop jellyfin
sudo apt purge -y 'jellyfin*'
sudo rm -f /etc/apt/sources.list.d/jellyfin.sources /etc/apt/keyrings/jellyfin.gpg
sudo apt update
Optional: sudo apt autoremove -y — see remove unused packages on Ubuntu if apt still reports auto-installed dependencies you no longer need.
Docker:
docker stop jellyfin
docker rm jellyfin
docker rmi jellyfin/jellyfin:latest   # optional
rm -rf ~/jellyfin                     # only if you do not need config/cache
See how to remove software on Ubuntu for broader cleanup patterns.
Troubleshooting
| Symptom | Likely cause | Fix |
|---|---|---|
libicu74 / libx265-199 not installable |
25.04 using noble Jellyfin repo | Use Docker or install on 24.04 LTS |
Browser cannot reach :8096 |
UFW blocking or service down | sudo ufw allow 8096/tcp; systemctl status jellyfin or docker ps |
| Empty library after scan | Wrong folder type or permissions | Match library type to content; fix ownership/chmod on media paths |
| Transcoding errors | Missing codecs or GPU passthrough | Apt install pulls jellyfin-ffmpeg7; Docker image bundles FFmpeg—check logs |
| Wizard will not return | IsStartupWizardCompleted still true |
Edit system.xml as above and restart |
Summary
Install Jellyfin on Ubuntu 22.04 or 24.04 LTS with the official apt repository—modern signed-by key in /etc/apt/keyrings, correct jammy or noble suite, then sudo apt install jellyfin. On Ubuntu 25.04, the noble repo fails dependency resolution (libicu74, libx265-199); run jellyfin/jellyfin in Docker on port 8096 instead. After install, enable systemd (apt), allow 8096/tcp in UFW, complete the web wizard, add media libraries, and use official client apps for phones and TVs.
References
- Jellyfin Linux installation
- Jellyfin Docker documentation
- Jellyfin downloads
