![Install LXD on Rocky Linux 9 [Step-by-Step]](/install-lxd-rocky-linux-9/install_lxd.jpg)
In this tutorial we will go through detailed step by step instructions to install LXD in Rocky Linux 9. But before that let's get an overview of LXD.
What is LXD?
LXD(Linux Container Daemon) is a next generation system container manager. It is a manager/hypervisor for LXC(Linux Container), an operating system level virtualization method. LXD and LXC were built by Canonical as open source. It is now managed by Canonical Ltd and with contributions from a number of other companies and individual contributors.
How to install LXD?
We will explain the LXD installation via Rocky Linux 9. Let's apply the prerequisites.
Prerequisites
First, let's keep the system up-to-date:
[foc@rocky9 ~]$ sudo dnf -y update
Then let's add the Epel repository to the system:
[foc@rocky9 ~]$ sudo dnf -y install epel-release
We will install LXD from snapd store, so let's install snapd:
[foc@rocky9 ~]$ sudo dnf install snapd -y
Let's enable and start the snapd socket:
[foc@rocky9 ~]$ sudo systemctl enable --now snapd.socket
Let's enable classic snap support by creating a symlink:
[foc@rocky9 ~]$ sudo ln -s /var/lib/snapd/snap /snap
Finally, reboot the system:
[foc@rocky9 ~]$ sudo reboot
Installing LXD with Snap
Let's install LXD from the snap repo:
[foc@rocky9 ~]$ sudo snap install lxd
lxd 5.5-37534be from Canonical✓ installed
LXD has been successfully installed. Version:
[foc@rocky9 ~]$ lxd version
5.5
Let's add our local user to the lxd group. otherwise you have to type every command with sudo.
[foc@rocky9 ~]$ sudo usermod -aG lxd foc
(foc is local username, you must write your own)
Let's do the initial configuration of the LXD:
[foc@rocky9 ~]$ lxd init
Would you like to use LXD clustering? (yes/no) [default=no]:
Do you want to configure a new storage pool? (yes/no) [default=yes]:
Name of the new storage pool [default=default]:
Name of the storage backend to use (btrfs, ceph, cephobject, dir, lvm) [default=btrfs]: lvm
Create a new LVM pool? (yes/no) [default=yes]:
Would you like to use an existing empty block device (e.g. a disk or partition)? (yes/no) [default=no]:
Size in GiB of the new loop device (1GiB minimum) [default=5GiB]:
Would you like to connect to a MAAS server? (yes/no) [default=no]:
Would you like to create a new local network bridge? (yes/no) [default=yes]:
What should the new bridge be called? [default=lxdbr0]:
What IPv4 address should be used? (CIDR subnet notation, “auto” or “none”) [default=auto]:
What IPv6 address should be used? (CIDR subnet notation, “auto” or “none”) [default=auto]:
Would you like the LXD server to be available over the network? (yes/no) [default=no]:
Would you like stale cached images to be updated automatically? (yes/no) [default=yes]:
Would you like a YAML "lxd init" preseed to be printed? (yes/no) [default=no]:
We set the configurations as default. You can customize it according to the system you will use.
Let's allow network bridge connection through firewall:
[foc@rocky9 ~]$ sudo firewall-cmd --add-interface=lxdbr0 --zone=trusted --permanent
[sudo] password for foc:
success
We created lxdbr0 with the previous command. Then reload the firewalld:
[foc@rocky9 ~]$ sudo firewall-cmd --reload
success
Create a New Container using LXC
Let's create a container using the Rocky Linux 9 image:
[foc@rocky9 ~]$ lxc launch images:rockylinux/9/amd64 rocky9
Creating rocky9
Starting rocky9
Let's list the containers on the system:
[foc@rocky9 ~]$ lxc image list
+-------+--------------+--------+-------------------------------------+--------------+-----------+----------+------------------------------+
| ALIAS | FINGERPRINT  | PUBLIC | DESCRIPTION                         | ARCHITECTURE | TYPE      | SIZE     | UPLOAD DATE                  |
+-------+--------------+--------+-------------------------------------+--------------+-----------+----------+------------------------------+
|       | 36baf58d32ce | no     | Rockylinux 9 amd64 (20220916_02:06) | x86_64       | CONTAINER | 107.68MB | Sep 18, 2022 at 6:24am (UTC) |
+-------+--------------+--------+-------------------------------------+--------------+-----------+----------+------------------------------+
Let's list the containers on the system:
[foc@rocky9 ~]$ lxc list
+----------------+---------+---------------------+----------------------------------------------+-----------+-----------+
| NAME | STATE | IPV4 | IPV6 | TYPE | SNAPSHOTS                                                                         |
+----------------+---------+---------------------+----------------------------------------------+-----------+-----------+
| precious-liger | STOPPED |                     |                                              | CONTAINER | 0         |
+----------------+---------+---------------------+----------------------------------------------+-----------+-----------+
| rocky9         | RUNNING | 10.95.174.64 (eth0) | fd42:a816:1b24:b31:216:3eff:feed:e029 (eth0) | CONTAINER | 0         |
+----------------+---------+---------------------+----------------------------------------------+-----------+-----------+
Let's log into the rocky9 container we created:
[foc@rocky9 ~]$ lxc exec rocky9 -- /bin/bash

[root@rocky9 ~]# cat /etc/os-release
NAME="Rocky Linux"
VERSION="9.0 (Blue Onyx)"
ID="rocky"
ID_LIKE="rhel centos fedora"
VERSION_ID="9.0"
PLATFORM_ID="platform:el9"
PRETTY_NAME="Rocky Linux 9.0 (Blue Onyx)"
ANSI_COLOR="0;32"
LOGO="fedora-logo-icon"
CPE_NAME="cpe:/o:rocky:rocky:9::baseos"
HOME_URL="https://rockylinux.org/"
BUG_REPORT_URL="https://bugs.rockylinux.org/"
ROCKY_SUPPORT_PRODUCT="Rocky-Linux-9"
ROCKY_SUPPORT_PRODUCT_VERSION="9.0"
REDHAT_SUPPORT_PRODUCT="Rocky Linux"
REDHAT_SUPPORT_PRODUCT_VERSION="9.0"
For start, stop, restart and delete, you can run the following commands by typing the container name
lxc start container-name
lxc stop container-name
lxc restart container-name
lxc delete container-name
To exit the container, simply type exit.
Manage with LXD GUI
To manage LXD with graphical web interface, let's install the lxdmosaic package from the snap repository:
[foc@rocky9 ~]$ sudo snap install lxdmosaic
[sudo] password for foc:
lxdmosaic 0+git.c6f53f3f from Daniel Hope (turtle0x1) installed
Let's assign ports 81 and 444 to the lxdmosaic web interface:
[foc@rocky9 ~]$ sudo snap set lxdmosaic ports.http=81 ports.https=444
Let's allow ports on the firewall:
[foc@rocky9 ~]$ sudo firewall-cmd --zone=public --add-port=81/tcp --permanent
success
[foc@rocky9 ~]$ sudo firewall-cmd --zone=public --add-port=444/tcp --permanent
success
[foc@rocky9 ~]$ sudo firewall-cmd --reload
success
Let's enable access to LXD hosts over the network and set a password for the same:
[foc@rocky9 ~]$ lxc config set core.https_address [::]
[foc@rocky9 ~]$ lxc config set core.trust_password passw0rd_
Then restart snapd:
[foc@rocky9 ~]$ sudo systemctl restart snapd
After this process, type the ip address of the server into the web
browser. For examplehttps://192.168.122.238:444
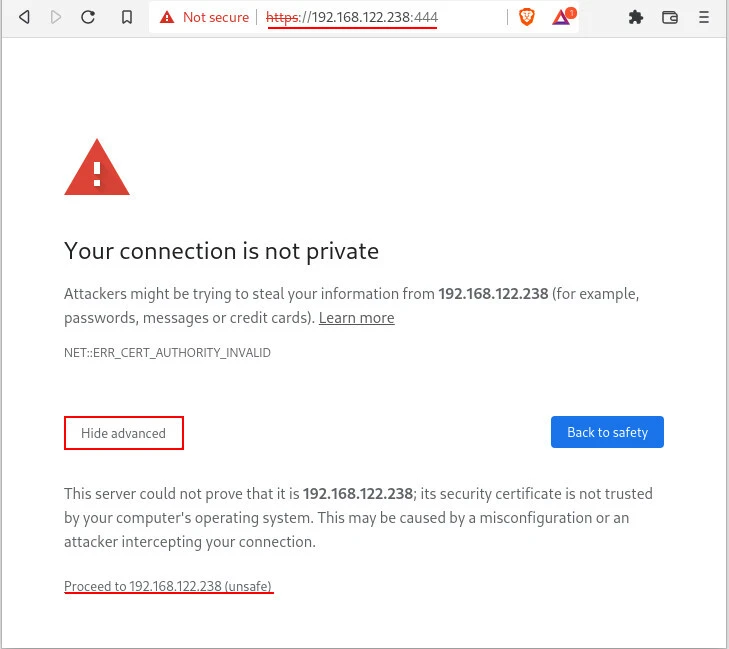
Click on Get Started

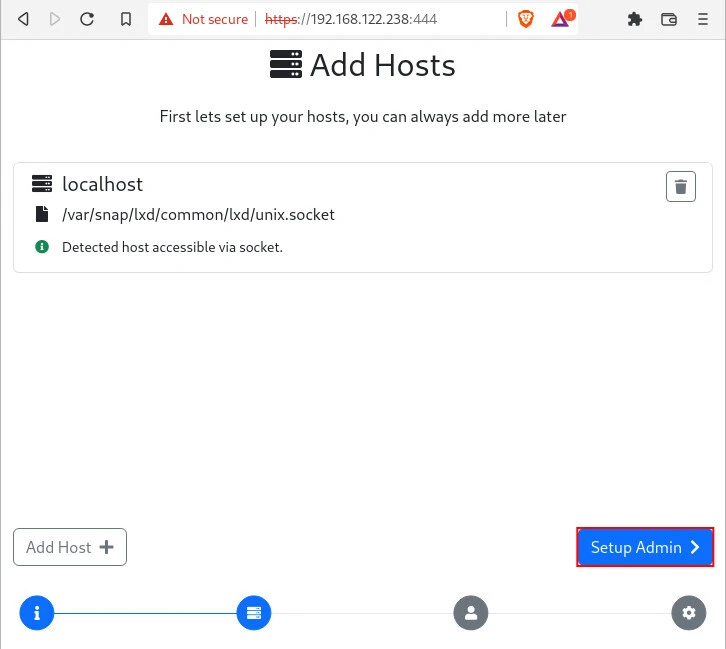
Since we are using localhost so we will just click on Setup Admin:
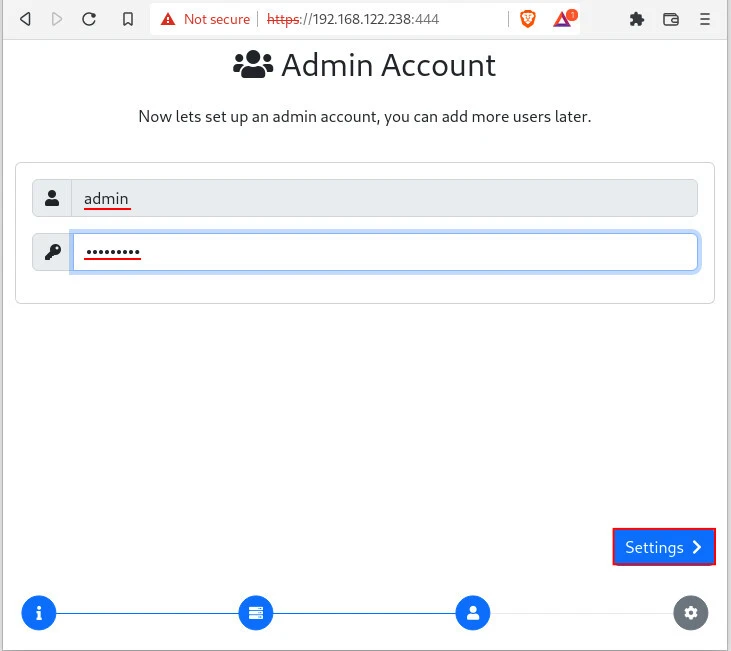
Provide the admin user login credentials which you plan to set for the first time:
Modify the LXD Site Settings as per your requirement:
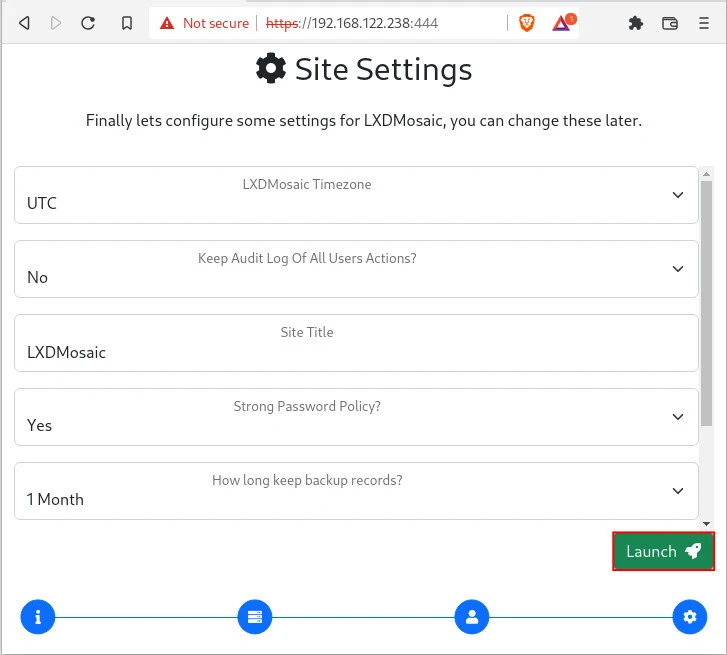
Next login to access the LXD GUI.

Great, so now you are on the LXD dashboard.
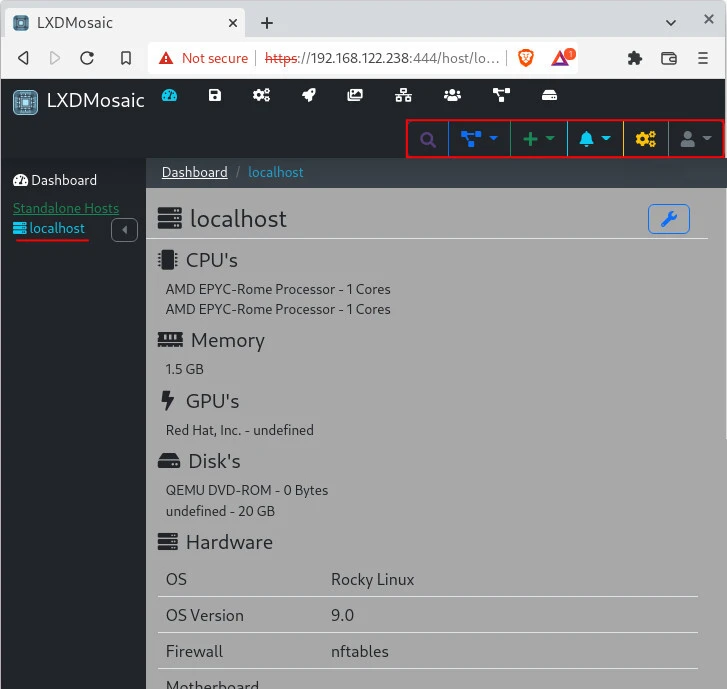
You can now do the operations you do from the terminal (image download, container create, etc.) from the GUI.
How to remove LXD?
There are 3 options to remove with Snap:
--no-wait
Do not wait for the operation to finish but just print the change id.

--revision
Remove only the given revision

--purge
Remove the snap without saving a snapshot of its data
Let's remove LXD with the following command:
[foc@rocky9 ~]$ sudo snap remove --purge lxd
lxd removed
Then let's remove snap from the server:
[foc@rocky9 ~]$ sudo dnf remove snapd
Everything about LXD has been removed from the system, you are ready for a clean start.
Summary
The graphical interface may not always work well, so you should be familiar with using LXD from the terminal. For more information about using LXD, you can get help from the addresses we shared in Preferences.
You can see more information about LXD with the help command:
[foc@rocky9 ~]$ lxd --help
Description:
  The LXD container manager (daemon)

  This is the LXD daemon command line. It's typically started directly by your
  init system and interacted with through a tool like `lxc`.

  There are however a number of subcommands that let you interact directly with
  the local LXD daemon and which may not be performed through the REST API alone.

Usage:
  lxd [flags]
  lxd [command]

Available Commands:
  activateifneeded   Check if LXD should be started
  cluster            Low-level cluster administration commands
  help               Help about any command
  import             Command has been replaced with "lxd recover"
  init               Configure the LXD daemon
  recover            Recover missing instances and volumes from existing and unknown storage pools
  shutdown           Tell LXD to shutdown all containers and exit
  version            Show the server version
  waitready          Wait for LXD to be ready to process requests

Flags:
  -d, --debug     Show all debug messages
      --group     The group of users that will be allowed to talk to LXD
  -h, --help      Print help
      --logfile   Path to the log file
      --syslog    Log to syslog
      --trace     Log tracing targets
  -v, --verbose   Show all information messages
      --version   Print version number

Use "lxd [command] --help" for more information about a command.
References
docs.rockylinux.org -
LXD Beginners Guide
Snapcraft.io -
Installing snap on Rocky Linux


![Steps to Install Darktable on Ubuntu [4 Methods]](/steps-to-install-darktable-on-ubuntu-4-methods/install-darktable-ubuntu_hu_f8517f63163b0d91.webp)


![How to Install Chkrootkit on Ubuntu? [Step-by-Step]](/install-chkrootkit-on-ubuntu/install-chrootkit-ubuntu_hu_1295ec8cece3ddb1.webp)