![Install MongoDB on AlmaLinux 8 [Step-by-Step]](/install-mongodb-on-almalinux-8/install_mongodb_almalinux.jpg)
MongoDB is a cross-platform, open-source, and document-based database management system. It facilitates users by providing full index support, high availability, replication, and auto-sharding, etc. As we mentioned earlier, MongoDB is a cross-platform database. However, the data integration process is much easier and comparatively faster than other databases. Due to the free availability of the MongoDB database, it is used in many organizations.
We will go through in this guide how to install MongoDB on AlmaLinux 8 system.
Lab Environment
To install MongoDB on AlmaLinux 8.4, we will set up the following environment:
***Server:
*Server OS: AlmaLinux release 8.4
MongoDB version: 4.4.10
Server IP: 198.168.0.196
**
Client:
Client IP: 192.168.0.188
Client OS: Ubuntu 20.04
Steps to install MongoDB on AlmaLinux 8
You can install MongoDB on AlmaLinux 8 distribution by executing the following steps:
Step 1: Update the system packages list (Optional)
This step can be considered optional and you may choose to skip. Here we prefer to update all the packages of our server before we install mongodb on AlmaLinux 8.
Open the terminal from the left sidebar of the system tray. Update the all system packages list by running the following ‘dnf’ command:
$ sudo dnf update
![Install MongoDB on AlmaLinux 8 [Step-by-Step]](/install-mongodb-on-almalinux-8/Mongodb_AlmaLinux_8-update_packages.webp)
This step is recommended for installing a new package on your Linux system but, if you have already updated packages then, skip this step.
Step 2: Create MongoDB repository
MongoDB can not be directly installed on AlmaLinux 8 by using the system default repository. Create a file repository using the nano text editor to include the MongoDB official repository in your system. To create MongoDB repo, use the following command:
$ sudo nano /etc/yum.repos.d/mongodb.repo
Paste the following content in this repository file:
[mongodb-org-4.4]
name=MongoDB Repository
baseurl=https://repo.mongodb.org/yum/redhat/$releasever/mongodb-org/4.4/x86_64/
gpgcheck=1
enabled=1
gpgkey=https://www.mongodb.org/static/pgp/server-4.4.asc

To check that the MongoDB repository has been added to your system, use the following 'repolist' command:
$ sudo dnf repolist
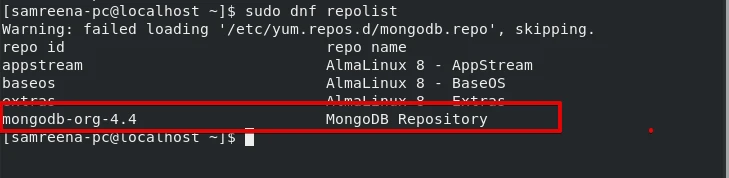
Once the MongoDB repository is configured on the AlmaLInux 8 system, move towards the installation step.
Step 3: Install MongoDB on AlmaLinux 8
Install the latest stable version of MongoDB on AlmaLinux 8 system by using the below-mentioned command:
$ sudo dnf install mongodb-org mongosh
![Install MongoDB on AlmaLinux 8 [Step-by-Step]](/install-mongodb-on-almalinux-8/mongodb-1.webp)
Here mongodb-org will install all the packages required to configure mongodb as a server and mongosh is used as a client tool to connect to mongodb instance: During the installation, it will import the gpg or signing key for MongoDB to your system.
If you wish to install specific version of mongodb then you can specify the MongoDB version with dnf on your AlmaLinux distribution using the following command:
$ sudo dnf install -y mongodb-org-5.0.1 mongodb-org-database-5.0.1 mongodb-org-server-5.0.1 mongodb-org-shell-5.0.1 mongodb-org-mongos-5.0.1 mongodb-org-tools-5.0.1
Now, to prevent unattended upgrades with the upgrade of yum, pin the
package by adding this package in the exclude directive
'/etc/yum.conf' using the following commands:
$ sudo cat >> /etc/yum.conf << EOF
> exclude=mongodb-org,mongodb-org-database,mongodb-org-server,mongodb-org-shell,mongodb-org-mongos,mongodb-org-tools
EOF

Step 4: Enable MongoDB service
Once the installation of MongoDB is completed, start and enable service of MongoDB by using the following 'systemctl' command:
Control the running service with systemctl start, stop, or restart; see the systemctl command for try-restart and dependency behavior.
$ sudo systemctl start mongod
$ sudo systemctl enable mongod

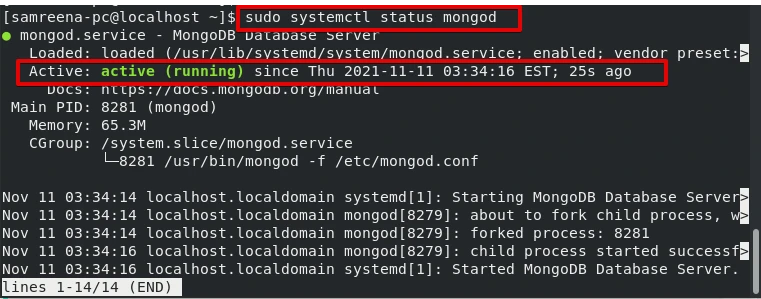
After enabling the service, check the running status of mongod service by using the below-mentioned command:
$ sudo systemctl status mongod
Step 5: Access MongoDB shell
You can access the MongoDB shell by running the below-mentioned terminal command:
$ mongo
The following shell interface displays on the terminal where you can run the database queries:

Connect with the admin database to create a new user with administrative privileges to manage the database.
> use admin

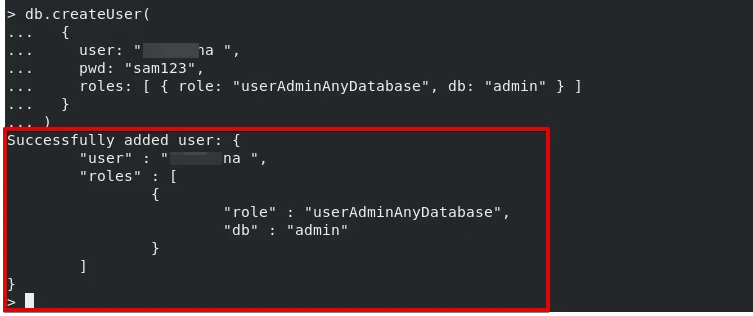
Now, create a new user and assigned role, name, and password by running the below-given command:
> db.createUser(
  {
     user: "Sam ",
     pwd: "sam123",
     roles: [ { role: "userAdminAnyDatabase", db: "admin" } ]
  }
)
Press ‘Enter’ to execute the above database query. You will receive the following output on the terminal screen:
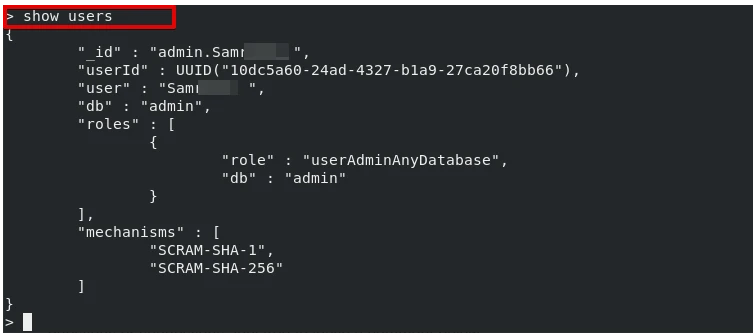
Use the following command to display all database users including the newly created user on your system.
> show users
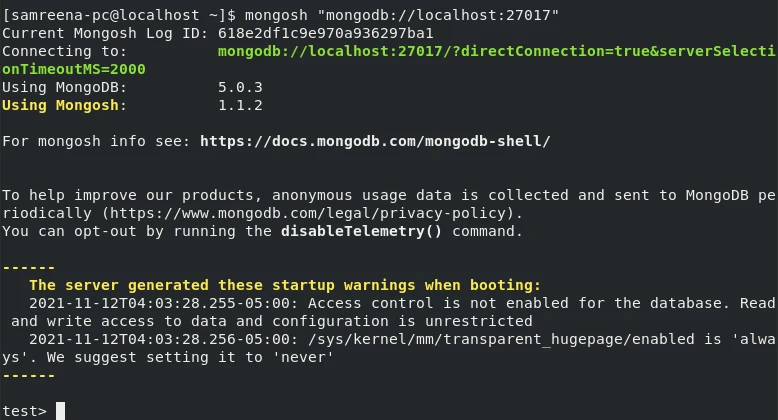
You can connect to the MongoDB shell instance within the localhost using the default port '27017'.
$ mongosh "mongodb://localhost:27017"
Step 6: Enable Remote connections
To enable access to the remote connection, you need to add client IP in the configuration file as follows:
$ sudo nano /etc/mongod.conf
Search the following lines:
# network interfaces
net:
port: 27017
bindIp: 127.0.0.1 # Enter 0.0.0.0,:: to bind to all IPv4 and IPv6 addresses or, alternatively, use the net.bindIpAll setting.
Change the preceding section into the following form:
# network interfaces
net:
port: 27017
bindIp: 198.168.0.196 # Enter 0.0.0.0,:: to bind to all IPv4 and IPv6 addresses or, alternatively, use the net.bindIpAll setting.
Step 7: Firewall configurations
To configure the firewall setting for the 28015 port, use the
following commands:
Open the listener port with firewall-cmd --add-port and reload; the firewalld shows --permanent pairs and zone selection.
$ sudo firewall-cmd --permanent --add-port=27017/tcp
$ sudo firewall-cmd --reload
Step 8: SELinux configurations
Check your SELinux policy on the server using the following command:
~]# getenforce
Enforcing
If it is Enforcing or Permissive then you can apply the following SELinux rule. If SELinux is disabled then you can skip this step.
To configure the SELinux for MongoDB port, run the below-mentioned command:
$ sudo semanage port -a -t mongod_port_t -p tcp 27017
Step 9: Access mongodb server from client node
Next we will use Ubuntu client to connect to our mongodb server. You can follow the official guide to install mongodb related packages on Ubuntu to setup your environment.
Next verify the connectivity towards mondodb server from the client using mongosh as follows:
$ sudo mongosh "mongodb://198.168.0.196:27017"
![Install MongoDB on AlmaLinux 8 [Step-by-Step]](/install-mongodb-on-almalinux-8/mongodb-2.webp)
Finally, we have completed the whole process to install MongoDB on AlmaLinux 8 distribution.
Uninstall MongoDB from AlmaLinux 8
First, stop and disable the mongod service by running the following commands:
$ sudo systemctl disable mongod
$ sudo systemctl stop mongod
Now, execute the following command to uninstall the MongoDB from your AlmaLinux system:
$ sudo dnf erase $(rpm -qa | grep mongodb-org)
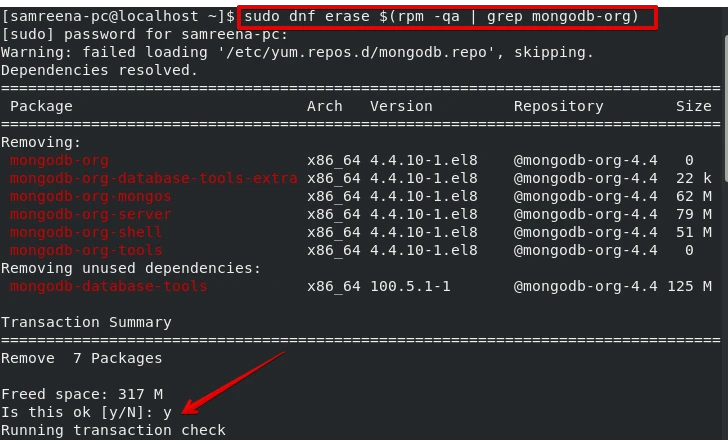
The above command will uninstall all MongoDB packages from your system. To remove all databases and log files of MongoDB, issue the following command:
$ sudo rm -r /var/log/mongodb
$ sudo rm -r /var/lib/mongo

Conclusion
We presented in this article how to install MongoDB database applications on the AlmaLinux 8 distribution. We also explained how to start a service and create a new database user with administrative privileges. In the end, we also mentioned the uninstallation process of MongoDB.
Further Reading
To explore more about the MongoDB database, you can visit their official MongoDB website. Thanks!
