![Install Rancher on Rocky Linux 9 [Step-by-Step]](/install-rancher-rocky-linux-9/install_rancher.jpg)
Getting started with Rancher
Rancher is a software developed by Rancher Labs, which was founded in 2014, to manage “Kubernetes” Clusters. Acquired by SUSE as of December 1, 2020.
In this article, we will install Rancher on Rocky Linux 9 using docker. We will install as a single node. At the end of the article, we will be sharing information for cluster installation.
Install Docker (Pre-requisite)
If your environment already contains docker then you can skip this
section. Use docker version to check the version of docker installed.
You can read more atTutorial: How to manage docker container with examples ?
Method-1: Using default package manager
Before we go ahead and installer docker on Rocky Linux 9, we must remove any older version of docker rpms
# dnf remove docker docker-common docker-selinux docker-engine
Next install the below dependent packages
# dnf -y install device-mapper-persistent-data lvm2
Next install Docker CE by installing the following packages
# dnf install docker-ce docker-ce-cli containerd.io docker-compose-plugin
It is possible you may get an error
- package buildah-1:1.24.2-4.el9_0.x86_64 requires runc >= 1.0.0-26, but none of the providers can be installed
- package buildah-1:1.26.2-1.el9_0.x86_64 requires runc >= 1.0.0-26, but none of the providers can be installed
To overcome this, use --allowerasing along with your
dnf command
i.e.
dnf install docker-ce docker-ce-cli containerd.io docker-compose-plugin --allowerasing
Once successfully installed, you will get the following output:
...
Upgraded:
  podman-2:4.1.1-1.el9_0.x86_64                                                                    podman-catatonit-2:4.1.1-1.el9_0.x86_64
Installed:
  container-selinux-3:2.188.0-1.el9_0.noarch            containerd.io-1.6.8-3.1.el9.x86_64              docker-ce-3:20.10.18-3.el9.x86_64                      docker-ce-cli-1:20.10.18-3.el9.x86_64
  docker-ce-rootless-extras-20.10.18-3.el9.x86_64       docker-compose-plugin-2.10.2-3.el9.x86_64       docker-scan-plugin-0.17.0-3.el9.x86_64                 flatpak-selinux-1.12.5-2.el9_0.noarch
  rpm-plugin-selinux-4.16.1.3-12.el9_0.x86_64           selinux-policy-34.1.29-1.el9_0.2.noarch         selinux-policy-targeted-34.1.29-1.el9_0.2.noarch
Removed:
  buildah-1:1.24.2-4.el9_0.x86_64

Complete!
Enable and start the docker service to automatically start after reboot:
Enable or disable the unit at boot with systemctl enable; the systemctl command documents enable --now, symlinks under /etc/systemd/system, and masks.
~]# systemctl enable docker --now
Created symlink /etc/systemd/system/multi-user.target.wants/docker.service → /usr/lib/systemd/system/docker.service.
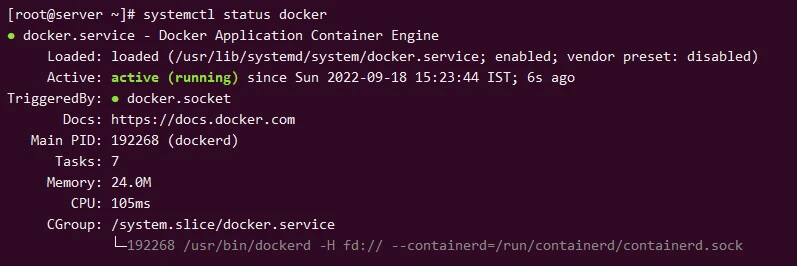
Next verify the status of the docker service:
~]# systemctl status docker
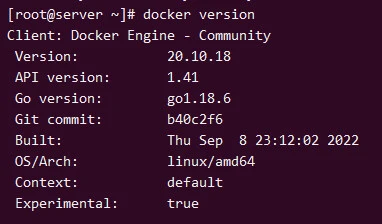
Check the version of docker:
~]# docker version
Method-2: Using Rancher repository
To download docker from Rancher's repository, the wget package must be installed on the system:
[root@rocky9 foc]# dnf install wget
Then let's download the docker installation script:
[root@rocky9 foc]# wget https://releases.rancher.com/install-docker/20.10.sh
--2022-09-17 00:06:19-- https://releases.rancher.com/install-docker/20.10.sh
Resolving releases.rancher.com (releases.rancher.com)... 18.66.15.106, 18.66.15.30, 18.66.15.5, ...
Connecting to releases.rancher.com (releases.rancher.com)|18.66.15.106|:443... connected.
HTTP request sent, awaiting response... 200 OK
Length: 21946 (21K) [application/octet-stream]
Saving to: ‘20.10.sh’

20.10.sh 100%[===============================================>] 21.43K --.-KB/s in 0.02s

2022-09-17 00:06:20 (1.31 MB/s) - ‘20.10.sh’ saved [21946/21946]
We need to make a small change in the script. If we don't make this change, the script will fail and we will see the docker-ce-cli package not found warning:
[root@rocky9 foc]# sed -i 's/VERSION="20.10.12"/VERSION="20.10.18"/g' 20.10.sh
The script is given execute permission:
[root@rocky9 foc]# chmod +x 20.10.sh
Let's run the script:
[root@rocky9 foc]# ./20.10.sh
# Executing docker install script, commit: 93d2499759296ac1f9c510605fef85052a2c32be
+ sh -c 'yum install -y -q yum-utils'
+ sh -c 'yum-config-manager --add-repo https://download.docker.com/linux/centos/docker-ce.repo'
Adding repo from: https://download.docker.com/linux/centos/docker-ce.repo
+ '[' stable '!=' stable ']'
+ '[' rocky = rhel ']'
+ '[' rocky = ol ']'
+ sh -c 'yum makecache'
Docker CE Stable - x86_64                                                              17 kB/s | 3.5 kB     00:00
Rocky Linux 9 - BaseOS                                                                6.1 kB/s | 3.6 kB     00:00
Rocky Linux 9 - AppStream                                                             6.9 kB/s | 3.6 kB     00:00
Rocky Linux 9 - Extras                                                                5.7 kB/s | 2.9 kB     00:00
Metadata cache created.
INFO: Searching repository for VERSION '20.10.18'
INFO: yum list --showduplicates 'docker-ce' | grep '20.10.18.*el' | tail -1 | awk '{print $2}'
+ '[' -n 20.10.18-3.el9 ']'
+ sh -c 'yum install -y -q docker-ce-cli-20.10.18-3.el9'
Importing GPG key 0x621E9F35:
 Userid     : "Docker Release (CE rpm) <[email protected]>"
 Fingerprint: 060A 61C5 1B55 8A7F 742B 77AA C52F EB6B 621E 9F35
 From       : https://download.docker.com/linux/centos/gpg

Installed:
  docker-ce-cli-1:20.10.18-3.el9.x86_64                     docker-scan-plugin-0.17.0-3.el9.x86_64

+ sh -c 'yum install -y -q docker-ce-20.10.18-3.el9'
uavc:  op=load_policy lsm=selinux seqno=3 res=1
Installed:
  checkpolicy-3.3-1.el9.x86_64                                 container-selinux-3:2.188.0-1.el9_0.noarch
  containerd.io-1.6.8-3.1.el9.x86_64                           docker-ce-3:20.10.18-3.el9.x86_64
  docker-ce-rootless-extras-20.10.18-3.el9.x86_64              fuse-common-3.10.2-5.el9.0.1.x86_64
  fuse-overlayfs-1.9-1.el9_0.x86_64                            fuse3-3.10.2-5.el9.0.1.x86_64
  fuse3-libs-3.10.2-5.el9.0.1.x86_64                           libslirp-4.4.0-7.el9.x86_64
  policycoreutils-python-utils-3.3-6.el9_0.noarch              python3-audit-3.0.7-101.el9_0.2.x86_64
  python3-libsemanage-3.3-2.el9.x86_64                         python3-policycoreutils-3.3-6.el9_0.noarch
  python3-setools-4.4.0-4.el9.x86_64                           python3-setuptools-53.0.0-10.el9.noarch
  slirp4netns-1.2.0-2.el9_0.x86_64                             tar-2:1.34-3.el9.x86_64

+ version_gte 20.10
+ '[' -z 20.10.18 ']'
+ eval calver_compare 20.10.18 20.10
++ calver_compare 20.10.18 20.10
++ set +x
+ sh -c 'yum install -y -q docker-ce-rootless-extras-20.10.18-3.el9'

================================================================================

To run Docker as a non-privileged user, consider setting up the
Docker daemon in rootless mode for your user:

    dockerd-rootless-setuptool.sh install

Visit https://docs.docker.com/go/rootless/ to learn about rootless mode.

To run the Docker daemon as a fully privileged service, but granting non-root
users access, refer to https://docs.docker.com/go/daemon-access/

WARNING: Access to the remote API on a privileged Docker daemon is equivalent
         to root access on the host. Refer to the 'Docker daemon attack surface'
         documentation for details: https://docs.docker.com/go/attack-surface/

================================================================================
And installation completed. Let's enable the service, then start it:
[root@rocky9 foc]# systemctl enable docker --now
When you look at the status of the service, you can see that it is active. You can proceed to the Rancher installation:
● docker.service - Docker Application Container Engine
     Loaded: loaded (/usr/lib/systemd/system/docker.service; enabled; vendor preset: disabled)
     Active: active (running) since Sat 2022-09-17 22:42:30 +03; 1min 46s ago
TriggeredBy: ● docker.socket
       Docs: https://docs.docker.com
   Main PID: 943 (dockerd)
      Tasks: 8
     Memory: 93.2M
        CPU: 161ms
     CGroup: /system.slice/docker.service
             └─943 /usr/bin/dockerd -H fd:// --containerd=/run/containerd/containerd.sock
Install Rancher
We have successfully installed Docker. Now it's time to install Rancher. It may take some time as the containers are downloaded to the system for the first time.:
[root@rocky9 foc]# docker run -d --restart=unless-stopped -p 80:80 -p 443:443 --privileged rancher/rancher:v2.4.9
Unable to find image 'rancher/rancher:v2.4.9' locally
v2.4.9: Pulling from rancher/rancher
171857c49d0f: Pull complete
...
14b0fa05d41d: Pull complete
b6a53aaae119: Pull complete
Digest: sha256:fda16cf3e793ecd45d9c5b60765be46447b9a7b039e82a7b369893b56bd41935
Status: Downloaded newer image for rancher/rancher:v2.4.9
c45b6f800691867661d0b0079be919b775570f4aba2e16055b015ddb926020fc
We downloaded the rancher:stable container image. A container has been
created using ports 80 and 443 and Rancher was successfully installed.
~]# docker ps
CONTAINER ID   IMAGE                          COMMAND                  CREATED              STATUS              PORTS                                                                      NAMES
e9d9cb00d6ad   rancher/rancher:v2.4.9         "entrypoint.sh"          12 minutes ago       Up 12 minutes       0.0.0.0:80->80/tcp, :::80->80/tcp, 0.0.0.0:443->443/tcp, :::443->443/tcp   boring_bassi
If you try to install stable and latest versions of Rancher, you may get the following error(You will find this error in the container logs):
k3s exited with exit status
That's why we chose v2.4.9 for the Rancher container. You can follow the logs of the container with the following command:
[root@rocky9 foc]# docker logs -f e9d9cb00d6ad
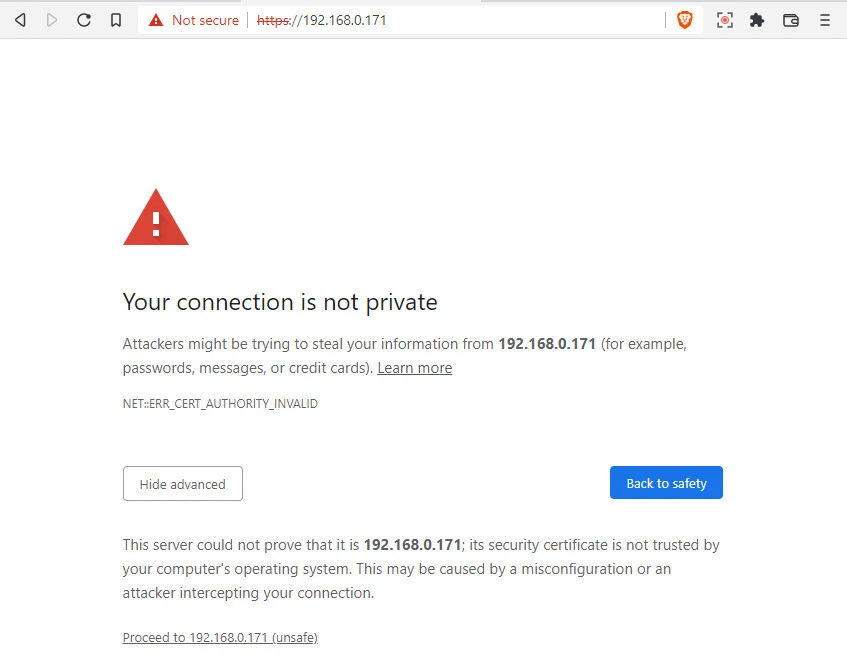
Access Rancher GUI
When the installation is completed without any problems, type the server ip address into the web browser. Since the certificate is self-signed so we get a warning which can be safely ignored as this is our private environment.
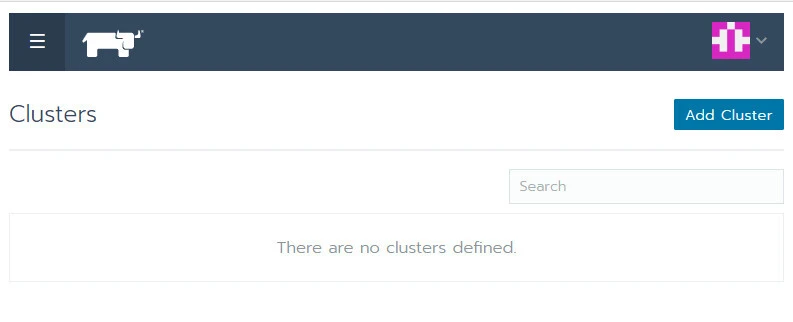
Next set a password for admin user:

Define the URL to be used to access the Rancher GUI:

Next login to the dashboard using the same credentials:
Summary
We explained the installation of single node, the installation takes place with a small system resource (1GB Ram, 1 CPU). You can find detailed information for Rancher cluster setup here. Note that you will need more system/hardware resources.
References
docs.ranchermanager.rancher.io - Installing Docker
docs.ranchermanager.rancher.io - Installing Rancher on a Single Node Using
Docker
docs.rockylinux.org - Install Docker Engine
