![How to install Zoom on AlmaLinux 8 [Step-by-Step]](/install-zoom-on-almalinux-8/install_zoom.jpg)
This article talks about how to install zoom client application on Alma Linux 8.
Zoom is a platform-independent video-conferencing application. It allows 40 minutes of free call to up to 100 users. To handle more than 100 participants users have to choose a pricing plan from three available pricing models i.e. Business, Pro, and Education. In today's world of coronavirus, we can say that the zoom application is a lifesaver for professional users.
Linux users can use this application to arrange meetings with clients using any platform such as Windows, MAC OS. If you know how to use Linux its installation and use are easy. Zoom provides a secure connection for video calling and chatting to users.
Prerequisites
- The AlmaLinux 8 distribution should install on your computer.
- Root user or sudo privileges are needed to install zoom on your system.
Zoom installation on AlmaLinux 8 distribution
You can install zoom on AlmaLinux 8 distribution by implementing the following steps:
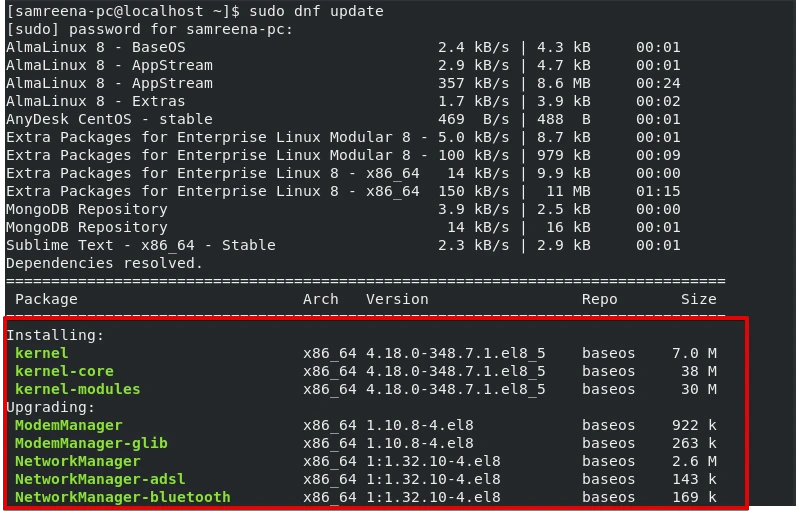
Step 1: Update the packages repository
The first step to installing any software on Linux is to update the packages and then refresh the repository. So, run the following command to update the package’s source list:
$ sudo dnf update
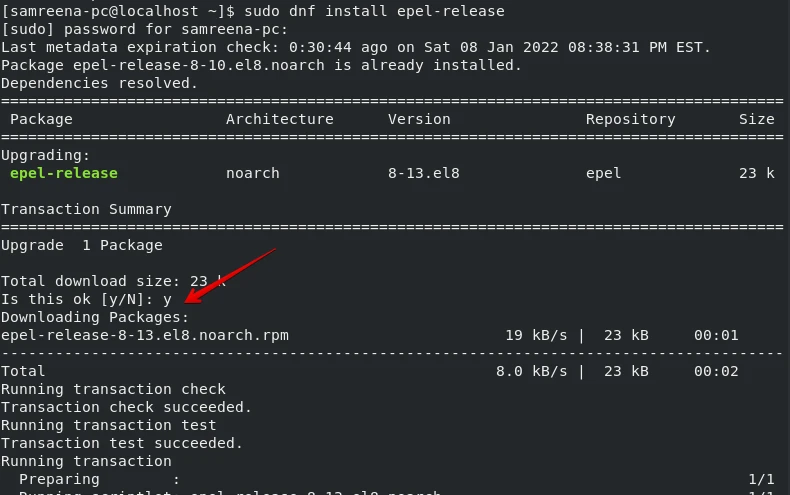
Step 2: Install Epel repository
After updating the system packages list, install the EPEL repository on your system. Using the epel, you can easily create and manage the set of all additional packages. Therefore, include the epel repository by executing the following command:
$ sudo dnf install epel-release
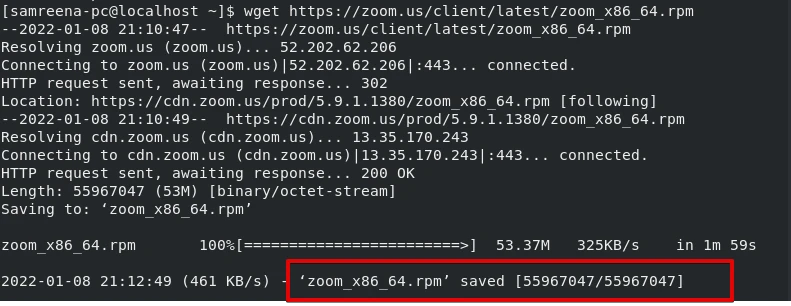
Step 2: Download Zoom client’s binary file
To install zoom, you need to download the binary file of the zoom application from the official website of zoom. Use the following ‘wget’ command to download the zoom binary file according to your system architecture.
$ wget https://zoom.us/client/latest/zoom_x86_64.rpm
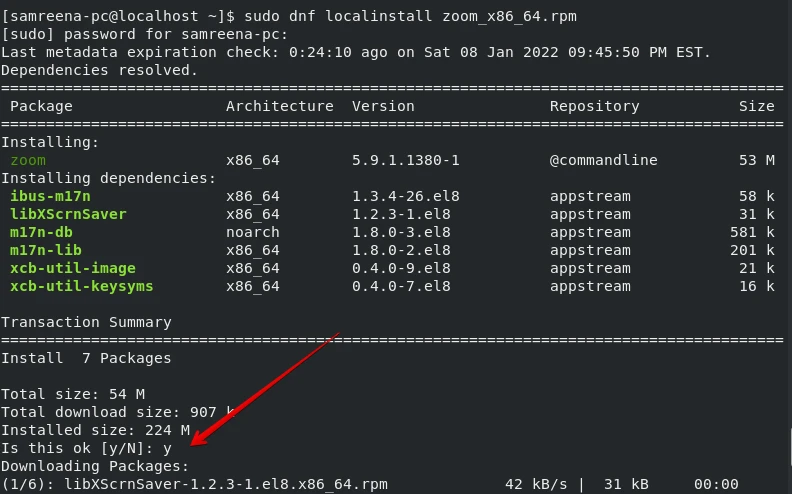
Step 3: Install Zoom on AlmaLinux 8
After doing the above steps, now you can install zoom on your system. So, once you have downloaded the binary file, run this binary file on your system to install zoom by issuing the dnf command:
$ sudo dnf localinstall zoom_x86_64.rpm
The above command will install zoom and its all required dependencies to run the zoom application on your system.
Step 4: Check Zoom version
Once the zoom client is installed on your system AlmaLinux 8, type the following command to check the installed zoom version:
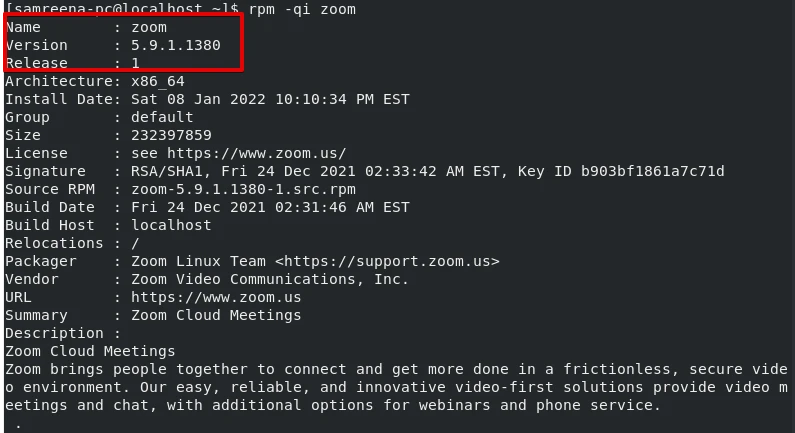
$ rpm -qi zoom
The installed version of zoom application details will display on the terminal as follows:
Step 5: Launch Zoom on Alma Linux 8
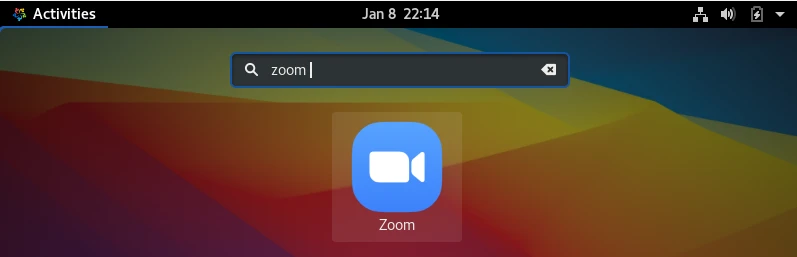
Once you install zoom, launch it on AlmaLinux 8 distribution. Using the two methods, you can easily start the zoom application on your system. Either, you can also launch the zoom client application by using the application search bar. Type the ‘zoom’ in the search bar. As a result, the zoom icon will show in the search result as follows:
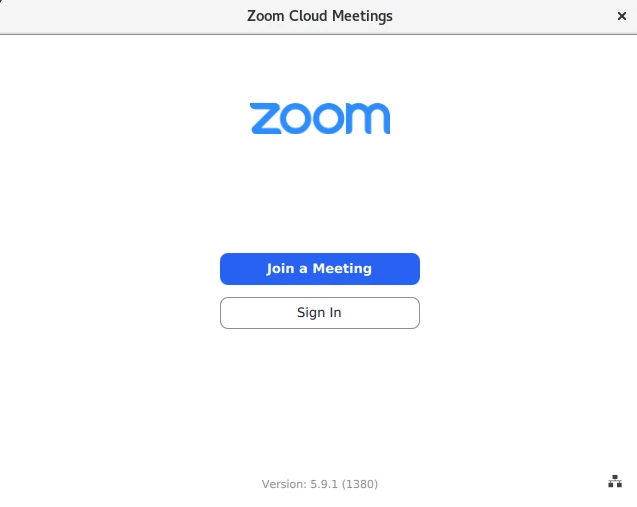
Click on this zoom icon to launch it on your system. or you can start zoomby using the terminal by typing the following command:
$ zoom client
The above command will open the zoom application’ login page on the desktop as follows:
Congratulations! The zoom installation is completed
Uninstall Zoom from AlmaLinux 8
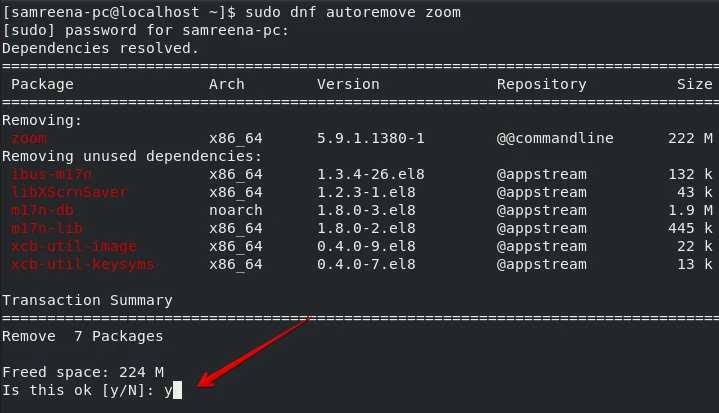
You can also uninstall the zoom client from your system AlmaLinux 8 simply by running the following command:
$ sudo dnf autremove zoom
Press ‘y’ and hit enter to uninstall zoom from AlmaLinux 8.
Summary
We have demonstrated in this article how to install zoom client on AlmaLinux 8 distribution. Zoom application is a good application for collaboration between teams and it is an easy platform to conduct professional meetings online. We have also discussed how to uninstall zoom from your system if you don’t need to use it further.


![Steps to Install Darktable on Ubuntu [4 Methods]](/steps-to-install-darktable-on-ubuntu-4-methods/install-darktable-ubuntu_hu_f8517f63163b0d91.webp)


![How to Install Chkrootkit on Ubuntu? [Step-by-Step]](/install-chkrootkit-on-ubuntu/install-chrootkit-ubuntu_hu_1295ec8cece3ddb1.webp)