
This tutorial shows you how to Node.js save form data in MySQL table
step-by-step. We will install and configure MySQL on the local machine
before creating a Node.js project and saving the data with express,
ejs, and mysql modules.
It would be best to understand Node.js and SQL basicsbefore proceeding with the tutorial.
Install MySQL
We use Ubuntu 22.04 for the demos.
# update the system
sudo apt update
sudo apt upgrade -y
# install the MySQL server
sudo apt install mysql-server
# log in as the root user
sudo mysql
# change authentication method with personal password
mysql> alter user 'root'@'localhost' identified with mysql_native_password by 'newpassword';
We update the system before installing the MySQL server. Then, we log in to MySQL and set a password for the root user.
You may get the error:ERROR 1819 (HY000): Your password does not satisfy the current policy requirements. That means your password does not meet the standards of the set MySQL database password policy level.
Here is how to check the password policy level.
Input
mysql> SHOW VARIABLES LIKE 'validate_password%';Output
+--------------------------------------+--------+
| Variable_name                        | Value  |
+--------------------------------------+--------+
| validate_password.check_user_name    | ON     |
| validate_password.dictionary_file    |        |
| validate_password.length             | 8      |
| validate_password.mixed_case_count   | 1      |
| validate_password.number_count       | 1      |
| validate_password.policy             | MEDIUM |
| validate_password.special_char_count | 1      |
+--------------------------------------+--------+
7 rows in set (0.03 sec)
The MEDIUM policy level requires a password to have 8 characters. The 8 characters should include an integer, mixed case, and special character.
Modify the password to meet the requirements.
mysql > alter user 'root'@'localhost' identified with mysql_native_password by '@Newpassword1!'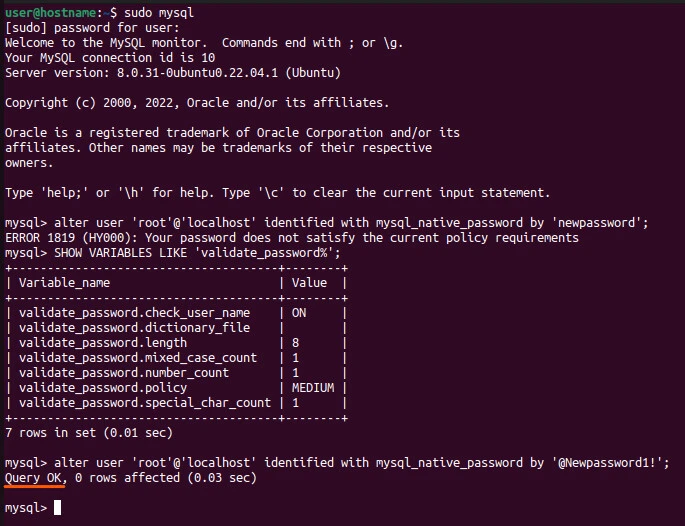
And voila, the new password was accepted!
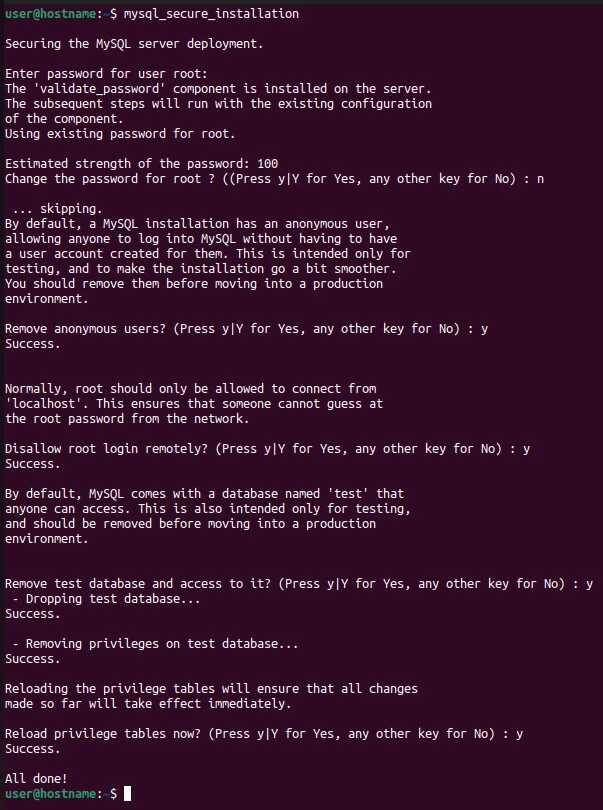
Exit the prompt and secure the database.
mysql> exit
mysql_secure_installation
You may be asked to choose the password policy. Do that before answering the subsequent prompts.
Step-1: Create MySQL database and table
Log in with the details you just set before creating a database.
mysql -u root -p
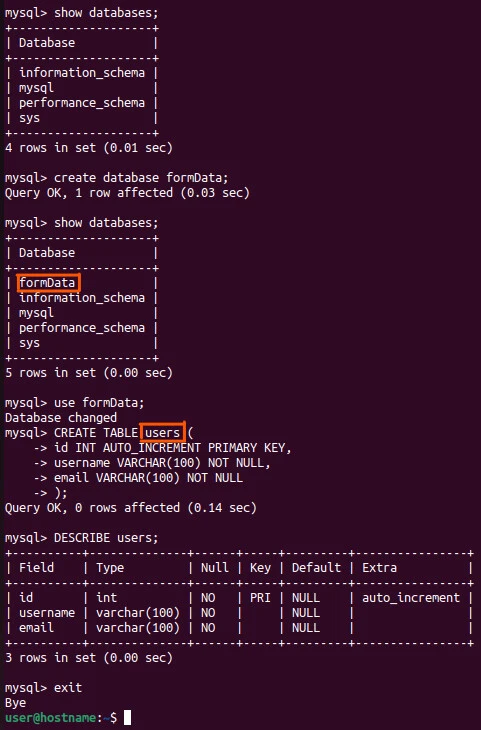
mysql > show databases;
mysql > create database formData;
mysql > show databases;
mysql > use formData;
mysql > CREATE TABLE users (
> id INT AUTO_INCREMENT PRIMARY KEY,
> username VARCHAR(100) NOT NULL,
> email VARCHAR(100) NOT NULL
> );
mysql > DESCRIBE users;
mysql > exitWe log in with the root -u user after a password -p prompt. Next, we
check the existing databases before and after creating the formData
database. We then tell MySQL to use our new database before creating a
users table and exiting the prompt.
Now we can proceed with the Node.js save form data in the MySQL table.
Step-2: Install the dependencies
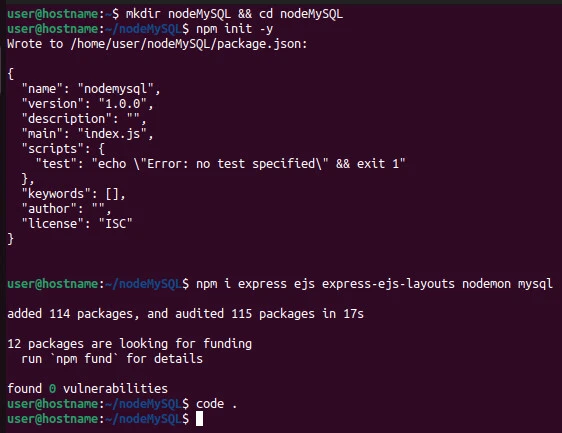
Initialize the project, install the dependencies, and open it with a code editor.
mkdir nodeMySQL && cd nodeMySQL
npm init -y
npm i express ejs express-ejs-layouts nodemon mysql
code .
We will collect the form data with express and EJS templating engine.
nodemon watches our express server during development. The mysql
module enables our node.js code to interact with the MySQL database we
created earlier.
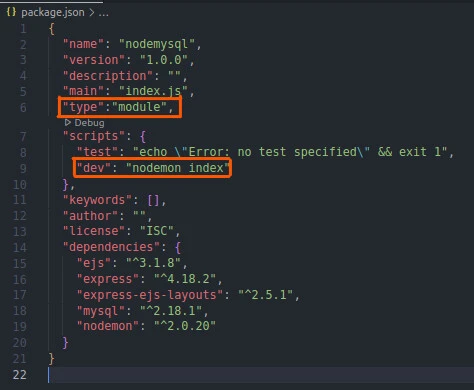
Remember to modify the package.json file to
use ECMAScript modules and nodemon.
Step-3: Create the project files
Let's create the views and the main script file.
mkdir views
touch index.js views/layout.ejs views/index.ejs
layout.ejs
<!DOCTYPE html>
<html lang="en">
<head>
    <meta charset="UTF-8">
    <meta http-equiv="X-UA-Compatible" content="IE=edge">
    <meta name="viewport" content="width=device-width, initial-scale=1.0">
    <link rel="stylesheet" href="/style.css">
    <title> Nodejs save form data in MySQL table</title>
</head>
<body>
    <%- body %>
</body>
</html>
index.ejs
<main>

    <h2>Register a user</h2>

    <form action="/users" method="POST">
        <div>
            <input type="text" name="username" placeholder="Username" required>
        </div>
        <div>
            <input type="email" name="email" placeholder="Email" required>
        </div>
        <button>Send</button>
    </form>

</main>
We collect the username and email and send them to the /users
route implemented in the index.js file.
index.js
import express from 'express'
import mysql from 'mysql'
import expressEjsLayouts from 'express-ejs-layouts'
const app = express()
//configure ejs
app.set('view engine', 'ejs')
app.use(expressEjsLayouts)
// receive form data
app.use(express.urlencoded({extended: true, limit: '1mb'}))
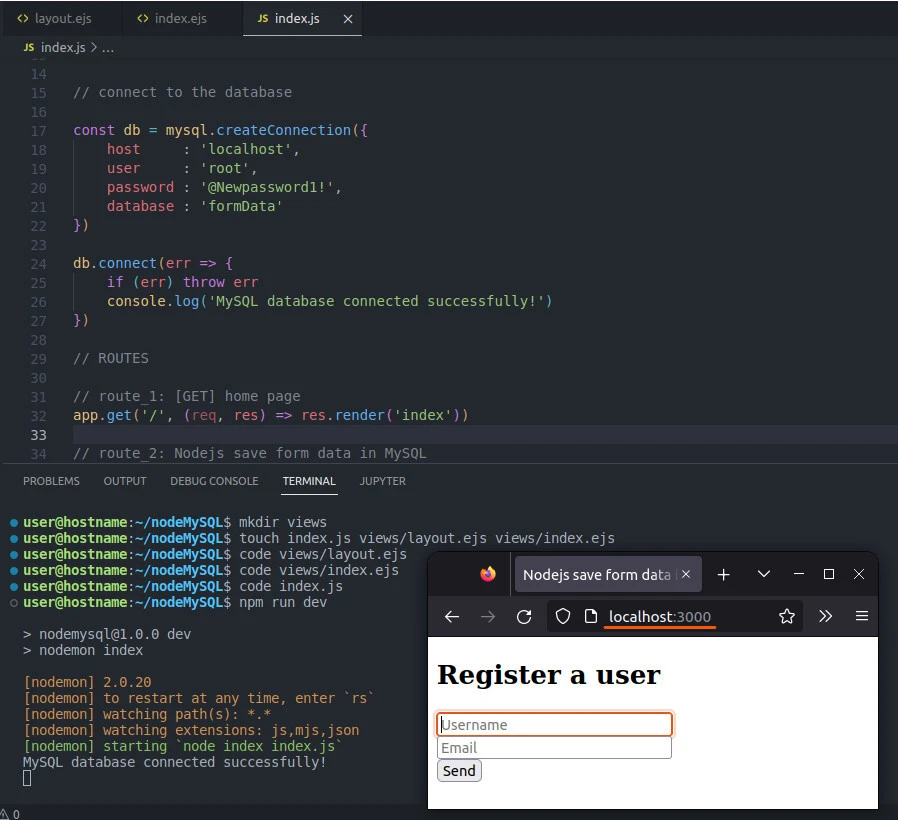
// connect to the database
const db = mysql.createConnection({
host : 'localhost',
user : 'root',
password : '@Newpassword1!',
database : 'formData'
})
db.connect(err => {
if (err) throw err
console.log('MySQL database connected successfully!')
})
// ROUTES
// route_1: [GET] home page
app.get('/', (req, res) => res.render('index'))
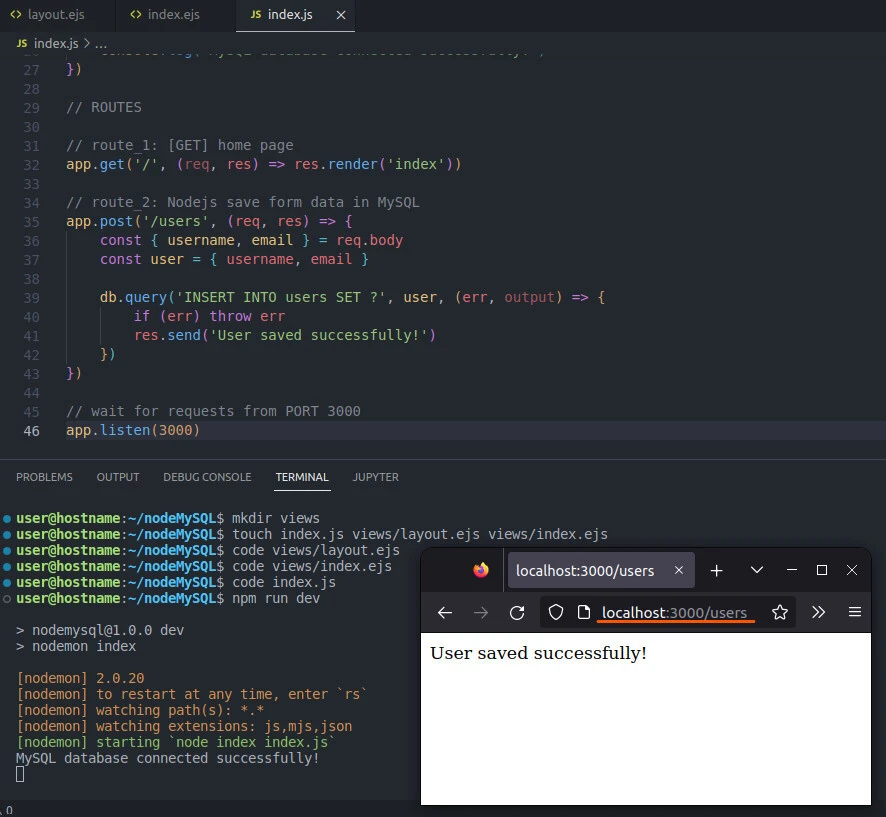
// route_2: Nodejs save form data in MySQL
app.post('/users', (req, res) => {
const { username, email } = req.body
const user = { username, email }
db.query('INSERT INTO users SET ?', user, (err, output) => {
if (err) throw err
res.send('User saved successfully!')
})
})
// wait for requests from PORT 3000
app.listen(3000)Here is the explanation of the code.
Step-4: Import the dependencies
import express from 'express'
import mysql from 'mysql'
import expressEjsLayouts from 'express-ejs-layouts'
We import the (express) web server module, (mysql) MySQL database
CLI tool, and the (express-ejs-layouts) EJS templating engine layouts.
Step-5: Connect to the MySQL database
const db = mysql.createConnection({
    host     : 'localhost',
    user     : 'root',
    password : '@Newpassword1!',
    database : 'formData'
})

db.connect( err => {
    if (err) throw err
    console.log('MySQL database connected successfully!')
})
Using the database CLI, we create the MySQL connection and supply it with the hostname, username, password, and database name. We then connect to the database and check the connection's success or throw an error using a callback function.
Now that the database is connected, the final step is to save the form data in the MySQL database.
Step-6: Save form data in MySQL database
app.post('/users', (req, res) => {
    const { username, email } = req.body
    const user = { username, email }

    db.query('INSERT INTO users SET ?', user, (err, output) => {
        if (err) throw err
        res.send('User saved successfully!')
    })
})
We post the form data to the /users route. On reaching the endpoint,
we grab the username and email from the request body object and
create a new user object with the data. For that to happen, we must
have informed express to accept URL-encoded data.
app.use(express.urlencoded({extended: true, limit: '1mb'}))Next, we insert the details in the formData database's users table.
Lastly, we send a success message to the requesting page.
Testing the application
Run the dev script.
npm run devConfirm that the database is connected before launching the browser and opening localhost port 3000.
Next, register two users.
Now recheck the MySQL table.
mysql -u root -p
mysql > use formData;
mysql > SELECT * FROM users;
We get the users we just saved.

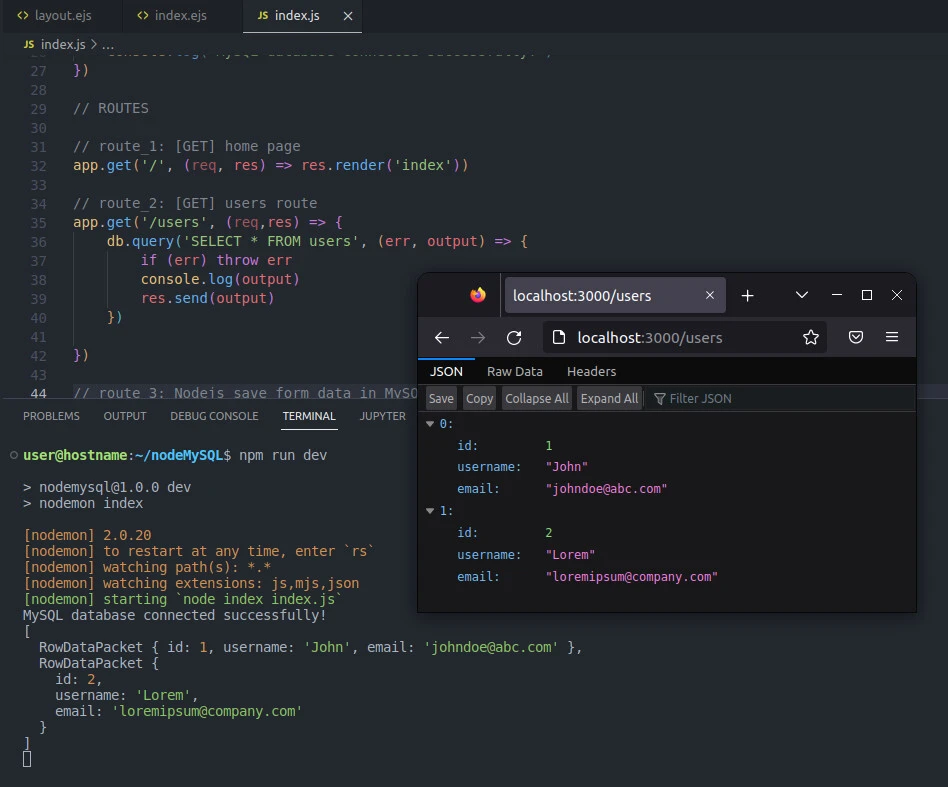
Alternatively, we could inspect the table from a GET route.
app.get('/users', (req,res) => {
    db.query('SELECT * FROM users', (err, output) => {
        if (err) throw err
        console.log(output)
        res.send(output)
    })
})
Conclusion
Congratulations on reaching this far! Now that you know how to Node.js save form data in MySQL table, you can apply the knowledge in your next projects. You also read more about using Node.js and Express.


![Solved: Get current directory in Node.js [4 Examples]](/nodejs-get-current-directory/nodejs_read_path_hu_330ba7c1a52cd324.webp)


![8 different ways to use assert in Node.js [Practical Examples]](/nodejs-assert-examples/nodejs_assert_hu_793ecb3001deaf7.webp)