
In this article I will share Step-by-Step Guide to Install and Configure Offline Two Factor Authentication using Open Source Google Authenticator for below scenarios in Linux
- Configure offline two factor authentication for SSH
- Configure offline two factor authentication for SUDO
- Configure offline two factor authentication for SU
Lab Environment
I have installed Oracle Virtual Box on Linux node on which I have created multiple Virtual Machines with RHEL/CentOS 7 and 8 Linux. The steps from this article to configure two factor authentication are verified on RHEL/CentOS 7 and 8 Linux environment.
You need internet connectivity on your Virtual Box to download and install the required Google Authenticator packages. But once two factor authentication is configured, you do not need internet connectivity for validation which means this will act as offline two factor authentication in Linux.
Google Authenticator with PAM
Using the pluggable authentication modules provided by PAM, Open Source Google Authenticator supports the following features for Offline two factor authentication in Linux, according to its GitHub page:
- Per-user secret and status file stored in the user’s home directory
- Support for 30-second TOTP codes
- Support for emergency scratch codes
- Protection against replay attacks
- Key provisioning via display of a QRCode
- Manual key entry of RFC 3548 base32 key strings
Step 1: Install Google Authenticator on RHEL/CentOS 7 and 8 Linux
There are two methods to install Google Authenticator on your RHEL/CentOS 7 and 8 Linux environment.
Method 1: Install using DNF or YUM
I hope you are aware of DNF which is an alternate to YUM. By default google authenticator rpm is not part of the CentOS or Red Hat repository so you must first install EPEL repository on your Linux node.
[root@centos-8 ~]# dnf install epel-release -y
Next install google authenticator rpm before we enable offline two factor authentication:
libqrencode is required to print QR code for offline two factor
authentication. Without this library you will get
"Failed to use libqrencode to show QR code visually for scanning. Consider typing the OTP secret into your app manually."
error. In RHEL/CentOS 7/8 Linux, libqrencode is provided by
qrencode-libs rpm.
[root@centos-8 ~]# dnf install google-authenticator qrencode-libs -y
Content of the rpm on RHEL/CentOS 7
[root@centos-7 ~]# rpm -ql google-authenticator-1.04-1.el7.x86_64
/usr/bin/google-authenticator
/usr/lib64/security/pam_google_authenticator.la
/usr/lib64/security/pam_google_authenticator.so
/usr/share/doc/google-authenticator-1.04
/usr/share/doc/google-authenticator-1.04/CONTRIBUTING.md
/usr/share/doc/google-authenticator/FILEFORMAT
/usr/share/doc/google-authenticator/README.md
/usr/share/doc/google-authenticator/totp.html
/usr/share/licenses/google-authenticator-1.04
/usr/share/licenses/google-authenticator-1.04/LICENSE
/usr/share/man/man1/google-authenticator.1.gz
/usr/share/man/man8/pam_google_authenticator.8.gz
Content of the rpm on RHEL/CentOS 8
[root@centos-8 ~]# rpm -ql google-authenticator-1.07-1.el8.x86_64
/usr/bin/google-authenticator
/usr/lib/.build-id
/usr/lib/.build-id/28
/usr/lib/.build-id/28/19f17158d9ddef0a7f6135defe09c66b2b8061
/usr/lib/.build-id/70
/usr/lib/.build-id/70/03ef7a7d6793e0fcd5b4db22f580420272c34a
/usr/lib64/security/pam_google_authenticator.la
/usr/lib64/security/pam_google_authenticator.so
/usr/share/doc/google-authenticator
/usr/share/doc/google-authenticator/CONTRIBUTING.md
/usr/share/doc/google-authenticator/FILEFORMAT
/usr/share/doc/google-authenticator/README.md
/usr/share/doc/google-authenticator/totp.html
/usr/share/licenses/google-authenticator
/usr/share/licenses/google-authenticator/LICENSE
/usr/share/man/man1/google-authenticator.1.gz
/usr/share/man/man8/pam_google_authenticator.8.gz
Method 2: Install using source code
You can clone the google authenticator git repository on your Linux node
-bash: git: command not found", to fix this you can install git using yum i.e. "yum install git -y"
# git clone https://github.com/google/google-authenticator-libpam.git
Cloning into 'google-authenticator-libpam'...
remote: Enumerating objects: 52, done.
remote: Counting objects: 100% (52/52), done.
remote: Compressing objects: 100% (39/39), done.
remote: Total 848 (delta 31), reused 32 (delta 13), pack-reused 796
Receiving objects: 100% (848/848), 580.86 KiB | 532.00 KiB/s, done.
Resolving deltas: 100% (539/539), done.
Next build and install
# cd google-authenticator-libpam/

# ./bootstrap.sh
# ./configure
# make
# make install
This will install and configure Google Authenticator on your Linux node.
Step 2: Configure offline two factor authentication in Linux
Now we do not need internet on the Linux node to enable offline two factor authentication. Execute the google-authenticator binary without any arguments as shown below, which will prompt you for various inputs
[root@centos-8 ~]# google-authenticator

Do you want authentication tokens to be time-based (y/n) y
Your new secret key is: Q7OLD3KUKF3F7BT5J3I7XMVKGI
Failed to use libqrencode to show QR code visually for scanning"
instead of QR image then you must install libqrencode library. In
RHEL/CentOS 7/8, this library is part of qrencode-libs rpm.

Enter code from app (-1 to skip): 952203   <-- Since this is CentOS 8, I have already configured Google Authenticator on my android device to get this OTP
Code confirmed
Your emergency scratch codes are:     <--- These emergency codes can be used when Google Authenticator is not accessible
  78193766
  22845673
  75571630
  42294143
  42293545

Do you want me to update your "/root/.google_authenticator" file? (y/n) y   <-- Press y to add the emergency codes under the provided file

Do you want to disallow multiple uses of the same authentication
token? This restricts you to one login about every 30s, but it increases
your chances to notice or even prevent man-in-the-middle attacks (y/n) y

By default, a new token is generated every 30 seconds by the mobile app.
In order to compensate for possible time-skew between the client and the server,
we allow an extra token before and after the current time. This allows for a
time skew of up to 30 seconds between authentication server and client. If you
experience problems with poor time synchronization, you can increase the window
from its default size of 3 permitted codes (one previous code, the current
code, the next code) to 17 permitted codes (the 8 previous codes, the current
code, and the 8 next codes). This will permit for a time skew of up to 4 minutes
between client and server.
Do you want to do so? (y/n) y

If the computer that you are logging into isn't hardened against brute-force
login attempts, you can enable rate-limiting for the authentication module.
By default, this limits attackers to no more than 3 login attempts every 30s.
Do you want to enable rate-limiting? (y/n) y
Step 3: Download and configure Google Authenticator Mobile App
Before we jump into the steps to enable and configure offline two factor authentication, we need this Google Authenticator app which will give us the OTP for verification code.
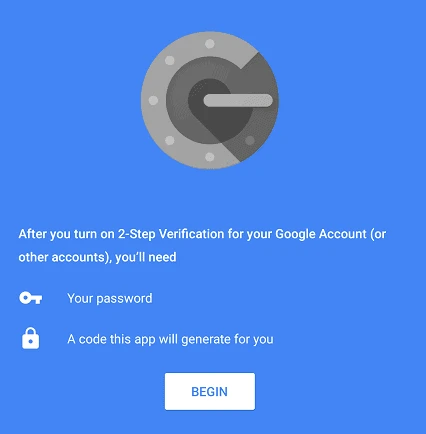
Download and Install "Google Authenticator" from your "Google Play
Store" or "App Store" based on your device.
Click on "BEGIN" to go to the next screen.
Next add a account. You can use the BARCODE or the KEY which was generated at Step 2 to add a new account.
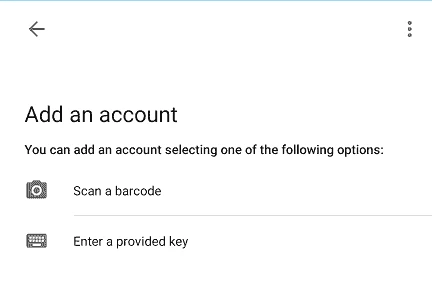
Once you add the account, you should start getting the OTP (Verification Code) which you can use to login on your Linux node configured with offline two factor authentication ssh.

Step 4: Configure ssh two factor authentication
To secure your SSH and prevent against brute force attacks you can configure SSH two factor authentication so that for every SSH attempt, you will need to also provide OTP or Verification code from Google Authenticator.
Step 4.1: Configure /etc/pam.d/sshd module
To enable SSH two factor authentication we will use the PAM module. The
file /etc/pam.d/sshd needs to be adjusted to call the
google-authenticator module:
[root@centos-8 ~]# cat /etc/pam.d/sshd
#%PAM-1.0
auth       required     pam_google_authenticator.so
auth       substack     password-auth
auth       include      postlogin
account    required     pam_sepermit.so
account    required     pam_nologin.so
account    include      password-auth
password   include      password-auth
# pam_selinux.so close should be the first session rule
session    required     pam_selinux.so close
session    required     pam_loginuid.so
# pam_selinux.so open should only be followed by sessions to be executed in the user context
session    required     pam_selinux.so open env_params
session    required     pam_namespace.so
session    optional     pam_keyinit.so force revoke
session    optional     pam_motd.so
session    include      password-auth
session    include      postlogin
Step 4.2: Configure /etc/ssh/sshd_config
Next enable ChallengeResponseAuthentication in /etc/ssh/sshd_config
[root@centos-8 ~]# grep ChallengeResponseAuthentication /etc/ssh/sshd_config
ChallengeResponseAuthentication yes
Restart the sshd service to activate the changes
[root@centos-8 ~]# systemctl restart sshd
Step 4.3: Verify ssh two factor authentication
Open a new SSH session which should now prompt for verification code
Since we have used
"auth <strong>required</strong> pam_google_authenticator.so", Linux
will prompt for verification
code followed by the
password of the user:
login as: root
Using keyboard-interactive authentication.
Verification code:                 <--- Provide the OTP from your Google Authenticator App
Using keyboard-interactive authentication.
Password:                          <-- provide the password of user "root"

Last login: Sat Mar 28 16:09:48 2020 from 10.0.2.2
[root@centos-8 ~]#
If you use
"auth <strong>sufficient</strong> pam_google_authenticator.so" then
Linux will only prompt for
verification code before logging in:
login as: root
Using keyboard-interactive authentication.
Verification code:               <--- Provide the OTP from your Google Authenticator App

Last login: Sat Mar 28 16:09:23 2020 from 10.0.2.2
[root@centos-8 ~]#
Step 5: Configure sudo two factor authentication (Optional)
If your requirement is only to configure SSH two factor authentication the you can ignore this step. But to enhance your security, you can also configure sudo two factor authentication so that every time a user uses SUDO, the user will be prompted for a OTP (Verification Code)
Step 5.1: Modify /etc/pam.d/sudo module
To enable sudo two factor authentication we will use the PAM module. The
file /etc/pam.d/sudo needs to be adjusted to call the
google-authenticator module:
[root@centos-8 ~]# cat /etc/pam.d/sudo
#%PAM-1.0
auth       required     pam_google_authenticator.so
auth       include      system-auth
account    include      system-auth
password   include      system-auth
session    include      system-auth
Step 5.2: Verify sudo two factor authentication
Next you can try to perform a sudo operation using any user:
[deepak@centos-8 ~]$ sudo ls -l /tmp/

We trust you have received the usual lecture from the local System
Administrator. It usually boils down to these three things:

    #1) Respect the privacy of others.
    #2) Think before you type.
    #3) With great power comes great responsibility.

Verification code:              <--- Provide the OTP from your Google Authenticator App
[sudo] password for deepak:     <--- Provide the password of user "deepak"

total 12
drwxr-x--T 2 root root 4096 Mar 23 17:47 marketing
drwx------ 3 root root 4096 Mar 24 19:49 systemd-private-64c4909968-chronyd.service-cpBn60
drwx------ 3 root root 4096 Mar 28 12:16 systemd-private-64c4909968-fprintd.service-Wo6SXe
auth sufficient pam_google_authenticator.so" then Linux
will only prompt for verification code:
Step 6: Configure su two factor authentication (Optional)
Again if your requirement is limited to SUDO or SSH two factor authentication you can ignore this step. But to enhance your security, you can also configure su two factor authentication so that every time a normal user attempts to switch user (su) role, the user will be prompted for OTP (Verification Code)
Step 6.1: Configure /etc/pam.d/su module
To enable su two factor authentication we will use the PAM module. The
file /etc/pam.d/su needs to be adjusted to call the
google-authenticator module:
[root@centos-8 ~]# cat /etc/pam.d/su
#%PAM-1.0
auth            required        pam_google_authenticator.so
auth            sufficient      pam_rootok.so
# Uncomment the following line to implicitly trust users in the "wheel" group.
#auth           sufficient      pam_wheel.so trust use_uid
# Uncomment the following line to require a user to be in the "wheel" group.
#auth           required        pam_wheel.so use_uid
auth            substack        system-auth
auth            include         postlogin
account         sufficient      pam_succeed_if.so uid = 0 use_uid quiet
account         include         system-auth
password        include         system-auth
session         include         system-auth
session         include         postlogin
session         optional        pam_xauth.so
Step 6.2: Verify su two factor authentication
Next verify your PAM configuration by trying to switch user (su):
[deepak@centos-8 ~]$ su -
Verification code:   <--- Provide the OTP from your Google Authenticator App
Password:            <--- Provide the password of user "root"
[root@centos-8 ~]#
auth sufficient pam_google_authenticator.so" then Linux
will only prompt for verification code:
Lastly I hope the steps from the article to configure offline two factor authentication using Google Authenticator on RHEL/CentoS 7/8 Linux was helpful. So, let me know your suggestions and feedback using the comment section.
Related Searches: two factor authentication linux ssh, ssh two factor authentication google, ssh otp google authenticator, linux 2 factor authentication