
In this tutorial, we will discuss how to create a "time since" functionality in Laravel 8, which allows you to display the time elapsed since a particular event or timestamp. This feature is commonly seen on social media platforms and blogs, where the time since a post, comment, or message was created is displayed in a human-readable format, such as "2 hours ago" or "3 days ago".
Creating a "time since" feature in Laravel 8 involves working with date and time manipulation, as well as formatting the output for user-friendly readability. We will cover the necessary steps to implement this functionality, including retrieving timestamps from the database, calculating the time difference, and displaying the result in a readable format.
Steps to create timesince in Laravel 8
There is no built-in method called
timesince in Laravel 8. However, you can create a custom function or
use Carbon class' diffForHumans() method to achieve the effect. You
get a string representation of the time that has or will have passed
between two dates.
Ensure Carbon is installed:
Laravel comes with the Carbon library pre-installed. However, if you need to install it manually, you can use the following command:
composer require nesbot/carbon
Retrieve the timestamp:
Fetch the timestamp you want to convert to a "time since" format from
the database. For example, let's assume you have a created_at
timestamp for a blog post:
$post = Post::find(1);
$timestamp = $post->created_at;
Create a helper function:
Create a helper function to convert the timestamp to a "time since"
format. In your app/helpers.php file (create this file if it doesn't
exist), add the following function:
use Carbon\Carbon;

if (! function_exists('time_since')) {
    function time_since($timestamp)
    {
        $now = Carbon::now();
        $timeSince = $->diffForHumans($timestamp, [
            'parts' => 1,
            'syntax' => Carbon::DIFF_ABSOLUTE
        ]);

        return $timeSince;
    }
}
If you don't have a helpers.php file, create one and autoload it by
adding the following to your composer.json file:
"autoload": {
    "files": [
        "app/helpers.php"
    ],
    ...
}
Then, run composer dump-autoload to update the autoloader.
Use the helper function in your views:
In your Blade template, you can now use the time_since() helper
function to display the "time since" format for the created_at
timestamp:
<p>Posted {{ time_since($post->created_at) }} ago</p>Now, when you display the blog post, you will see the "time since" format, such as "2 hours ago" or "3 days ago", depending on the timestamp.
By using the Carbon library and creating a simple helper function, you can easily implement a "time since" functionality in your Laravel 8 application, enhancing the user experience with a more human-readable time format.
Now let me show you how to create timesince in Laravel 8 practically.
Lab environment setup
Launch your terminal and <a href="https://laravel.com/docs/8.x/" target="_blank" rel="noopener"
install Laravel 8 and open the project with a code editor.
composer create-project --prefer-dist laravel/laravel time_since "8.*"
cd time_since
code .
Now create the database before seeding it
with 3 users from the UserFactory.
// in database/seeders/DatabaseSeeder.php
<?php

namespace Database\Seeders;
use Illuminate\Database\Seeder;

class DatabaseSeeder extends Seeder
{
    /**
     * Seed the application's database.
     */
    public function run(): void
    {
        \App\Models\User::factory(3)->create();
    }
}
Next, migrate the changes while seeding the database.
php artisan migrate --seedNow let's inspect the fetched the users using Eloquent and Query builder before checking the time that has passed since we created them.
How to fetch data from the database and display the "time since" format
1. Use Laravel Eloquent
In the example given, we define a route closure in the routes/web.php
file, which retrieves users from the database ordered by their creation
time in descending order. This is done using the orderBy() method with
the 'created_at' field. The fetched users are then passed to the
'welcome' view using the compact() function.
controller
// in routes/web.php
<?php

use App\Models\User;
use Illuminate\Support\Facades\DB;
use Illuminate\Support\Facades\Route;

Route::get('/', function () {
    $users = User::orderBy('created_at', 'desc')->get();
    return view('welcome', compact('users'));
});
We fetch the users while ordering them with the time they were created. We then send the details to view for display.
In the 'welcome' Blade view, we loop through each user using the
@foreach directive and display the "time since" format for the user's
creation time. We utilize Carbon's diffForHumans() method to convert
the 'created_at' timestamp to a more readable, user-friendly format.
view
// in resources/views/welcome.blade.php
@foreach ($users as $user)
    {{ $user->created_at->diffForHumans() }}
@endforeach
By combining Laravel's Eloquent ORM to fetch data and Carbon's
diffForHumans() method, we can seamlessly display the "time since"
format in a Laravel application, providing users with an intuitive and
easy-to-understand representation of time.
We loop through each user and print the
time their details were stored in the database. The diffForHumans()
function converts the time to a reader-friendly manner.

2. Use Laravel Query Builder
In the routes/web.php file, we define a route closure that uses the
Query Builder to fetch users from the 'users' table. The orderBy()
method is applied with the 'created_at' field to order the users by
their creation time in descending order. The fetched users are then
passed to the 'welcome' view using the compact() function.
controller
// in routes/web.php
<?php

use App\Models\User;
use Illuminate\Support\Facades\DB;
use Illuminate\Support\Facades\Route;

Route::get('/', function () {
    $users = DB::table('users')->orderBy('created_at', 'desc')->get();
    return view('welcome', compact('users'));
});
In the 'welcome' Blade view, we loop through each user using the
@foreach directive and display the "time since" format for the user's
creation time. Instead of directly calling the diffForHumans() method
on the 'created_at' field, we use the Carbon\Carbon::parse() method to
create a Carbon instance from the timestamp. Then, we call the
diffForHumans() method to convert the timestamp to a more readable,
user-friendly format.
view
// in resources/views/welcome.blade.php
@foreach ($users as $user)
  <h2 class="text-center">{{ Carbon\Carbon::parse($user->created_at)->diffForHumans() }}</h2>
@endforeach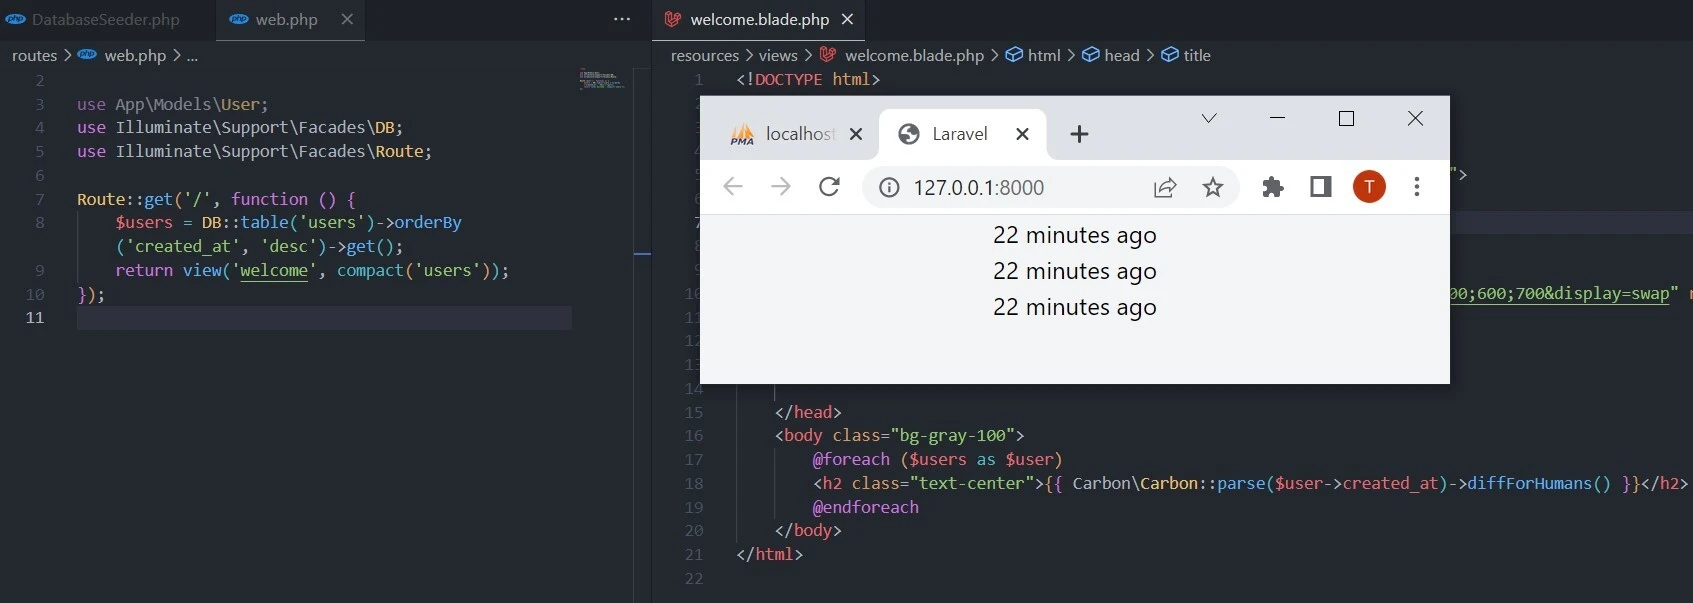
You could get an error message, "Call to a
member function diffForHumans() on string", if you don't use the
parse() method. That is because, unlike Eloquent, the Laravel query
builder does not parse the Carbon instance automatically.
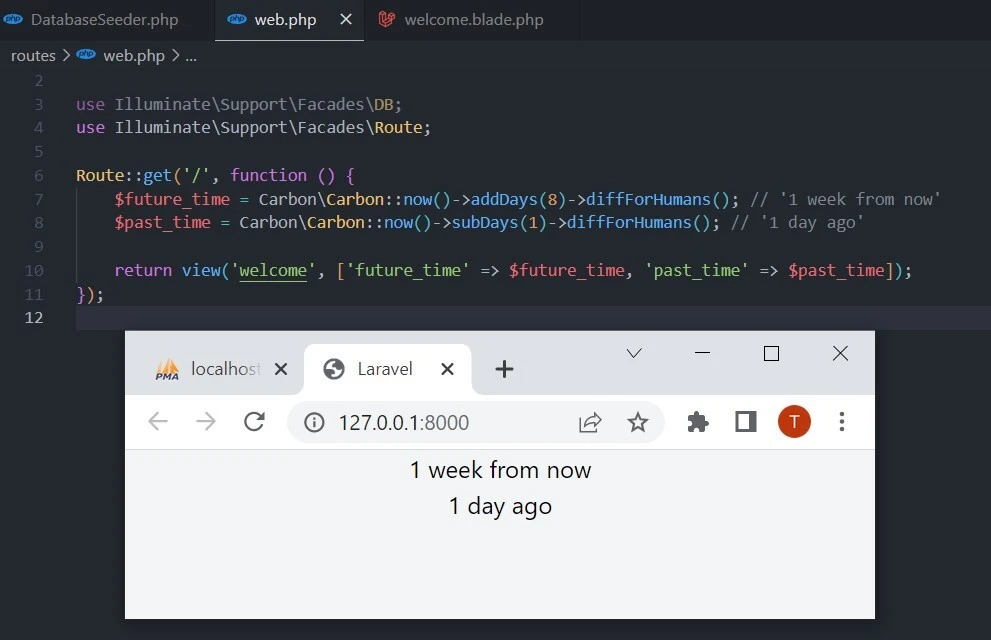
Besides, you can use Carbon's other
methods like now(), addDays(), and subDays() to manually create
user-friendly time.
$future_time = Carbon\Carbon::now()->addDays(2)->diffForHumans(); // '2 days from now'
$past_time = Carbon\Carbon::now()->subDays(1)->diffForHumans(); // '1 day ago'
The now() method tells time from the current time. addDays() tells
future, whereas subDays()tells past time.
Conclusion
In this tutorial, we explored different approaches to create a "time since" functionality in Laravel applications, which displays the elapsed time since a specific event or timestamp in a human-readable format. This feature is commonly used in social media platforms, blogs, and other applications where the relative time of an event, such as a post or comment, needs to be presented to the user.
We covered two methods of fetching data from the database: using Laravel's Eloquent ORM and the Query Builder. Both methods involve ordering the fetched records by their creation time and passing the results to a Blade view. The primary difference between these two methods lies in the way the data is retrieved, with Eloquent ORM providing a more abstract, object-oriented approach while the Query Builder offers a more direct, table-centric method.
To display the "time since" format in the Blade view, we utilized the
Carbon library, which simplifies date and time manipulation. We
demonstrated how to use Carbon's diffForHumans() method to convert
timestamps to a more user-friendly format, enhancing the overall user
experience.
By following the steps and examples provided, developers can implement a "time since" functionality in Laravel applications, offering users an intuitive and easy-to-understand representation of time.
