
Normally we prefer vcsu to perform firmware upgrade in HPE Virtual Connect (VC) but one of the major drawbacks on vcsu is that it supports single enclosure FW upgrade at a time. So you cannout upgrade HPE VC from multiple enclosures in parallel. You are bound to perform sequential firmware upgrade with vcsu.
To mitigate this drawback we have Smart Update Manager from HPE.
Overview on HPE Smart Update Manager
SUM is a tool for firmware, driver, and software maintenance on ProLiant servers, BladeSystem enclosures, Moonshot systems, and other nodes. It provides a browser-based GUI or a command-line scripting interface for flexibility and adaptability. SUM identifies associated nodes you can update at the same time to avoid interdependency issues.
Key features of SUM include:
- Discovery engine that finds installed versions of hardware, firmware, and software on nodes.
- SUM deploys updates in the correct order and ensures that all dependencies are met before deploying an update.
- Interdependency checking.
- Automatic and step-by-step localhost Guided Update process.
- Web browser-based mode.
- Ability to create custom baselines and ISOs.
- Support for iLO Repository (Gen10 iLO 5 nodes only).
- Simultaneous firmware and software deployment for multiple remote nodes.
- Local offline firmware deployments with SPP deliverables.
- Extensive logging in all modes.
For this article we will concentrate on the "Simultaneous firmware and software deployment for multiple remote nodes" feature of SUM
1. Download SUM package
SUM is available in different variant based on the distribution you plan to use for performing VC firmware upgrade. I normally use Linux environment as my source node and have not tried Windows Server for this exercise.
Below are the download links of the latest available SUM at the time of writing this article. You can always navigate to "Revision History" TAB and look out for new version of SUM. It is important that you use the latest available version to perform VC Firmware upgrade as most VC have a dependency over the vcsu version which will be part of these SUM rpm. For example VC 4.80 needs vcsu 1.15 or higher which is bundled with SUM 8.5
SUM 8.5 ⇒ Download Link for Linux ⇒ Download Link for WIndows
2. Extract SUM archive (Install)
You can either download the sum rpm and install it or extract the sum archive from the Windows link. Here I am extracting the Windows archive on the Linux server:
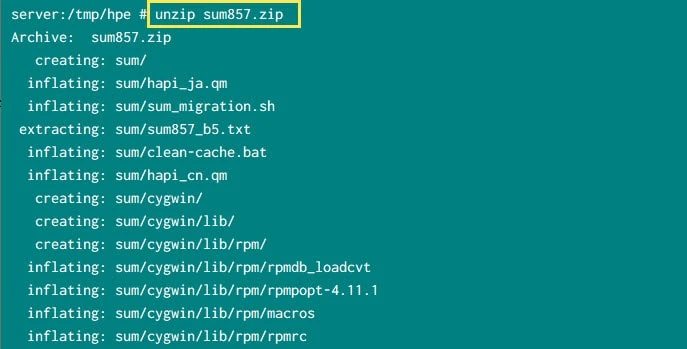
Extract SUM archive
List the content of the extracted archive. Here we have smartupdate
binary as highlighted which we will use to perform firmware upgrade of
multiple Virtual Connect in parallel.
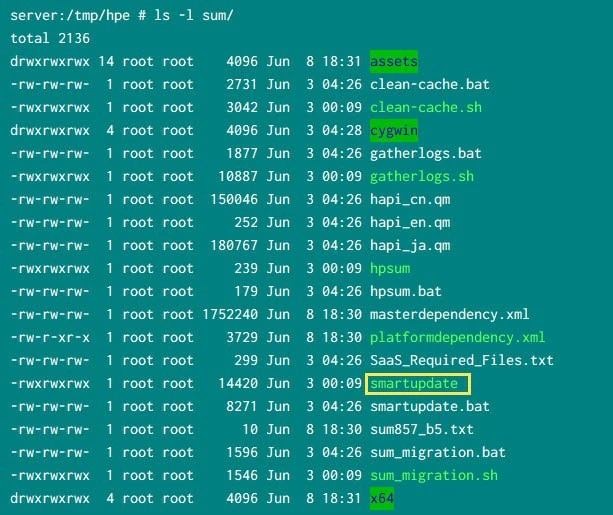
SUM archive content
3. Download Virtual Connect Firmware
Next download the virtual connect firmware to the version to which you wish to upgrade your enclosures. Below is a link for VC 4.80 Firmware rpm
HPE BladeSystem c-Class Virtual Connect Firmware, Ethernet plus 8Gb 20-port and 8/16Gb 24-port FC Edition Component for Linux
Copy this rpm to your Linux server using which you plan to upgrade the
VC. I have placed this rpm inside /tmp
# ls -l /tmp/firmware-vceth-4.85-1.1.x86_64.rpm
-r-xr-x--- 1 root root 289219285 Aug 24 16:02 /tmp/firmware-vceth-4.80-1.1.x86_64.rpm
4. Create Input File
We would need an input file which will contain all the details for performing automated Firmware Upgrade of multiple HPE Virtual Connect. You can use any name as per your preference for the input file.
Below is a sample input file content from my setup:
# cat /tmp/update_vc.in
SILENT = YES
IGNOREERRORS = ServerNotFound,BadPassword,FailedDependencies
SOURCEPATH = /tmp
COMPONENTSLIST = firmware-vceth-4.80-1.1.x86_64.rpm
ONFAILEDDEPENDENCY = OmitComponent
SKIPTARGET = NO
VERBOSE = YES
IGNOREWARNINGS = YES
INSTALLED_REPORT = YES
[TARGETS]
HOST = 192.168.10.10
HOST = 192.168.20.10
HOST = 192.168.30.10
HOST = 192.168.40.10
TARGETTYPE = virtual_connect
UID = Administrator
PWD = Passw0rd
OAUID = Administrator
OAPWD = Passw0rd
[END]
ETHACTORDER = SERIAL
In this example I have provided the IP Address of HPE Virtual Connect
from 5 enclosures in the same TARGET - END block because all these VC
and mapped OA have same Administrator password.
In your case if the username and password are different for
individual VC and OA of each enclosure then you will have to create
separate TARGET - END block.
For example, in this input file I have
only placed the
TARGET - END block, you can
copy the remaining variables
from the input file shared above. As you see I have created two
TARGET - END block with individual VC IP Address and login
credentials. You can add as many blocks as per your requirement.
[TARGETS]
HOST = 192.168.10.10
TARGETTYPE = virtual_connect
UID = Administrator
PWD = Passw0rd1
OAUID = Administrator
OAPWD = Passw0rd1
[END]
ETHACTORDER = SERIAL
[TARGETS]
HOST = 192.168.20.10
TARGETTYPE = virtual_connect
UID = Administrator
PWD = Passw0rd2
OAUID = Administrator
OAPWD = Passw0rd2
[END]
ETHACTORDER = SERIAL
Follow below Table to get the details of individual parameters used in the above input file. You can check official SUM CLI Guide to get more details on these parameters:
| Parameter | Description |
|---|---|
| IGNOREERRORS | This parameter causes the installation and ignore errors. Possible values: ServerNotFound - Bypasses inactive or unavailable remote hosts when deploying firmware or software to multiple remote hosts at the same time. BadPassword - Bypasses remote nodes that report incorrect credentials provided and continue with other nodes. FailedDependencies - Ignores any nodes with failed dependencies and proceeds with nodes that are ready. |
| SILENT | Possible value: YES Causes the installation to run silently with no GUI or interactive CLI output. All data writes to the log file. Any generated prompts use the default option and continue the installation without user input. If a component requires input before installation (such as configuration information), the component installation fails and writes an error message to the log file. NOTE: If you enter the value NO, the input file will not work correctly. HP SUM will try to launch the GUI mode. |
| SOURCEPATH | Possible values: Directory path, UNC location Provides a single local baseline path or a UNC file share. This action creates an inventory from the given path instead of the local or default baseline |
| COMPONENTSLIST | Possible values: Component names with file extensions (.exe, .rpm,. .zip, or .scexe) Limits the list of components to be updated. |
| ONFAILEDDEPENDENCY | Tells SUM how to proceed when a component has a failed
dependency. Possible values: OmitHost (default) - Puts the host in a failure state, and SUM does not attempt installation. OmitComponent - Clears the affected components and proceeds with any updates that do not have dependency failures. Force - Attempts all updates, even if they have dependency failures |
| SKIPTARGET | Possible values: YES (default), NO The default setting skips a remote node if HP SUM finds a remote session running on the node. Defines the behavior when a remote node has an existing HP SUM session in progress. Use this parameter to skip the host if an existing HP SUM session already exists. A value of NO overrides the session in progress |
| VERBOSE | Possible values: YES, NO This parameter determines the amount of details SUM provides during deployment. The following attributes are related to nodes and baselines. Use these attributes for each node or baseline. |
| IGNOREWARNINGS | Possible values: YES, NO Allows installation to proceed after SUM receives warnings on nodes. Some warnings include: • Active member of a Serviceguard cluster • TPM warning • Superdome X-specific warnings • Pending iLO installation queue warnings • iLO task queue exceptions • iLO 5 and iSUT warnings |
| INSTALLED_REPORT | Possible values: YES, NO Generates a report that lists all installed firmware, software, and driver versions installed on all nodes. HP SUM performs the inventory, deploys updates, generates the report, and then exits. HP SUM generates reports in HTML, XML, and CSV format. |
| TARGETTYPE | Specifies the type of node (--targettype Linux (Linux) /targettype Windows) (Windows)), and can shorten the inventory process. |
| UID | Possible values:
Specifies the user ID for logging into the nodes. |
| PWD | Possible values:
Uses the password for the user ID specified in the UID. |
| OAUID | User can define the OAUID variable multiple times before each HOST
variable. Provides the user name credentials for the OA associated with VC. Define a value for these variables before the HOST variable in the [TARGETS] section. This parameter applies only to VC firmware. You can also use OAUSER or OAUSERNAME. |
| OAPWD | User can define OAPWD variable multiple times before each HOST
variable. Provides the password credentials for the OA associated with VC. Define a value for these variables before the HOST variable in the [TARGETS] section. This parameter applies only to VC target. You can also use OAPASSWORD. |
| ETHACTORDER | Use this command to determine VC-Enet module activation order. Possible value: ODDEVEN (default) PARALLEL SERIAL MANUAL |
5. Modify sum.ini (Optional)
This step is optional based on your partition scheme. SUM requires
around ~1.1 GB of space under /var/tmp to extract and process the
upgrade. So if you plan to upgrade 10 Virtual Connect using single input
file then you would need ~11 GB of free space under /var/tmp. If you
have such amount of free storage under /var/tmp then you can ignore
this step or else follow the steps to use an alternate location for SUM.
Navigate inside the extracted sum archive
# cd /tmp/hpe/sum
and execute smartupdate which will fail:
server:/tmp/hpe/sum # ./smartupdate
Error: cannot launch browser.
This step is required to create /var/tmp/sum/sum.ini file. With every
execution sum.ini file is created and if the file is already there,
the same would be referred instead of creating a new one.
Now open /var/tmp/sum/sum.ini and modify the temp_dir variable.
Replace /var/tmp with any alternate location which contains more space
as required for VC firmware upgrade
[Engine]
mode=release
temp_dir=/home/deepak
use_http=false
For example, I have changed the location to /home/deepak so now all
the logs from SUM would be stored inside this new location.
6. Upgrade multiple HPE Virtual Connect
Now our setup is ready to initiate the VC firmware upgrade of multiple enclosures. Execute the below command to initiate the upgrade:
server:/tmp/hpe/sum # ./smartupdate --inputfile /tmp/update_vc.in
Upgrade of a single VC takes around ~45-50 minutes. but since we are
doing multiple VC Firmware upgrade in parallel the overall time should
be ~1 hour. Do not Terminate the session, if required you can use
tmux to
trigger the firmware upgrade to avoid any network issues.
Below is a snippet from my terminal of the output from the command
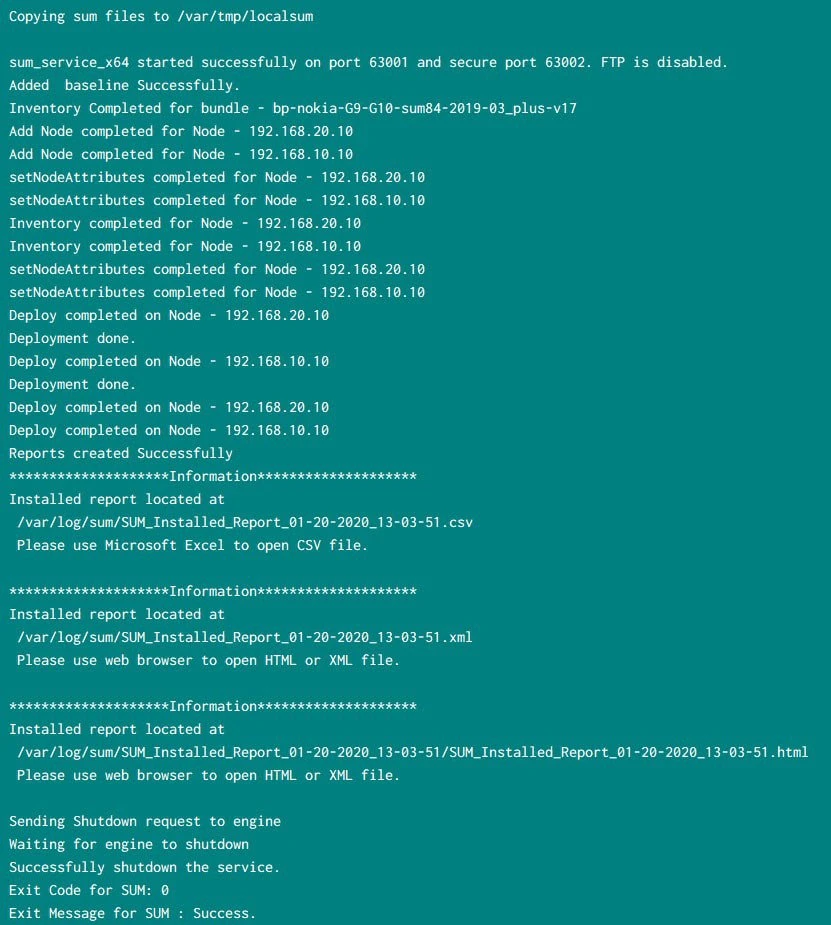
SUM console output (upgrading multiple VC firmware)
7. Check SUM Report
Since we had used INSTALLED_REPORT=YES in our input file, at the end
of execution SUM will generate report of the FW upgrade status in 3
formats
- HTML
- CSV
- XML
The path of all the tree types of report is provided on the console
Installed report located at
/var/log/sum/SUM_Installed_Report_01-20-2020_13-03-51/SUM_Installed_Report_01-20-2020_13-03-51.html
Please use web browser to open HTML or XML file.
You can copy this folder
/var/log/sum/SUM_Installed_Report_01-20-2020_13-03-51 to a Windows
Server if you don't have GUI enabled on your Linux server or you can
directly open the html file and check the report of the Firmware Upgrade
8. Troubleshooting FW Upgrade Issues
if you have changed the location of temp_dir then the logs would be under the new location as you have provided. The default location of all the logs would be under
/var/tmp/sum/var/log/sum
For any kind of issues, check the logs under
/var/tmp/sum/<VC IP Address>/firmware-vceth-X.XX-1.1.x86_64.log
For the summary, of execution check
/var/log/sum/<VC IP Address>/sum_detail_log.txt
Conclusion
In this tutorial we learned how to upgrade multiple HPE Virtual Connect Firmware from different enclosures in parallel. As already informed, HPE officially doesn't support multiple VC firmware upgrade. As doing this exercise requires a good hardware and stable network connectivity between source server and Virtual Connect.
If you face any issues with the upgrade then feel free to use the comment box with as much detail as possible of the error and I can try to help you accordingly.
