
What is Windows Subsystem for Linux (WSL)
Windows Subsystem for Linux (WSL) is a compatibility layer available for Windows 10, Windows 11, and Windows Server 2019 that enables users to run GNU/Linux environments natively on their system. That includes some of the most popular Linux command-line tools, utilities, and applications. With WSL, you can:
- Select a Linux distribution to install on Microsoft Store (E.g., Kali Linux, Ubuntu, Debian, etc.)
- Use command-line tools like grep, sed, awk, and other ELF-64 binaries (see awk command).
- Create and run bash shell scripts with languages like:
- NodeJS, Javascript, Python, Ruby, C/C++, C# & F#, Rust, Go, etc
- Utilize various GNU/Linux command-line applications such as:
- Tools: vim, emacs, tmux
- Services: SSHD, MySQL, Apache, lighttpd, MongoDB, PostgreSQL.
- Invoke Windows applications from the Unix-command-line shell
- Install additional packages from your distributions' package manager
- Invoke GNU/Linux packages and applications on Windows
The first version of Windows Subsystem for Linux (WSL1) was first released on August 2, 2016. On June 12, 2019, the second version, now called Windows Subsystem for Linux 2, was released. This second release introduced major changes, such as emulating a real Linux channel through the Hyper-V feature and increase file system performance.
In this post, we will give you a detailed guide on installing WSL2 on Windows.
Step-1: Enable Windows Subsystem for Linux Feature
If you are not already running WSL1, then you need to enable Windows Subsystem for Linux on your System. Follow the steps below.
Open the Windows Search bar (Win key + S) and enter "Turn Windows features On or Off."
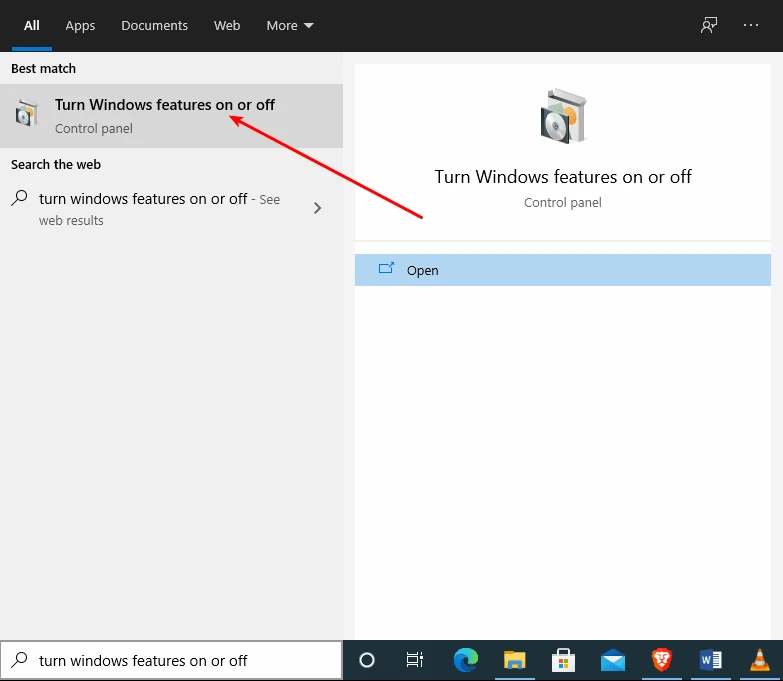
Enable Windows Subsystem for Linux Feature
That will open the Windows Features window. Scroll down and search for the option, Windows Subsystem for Linux. Click on the checkbox to enable the feature. The system will search and install the required packages before prompting you to Reboot your system.
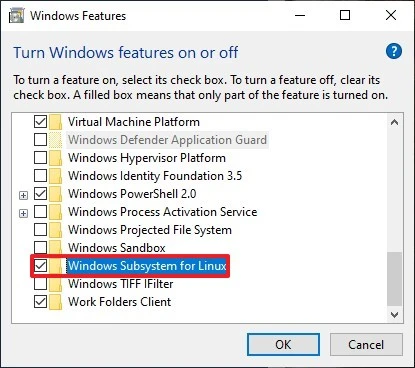
Enable Windows Subsystem for Linux Feature
Ste-2: Enable Virtual Machine Platform
This step wasn't necessary for WSL 1; however, with WSL 2, we will need to use the Hyper-V feature.
- On the Windows Search bar (Win key + S), type PowerShell. Right-click on it and select the option "Run as administrator"
- Enter the command below and hit enter.
Enable-WindowsOptionalFeature -Online -FeatureName VirtualMachinePlatform

If the command executes successfully without any errors, as shown in the image above, Reboot your PC to apply the changes.
Step-3: Enable Windows Subsystem for Linux 2 (WSL 2)
Up to this point, we have everything set up for WSL2. We can now proceed and enable Windows Subsystem for Linux 2 on our Windows system. Follow the steps below.
Download the WSL2 Kernel update.Once the download
completes, navigate to the Downloads folder and install the .msi
file.
Open the Windows Search bar (Win key + S) and search Powershell. Right-click on it and select the "Run as administrator" option.Execute the command below to set WSL2 as the default architecture for all your Linux distributions.
wsl --set-default-version 2

If you have distributions that you installed with WSL1, you will need to convert them to WSL2. For example, if you installed Ubuntu, use the command below to convert it to WSL2.
wsl --set-version Ubuntu 2
wsl -l -v
After completing all the steps above, all your new distributions will use the WSL2 architecture.
Step-4: Install a Linux Distribution
Up to this point, we have successfully installed and enabled WSL2 on Windows. To install and start using Linux, follow the steps below.
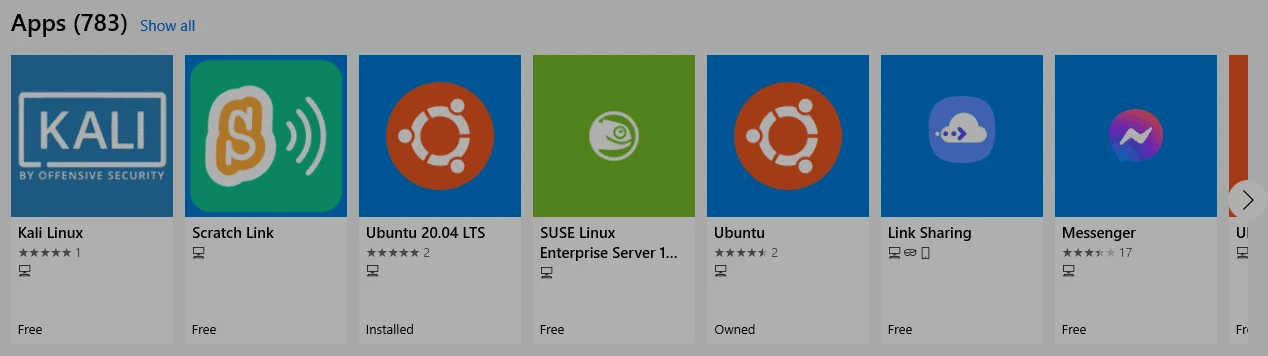
Open the Microsoft Store application and Sign In with your Microsoft account.
On the search bar, enter "Linux." That will list all the distributions available for you to install. For this tutorial, we will install Ubuntu 20.04 LTS.
Install Linux using Windows Subsystem for Linux
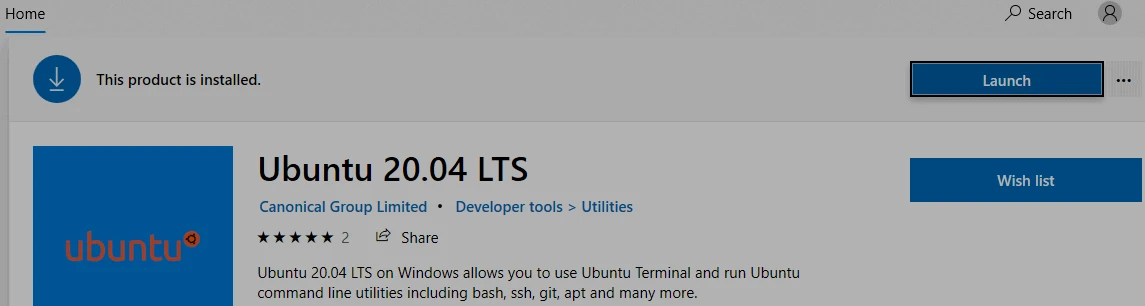
Select your distribution of choice and click Get or Install. The installation might take some time as it will need to download the package.
Once done, click Launch to start your Linux OS.
Install Ubuntu using Windows Subsystem for Linux
That will open the Linux command-line window. The distribution will install some packages before prompting you to enter a new username and password.
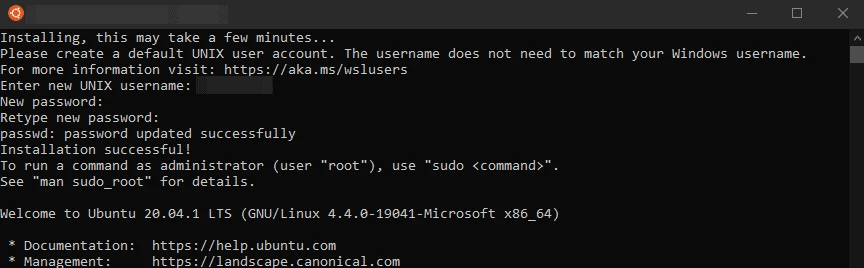
Linux installed using Windows Subsystem for Linux (WSL)
That's it! You have successfully enabled Windows Subsystem for Linux 2 and even installed your first distribution.
Conclusion
I believe this post has given you a clear guide on installing WSL2 on your Windows system. Please feel free to leave a comment and share your experience using WSL2 with our readers.
Further Readings
Windows Subsystem for Linux Installation Guide for Windows 10
Related Searches: Enable windows subsystem for Linux, install WSL, how to get Linux on windows 10, install Linux on windows 10, enable WSL
