
In this tutorial, I will give you a step-by-step guide on how to set up and install DVWA on your Kali Linux system.
When starting as a penetration tester, you will need a pentesting-lab to test out your penetration skills. One such system is the Damn Vulnerable Web Application (DVWA). DVWA is a vulnerable web application developed using PHP and MySQL that allows ethical hackers to test out their hacking skills and security tools.
It’s also an excellent guide for professional web developers with security in mind. They can use it to learn which features of a web application are easy to exploit. Some of the most common web vulnerabilities demonstrated by this application include Cross-Site Request Forgery (CSRF), File Inclusion, SQL injection, Bruteforce attacks, and much more.
Pre-requisites to install DVWA
This tutorial assumes that you already have a Kali Linux Server Up and Running.
Step 1: Download Damn Vulnerable Web Application (DVWA)
To get started, we will need to clone the DVWA GitHub into our
/var/www/html directory. That is the location where Localhost files
are stored in Linux systems. Launch the Terminal and change our
directory to the /var/www/html directory with the command below.
$ cd /var/www/html
Sample Output:

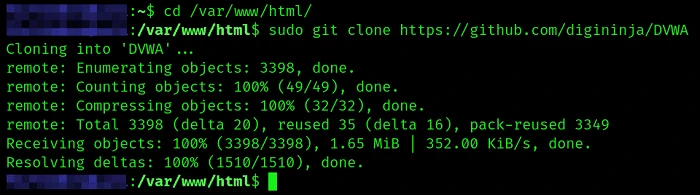
Once in this directory, we will clone the DVWA GitHub repository with the command below.
$ sudo git clone https://github.com/digininja/DVWA
*Sample Output:
*
After cloning, we can rename the DVWA folder to dvwa. That is not
mandatory, but it makes work easier when executing multiple commands.
$ sudo mv DVWA dvwa
Step 2: Configure DVWA
After downloading cloning DVWA in our /var/www/html directory, we
still need to do some minor configurations. To get started, let’s set
read, write, and execute permissions to the DVWA directory. Execute the
command below.
$ chmod -R 777 dvwa/
Sample Output:

After successfully executing the command, we need to set up the user and password required to access the database. Change directory to point to the config directory with the command below.
$ cd dvwa/config
When you run the ls command to view the files inside the directory, you
will see the config.inc.php.dist file. That is the original file
containing the default configurations. We won’t edit it. Instead, we
will create a copy of this file called config.inc.php and the original
config.inc.php.dist file will act as our backup in case things go
wrong.
Execute the command below.
sudo cp config.inc.php.dist config.inc.php
Sample Output:

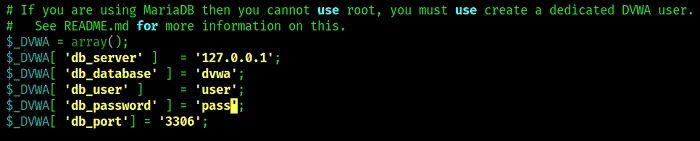
Run the command below to open the newly created file with nano editor
and make the necessary changes, as shown in the image below. We will set
db_user as user and db_password as pass. Feel free to use a
different username or password.
$ sudo nano config.inc.php
Sample Output:
Save the file (Ctrl + O, then Enter) and Exit (Ctrl + X). That’s it!
We are done configuring the DVWA Web application. Let’s move on and
configure the database (MySQL).
Step 3: Install MySQL on Kali Linux
By default, MySQL comes pre-installed on Kali Linux. If that’s not the case for you or maybe you messed up with MySQL, we can go ahead and install it manually. If you have worked with Debian-based distributions, MySQL comes in two packages:
- mysql-server
- mysql-client
In our case, we will need to install the mysql-server. However, there is a catch. If you try using the command apt install mysql-server you will most likely get the error *“Package mysql-server is not available, but is referred to by another package. E: Package ‘mysql-server’ has no installation candidate."*That’s because the package mysql-server is referred to default-mysql-server in Kali Linux and also in the latest release of Debian (Debian 10). Therefore, use the command below:
sudo apt install default-mysql-server
*Sample output:
*

Step 4: Configure MySQL Database
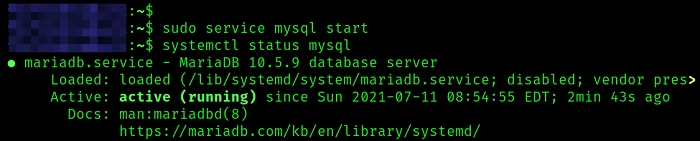
Start the Mysql service with the command below:
$ sudo service mysql start
You can check whether the service is running using the
systemctl status command below.
$ systemctl status mysql
Sample Output:
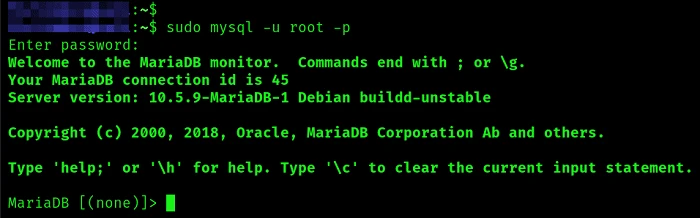
Login to the MySQL database using the command below as root. If you have another name set for the superuser in your system, use it instead of root.
$ sudo mysql -u root -p
You will see a prompt to enter the password. Just hit Enter since we haven’t set any password. MySQL will open, as shown in the image below:
We will create a new user with the username and password set in our DVWA
application configuration file. In my case, the username was ‘user,’
and the password was ‘pass.’ The server we are using is Localhost
(127.0.0.1). Use the command below.
create user 'user'@'127.0.0.1' identified by 'pass';
Sample Output:

We need to grant this new user privilege over the dvwa database. Execute the command below.
grant all privileges on dvwa.* to 'user'@'127.0.0.1' identified by 'pass';
Up to this point, we are through with configuring both the DVWA application and the MySQL database. Type exit to close the database.

Step 5: Install PHP
PHP comes installed in Kali Linux. However, if you want to install a particular version, you can do it manually from the Terminal. In this post, we will install PHP 7.4 which is the latest release as of writing this post. Follow the steps below.
First, update your system and add the SURY PHP PPA repository by executing the commands below.
sudo apt update
sudo apt -y install lsb-release apt-transport-https ca-certificates
sudo wget -O /etc/apt/trusted.gpg.d/php.gpg https://packages.sury.org/php/apt.gpg
echo "deb https://packages.sury.org/php/ buster main" | sudo tee /etc/apt/sources.list.d/php.list
Sample output:

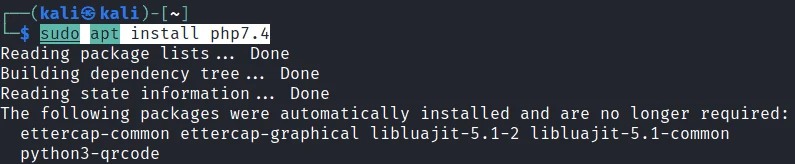
After successfully adding the repository, use the command below to install PHP 7.4
sudo apt update
sudo apt install php7.4 -y
Sample output:
To install additional PHP extensions, use the syntax below where xxx stands for the extension name.
sudo apt install php7.4-xxx
e.g
sudo apt install php7.4-{cli,json,imap,bcmath,bz2,intl,gd,mbstring,mysql,zip}
Sample output:

Step 6: Configure Apache Server
Now, we need to configure the server. Use the command below to change
your location on the Terminal to point to /etc/php/7.3/apache2
directory.
$ cd /etc/php/7.4/apache2
As of writing this post, I was running PHP version 7.4. You might need to confirm your version and replace it on the command. Use the command below to check the installed version.
$ ls /etc/php
In the /etc/php/7.4/apache2, when you execute the ls command, you will
see a file called php.ini. That is the file we will edit to configure
our localhost server. Use the command below to open it using the nano
editor.
$ sudo nano php.ini
Scroll down and look for these two lines: allow_url_fopen and
allow_url_include. Set them both as On. Save the file (Ctrl + O,
then Enter) and Exit (Ctrl + X).

Start Apache server using the command below:
$ sudo service apache2 start
To check whether the service started successfully, use the status command.
$ systemctl status apache2
Sample Output:

Step 7: Access DVWA on Your Browser
That’s it! We now have everything configured, and we can proceed to launch DVWA. Open your browser and enter the URL:
http://127.0.0.1/dvwa/
That will open the setup.php web page as shown in the image:
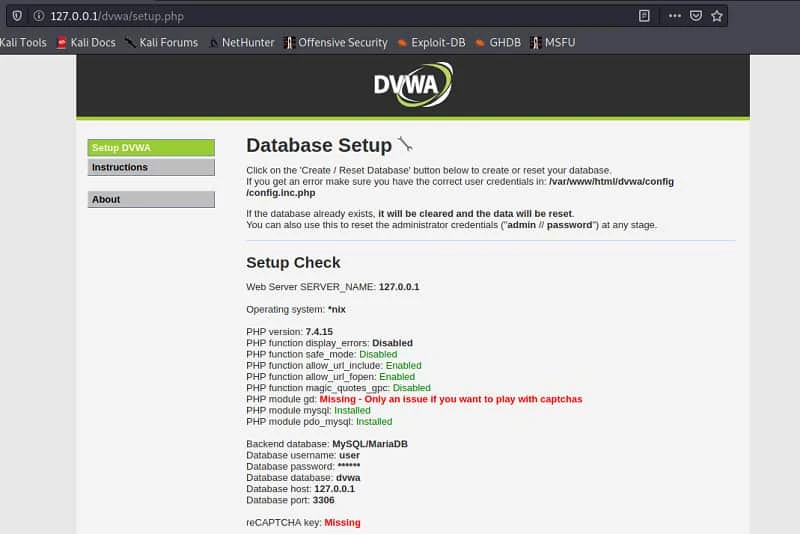
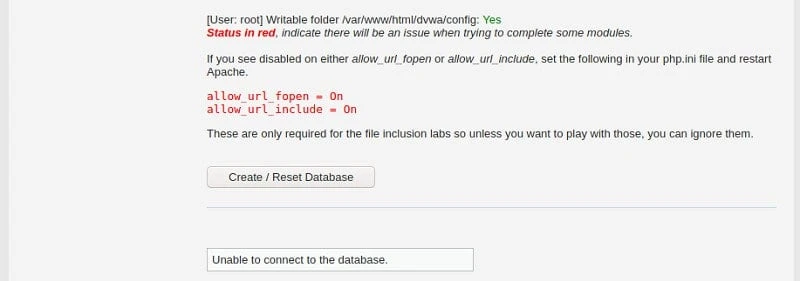
You might see the errors colored in red as in the image above. Don’t panic! Scroll down and click the Create / Reset Database button.
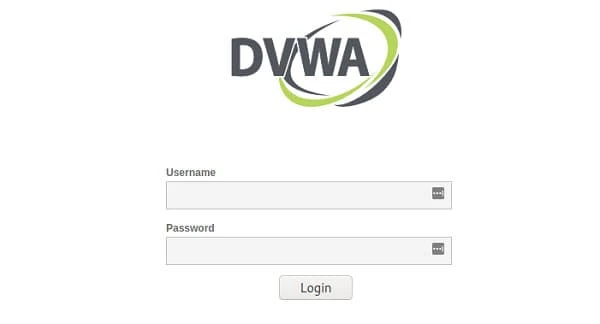
That will create and configure the database. After some time, you will be redirected to the DVWA login page. Log in with these credentials:
- Username - admin
- Password - password
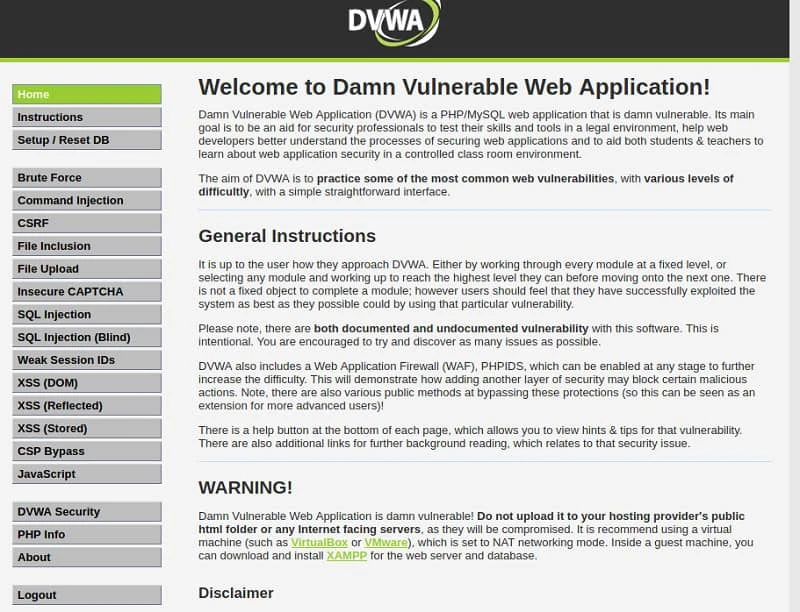
Once logged in, you will see the DVWA main page. On the left panel, we have the different types of attacks you can exploit and the DVWA Security button that allows you to choose the desired security level - Low, Medium, High, or Impossible.
Conclusion
That is how we install DVWA on Kali Linux. Pretty easy, right? DVWA is an excellent resource for both beginners getting started with Penetration Testing and experts. All you need to do is change the security levels depending on your skills. Feel free to share the vulnerability you found interesting to exploit with our readers in the comments section.
