iOS developer interviews in 2026 test whether you can ship reliable apps on Apple’s stack—Swift value semantics, ARC discipline, SwiftUI state, and Swift 6 concurrency—not whether you can recite every UIKit delegate method. Loops at Apple, Google (iOS apps on the App Store), banks, and startups alike push async/await, actors, and architecture trade-offs alongside UI fundamentals.
Below are 45 questions for iOS developer and senior mobile engineer roles: Swift language depth, UIKit and SwiftUI, memory, concurrency, persistence, networking, testing, and scenario design. Open each answer after you try the question yourself. For the Android side of mobile prep, see senior Android developer interview questions. For shared OOP and threading vocabulary, skim Java interview questions (part 1).
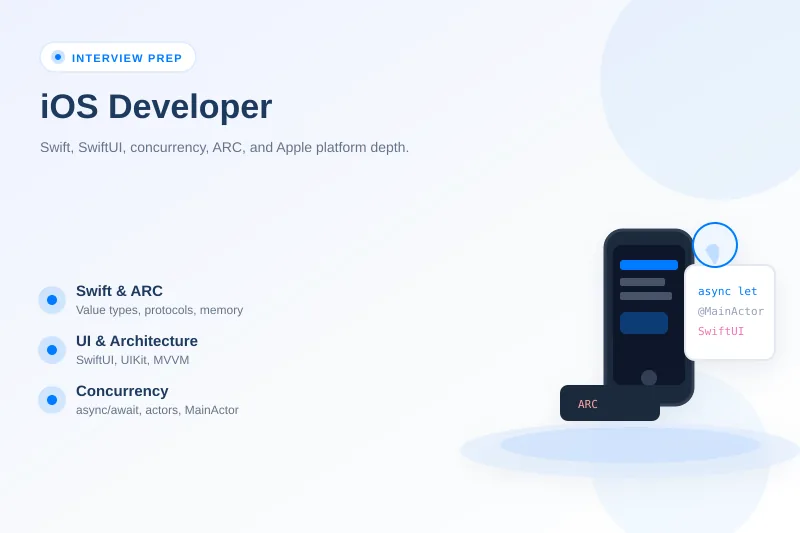
@MainActor, and walk one offline-first or list performance scenario aloud.
Interview context and how to prepare
What do iOS developer interviews actually test?
iOS interviews test whether you can build production apps on Apple platforms—not syntax trivia alone.
| Level | Typical focus |
|---|---|
| Junior | Swift basics, optionals, UITableView/UICollectionView or SwiftUI lists, Auto Layout basics |
| Mid | ARC, protocols, networking, MVVM, persistence, unit tests |
| Senior | Concurrency (async/await, actors), performance, modularization, app architecture, system design |
| Staff+ | Cross-team API design, Swift 6 migration, release strategy, mentoring |
Common formats:
- Phone screen → take-home or live coding → system design (senior) → behavioral
- Apple loops: deep Swift, frameworks, craftsmanship, collaboration
- Google iOS loops: algorithms + mobile depth + cross-platform empathy (compare with their stack when asked)
A strong candidate explains trade-offs (UIKit vs SwiftUI, Core Data vs SwiftData) with project context.
Apple iOS developer vs Google iOS developer interviews — what differs?
Both hire engineers to ship App Store products; emphasis varies:
| Signal | Apple-heavy loops | Google-heavy loops |
|---|---|---|
| Language | Swift/Obj-C depth, Apple APIs, HIG | Swift + strong CS/algorithms |
| UI | SwiftUI/UIKit craft, accessibility | Scale, metrics, A/B, performance |
| Process | Craft, API design, privacy | Structured interviews, coding rigor |
| Platform | Latest OS features, WWDC direction | Large-app architecture, shared libraries |
Same prep core: Swift, ARC, concurrency, networking, architecture, testing.
Differentiate answers with product scale (1M DAU vs internal tool) and release cadence you have shipped.
Do not assume one company’s folklore—read the team (consumer app vs enterprise SDK).
What is a typical iOS developer interview loop?
| Round | Duration | Focus |
|---|---|---|
| Recruiter / HM | 30 min | Apps shipped, App Store link, stack |
| Swift / iOS fundamentals | 45–60 min | Types, ARC, protocols, UI lifecycle |
| UI & architecture | 45–60 min | SwiftUI state or UIKit patterns, MVVM |
| Live coding | 45–90 min | Small feature, API client, table/list problem |
| System design | 45–60 min | Feed, chat, offline sync—senior roles |
| Behavioral | 30–45 min | Crashes, deadlines, code review |
Take-home tasks: build a small app (network + list + detail) with README and tests.
Practice explaining answers aloud; interviewers follow up on spoken reasoning more than memorized flashcards.
What is a realistic 4–6 week prep plan?
| Week | Focus | Output |
|---|---|---|
| 1 | Swift — optionals, structs/classes, protocols, enums | 20 small Playground exercises |
| 2 | ARC — weak/unowned, closures, retain cycles | Fix three leak scenarios on paper |
| 3 | UI — SwiftUI state or UIKit table + navigation | Ship one screen with loading/error states |
| 4 | Concurrency — async/await, Task, @MainActor |
Refactor one callback API to async |
| 5 | Data + network — URLSession, Codable, persistence choice | Mini app with cache |
| 6 | Tests + scenarios — XCTest, offline design, STAR stories | One architecture whiteboard |
Pair mobile prep with senior Android interviews for cross-platform system design vocabulary.
Swift language fundamentals
Struct vs class — when do you use each?
Swift has both value types and reference types.
| Area | Struct | Class |
|---|---|---|
| Type category | Value type | Reference type |
| Assignment | Creates an independent value | Shares the same instance |
| Identity | No object identity | Has identity with === |
| Inheritance | Not supported | Supported |
| ARC | Struct itself is not reference-counted | Managed by ARC |
| Mutation | Controlled with mutating methods |
Mutable through references |
| Common use | Models, values, DTOs, SwiftUI views | View controllers, delegates, shared services |
Prefer structs when the data represents a value:
- API response models
- Form data
- App state snapshots
- Coordinates, sizes, dates, money-like values
- SwiftUI
Viewtypes
Use classes when you need identity or shared mutable state:
UIViewController- Delegate objects
- Shared cache/session managers
- Objects that need inheritance
- Objects with lifecycle/deinitialization behavior
Example:
struct UserProfile {
    var name: String
}

final class ImageCache {
    private var storage: [URL: UIImage] = [:]
}
Interview follow-up: Swift collections like Array, String, and Dictionary are value types but use copy-on-write internally, so copying is usually efficient until one copy is mutated.
Important nuance: a struct can contain a class reference. In that case, the struct value is copied, but the reference inside it may still point to shared mutable state.
A strong answer is:
“I use structs by default for data because value semantics reduce shared-state bugs. I use classes when I need identity, reference semantics, inheritance, Objective-C/UIKit interop, or a controlled lifecycle.”
Optional binding: if let vs guard let?
Both if let and guard let safely unwrap optionals, but they communicate different intent.
// if let — use value only inside this branch
if let name = user?.name {
    print(name)
}

// guard let — required value; exit early if missing
func greet(_ user: User?) {
    guard let name = user?.name else { return }
    print("Hello, \(name)")
}
Prefer guard let |
Prefer if let |
|---|---|
| Value is required to continue | Value is optional for one branch |
| You want early exit | You have success/failure branches |
| You want less nesting | You only need value in a small scope |
| Used in functions, handlers, validation | Used for conditional UI or optional behavior |
Example interview explanation:
func submit(user: User?) {
    guard let user else {
        showLogin()
        return
    }

    save(user)
}
Here, guard makes the happy path clear. After the guard statement, user is safely unwrapped for the rest of the function.
Avoid force unwraps in normal production paths:
// Risky
let name = user!.name
Force unwrap is acceptable only when nil is truly impossible and you can justify why, such as a storyboard outlet after view loading or a test setup where failure should crash loudly.
Implicitly unwrapped optionals like String! still appear in UIKit/Objective-C interop, but they should not be used casually.
A strong answer is:
“I use
guard letwhen the value is required and I want to exit early. I useif letwhen the optional value only matters for one conditional branch. I avoid force unwrap unless nil is impossible by design.”
What are enums with associated values good for?
Swift enums with associated values let each case carry different data.
They are useful for modeling state, events, and results safely.
enum LoadState<T> {
    case idle
    case loading
    case loaded(T)
    case failed(Error)
}
This is better than multiple unrelated booleans:
var isLoading = false
var data: [User]?
var error: Error?
With separate flags, invalid states are possible:
isLoading == trueanddata != nilerror != nilanddata != nil- Not loading, no data, no error, but unclear state
With an enum, the state is explicit:
switch state {
case .idle:
    showEmpty()
case .loading:
    showSpinner()
case .loaded(let users):
    showUsers(users)
case .failed(let error):
    showError(error)
}
Common interview use cases:
- API loading state
- Login state
- Navigation flow
- Form submission state
- Deep link handling
- Network result modeling
- UI state machines
Swift checks switch exhaustiveness, so if you add a new enum case later, the compiler can force you to handle it.
A strong answer is:
“Enums with associated values help model state clearly. Instead of juggling booleans and optional values, I can represent each valid state directly and let the compiler enforce exhaustive handling.”
What is protocol-oriented programming?
Protocol-oriented programming means designing around capabilities instead of deep inheritance trees.
A protocol defines what a type can do:
protocol FeedRepository {
    func fetchFeed() async throws -> [FeedItem]
}
Different types can conform:
struct RemoteFeedRepository: FeedRepository {
    func fetchFeed() async throws -> [FeedItem] {
        // call API
    }
}

struct MockFeedRepository: FeedRepository {
    func fetchFeed() async throws -> [FeedItem] {
        []
    }
}
Why it helps:
- Improves testability
- Supports dependency injection
- Avoids deep class inheritance
- Lets structs, classes, enums, and actors share behavior
- Makes code depend on abstraction, not concrete implementation
Protocol extensions can provide default behavior:
extension FeedRepository {
    func refresh() async throws -> [FeedItem] {
        try await fetchFeed()
    }
}
Interviewers often ask where protocols help in iOS apps:
- Mocking API clients in unit tests
- Abstracting persistence
- Swapping real services with fake services
- Building reusable view models
- Avoiding tightly coupled UIKit/SwiftUI code
Important nuance: protocol extensions are powerful, but they are not the same as overriding class methods. Dynamic dispatch behavior can differ depending on whether the method is a protocol requirement.
Also know modern Swift syntax:
some Protocolmeans one hidden concrete type chosen by the functionany Protocolmeans a boxed existential that can hold different conforming types
A strong answer is:
“Protocol-oriented programming means I define behavior with protocols and compose types around those capabilities. It helps with testability, dependency injection, and avoiding unnecessary inheritance.”
Why are generics useful in Swift?
Generics let you write reusable code without losing type safety.
func first<T>(_ items: [T]) -> T? {
    items.first
}
Without generics, you may reach for Any, which loses compile-time type information:
func first(_ items: [Any]) -> Any? {
    items.first
}
Generics are used heavily in Swift and Apple APIs:
| API | Generic meaning |
|---|---|
Array<Element> |
Array of a specific element type |
Dictionary<Key, Value> |
Key/value types are known |
Optional<Wrapped> |
Wrapped value may or may not exist |
Result<Success, Failure> |
Success and failure types are explicit |
Task<Success, Failure> |
Async task result types are known |
Generic constraints make code reusable but still safe:
func printIDs<T: Identifiable>(_ items: [T]) {
    for item in items {
        print(item.id)
    }
}
Interview follow-ups:
- Associated types in protocols
- Generic constraints with
where someopaque return typesanyexistential types- Type erasure when concrete generic types become too complex
Example answer for some vs any:
| Syntax | Meaning |
|---|---|
some View |
Function returns one specific hidden concrete type |
any FeedRepository |
Variable can hold any conforming repository type |
A strong answer is:
“Generics let me write reusable code while preserving type information. I use them when the algorithm is the same but the data type changes, and I add constraints when the generic type must provide specific behavior.”
What does Codable do and what pitfalls appear in interviews?
Codable is a type alias for Encodable and Decodable.
It lets Swift types convert to and from formats such as JSON or property lists.
struct UserDTO: Codable {
    let id: UUID
    let name: String
    let joinedAt: Date
}
Common JSON decoding:
let decoder = JSONDecoder()
decoder.dateDecodingStrategy = .iso8601

let user = try decoder.decode(UserDTO.self, from: data)
Common interview pitfalls:
| Problem | Solution |
|---|---|
| JSON key does not match Swift property | Use CodingKeys |
| Snake case keys | Use keyDecodingStrategy carefully |
| Date format mismatch | Set dateDecodingStrategy |
| Missing optional field | Use optional property or decodeIfPresent |
| Missing required field | Let decoding fail or provide custom decoding |
| API model differs from app model | Use DTO → domain mapping |
| Backend changes response shape | Add backward-compatible decoding |
| Huge payload | Decode only needed fields or redesign API |
Example key mapping:
struct UserDTO: Codable {
    let userID: Int
    let fullName: String

    enum CodingKeys: String, CodingKey {
        case userID = "user_id"
        case fullName = "full_name"
    }
}
A strong answer should not say “Codable always handles JSON automatically.” It handles simple cases well, but real APIs often need custom keys, date strategies, optional handling, and version-tolerant decoding.
For production apps, consider separating:
- DTO model — matches API response
- Domain model — matches app business logic
- View model — matches screen needs
A strong answer is:
“Codable gives type-safe encoding and decoding, but real APIs need careful handling of key names, dates, missing fields, and DTO-to-domain mapping. I do not let backend JSON shape leak everywhere into the app.”
Value type vs reference type — practical interview angle?
The practical difference is how changes spread through the app.
A value type gives each variable its own independent value.
struct Settings {
    var theme: String
}

var a = Settings(theme: "Light")
var b = a
b.theme = "Dark"

print(a.theme) // Light
print(b.theme) // Dark
A reference type lets multiple variables point to the same instance.
final class SettingsStore {
    var theme = "Light"
}

let a = SettingsStore()
let b = a
b.theme = "Dark"

print(a.theme) // Dark
print(b.theme) // Dark
Why interviewers care:
- Value types reduce accidental shared mutation
- Reference types are useful for shared identity
- Classes are managed by ARC
- Reference cycles can cause memory leaks
- Value semantics make state easier to reason about
- Reference semantics are often needed for delegates, controllers, caches, and long-lived services
In SwiftUI, View types are structs because the view is a description of UI for a given state. Long-lived state usually belongs in a model object, observable type, actor, or service.
Modern SwiftUI note:
- Older apps often use
ObservableObjectwith@Published - Newer SwiftUI code may use the Observation framework with
@Observable
Value vs reference also affects concurrency. Value types are often easier to pass safely, while shared mutable class instances need more care. Actors are reference types but protect their mutable state through actor isolation.
A strong answer is:
“Value types are best when I want predictable independent state. Reference types are best when identity, shared lifecycle, or shared mutable state matters. In iOS, I use value models for data and reference types for controllers, services, delegates, actors, and observable state owners.”
Memory management and ARC
How does ARC work in Swift?
ARC means Automatic Reference Counting. Swift uses ARC to manage the memory of class instances.
When something holds a strong reference to a class instance, ARC keeps that instance alive. When the last strong reference goes away, ARC deallocates the instance and calls deinit.
final class UserSession {
    deinit {
        print("UserSession deallocated")
    }
}

var session: UserSession? = UserSession()
session = nil // deinit runs when no strong references remain
Important points:
- Strong references are the default
- ARC is deterministic, unlike garbage collection
deinitruns when the last strong reference is released- Structs and enums are value types, not ARC-managed class instances
- Reference cycles can prevent
deinitfrom running weakandunownedreferences help break cycles
Common retain cycle:
final class Parent {
    var child: Child?
}

final class Child {
    var parent: Parent?
}
If both references are strong, neither object can be released.
Fix:
final class Child {
    weak var parent: Parent?
}
Interviewers do not only want the definition of ARC. They want to know whether you understand why memory leaks still happen in Swift.
ARC is automatic, but it is not magic. It cannot automatically solve strong reference cycles.
A strong answer is:
“ARC tracks strong references to class instances. When the last strong reference goes away, the object is deallocated. The main risk is a retain cycle, so I use
weakorunownedwhere ownership should not be strong.”
Weak vs unowned — when to use each?
Use weak and unowned to avoid strong reference cycles, but they have different safety rules.
| Area | weak |
unowned |
|---|---|---|
| Keeps object alive? | No | No |
| Becomes nil? | Yes | No |
| Type | Optional | Usually non-optional |
| Safety | Safer default | Can crash if object is gone |
| Common use | Delegates, closures, parent references | Same lifetime guaranteed |
| Risk | Need optional handling | Runtime crash if assumption is wrong |
Use weak when the referenced object may be deallocated first.
protocol LoginViewControllerDelegate: AnyObject {
    func loginDidFinish()
}

final class LoginViewController: UIViewController {
    weak var delegate: LoginViewControllerDelegate?
}
Use [weak self] in escaping closures when the closure may outlive the object.
network.fetchUser { [weak self] result in
    guard let self else { return }
    self.handle(result)
}
Use unowned only when the referenced object is guaranteed to live at least as long as the reference.
final class Customer {
    let card: CreditCard

    init(card: CreditCard) {
        self.card = card
    }
}

final class CreditCard {
    unowned let customer: Customer

    init(customer: Customer) {
        self.customer = customer
    }
}
In real app code, weak is usually the safer interview answer unless you can clearly prove the lifetime relationship.
Avoid this unless justified:
api.load { [unowned self] in
    self.updateUI()
}
If the view controller is dismissed before the API finishes, this can crash.
A strong answer is:
“I use
weakwhen the reference can become nil, such as delegates and escaping closures. I useunownedonly when the other object is guaranteed to outlive the reference. If I cannot prove that lifetime, I chooseweak.”
How do you find and fix a retain cycle?
A retain cycle happens when two or more objects keep each other alive through strong references.
Common sources:
- Closure captures
selfstrongly - Parent holds child and child holds parent
- Delegate is strong instead of weak
TimerorCADisplayLinkretains its target- ViewModel owns a callback that captures ViewController
- Combine subscription captures
selfand is stored byself - Long-running async task keeps an object alive unexpectedly
Example closure cycle:
final class ProfileViewModel {
    var onUpdate: (() -> Void)?

    func refresh() {
        onUpdate?()
    }
}

final class ProfileViewController: UIViewController {
    let viewModel = ProfileViewModel()

    override func viewDidLoad() {
        super.viewDidLoad()

        viewModel.onUpdate = {
            self.updateUI()
        }
    }
}
Here, the view controller owns the view model. The view model owns the closure. The closure owns self.
Fix:
viewModel.onUpdate = { [weak self] in
    self?.updateUI()
}
For delegates:
weak var delegate: SomeDelegate?For timers:
- Invalidate the timer
- Use a weak target pattern
- Use closure-based APIs carefully with
[weak self]
How to verify:
- Add
deinitlogs during debugging - Use Xcode Memory Graph Debugger
- Use Instruments Leaks/Allocations
- Navigate away from the screen and confirm objects deallocate
- Check whether view controllers remain in memory after dismissal
Interview scenario answer:
“If a dismissed view controller is not deallocated, I would check closures, delegates, timers, and subscriptions. Then I would verify the fix with Memory Graph or Instruments, not just assume
[weak self]solved it.”
A strong answer is:
“I find retain cycles by checking objects that should deallocate but do not. I usually inspect closures, delegates, timers, and subscriptions, then fix ownership with
weak, cleanup, or cancellation, and verify using Xcode Memory Graph or Instruments.”
What is copy-on-write (COW)?
Copy-on-write is an optimization used by Swift value types such as Array, String, Dictionary, and Set.
The idea is simple:
- Two values can share the same underlying storage
- As long as nobody mutates, no real copy is needed
- When one value mutates, Swift makes a separate copy if storage is shared
Example:
var a = [1, 2, 3]
var b = a        // storage can be shared

b.append(4)      // copy happens before mutation if needed

print(a)         // [1, 2, 3]
print(b)         // [1, 2, 3, 4]
Why it matters:
- Value semantics stay predictable
- Large values are not always copied immediately
- Performance stays good for many common cases
- Mutation can still trigger a real copy
Interviewers may ask this because candidates often say “structs are always copied.” That is conceptually true at the value level, but Swift can optimize storage internally.
Senior follow-up: custom COW types can use reference storage internally and check uniqueness before mutation.
isKnownUniquelyReferenced(&storage)If storage is uniquely referenced, mutate it directly. If not, copy the storage first.
Common performance note:
- Passing arrays around is usually cheap
- Repeated mutation of shared storage can become expensive
- Large structs with reference-type properties need careful design
- Copy-on-write is an implementation optimization, not a reason to ignore data ownership
A strong answer is:
“Copy-on-write lets Swift value types share storage until mutation. It preserves value semantics while avoiding unnecessary copies, but mutation of shared storage can still trigger a real copy.”
Architecture and design patterns
MVC vs MVVM on iOS?
iOS apps have historically used MVC, but many production teams use MVVM or related patterns to keep screens testable and maintainable.
| Pattern | Practical meaning on iOS |
|---|---|
| MVC | Model, View, ViewController |
| MVVM | View, ViewModel, Model |
| VIPER / Clean | More layers for large teams and strict boundaries |
| TCA / Redux-like | State/action-driven architecture, often SwiftUI-friendly |
In Apple-style MVC:
- Model holds data/business rules
- View displays UI
- ViewController coordinates the view and model
The problem is that UIViewController often becomes too large. It may handle:
- View lifecycle
- API calls
- Formatting
- Validation
- Navigation
- Error handling
- Analytics
- Table/collection delegates
This is why people joke that MVC becomes “Massive View Controller.”
MVVM helps by moving presentation logic into a ViewModel.
@Observable
final class ProfileViewModel {
    var name = ""
    var isLoading = false

    func load() async {
        // fetch and map data for the view
    }
}
SwiftUI works naturally with observable state. UIKit teams also use MVVM, often with closures, delegates, Combine, async/await, or coordinators.
Use MVVM for:
- Testable presentation logic
- Screens with loading/error/content states
- API-backed screens
- Complex form validation
- Shared UI state
But do not over-architect tiny screens. The pattern should reduce complexity, not add ceremony.
A strong answer is:
“MVC is common in UIKit, but ViewControllers can become too large. I use MVVM when moving presentation state and formatting into a testable ViewModel improves maintainability. For larger apps, I choose architecture based on team size, testing needs, and navigation complexity.”
What is the delegate pattern and where is it used?
The delegate pattern lets one object hand off responsibility to another object through a protocol.
It is common in UIKit and Apple frameworks.
Examples:
UITableViewDelegateUICollectionViewDelegateURLSessionDelegateCLLocationManagerDelegateUITextFieldDelegate
Simple example:
protocol LoginViewControllerDelegate: AnyObject {
    func loginViewControllerDidFinish(_ controller: LoginViewController)
}

final class LoginViewController: UIViewController {
    weak var delegate: LoginViewControllerDelegate?

    func didTapDone() {
        delegate?.loginViewControllerDidFinish(self)
    }
}
Why weak?
The parent often owns the child view controller. If the child strongly owns its delegate, both can keep each other alive.
weak var delegate: LoginViewControllerDelegate?Delegates are good for:
- One-to-one communication
- Parent-child screen callbacks
- Custom UI components
- Framework callbacks
- Situations where the receiver should be explicit and typed
Delegate limitations:
- Usually only one receiver
- Can become verbose
- Not ideal for broadcasting global app events
- Too many delegate methods can make APIs heavy
SwiftUI uses fewer UIKit delegates for UI, but delegate patterns still matter because many system frameworks and UIKit APIs use them heavily.
A strong answer is:
“A delegate is a typed one-to-one callback relationship defined by a protocol. I usually make delegates weak to avoid retain cycles, and I use them for parent-child UI communication or framework callbacks.”
Delegates vs NotificationCenter?
Delegates and NotificationCenter are both communication patterns, but they solve different problems.
| Area | Delegate | NotificationCenter |
|---|---|---|
| Relationship | Usually one-to-one | One-to-many broadcast |
| Type safety | Strong protocol methods | Notification name + payload |
| Coupling | More direct | Looser |
| Traceability | Easier to follow | Can become hard to trace |
| Common use | Parent-child callbacks, UI events | App-wide events |
| Return value | Possible through delegate method | No direct response |
Use a delegate when one specific object should handle an event.
delegate?.loginViewControllerDidFinish(self)Use NotificationCenter when many parts of the app may need to react to the same event.
NotificationCenter.default.post(name: .userDidLogout, object: nil)Good NotificationCenter use cases:
- User logged out
- Theme changed
- Language changed
- App-wide data refresh needed
- System notifications
Bad use cases:
- Passing data between two closely related screens
- Replacing clear dependency flow
- Creating hidden app-wide event spaghetti
- Using raw string names everywhere
Safer pattern:
extension Notification.Name {
    static let userDidLogout = Notification.Name("userDidLogout")
}
Modern alternatives:
- Combine publishers
- Async sequences
- SwiftUI environment/state
- Direct dependency injection
- Store/action-based architecture
A strong answer is:
“I use delegates for typed one-to-one communication and NotificationCenter for one-to-many broadcasts. I avoid NotificationCenter for normal screen-to-screen data flow because it can hide dependencies and become difficult to debug.”
How do you do dependency injection on iOS?
Dependency injection means a type receives its dependencies instead of creating them internally.
This improves:
- Testability
- Reusability
- Loose coupling
- Mocking/faking in tests
- Clear ownership
Prefer initializer injection for required dependencies.
protocol FeedRepository {
    func fetchFeed() async throws -> [FeedItem]
}

final class FeedViewModel {
    private let repository: FeedRepository

    init(repository: FeedRepository) {
        self.repository = repository
    }
}
In tests:
struct MockFeedRepository: FeedRepository {
    func fetchFeed() async throws -> [FeedItem] {
        [FeedItem(title: "Test")]
    }
}
Common DI styles on iOS:
| Approach | Use case |
|---|---|
| Initializer injection | Required dependencies |
| Property injection | Optional dependencies or UIKit storyboard cases |
| Factory/builder | Screen construction |
| SwiftUI environment | Shared app-level dependencies |
| Protocol abstraction | Testing and swapping implementations |
| DI container | Large modular apps |
Avoid creating dependencies inside the object when they need to be mocked.
// Harder to test
final class FeedViewModel {
    private let repository = RemoteFeedRepository()
}
Better:
final class FeedViewModel {
    private let repository: FeedRepository

    init(repository: FeedRepository) {
        self.repository = repository
    }
}
Singletons are not always wrong, but they should be used carefully. A global singleton can make tests order-dependent and hide dependencies.
Use singletons only for truly global system-like services or when the framework already exposes one, such as UserDefaults.standard or NotificationCenter.default.
A strong answer is:
“I prefer initializer injection with protocols because it makes dependencies explicit and easy to replace in tests. I use factories or SwiftUI environment for app wiring, and I avoid unnecessary singletons because they hide dependencies.”
What is the coordinator pattern?
The coordinator pattern moves navigation logic out of view controllers.
In UIKit, a coordinator usually owns a navigation controller and decides which screen comes next.
final class AppCoordinator {
    private let navigationController: UINavigationController

    init(navigationController: UINavigationController) {
        self.navigationController = navigationController
    }

    func start() {
        showLogin()
    }

    private func showLogin() {
        let viewController = LoginViewController()
        viewController.delegate = self
        navigationController.pushViewController(viewController, animated: true)
    }
}
Without a coordinator, view controllers often know too much:
- Which screen comes next
- How to create the next screen
- Which dependencies the next screen needs
- How to handle login/logout flow
- How to switch tabs or reset navigation
With a coordinator:
- ViewControllers stay focused on UI
- Navigation flow is easier to test
- Deep flows are easier to manage
- Screen creation is centralized
- Dependencies can be injected during screen construction
Common coordinator structure:
AppCoordinator
  LoginCoordinator
  MainTabCoordinator
  SettingsCoordinator
UIKit use cases:
- Login/onboarding flows
- Checkout flows
- Multi-step forms
- Deep navigation graphs
- Apps with many screens
SwiftUI does not usually use the classic UIKit coordinator in the same way. Similar goals can be achieved with:
NavigationStackNavigationPath- Router object
- Enum-based routes
- Observable navigation state
Example SwiftUI route idea:
enum Route: Hashable {
    case profile(User.ID)
    case settings
}
Then navigation state can be driven by a path/router.
Coordinator trade-off:
- Helpful for complex navigation
- Extra ceremony for small apps
- Can become another “god object” if not split by flow
A strong answer is:
“A coordinator owns navigation flow so view controllers do not create and push every next screen themselves. I use it in UIKit apps with complex navigation, while in SwiftUI I usually model similar routing with
NavigationStack, routes, and navigation state.”
UIKit essentials
UIKit view controller lifecycle — what matters in interviews?
UIKit view controller lifecycle questions test whether you know where to put setup, refresh, layout, and cleanup code.
| Method | When it runs | Common use |
|---|---|---|
loadView |
When creating the view manually | Build root view without storyboard/xib |
viewDidLoad |
Once after view is loaded | One-time setup, constraints, bindings |
viewWillAppear |
Before view appears each time | Refresh visible state, navigation bar setup |
viewIsAppearing |
While the view is being added | Appearance-related updates with safer timing |
viewDidAppear |
After view is visible | Start animations, analytics, focus |
viewWillDisappear |
Before leaving screen | Pause work, save draft state |
viewDidDisappear |
After leaving screen | Stop expensive work, cancel tasks |
viewDidLayoutSubviews |
After layout updates frames | Frame-dependent work only |
Example:
override func viewDidLoad() {
    super.viewDidLoad()
    setupViews()
    setupConstraints()
    bindViewModel()
}

override func viewWillAppear(_ animated: Bool) {
    super.viewWillAppear(animated)
    refreshIfNeeded()
}

override func viewDidDisappear(_ animated: Bool) {
    super.viewDidDisappear(animated)
    task?.cancel()
}
Common mistakes:
- Doing heavy synchronous work in
viewDidLoad - Starting network work without cancellation
- Adding constraints repeatedly in
viewDidLayoutSubviews - Assuming
viewDidLoadruns every time the screen appears - Updating UI from a background thread
- Not handling repeated appearances after tab switch or navigation pop
Where to put common work:
| Work | Better place |
|---|---|
| One-time UI setup | viewDidLoad |
| Navigation bar appearance | viewWillAppear |
| Analytics screen event | viewDidAppear |
| Cancel async task | viewWillDisappear or viewDidDisappear |
| Frame-based corner radius/shadow path | viewDidLayoutSubviews |
| Data refresh every time screen opens | viewWillAppear or ViewModel trigger |
Senior-level topics:
- State restoration
- Memory pressure handling
- Task cancellation when screen disappears
- Avoiding retain cycles from closures started in lifecycle methods
- Difference between view loading and view appearing
A strong answer is:
“I use
viewDidLoadfor one-time setup, appearance callbacks for refresh and analytics,viewDidLayoutSubviewsonly for frame-dependent layout work, and disappearance callbacks to pause or cancel work.”
How does UITableView reuse work?
UITableView reuses cells for performance. Instead of creating a new cell for every row, the table view keeps a reuse pool and gives you a recycled cell when needed.
let cell = tableView.dequeueReusableCell(
    withIdentifier: "ItemCell",
    for: indexPath
) as! ItemCell

cell.configure(with: items[indexPath.row])
return cell
Why reuse matters:
- Smooth scrolling
- Lower memory use
- Fewer view allocations
- Better battery/performance
Important rule: always configure the full cell state.
A reused cell may still contain old state from a previous row, so reset values such as:
- Image
- Text
- Selection state
- Loading indicator
- Hidden labels
- Accessory type
- Async image task
Example:
final class ItemCell: UITableViewCell {
    override func prepareForReuse() {
        super.prepareForReuse()
        titleLabel.text = nil
        thumbnailView.image = nil
        imageTask?.cancel()
        imageTask = nil
    }
}
Modern table updates often use diffable data sources instead of manually calling many insert/delete/reload methods.
var snapshot = NSDiffableDataSourceSnapshot<Section, Item>()
snapshot.appendSections([.main])
snapshot.appendItems(items)
dataSource.apply(snapshot, animatingDifferences: true)
Diffable data sources help avoid common update crashes like:
Invalid update: invalid number of rows in sectionFor image-heavy lists, also know prefetching:
UITableViewDataSourcePrefetching- Start image/data loading before row appears
- Cancel prefetch when row is no longer likely to appear
- Avoid updating a reused cell with an old async result
Common async image bug:
// Bad if cell is reused before image returns
cell.imageView.image = downloadedImage
Better: verify the cell still represents the same model before applying the image.
A strong answer is:
“Table views reuse cells to keep scrolling fast. I fully configure cells every time, reset state in
prepareForReuse, cancel old async work, and use diffable data sources for safer list updates.”
Auto Layout — intrinsic content size and constraints?
Auto Layout calculates view positions and sizes from constraints.
Important concepts:
| Concept | Meaning |
|---|---|
| Constraint | Relationship between views or anchors |
| Intrinsic content size | Natural size of a view, such as label text size |
| Content hugging | How strongly a view resists growing |
| Compression resistance | How strongly a view resists shrinking |
| Safe area | Area not covered by notch, home indicator, bars |
| Priority | Strength of a constraint |
| Ambiguous layout | Not enough constraints to determine layout |
| Unsatisfiable layout | Conflicting constraints |
Example programmatic constraints:
NSLayoutConstraint.activate([
    titleLabel.topAnchor.constraint(equalTo: view.safeAreaLayoutGuide.topAnchor, constant: 16),
    titleLabel.leadingAnchor.constraint(equalTo: view.leadingAnchor, constant: 16),
    titleLabel.trailingAnchor.constraint(equalTo: view.trailingAnchor, constant: -16)
])
For Auto Layout in code, remember:
titleLabel.translatesAutoresizingMaskIntoConstraints = falseIntrinsic content size example:
- A
UILabelknows its natural size from its text and font - A
UIButtonknows its natural size from title and content insets - An image view may need explicit width/height if image size is not enough
Content hugging vs compression resistance:
| Priority | Question it answers |
|---|---|
| Content hugging | Which view should avoid growing? |
| Compression resistance | Which view should avoid shrinking? |
Common interview debugging points:
- Check console for constraint conflict logs
- Use Debug View Hierarchy
- Add identifiers to constraints
- Look for missing width/height or edge constraints
- Avoid adding duplicate constraints repeatedly
- Use safe area instead of hardcoding top/bottom offsets
Do not create constraints repeatedly inside viewDidLayoutSubviews. That method can run many times.
Use viewDidLayoutSubviews only when actual frames are needed, such as:
- Updating shadow path
- Applying frame-based gradients
- Adjusting rounded corners based on final size
A strong answer is:
“Auto Layout solves constraints to determine size and position. I use intrinsic content size, hugging, compression resistance, priorities, and safe areas to build adaptive layouts, and I debug conflicts with the console and View Hierarchy.”
Storyboards vs programmatic UI — trade-offs?
Storyboards and programmatic UI are both valid. A good interview answer should discuss team workflow, not personal religion.
| Storyboards | Programmatic UI |
|---|---|
| Visual layout | Code-reviewed layout |
| Fast for simple screens | Better for reusable components |
| Useful for small teams/prototypes | Better for large teams and Git merges |
| Segues visible | Navigation is explicit in code |
| Merge conflicts can be painful | More verbose |
| Harder to refactor at scale | Easier to search and modularize |
Storyboards are useful when:
- The team is comfortable with Interface Builder
- Screens are simple
- Designers/developers benefit from visual layout
- Legacy UIKit app already uses storyboards
Programmatic UI is useful when:
- Many developers work on the same screens
- You need reusable components
- You want easier code review
- You want fewer merge conflicts
- UI is built dynamically
- Architecture uses coordinators/factories
SwiftUI changes the discussion because it is declarative and code-first:
struct ProfileView: View {
    var body: some View {
        VStack {
            Text("Profile")
            Button("Edit") {}
        }
    }
}
Many modern apps mix approaches:
- UIKit legacy screens
- SwiftUI for new features
UIHostingControllerto embed SwiftUI inside UIKitUIViewRepresentableto use UIKit views inside SwiftUI
A strong senior answer should include migration reality. Most teams do not rewrite a stable storyboard app just because programmatic UI is fashionable.
A strong answer is:
“Storyboards are good for visual simple flows, while programmatic UI is better for large teams, reusable components, and code review. I choose based on team workflow, app size, and existing codebase—not ideology.”
SwiftUI
SwiftUI vs UIKit — when would you choose each in 2026?
SwiftUI and UIKit can coexist in the same iOS app.
| SwiftUI | UIKit |
|---|---|
| Declarative UI | Imperative UI |
| Fast for new screens | Mature and battle-tested |
| Great with state-driven UI | Fine-grained control |
| Less boilerplate | More APIs and legacy support |
| Strong for forms/settings/lists | Strong for complex custom interactions |
| Natural with Observation/concurrency | Common in older enterprise apps |
Choose SwiftUI for:
- New greenfield screens
- Forms, settings, dashboards, lists
- State-driven UI
- Faster iteration
- Multi-platform UI where practical
- Teams already targeting modern iOS versions
Choose UIKit for:
- Existing UIKit apps
- Complex custom transitions
- Heavy collection/table customization
- Mature third-party UIKit SDKs
- Features where SwiftUI API support is still limiting
- Very fine-grained layout/gesture control
Interop is important:
// Embed SwiftUI in UIKit
let controller = UIHostingController(rootView: ProfileView())// Wrap UIKit for SwiftUI
struct CameraPreview: UIViewRepresentable {
func makeUIView(context: Context) -> UIView { UIView() }
func updateUIView(_ uiView: UIView, context: Context) {}
}A practical answer: use SwiftUI for new features when deployment target and team skill allow it, but keep UIKit where the existing app or required behavior makes it the safer choice.
A strong answer is:
“I prefer SwiftUI for new state-driven screens, but I still use UIKit for legacy apps, complex custom UI, or APIs where UIKit gives better control. In real apps, I often mix both using
UIHostingControllerand representable wrappers.”
@State vs @StateObject vs @ObservedObject vs @EnvironmentObject?
SwiftUI property wrappers define who owns the state and how changes update the view.
| Wrapper | Owns data? | Best use |
|---|---|---|
@State |
View owns simple local state | Toggle, text input, selected tab |
@Binding |
Parent owns state | Child edits parent state |
@StateObject |
View creates and owns ObservableObject |
Legacy ViewModel lifecycle |
@ObservedObject |
External owner provides object | Passed-in legacy ViewModel |
@EnvironmentObject |
Ancestor injects shared object | App/session-wide shared state |
@Environment |
Reads environment value | Theme, locale, dependencies |
Example local state:
@State private var isExpanded = falseLegacy ObservableObject ownership:
@StateObject private var viewModel = ProfileViewModel()Passed-in object:
@ObservedObject var viewModel: ProfileViewModelCommon bug:
// Bad: new object can be recreated with view updates
@ObservedObject var viewModel = ProfileViewModel()
If the view creates the object, use @StateObject in the older ObservableObject model.
Modern Observation note:
With the newer @Observable macro, many simple models can be owned with @State instead of @StateObject.
@Observable
final class ProfileModel {
    var name = ""
}

struct ProfileView: View {
    @State private var model = ProfileModel()

    var body: some View {
        Text(model.name)
    }
}
Use @EnvironmentObject carefully. It is convenient, but hidden dependencies can make previews and tests fail if the object is not injected.
A strong answer is:
“The key is ownership.
@Stateis local value state,@Bindingedits parent state,@StateObjectowns a legacy observable object,@ObservedObjectobserves an externally owned object, and@EnvironmentObjectis shared from an ancestor.”
Why are SwiftUI Views structs?
SwiftUI views are structs because they are lightweight descriptions of UI for a given state.
They are not long-lived view objects like UIView.
struct ProfileView: View {
    let name: String

    var body: some View {
        Text(name)
    }
}
When state changes, SwiftUI can recreate the view value and compare/update the underlying rendered UI efficiently.
Important interview points:
bodycan be evaluated many times- Views should be cheap to create
- Do not store long-lived business state directly in a view struct
- Avoid expensive work inside
body - Put async work in
.task, services, or ViewModels - Use stable identity in lists
Bad pattern:
var body: some View {
    Text(expensiveCalculation())
}
Better:
- Precompute in model/ViewModel
- Use cached state
- Use
@State,@Observable, or a ViewModel - Extract subviews for clarity
- Use
.taskfor async loading
View identity matters:
ForEach(users, id: \.id) { user in
    UserRow(user: user)
}
Avoid unstable IDs like UUID() generated inside body, because they make SwiftUI think every item is new.
A strong answer is:
“SwiftUI views are structs because they are cheap descriptions of UI, not persistent UI objects. Persistent state belongs in state properties, models, or ViewModels, and
bodyshould stay lightweight.”
SwiftUI performance pitfalls?
SwiftUI performance issues often come from unstable identity, excessive observation, heavy body work, or too much work on the main actor.
| Pitfall | Better approach |
|---|---|
Expensive work in body |
Move to model/ViewModel, cache, or compute once |
Unstable IDs in ForEach |
Use stable model IDs |
| One huge view | Extract smaller views |
| Over-observation | Split observable state by feature/screen |
| Network/image work on main thread | Use async APIs and update UI on main actor |
| Too many updates from parent state | Move state closer to where it is used |
| Large lists without lazy containers | Use List, LazyVStack, pagination |
| Recreating objects in body | Own them with the right state wrapper |
Bad identity example:
ForEach(items, id: \.self) { item in
    Row(item: item)
}
This can be okay for simple stable values, but for models, prefer stable IDs.
ForEach(items, id: \.id) { item in
    Row(item: item)
}
Bad body example:
var body: some View {
    List(viewModel.sortAndFilter(items)) { item in
        Row(item: item)
    }
}
Better:
- Store sorted/filtered data in model state
- Use a computed value only if it is cheap
- Recalculate when inputs change, not every render
- Use pagination for large data sets
Useful tools:
- Instruments
- SwiftUI performance/hitches profiling
- Time Profiler
- Memory Graph
- OSLog/signposts for expensive flows
Senior-level point: performance is often about state design. If one global object changes and many views observe it, SwiftUI may update more UI than necessary.
A strong answer is:
“I keep SwiftUI views lightweight, use stable identity, avoid expensive
bodywork, split observable state, and profile with Instruments instead of guessing.”
Concurrency and threading
GCD vs async/await — what do you say in 2026?
GCD and Swift structured concurrency both handle async work, but they have different programming models.
| GCD | async/await |
|---|---|
| Queue-based | Task-based |
| Callback style | Linear async code |
| Manual dispatch to queues | Suspension with await |
| Harder cancellation flow | Structured cancellation support |
| Easy to create callback pyramids | Easier error propagation |
| Legacy and still common | Preferred for modern Swift |
GCD example:
DispatchQueue.global().async {
    let data = loadData()

    DispatchQueue.main.async {
        self.updateUI(data)
    }
}
Modern async/await:
func loadFeed() async throws -> [Post] {
    let (data, _) = try await URLSession.shared.data(from: url)
    return try JSONDecoder().decode([Post].self, from: data)
}
Calling from UI:
Task {
    do {
        posts = try await service.loadFeed()
    } catch {
        errorMessage = error.localizedDescription
    }
}
Still know GCD because many older apps and SDKs use:
DispatchQueue.main.async- Completion handlers
- Operation queues
- Legacy callback APIs
Modern answer should include:
- Use async/await for new code
- Use actors for shared mutable state
- Use
@MainActorfor UI state - Use continuations to bridge callback APIs
- Use GCD when working with legacy code or low-level queue control
A strong answer is:
“I prefer async/await for new Swift code because it gives clearer control flow, error handling, and cancellation. I still understand GCD because older iOS code and some APIs use queues and callbacks.”
What is @MainActor and why does it matter?
@MainActor is a global actor used to isolate code that must run on the main actor, which is where UI updates should happen.
@MainActor
final class FeedViewModel: ObservableObject {
    @Published var posts: [Post] = []
    @Published var isLoading = false

    func load() async {
        isLoading = true
        defer { isLoading = false }

        do {
            posts = try await service.fetchPosts()
        } catch {
            posts = []
        }
    }
}
Why it matters:
- UI state should be updated on the main actor
- Prevents accidental background UI updates
- Replaces scattered
DispatchQueue.main.async - Makes thread expectations visible in the type system
- Helps with Swift concurrency safety
You can mark:
- A class
- A method
- A property
- A closure
- A ViewModel that owns UI state
Example method-only annotation:
@MainActor
func apply(_ posts: [Post]) {
    self.posts = posts
}
Common mistake:
Task.detached {
    self.posts = posts // unsafe for UI state
}
Better:
Task {
    let posts = try await service.fetchPosts()
    await MainActor.run {
        self.posts = posts
    }
}
If the whole ViewModel is @MainActor, you usually do not need scattered MainActor.run calls for its properties.
Senior nuance: do not put heavy CPU work on the main actor. Do background work outside, then return to the main actor only to update UI state.
A strong answer is:
“
@MainActorisolates UI-related code to the main actor. I use it for ViewModels and UI state so updates are safe and explicit, while keeping heavy work off the main actor.”
What is an actor in Swift?
An actor is a reference type that protects its mutable state from data races.
Only one task at a time can access actor-isolated mutable state.
actor ImageCache {
    private var storage: [URL: Data] = [:]

    func data(for url: URL) -> Data? {
        storage[url]
    }

    func insert(_ data: Data, for url: URL) {
        storage[url] = data
    }
}
Using the actor:
let cache = ImageCache()

await cache.insert(data, for: url)
let cached = await cache.data(for: url)
Why actors matter:
- Safer shared mutable state
- Compiler-enforced isolation
- Less manual locking
- Better fit with async/await
- Helpful for caches, managers, and background state
Actor vs class with lock:
| Class + lock | Actor |
|---|---|
| Manual locking | Compiler-enforced isolation |
| Easy to forget lock | Access requires await from outside |
| Risk deadlocks | Safer state access |
| More boilerplate | Clear concurrency model |
Important nuance: actors are reentrant. When an actor method hits an await, other work may run on that actor before the original method resumes.
actor BankAccount {
    var balance = 100

    func withdraw(_ amount: Int) async -> Bool {
        guard balance >= amount else { return false }
        await logWithdrawal(amount)
        balance -= amount
        return true
    }
}
The await can allow interleaving. For critical state, update state before suspension or re-check after suspension.
A strong answer is:
“An actor is a reference type that serializes access to its isolated state. I use actors for shared mutable state instead of manually locking, but I remember that actor methods can be reentrant across
awaitpoints.”
What is Sendable and why does Swift 6 matter?
Sendable marks values that are safe to pass across concurrency boundaries, such as tasks and actors.
A type is sendable when it can be safely used from concurrent code without causing data races.
Examples usually safe:
- Immutable value types
- Structs whose stored properties are also
Sendable - Enums with sendable associated values
- Actors
- Carefully designed final classes
Example:
struct User: Sendable {
    let id: UUID
    let name: String
}
Classes need more care because they can hold shared mutable state.
final class Counter: @unchecked Sendable {
    private let lock = NSLock()
    private var value = 0
}
@unchecked Sendable means you promise the compiler that the type is safe. Use it sparingly because the compiler will not fully verify your claim.
Why Swift 6 matters:
Swift 6 language mode makes concurrency checking stricter. Code that only produced warnings in earlier modes may become errors when unsafe sharing crosses actor/task boundaries.
Common migration fixes:
- Add
@MainActorto UI-facing types - Make DTOs and value models
Sendable - Avoid capturing mutable non-sendable state in concurrent closures
- Replace shared mutable classes with actors
- Use
nonisolatedcarefully for safe actor members - Bridge legacy callbacks with continuations
- Enable strict checking per module instead of fixing everything at once
Common interview scenario:
“We turned on stricter concurrency checks and many warnings appeared around ViewModels, delegates, and shared services. I fixed UI state with
@MainActor, converted simple models toSendable, and moved shared mutable caches behind actors.”
A strong answer is:
“
Sendabletells Swift a value can safely cross concurrency boundaries. Swift 6 matters because stricter concurrency checking forces unsafe shared mutable state to be fixed instead of silently becoming a data race.”
Task, async let, and TaskGroup?
Swift gives different tools for different async needs.
| Tool | Use |
|---|---|
Task { } |
Start async work from synchronous context |
Task.detached { } |
Unstructured work not inheriting current actor/task context |
async let |
Fixed number of parallel child tasks |
withTaskGroup |
Dynamic number of child tasks |
withThrowingTaskGroup |
Dynamic child tasks that can throw |
Task example:
Task {
    await viewModel.load()
}
async let example for a fixed number of parallel calls:
async let users = fetchUsers()
async let posts = fetchPosts()

let feed = try await Feed(users: users, posts: posts)
Task group for dynamic parallel work:
let images = await withTaskGroup(of: UIImage?.self) { group in
    for url in urls {
        group.addTask {
            await loadImage(url)
        }
    }

    var result: [UIImage] = []

    for await image in group {
        if let image {
            result.append(image)
        }
    }

    return result
}
Structured concurrency means child tasks are tied to the parent scope. This helps with:
- Cancellation
- Error propagation
- Avoiding orphan tasks
- Reasoning about task lifetime
Important caution:
Task.detached does not inherit the same actor context or priority in the same way. Avoid it for normal UI work unless you know why you need it.
Screen-level example:
- Start load in
.taskorTask - If the screen disappears, task can be cancelled
- Check cancellation in long-running work
- Do not update UI after cancellation
A strong answer is:
“I use
Taskto start async work,async letfor a fixed number of parallel operations, and task groups for dynamic parallel work. I prefer structured concurrency because child task lifetime and cancellation are easier to reason about.”
What are checked continuations?
Checked continuations bridge callback-based APIs into async/await.
Legacy callback API:
func fetchLegacy(completion: @escaping (Result<Data, Error>) -> Void) {
    // older SDK callback
}
Async wrapper:
func fetchLegacyAsync() async throws -> Data {
    try await withCheckedThrowingContinuation { continuation in
        fetchLegacy { result in
            continuation.resume(with: result)
        }
    }
}
Use:
| API | Use |
|---|---|
withCheckedContinuation |
Callback returns success value only |
withCheckedThrowingContinuation |
Callback can return error |
withUnsafeContinuation |
Lower-level, fewer runtime checks |
Why “checked” matters:
- Helps detect double resume bugs
- Helps detect paths where continuation is never resumed
- Safer for migrations from callback code
Common mistakes:
// Bug: continuation may resume twice
completionA = {
    continuation.resume(returning: data)
}

completionB = {
    continuation.resume(returning: otherData)
}
A continuation must be resumed exactly once.
Also handle cancellation if the underlying API supports it. For example, if you wrap a network task, store the task and cancel it when the Swift task is cancelled.
Good use cases:
- Legacy SDK callbacks
- Delegate/callback APIs
- Old URLSession completion handlers
- One-shot async operations
Bad use cases:
- Multi-event streams
- Repeated delegate events
- Notifications over time
For streams of many values, consider AsyncStream or AsyncThrowingStream instead of a single continuation.
A strong answer is:
“Checked continuations let me wrap a one-shot callback API in async/await. I must resume the continuation exactly once, use the throwing version for errors, and consider cancellation when the underlying API supports it.”
Networking, persistence, and security
How do you make a network request on iOS?
Modern iOS networking usually uses URLSession with async/await.
For a simple GET request:
struct APIClient {
    func get<T: Decodable>(_ type: T.Type, from url: URL) async throws -> T {
        let (data, response) = try await URLSession.shared.data(from: url)

        guard let http = response as? HTTPURLResponse else {
            throw APIError.invalidResponse
        }

        guard (200...299).contains(http.statusCode) else {
            throw APIError.badStatus(http.statusCode)
        }

        return try JSONDecoder().decode(T.self, from: data)
    }
}
For real apps, prefer URLRequest when you need headers, method, body, cache policy, or timeout.
var request = URLRequest(url: url)
request.httpMethod = "GET"
request.timeoutInterval = 30
request.setValue("Bearer \(token)", forHTTPHeaderField: "Authorization")

let (data, response) = try await URLSession.shared.data(for: request)
A production-ready answer should discuss:
| Topic | What to say |
|---|---|
| Status code | Check HTTPURLResponse and handle non-2xx |
| Decoding | Decode DTOs with JSONDecoder |
| Errors | Separate network, status, decoding, and auth errors |
| Timeout | Configure request/session timeout |
| Retry | Retry safe transient failures, usually GET |
| Auth | Add token through request builder or API client |
| Cancellation | Cancel task when screen disappears |
| Caching | Use URLCache or app-level cache where useful |
| Background transfer | Use background URLSessionConfiguration for large uploads/downloads |
| Certificate pinning | Advanced security; use only when operationally justified |
Avoid blindly retrying unsafe requests such as payment or order creation unless the backend supports idempotency keys.
Example error enum:
enum APIError: Error {
    case invalidResponse
    case badStatus(Int)
    case decoding(Error)
}
Senior-level answer: keep networking out of ViewControllers. Put it behind an API client/repository protocol so ViewModels can be tested with fakes.
A strong answer is:
“I use
URLSessionwith async/await, validate the HTTP response, decode into DTOs, and expose typed errors. In production, I also handle timeouts, cancellation, auth headers, retry policy, caching, and testability through an injected API client.”
Core Data vs SwiftData vs UserDefaults?
Choose persistence based on data size, structure, security, and deployment target.
| Store | Best use |
|---|---|
UserDefaults |
Small preferences, feature flags, simple settings |
| Keychain | Passwords, tokens, credentials, sensitive secrets |
| Files | Images, documents, downloaded blobs |
| SQLite | Custom relational storage when you need control |
| Core Data | Mature object graph, complex queries, migrations, older iOS support |
| SwiftData | Swift-native model persistence, SwiftUI-friendly, iOS 17+ |
Use UserDefaults for small non-sensitive values:
UserDefaults.standard.set(true, forKey: "hasSeenOnboarding")Do not store secrets in UserDefaults.
Use Keychain for:
- Access tokens
- Refresh tokens
- Passwords
- Private credentials
- Sensitive account identifiers
Core Data is still important because many existing enterprise apps use it. It is mature, powerful, and supports complex persistence needs.
SwiftData is newer and more Swift-friendly:
@Model
final class Article {
    var title: String
    var isBookmarked: Bool

    init(title: String, isBookmarked: Bool = false) {
        self.title = title
        self.isBookmarked = isBookmarked
    }
}
SwiftData works nicely with SwiftUI, but deployment target matters. If your app supports older iOS versions, Core Data may still be the practical choice.
Offline-first interview answer:
- Local database is the source of truth
- UI reads from local store
- Sync service updates local store
- Network failure should not break reading
- Conflicts need a clear policy
- Migrations must be planned before schema changes
Senior topics:
- Lightweight/heavyweight migrations
- Conflict resolution
- Batch deletes
- Background contexts
- Sync status fields
- DTO-to-persistent-model mapping
- Core Data
NSFetchedResultsController - SwiftData
@Query
A strong answer is:
“I use UserDefaults only for small non-sensitive preferences, Keychain for secrets, Core Data for mature complex persistence or older iOS support, and SwiftData for modern SwiftUI-friendly persistence when the deployment target allows it.”
App Transport Security and Keychain — interview basics?
iOS security interview answers should show defense in depth, not one magic API.
| Topic | Interview answer |
|---|---|
| ATS | Enforces safer network transport, HTTPS by default |
| Keychain | Stores credentials/secrets securely |
| LocalAuthentication | Verifies user presence with Face ID/Touch ID/passcode |
| Privacy manifests | Declare data use and required-reason APIs |
| ATT | Required for tracking users across apps/sites |
| Certificate pinning | Optional advanced protection with operational cost |
| Route/UI locks | Convenience only; server must enforce real authorization |
App Transport Security (ATS) helps prevent insecure network connections. Avoid broad exceptions like allowing all HTTP traffic.
Bad pattern:
<key>NSAllowsArbitraryLoads</key>
<true/>
If an exception is needed, make it narrow and justify it.
Keychain is for sensitive data:
- Access token
- Refresh token
- Password
- Private credential
- API secret issued to the user/device
Do not store secrets in:
UserDefaults- Plain plist
- Local JSON file
- Hardcoded constants
LocalAuthentication is commonly used for Face ID / Touch ID / passcode prompts. It proves user presence, but it does not replace backend authorization or secure token handling.
Example interview distinction:
“Face ID can unlock access to a token stored securely, but the server still decides whether the request is authorized.”
Privacy topics to mention in modern interviews:
- Ask only for permissions you need
- Explain permission purpose clearly
- Keep privacy manifest accurate
- Be careful with third-party SDKs
- Do not collect tracking data without proper consent
- Avoid using required-reason APIs without declaring valid reasons
A strong answer is:
“I rely on ATS for secure transport, Keychain for secrets, LocalAuthentication for user presence, and backend authorization for real access control. I also keep privacy manifests and permission usage aligned with what the app actually does.”
Testing, release, and scenarios
What do interviewers expect from XCTest?
Interviewers expect you to write testable iOS code, not only know XCTest syntax.
Common test layers:
| Test type | What to test |
|---|---|
| Unit tests | ViewModels, services, parsers, validators, pure Swift logic |
| Async tests | async/await code, repositories, use cases |
| UI tests | Critical user flows like login, checkout, onboarding |
| Snapshot tests | Visual regression, if the team uses a library |
| Integration tests | Feature behavior with multiple real components |
Simple decoding test:
func testDecodeUser() throws {
    let json = #"{"id":"1","name":"Ada"}"#.data(using: .utf8)!

    let user = try JSONDecoder().decode(User.self, from: json)

    XCTAssertEqual(user.name, "Ada")
}
Async XCTest example:
func testFetchUsers() async throws {
    let repository = MockUserRepository()

    let users = try await repository.fetchUsers()

    XCTAssertEqual(users.count, 1)
}
Good testing practices:
- Inject dependencies through protocols
- Do not hit real network in unit tests
- Use fake repositories for ViewModels
- Use custom
URLProtocolor mock API client for networking - Test loading, success, empty, and failure states
- Keep UI tests fewer and focused because they are slower
- Avoid testing implementation details
Example ViewModel test idea:
func testLoadShowsUsers() async {
    let viewModel = UserListViewModel(repository: MockUserRepository())

    await viewModel.load()

    XCTAssertEqual(viewModel.state, .loaded([User(id: "1", name: "Ada")]))
}
Modern note: Apple also has the newer Swift Testing framework, but XCTest is still widely used in existing iOS projects and interviews.
A strong answer is:
“I unit test ViewModels and pure logic with injected dependencies, test async code using async XCTest methods, avoid real network in unit tests, and reserve UI tests for the most important flows.”
What is code signing and why do interviewers ask?
Code signing proves the app comes from a trusted developer and has the entitlements it claims.
Interviewers ask because it shows whether you have shipped real apps, not only run code on the Simulator.
Important terms:
| Term | Meaning |
|---|---|
| Bundle ID | Unique app identifier |
| App ID | Apple Developer identity for an app/capability set |
| Certificate | Proves developer/team identity |
| Provisioning profile | Connects app ID, certificate, devices, and entitlements |
| Entitlements | Permissions/capabilities granted to the app |
| Development signing | Run on local devices during development |
| Distribution signing | TestFlight/App Store/enterprise distribution |
| Capabilities | Push, App Groups, Keychain Sharing, iCloud, Sign in with Apple |
Provisioning profiles matter because they define what the signed app is allowed to do.
Examples of capabilities:
- Push notifications
- App Groups
- Keychain sharing
- Associated domains
- iCloud/CloudKit
- Background modes
Common problems:
- Wrong bundle ID
- Expired certificate
- Missing device in development profile
- Capability enabled in code but not in profile
- App Group mismatch
- Push notification entitlement missing
- CI machine missing signing credentials
CI/CD signing topics:
- Xcode automatic signing
- Xcode Cloud
- fastlane match
- Secure certificate/profile storage
- Separate development, staging, and production bundle IDs
- TestFlight distribution
Good interview answer: code signing is not only paperwork. It affects whether push, Keychain sharing, associated domains, App Groups, and app distribution work.
A strong answer is:
“Code signing proves app identity and controls entitlements. Provisioning profiles connect the bundle ID, certificate, devices, and capabilities. Interviewers ask because signing issues appear in real device testing, CI, TestFlight, and App Store releases.”
Scenario: Design offline-first reading list app.
An offline-first reading list should treat local storage as the source of truth.
High-level design:
- Store articles locally using Core Data or SwiftData
- Render UI from the local store
- Sync with server on launch, foreground, and background refresh
- Queue local changes when offline
- Retry sync when network returns
- Resolve conflicts with a clear policy
- Cache images separately
- Show sync/offline state to the user
Suggested model fields:
Article {
    id
    title
    body
    updatedAt
    isBookmarked
    syncStatus
    serverVersion
}
UI behavior:
- User can read saved articles offline
- Bookmark action updates local DB immediately
- UI shows optimistic update
- Sync service uploads pending changes later
- Offline banner appears when network is unavailable
- Failed sync does not lose user actions
Sync policy:
| Problem | Possible solution |
|---|---|
| Same article edited on two devices | Server version or updated timestamp |
| Bookmark changed offline | Queue local operation |
| Delete vs update conflict | Define server/client precedence |
| Large images | Disk cache with eviction |
| Background limits | Use background tasks carefully |
Use BGAppRefreshTask for periodic refresh, but do not promise exact timing. iOS gives limited background execution based on system conditions.
Testing plan:
- Airplane mode
- Slow/flaky network
- App kill and relaunch
- Conflict simulation
- Partial sync failure
- Large article list
- Background refresh behavior
Senior-level point: offline-first is mostly a data consistency problem, not only a local database problem.
A strong answer is:
“I would make the local database the source of truth, update it optimistically, sync deltas with the server, queue offline changes, handle conflicts explicitly, and test airplane mode, flaky network, and app relaunch scenarios.”
Scenario: UITableView scrolls poorly with remote images.
Poor scrolling with remote images usually comes from doing too much work on the main thread or not handling cell reuse correctly.
Diagnosis path:
- Confirm cells are reused correctly
- Reset image state in
prepareForReuse - Cancel old image requests when a cell is reused
- Avoid decoding huge images on the main thread
- Downsample images to cell size
- Add memory cache
- Add disk cache if images repeat
- Use prefetching for upcoming rows
- Verify with Instruments
Cell reuse fix:
override func prepareForReuse() {
    super.prepareForReuse()
    thumbnailView.image = placeholderImage
    imageTask?.cancel()
    imageTask = nil
}
Async loading safety:
cell.configure(title: item.title, image: placeholderImage)

imageLoader.load(url: item.imageURL) { [weak tableView] image in
    guard let currentCell = tableView?.cellForRow(at: indexPath) as? ItemCell else {
        return
    }

    currentCell.thumbnailView.image = image
}
In production, also verify that the cell still represents the same item. Index paths can change when the table updates.
Performance fixes:
| Problem | Fix |
|---|---|
| Full-size 4K image decoded for small cell | Downsample to target size |
| Network request repeats while scrolling | Memory/disk cache |
| Old image appears in reused cell | Reset and verify identity |
| Scroll hitch | Move decode work off main thread |
| Late image updates wrong cell | Cancel task and check model ID |
| Loading starts too late | UITableViewDataSourcePrefetching |
SwiftUI note: AsyncImage is convenient, but production apps often need a custom image loader for caching, cancellation, placeholders, retries, and downsampling.
Measure with:
- Time Profiler
- Allocations
- Memory Graph
- Network instrument
- Core Animation hitches
A strong answer is:
“I would check reuse first, reset and cancel work in
prepareForReuse, downsample images off the main thread, add cache layers, use prefetching, and verify smooth scrolling with Instruments.”
Scenario: Modularize large iOS app?
A large iOS app should be modularized around features, shared foundations, and team boundaries.
Common module layout:
App
Features/
  FeedFeature
  ProfileFeature
  SettingsFeature
Core/
  Networking
  Persistence
  Analytics
  DesignSystem
  Utilities
Common tools:
- Swift Package Manager
- Xcode projects/workspaces
- Tuist or similar project generation tools
- Internal frameworks/packages
Good module types:
| Module | Purpose |
|---|---|
| App | Composition root, app lifecycle, dependency wiring |
| Feature | Screen/flow-specific code |
| DesignSystem | Reusable UI components, colors, typography |
| Networking | API client, request building, auth transport |
| Persistence | Core Data/SwiftData wrapper, storage abstractions |
| Analytics | Event tracking abstraction |
| Domain/Core | Shared models and business rules |
| TestingSupport | Mocks, fakes, test helpers |
Benefits:
- Faster focused builds
- Clear ownership
- Better testability
- Safer refactoring
- Reduced merge conflicts
- Reusable features/components
- Cleaner dependency direction
Boundary rules:
- Feature modules should not depend on each other directly
- Shared modules should stay generic
- UI modules should not know backend details
- Public APIs should be intentionally small
- App module wires dependencies together
- Avoid circular dependencies
Example dependency direction:
App
 → Feature
   → DesignSystem
   → Domain
   → Networking protocol
Avoid premature micro-modules. Too many tiny modules increase build complexity and developer friction.
Split when:
- Multiple teams own different areas
- Build time is too slow
- Feature boundaries are stable
- Code ownership is unclear
- Reuse is real, not imagined
- App also ships SDK/internal packages
Senior-level topics:
- Public API stability
- Deprecation policy
- Dependency inversion
- CI build caching
- Binary vs source packages
- Feature flags
- Release cadence
- Test ownership per module
A strong answer is:
“I modularize by feature and shared capability, enforce dependency direction, keep public APIs small, and avoid premature micro-modules. The goal is faster builds, clearer ownership, and safer team scaling.”
How do you approach accessibility on iOS?
Accessibility should be designed into the screen, not added at the end.
Important areas:
| Area | What to do |
|---|---|
| VoiceOver | Labels, hints, traits, reading order |
| Dynamic Type | Scalable fonts and flexible layouts |
| Contrast | Text and controls readable in all themes |
| Color | Do not use color as the only signal |
| Touch targets | Make controls easy to tap |
| Motion | Respect Reduce Motion |
| Custom controls | Add correct accessibility role/traits |
| Forms | Clear labels, errors, and focus behavior |
| Testing | VoiceOver, Accessibility Inspector, largest text sizes |
UIKit example:
button.accessibilityLabel = "Add article"
button.accessibilityHint = "Adds this article to your reading list"
button.accessibilityTraits = [.button]
SwiftUI example:
Image(systemName: "bookmark")
    .accessibilityLabel("Bookmark article")
Dynamic Type:
- Use system text styles where possible
- Avoid fixed-height labels
- Test the largest accessibility text sizes
- Let layouts wrap or stack vertically
- Avoid clipped text
VoiceOver:
- Ensure custom controls have meaningful labels
- Group related elements when it improves navigation
- Keep reading order logical
- Do not expose decorative images
- Announce important dynamic updates when needed
Common mistakes:
- Clickable image with no label
- Custom button built from
Viewbut no trait - Text clipped at large sizes
- Error message shown visually but not accessible
- Color-only validation state
- Modal opens without focus management
Senior answer: accessibility improves quality for everyone and is often required in enterprise, government, healthcare, finance, and public-facing apps.
A strong answer is:
“I support VoiceOver, Dynamic Type, contrast, touch targets, and Reduce Motion from the start. I test with real accessibility settings and make custom controls expose the right labels, hints, traits, and focus behavior.”
Final-week checklist for iOS developer interviews?
Use the final week to revise practical explanations and scenarios.
Swift fundamentals:
- Struct vs class
- Value vs reference semantics
- Optionals,
guard let, and force unwrap risk - Enums with associated values
- Protocol-oriented programming
- Generics,
some, andany - Codable pitfalls
- Copy-on-write
Memory and architecture:
- ARC and retain cycles
-
weakvsunowned - Closure capture lists
- MVC vs MVVM
- Delegate pattern
- NotificationCenter trade-offs
- Dependency injection
- Coordinator pattern
UIKit and SwiftUI:
- View controller lifecycle
- UITableView reuse and diffable data source
- Auto Layout basics
- Storyboard vs programmatic UI
- SwiftUI vs UIKit
- SwiftUI state wrappers
- Why SwiftUI views are structs
- NavigationStack
- SwiftUI performance pitfalls
Concurrency:
- GCD vs async/await
-
@MainActor - Actors
-
Sendable -
Task,async let, and task groups - Checked continuations
- Cancellation
Networking, persistence, release:
- URLSession request flow
- HTTP status and decoding errors
- Core Data vs SwiftData vs UserDefaults
- Keychain and ATS
- XCTest and async tests
- Code signing and provisioning profiles
- App Store/TestFlight release basics
- Privacy manifests and permissions
Scenario drills:
- Build offline-first reading list
- Fix slow table scrolling with remote images
- Debug retain cycle after screen dismiss
- Design modular app architecture
- Add token-based API client
- Implement SwiftUI navigation router
- Explain migration from UIKit to SwiftUI
- Explain Swift 6 concurrency migration
- Improve app accessibility
- Tell a production bug story using STAR
Behavioral story ideas:
- App Store release issue
- Crash or memory leak fix
- Slow screen performance improvement
- SwiftUI migration
- UIKit legacy maintenance
- API contract change
- Accessibility improvement
- CI/code signing failure
- Deadline trade-off with measurable result
Good final close:
“I can build new SwiftUI features, maintain UIKit code, debug memory and performance issues, explain Swift concurrency safely, and connect architecture decisions to reliability, testability, and user experience.”
Pattern cheat sheet (quick reference)
| Need | Reach for |
|---|---|
| Simple network request | URLSession + async/await |
| Request with headers/body | URLRequest |
| Decode API response | Codable DTO |
| Store user preference | UserDefaults |
| Store token/password | Keychain |
| Complex local database | Core Data |
| Modern SwiftUI persistence | SwiftData |
| Secure network transport | ATS + HTTPS |
| Biometric prompt | LocalAuthentication |
| Unit test async code | async XCTest method |
| Mock API layer | Protocol + fake repository |
| App distribution | Code signing + provisioning profile |
| Offline-first UI | Local DB as source of truth |
| Remote image list | Reuse reset + cancellation + cache |
| Large app structure | SPM feature/core modules |
| iOS accessibility | VoiceOver + Dynamic Type + traits |
Pattern cheat sheet (quick reference)
| Topic | Remember |
|---|---|
| UI updates | Main thread / @MainActor |
| Shared mutable state | actor or isolation |
| Cycles | weak delegates, [weak self] |
| Lists | Reuse identifiers, diffable data |
| SwiftUI state | @StateObject for owned VMs |
| Network | async URLSession + Codable |
| Secrets | Keychain, not UserDefaults |
| Tests | Protocol injection + XCTest |
References
Official Apple documentation
- Swift documentation
- SwiftUI tutorials
- URLSession
- Concurrency (async/await)
- Human Interface Guidelines
On-site prep
- Senior Android developer interviews
- Java interview questions — part 1
- Java interview questions — part 2
- Front-end developer interviews
- Full stack developer interviews
- Git interview questions
- Interview Questions category
Summary
iOS interviews combine Swift fundamentals (value types, ARC, protocols) with modern concurrency (async/await, actors, @MainActor) and honest UIKit vs SwiftUI trade-offs. Answer aloud and compare your structure to each section. Pair with senior Android prep for mobile system design.
