CUDA (Compute Unified Device Architecture) is NVIDIA’s parallel computing platform and API. It lets C, C++, and other supported languages offload work to the GPU—useful for machine learning, scientific computing, and video processing. On Ubuntu the install splits into two layers: a proprietary NVIDIA driver that owns the GPU, and the CUDA toolkit (nvcc, headers, libraries) from NVIDIA’s APT repository.
This guide walks through install CUDA on Ubuntu the way NVIDIA’s Linux installation guide documents today: driver first, cuda-keyring network repo (not deprecated apt-key), then cuda-toolkit, PATH setup, and verification. Commands below target Ubuntu 22.04 LTS and 24.04 LTS; adjust the repo codename for your release.
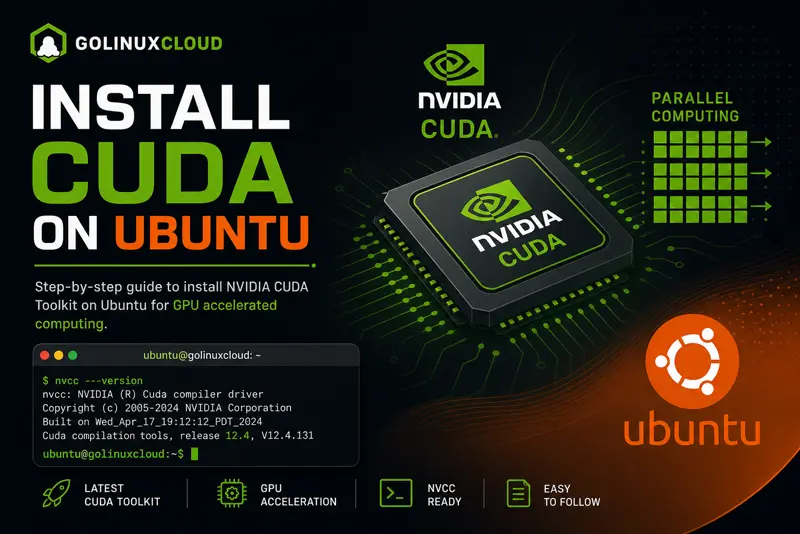
nvcc working while runtime kernels fail—or nvidia-smi showing a lower CUDA version than the toolkit you installed.
Quick command summary
| Task | Command |
|---|---|
| List recommended driver | ubuntu-drivers devices |
| Auto-install driver | sudo ubuntu-drivers autoinstall |
| Verify driver | nvidia-smi |
| Add CUDA keyring (24.04 example) | wget https://developer.download.nvidia.com/compute/cuda/repos/ubuntu2404/x86_64/cuda-keyring_1.1-1_all.deb then sudo dpkg -i cuda-keyring_1.1-1_all.deb |
| Install toolkit | sudo apt update && sudo apt install -y cuda-toolkit |
| Add CUDA to PATH | echo 'export PATH=/usr/local/cuda/bin${PATH:+:${PATH}}' >> ~/.bashrc |
| Check compiler | nvcc --version |
| Compile sample | nvcc -o vector_add vector_add.cu |
Prerequisites
- Physical NVIDIA GPU (or VM with GPU passthrough). CUDA does not run on CPU-only hosts.
- Ubuntu 22.04 LTS, 24.04 LTS, or newer with sudo access.
- 64-bit amd64 for the commands in this article (ARM64 Jetson uses a different image—see NVIDIA’s Jetson docs).
- Build tools:
sudo apt install -y build-essential linux-headers-$(uname -r) - Disk space: several gigabytes under
/usr/local/cuda-*plus driver packages. - For driver details and GUI paths, see install NVIDIA drivers on Ubuntu.
Compatibility: driver, GPU, and CUDA version
Before installing, cross-check three columns:
| Check | Where to look |
|---|---|
| Minimum driver for CUDA X.Y | CUDA Toolkit release notes |
| GPU compute capability | CUDA GPUs |
| Ubuntu + GCC support | Same release notes (each CUDA version supports specific GCC ranges) |
Example: a Tesla V100 (Volta) needs a CUDA release that supports sm_70+. A mobile GeForce MX150 needs a driver branch Ubuntu still ships in ubuntu-drivers devices, not a decade-old 390 series unless you deliberately pin an old toolkit.
Use lscpu and lspci | grep -i nvidia when documenting the host CPU architecture alongside GPU passthrough planning.
Step 1: Update Ubuntu and install the NVIDIA driver
Refresh package indexes:
sudo apt updateIdentify the driver Ubuntu recommends for your card:
ubuntu-drivers devicesOn a laptop with a GeForce MX150, output commonly resembles:
== /sys/devices/pci0000:00/0000:00:02.0 ==
modalias : pci:v000010DEd00001D10sv00001028sd000007D1bc03sc02i00
vendor   : NVIDIA Corporation
model    : GP108M [GeForce MX150]
driver   : nvidia-driver-525 - third-party free recommended
driver   : nvidia-driver-515-server - distro non-free
driver   : nvidia-driver-470 - distro non-free
driver   : nvidia-driver-470-server - distro non-free
driver   : nvidia-driver-515 - distro non-free
driver   : nvidia-driver-450-server - distro non-free
Install the recommended branch (replace the version number with yours):
sudo apt install -y nvidia-driver-525Or let Ubuntu pick automatically:
sudo ubuntu-drivers autoinstallReboot so the proprietary module loads:
sudo rebootStep 2: Verify the NVIDIA driver
After login, confirm the kernel module and GPU are visible:
nvidia-smiOn a desktop with a GeForce RTX 3080, nvidia-smi often looks like:
+-----------------------------------------------------------------------------+
| NVIDIA-SMI 525.37.12    Driver Version: 525.37.12    CUDA Version: 12.2     |
|-------------------------------+----------------------+----------------------+
| GPU  Name        Persistence-M| Bus-Id        Disp.A | Volatile Uncorr. ECC |
| Fan  Temp  Perf  Pwr:Usage/Cap|         Memory-Usage | GPU-Util  Compute M. |
|===============================+======================+======================|
|   0  GeForce RTX 3080    Off  | 00000000:01:00.0 Off |                  N/A |
|  30%   55C    P2    70W / 320W |   5000MiB / 10000MiB |     60%      Default |
+-----------------------------------------------------------------------------+
The CUDA Version line in nvidia-smi is the maximum runtime version the driver supports, not the toolkit you have installed yet. You still need cuda-toolkit for nvcc and development headers.
Step 3: Add the official CUDA APT repository
NVIDIA’s current network repository method uses the cuda-keyring package—avoid legacy apt-key adv and hard-coded ubuntu2004 entries on modern Ubuntu.
Pick the distro tag from the CUDA download page (Linux → x86_64 → Ubuntu → your version → deb (network)).
Ubuntu 24.04 LTS (ubuntu2404):
wget https://developer.download.nvidia.com/compute/cuda/repos/ubuntu2404/x86_64/cuda-keyring_1.1-1_all.deb
sudo dpkg -i cuda-keyring_1.1-1_all.deb
sudo apt update
Ubuntu 22.04 LTS (ubuntu2204):
wget https://developer.download.nvidia.com/compute/cuda/repos/ubuntu2204/x86_64/cuda-keyring_1.1-1_all.deb
sudo dpkg -i cuda-keyring_1.1-1_all.deb
sudo apt updateadd-apt-repository plus apt-key adv against ubuntu2004 repos on 18.04/20.04. That pattern is obsolete and the wrong codename on 22.04+. Use cuda-keyring and the matching ubuntu2204 / ubuntu2404 path from the installation guide.
Local repository alternative
If you downloaded the large local .deb repo file from NVIDIA instead:
sudo dpkg -i cuda-repo-ubuntu2404-*-local_*.deb
sudo cp /var/cuda-repo-ubuntu2404-*-local/cuda-*-keyring.gpg /usr/share/keyrings/
wget https://developer.download.nvidia.com/compute/cuda/repos/ubuntu2404/x86_64/cuda-ubuntu2404.pin
sudo mv cuda-ubuntu2404.pin /etc/apt/preferences.d/cuda-repository-pin-600
sudo apt update
Step 4: Install the CUDA toolkit
Install the toolkit package (driver already handled in Step 1):
sudo apt install -y cuda-toolkitNVIDIA documents cuda-toolkit and apt install as separate commands—do not chain them with && on the same line in fragile automation if your mirror prompts for input; run update, then install.
The default install location is /usr/local/cuda-<version>/ with a symlink at /usr/local/cuda. A reboot is sometimes recommended after major upgrades; for a first install on a stable driver it is optional if nvidia-smi already works.
cuda meta-package can install NVIDIA’s bundled driver and conflict with nvidia-driver-* from Ubuntu. Prefer cuda-toolkit when you already installed the distro driver in Step 1.
Step 5: Set environment variables
Add CUDA binaries to your PATH (per post-installation actions):
echo 'export PATH=/usr/local/cuda/bin${PATH:+:${PATH}}' >> ~/.bashrc
source ~/.bashrc
For all users on a shared server, use /etc/profile.d/cuda.sh with the same export line.
Debian packages usually register libraries with ldconfig; if a .run installer was used instead, you may also need:
echo 'export LD_LIBRARY_PATH=/usr/local/cuda/lib64${LD_LIBRARY_PATH:+:${LD_LIBRARY_PATH}}' >> ~/.bashrcSee .bashrc vs .bash_profile if login shells do not read ~/.bashrc.
Step 6: Verify CUDA installation
Check the compiler:
nvcc --versionExample output shape:
nvcc: NVIDIA (R) Cuda compiler driver
Copyright (c) 2005-2023 NVIDIA Corporation
Built on Tue_Jul_11_02:20:44_PDT_2023
Cuda compilation tools, release 12.0, V12.0.140
Your exact release and build strings depend on the toolkit version APT installed.
Confirm the driver still answers:
nvidia-smiStep 7: Compile and run a sample CUDA program
Minimal vector addition
Create vector_add.cu:
#include <cuda_runtime.h>
#include <stdio.h>

__global__ void add(int n, float *x, float *y) {
    int i = blockIdx.x * blockDim.x + threadIdx.x;
    if (i < n) y[i] = x[i] + y[i];
}

int main() {
    int n = 1 << 20;
    size_t bytes = n * sizeof(float);
    float *h_x = (float *)malloc(bytes);
    float *h_y = (float *)malloc(bytes);
    for (int i = 0; i < n; i++) { h_x[i] = 1.0f; h_y[i] = 2.0f; }

    float *d_x, *d_y;
    cudaMalloc(&d_x, bytes);
    cudaMalloc(&d_y, bytes);
    cudaMemcpy(d_x, h_x, bytes, cudaMemcpyHostToDevice);
    cudaMemcpy(d_y, h_y, bytes, cudaMemcpyHostToDevice);

    int threads = 256;
    int blocks = (n + threads - 1) / threads;
    add<<<blocks, threads>>>(n, d_x, d_y);
    cudaMemcpy(h_y, d_y, bytes, cudaMemcpyDeviceToHost);

    printf("Sample result y[0] = %f (expect 3.0)\n", h_y[0]);

    cudaFree(d_x); cudaFree(d_y);
    free(h_x); free(h_y);
    return 0;
}
Compile and run:
nvcc -o vector_add vector_add.cu
./vector_add
Expected line:
Sample result y[0] = 3.000000 (expect 3.0)Official deviceQuery sample
NVIDIA moved samples to github.com/NVIDIA/cuda-samples. Clone the repo, build deviceQuery, and run it—the output should name your GPU and report Result = PASS when the driver and toolkit align.
Optional: scheduled checks and upgrades
- Upgrade only the toolkit:
sudo apt update && sudo apt install --only-upgrade cuda-toolkit - Pin a specific major version via the CUDA toolkit archive if frameworks (TensorFlow, PyTorch) require an older CUDA line.
- Pair host scans with rkhunter / rootkit checks on internet-facing GPU nodes—orthogonal to CUDA, but part of a sensible server baseline.
Uninstall
Remove APT-managed toolkit and keyring:
sudo apt purge -y cuda-toolkit 'cuda-*'
sudo apt autoremove -y
Runfile installs provide /usr/local/cuda-*/bin/cuda-uninstaller. Remove /usr/local/cuda-* directories only when no other NVIDIA stack depends on them.
Troubleshooting
| Symptom | Likely cause | Fix |
|---|---|---|
nvidia-smi: command not found |
Driver not installed or wrong GPU | Re-run Step 1; confirm lspci | grep -i nvidia |
NVIDIA-SMI has failed after reboot |
Nouveau still bound, or Secure Boot blocking module | Blacklist nouveau; sign module or disable Secure Boot for proprietary driver |
nvcc: command not found |
PATH not set | Step 5; open a new shell |
| Driver CUDA version < toolkit | Toolkit too new for driver | Upgrade nvidia-driver-* or install older toolkit from archive |
apt install cuda breaks desktop |
Meta-package replaced Ubuntu driver | Purge cuda driver component; use cuda-toolkit + ubuntu-drivers driver |
| Install loop asks to reboot forever | Mixed runfile + apt driver (common on 18.04-era guides) | Pick one channel: Ubuntu driver + cuda-keyring + cuda-toolkit |
| Sample builds, runtime fails | VM without GPU | Use hardware passthrough or cloud GPU instance |
References
- CUDA Installation Guide for Linux — official APT network and local repo steps
- CUDA downloads — pick Ubuntu version and repo codename
- CUDA toolkit archive — older releases
- cuda-samples on GitHub —
deviceQueryand reference code - Ask Ubuntu: Install CUDA on 18.04 — historical context (PPA /
nvidia-cuda-toolkit); prefer NVIDIA repo on current LTS - On-site: install NVIDIA drivers on Ubuntu, apt command, reboot safely
Summary
Install CUDA on Ubuntu by separating concerns: install the proprietary NVIDIA driver (ubuntu-drivers devices → nvidia-driver-* or ubuntu-drivers autoinstall), confirm nvidia-smi, add NVIDIA’s cuda-keyring for ubuntu2204 or ubuntu2404, then sudo apt install cuda-toolkit. Export /usr/local/cuda/bin on PATH, run nvcc --version, and compile a small kernel or deviceQuery from the official samples.
Use the cuda-keyring network repo—not deprecated apt-key lines aimed at ubuntu2004. Keep driver, GPU architecture, and toolkit versions inside the same release-notes matrix so runtime and compiler stay aligned.
