
Step by step Guide to install RHEL 8 Beta with screenshots. How to install Red Hat Enterprise Linux 8 Beta with images.
In this article I will share step by step guide to install RHEL 8 (Red Hat Enterprise Linux 8) with screenshots. At the time of writing this article the stable RHEL 8 build was not out for public access so I have used RHEL 8 beta. RHEL 8 beta is available for public access and you do not need any RHEL support contract to download RHEL 8 ISO image.
Step by Step Guide to install RHEL 8 Beta with screenshots
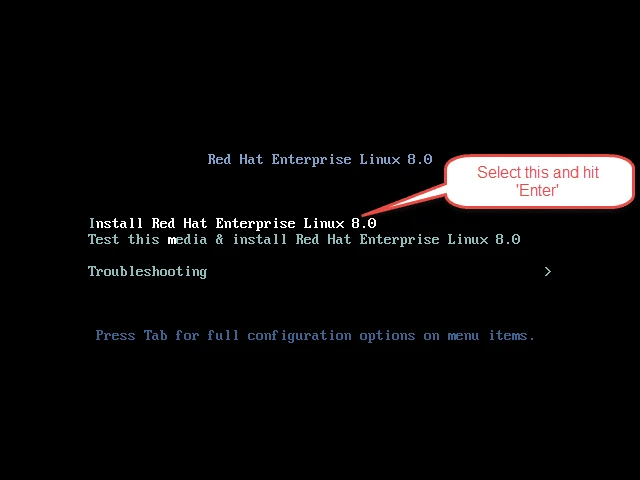
We are using Oracle VirtualBox installed on my Linux Server for the demonstration of the steps from this article to install RHEL 8 Linux. I have already downloaded the media and booting my vm with the RHEL 8 DVD ISO. Next follow the screenshots
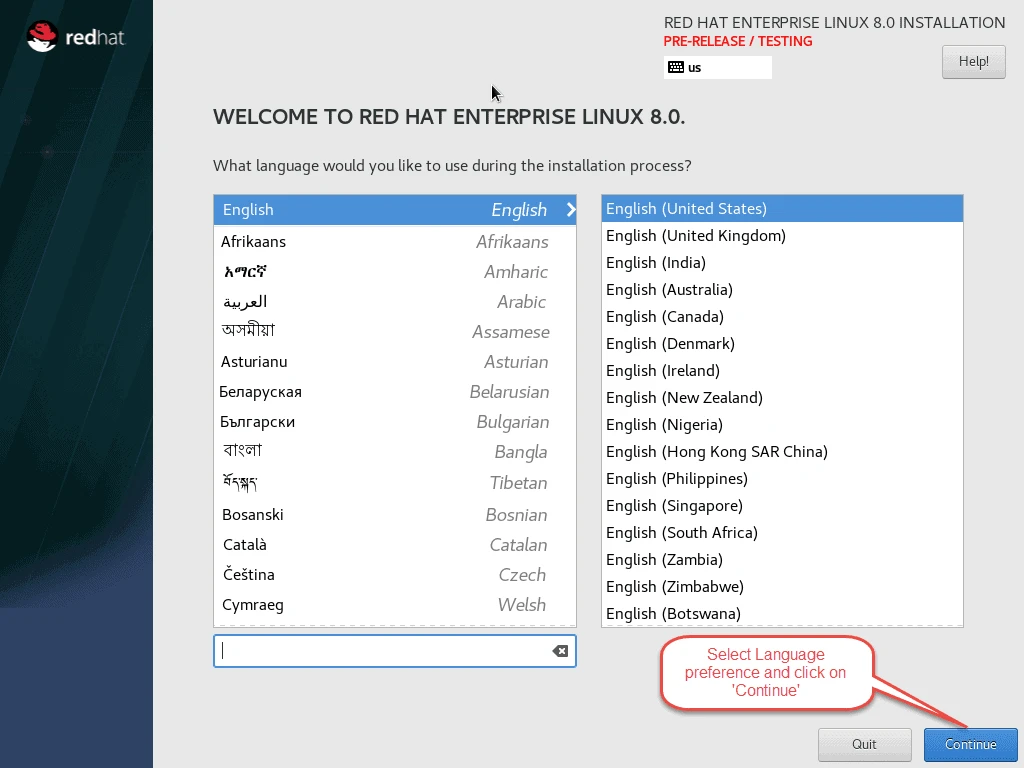
Select your preferred "Language" and "Keyboard Layout"
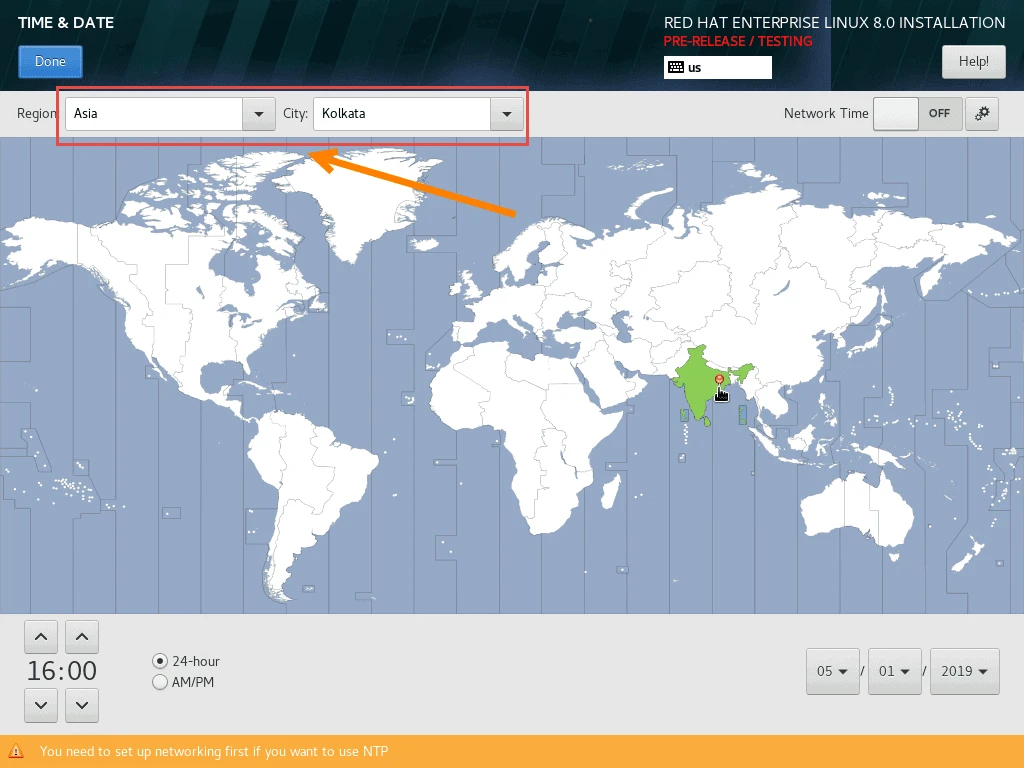
Change the Time and Date (Timezone)
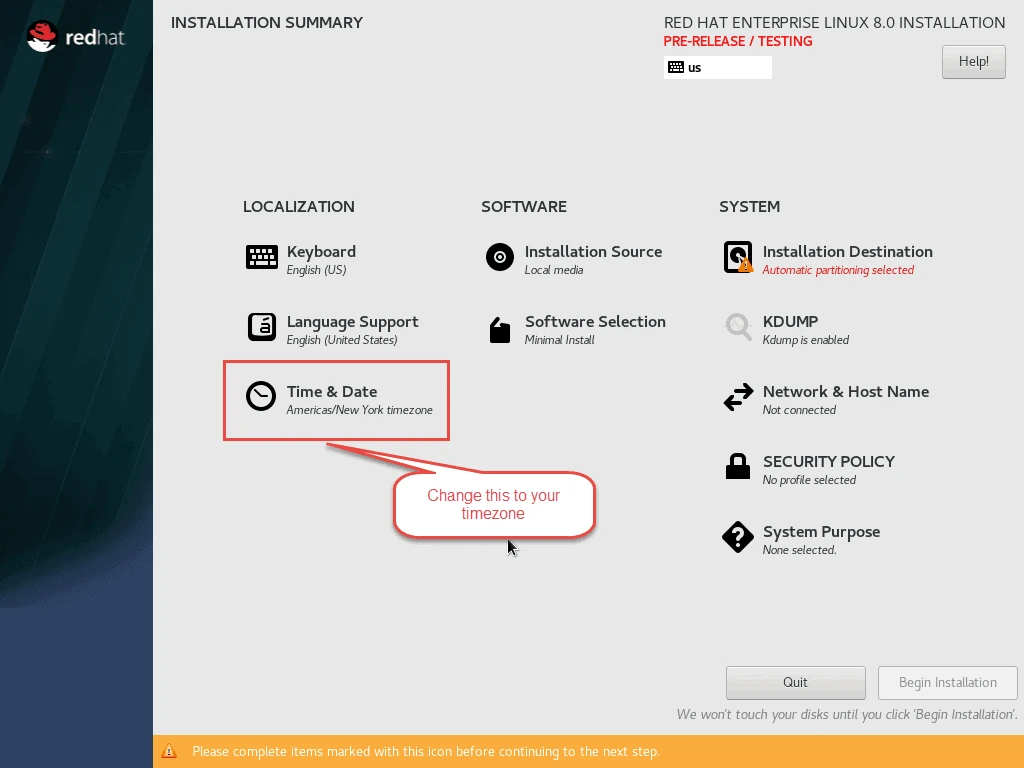
I have selected "Asia/Kolkata" timezone
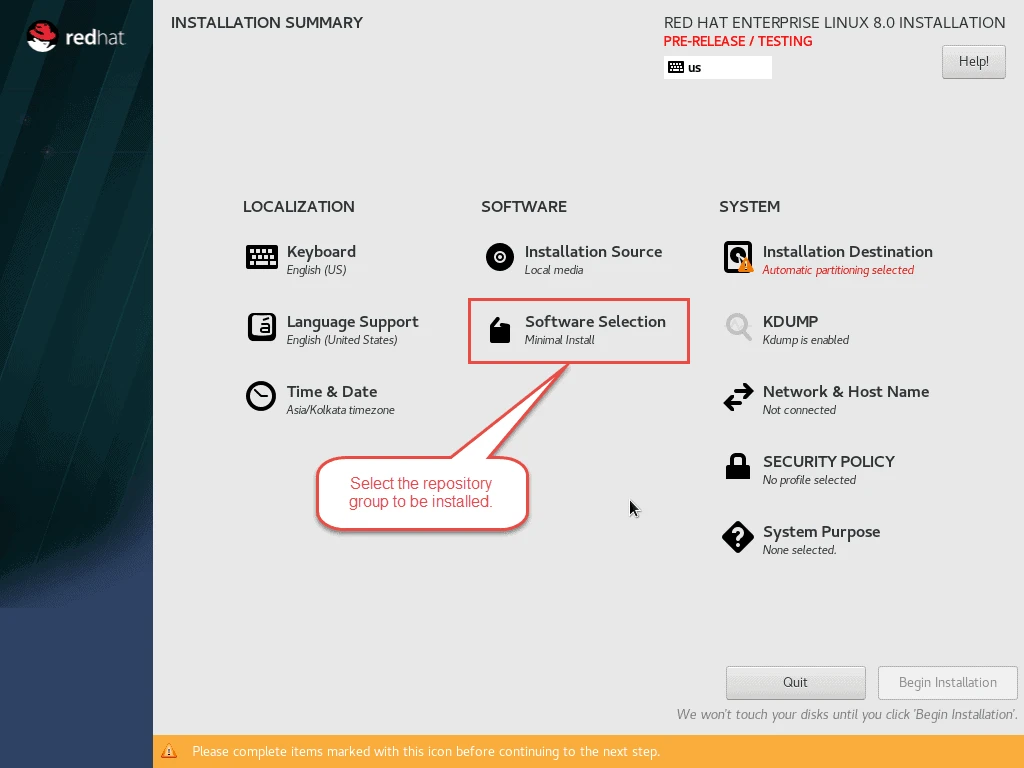
Next select the Software to be installed. By default "Minimal Install" is selected.
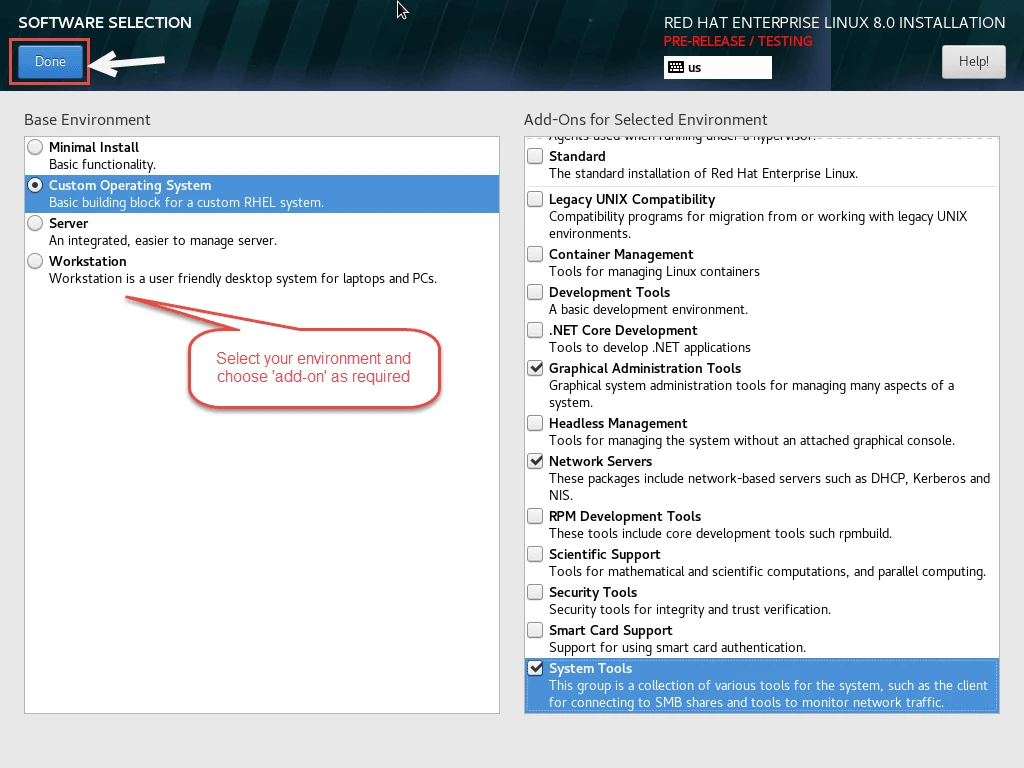
I have selected "Custom Operating System" with some additional Add Onand lastly Click on Done.
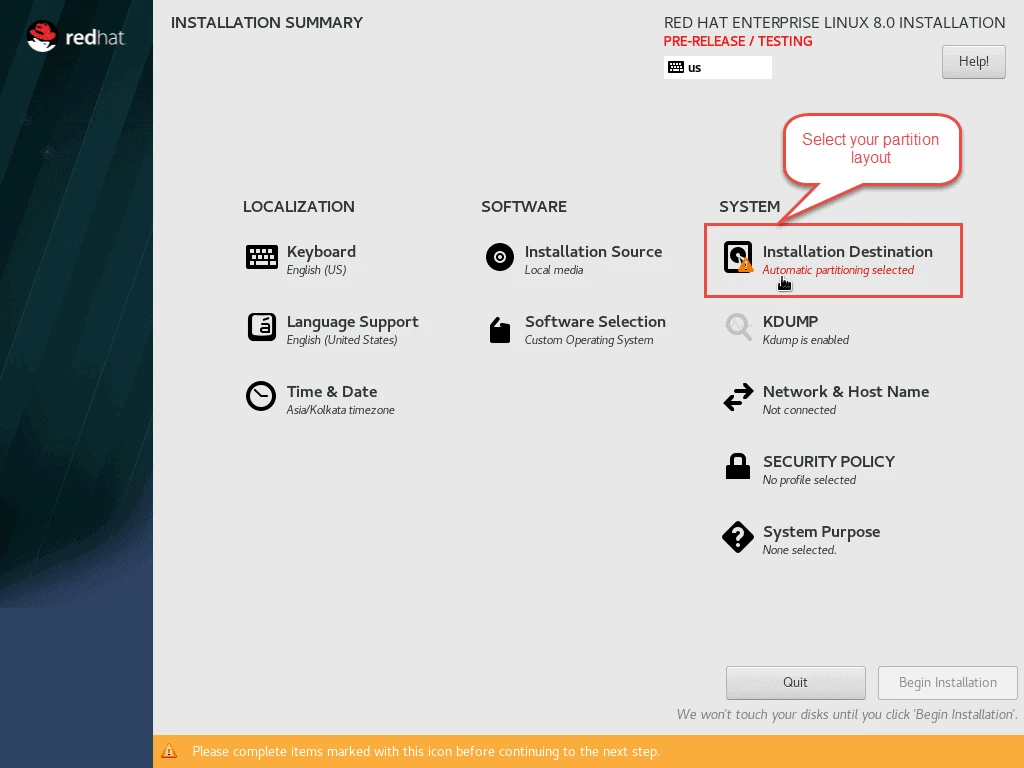
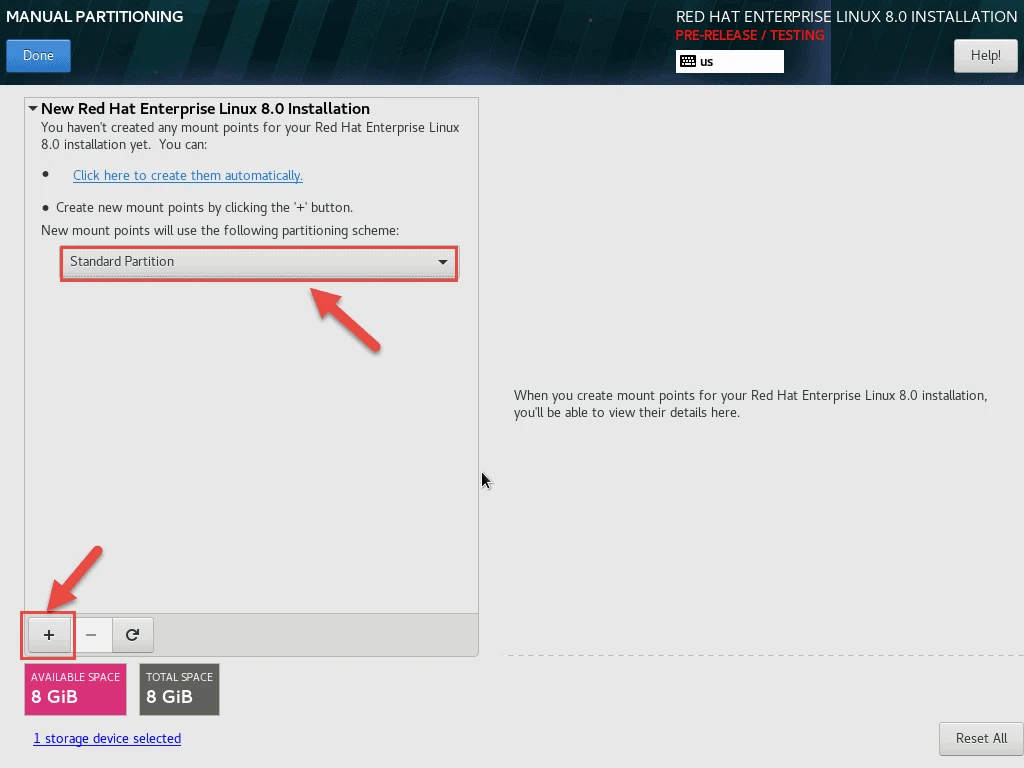
By default "Automatic Partitioning" is selected as "Installation Destination". For this article we will create a "custom layout"
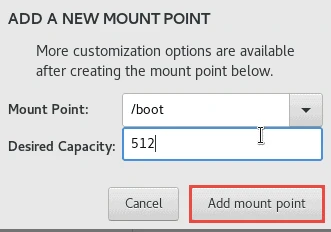
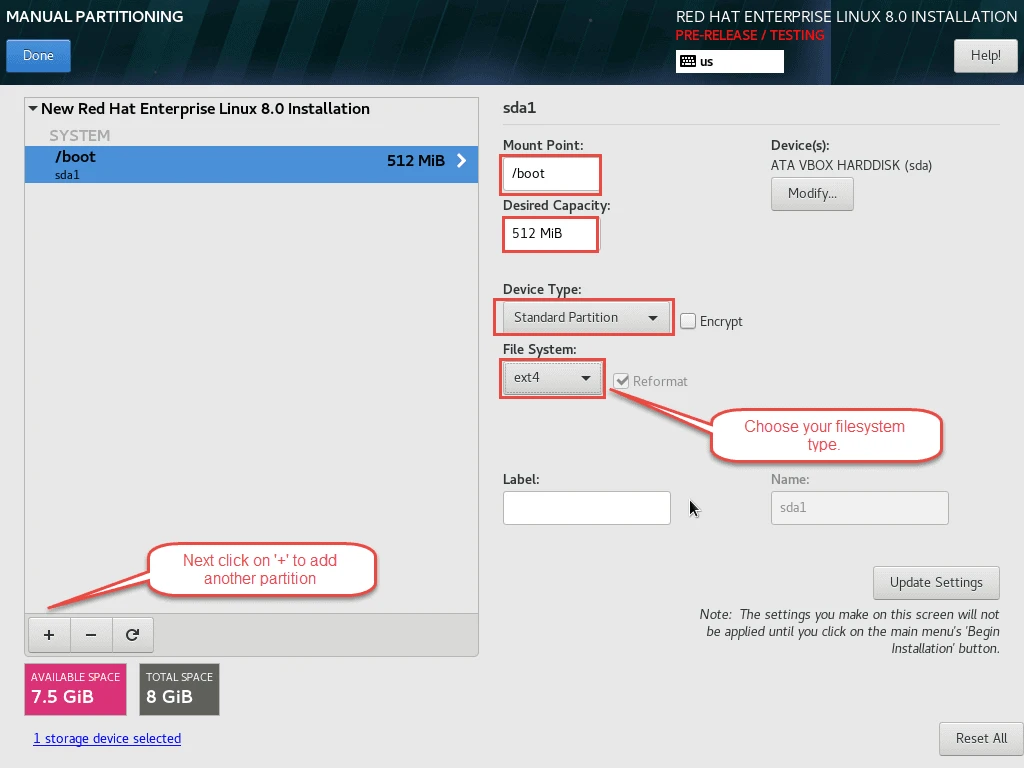
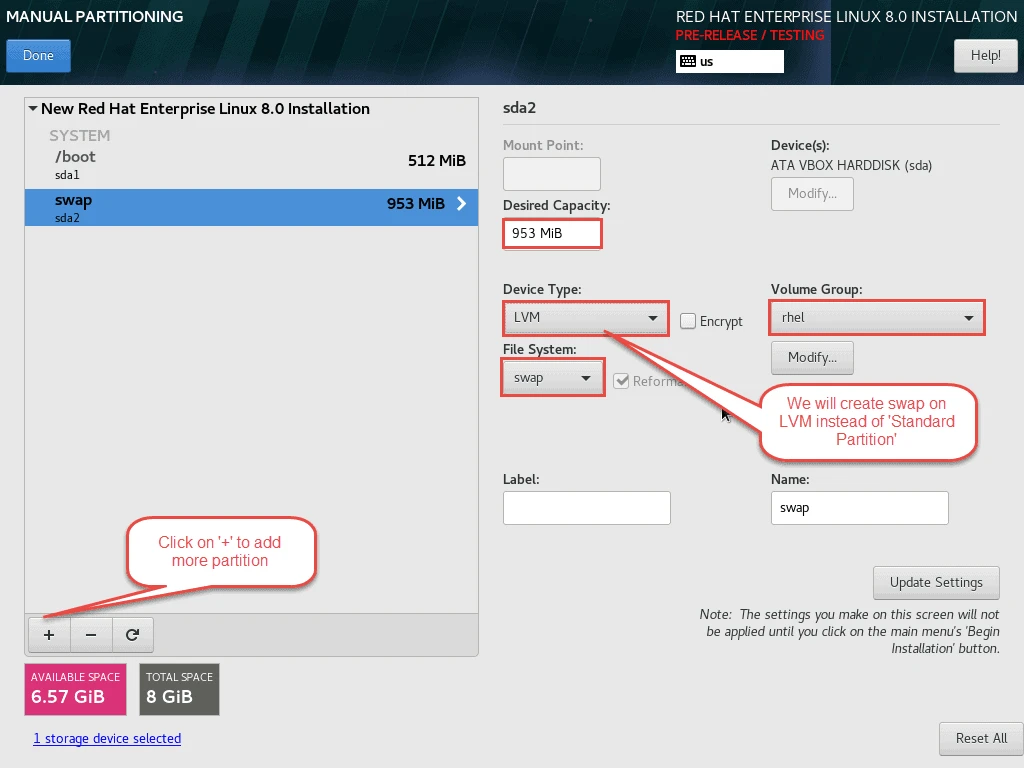
We will create a basic setup with one boot partition, one swap and one root partition. Here the boot partition will be standard partition while root and swap will be LVM partition.
Our boot partition will have 512MB
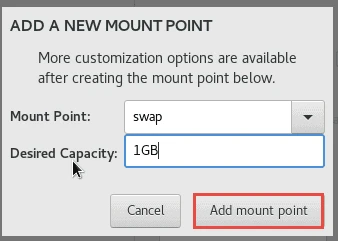
Next will create a swap partition.
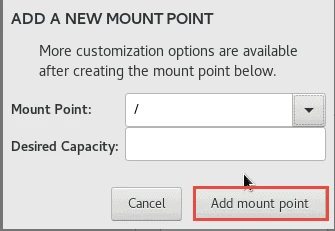
Finally will create a root partition.

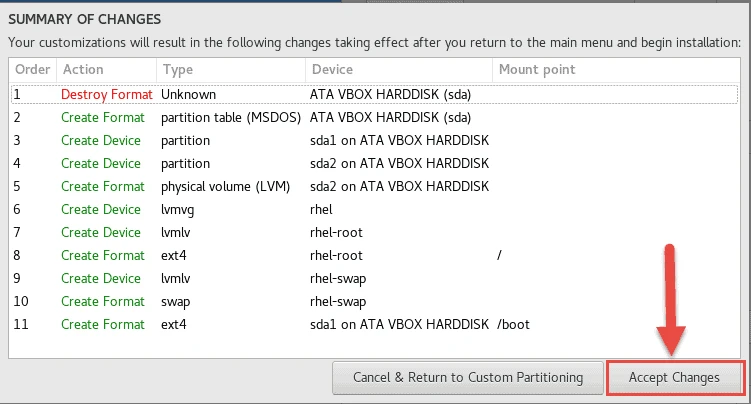
Accept the final changes.
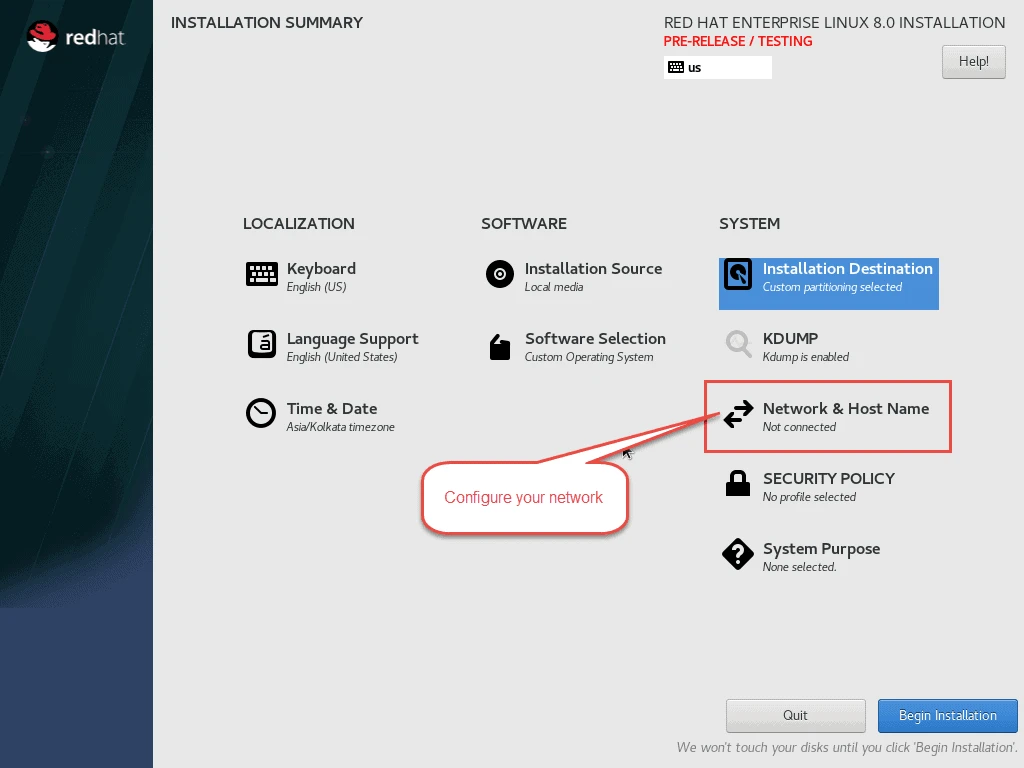
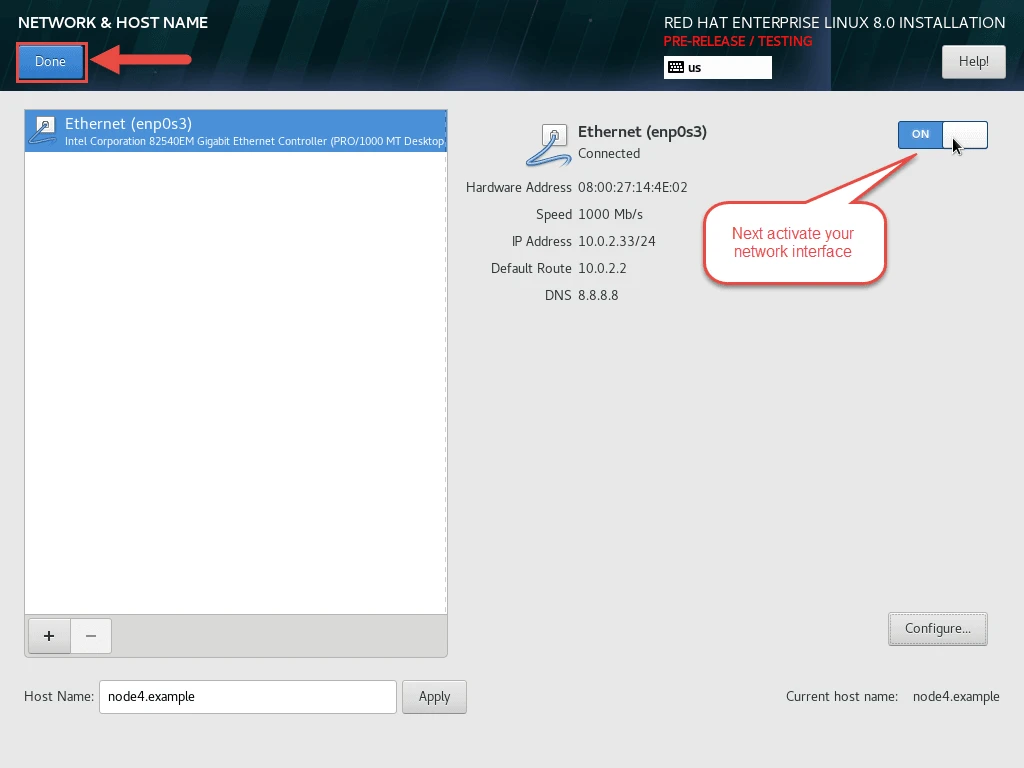
Configure your "Network and Hostname".
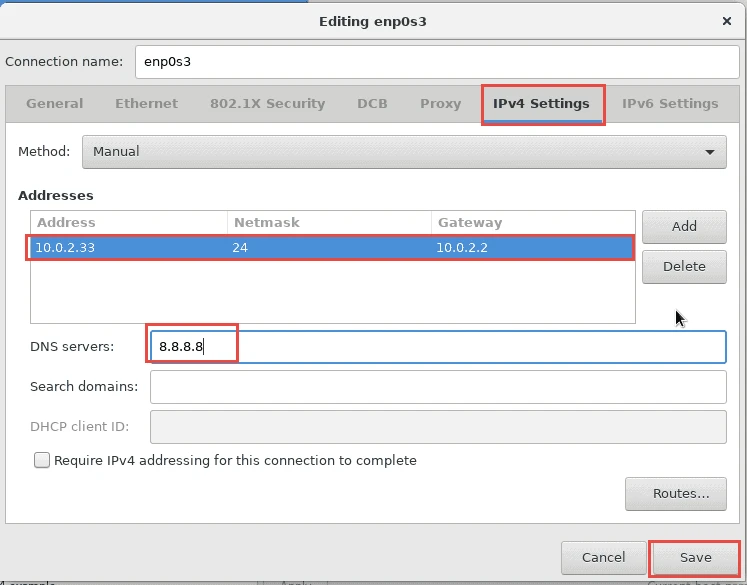
Select your interface and configure IPv4 address.

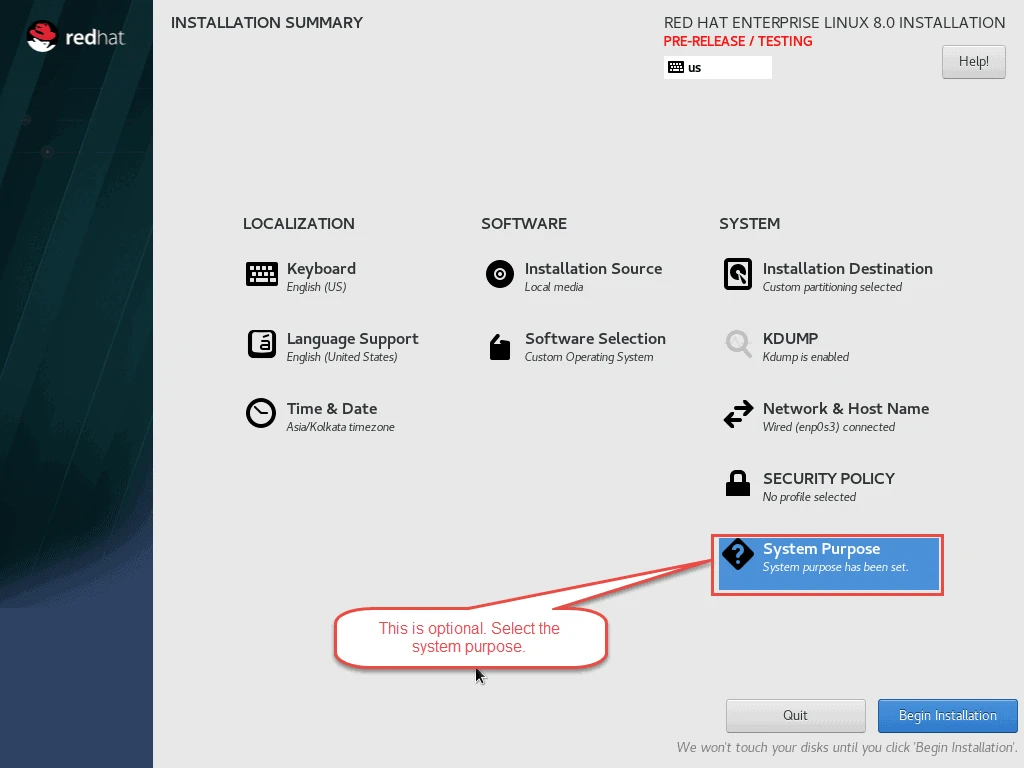
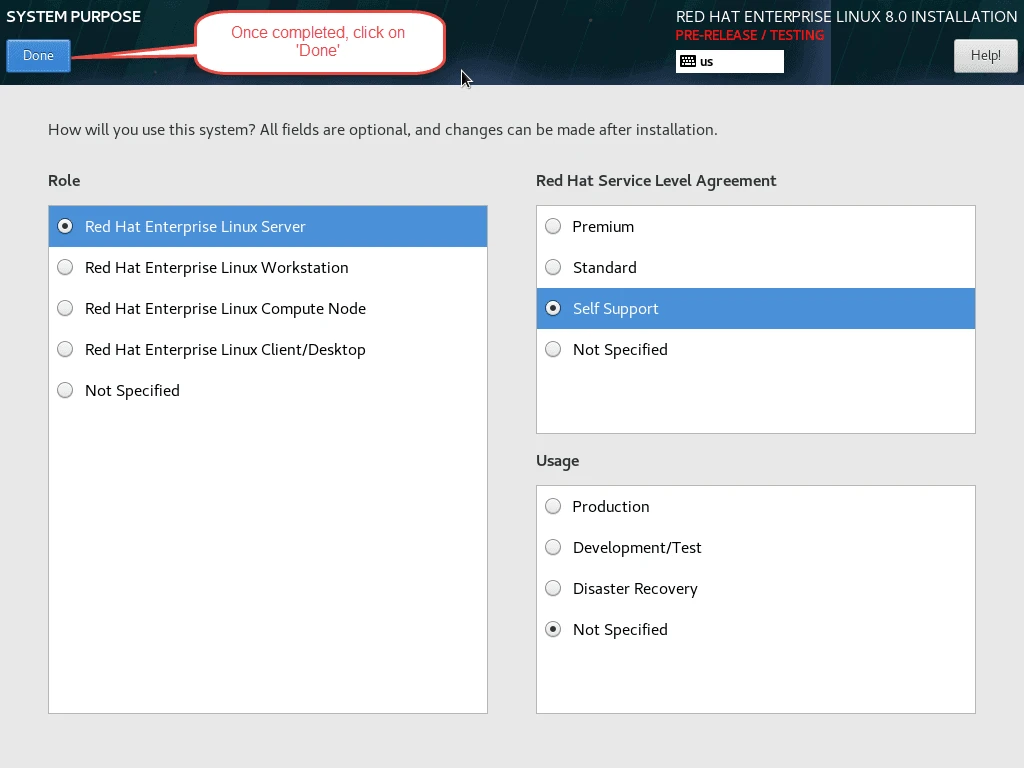
Next configure the "System Purpose". This is an optional step.
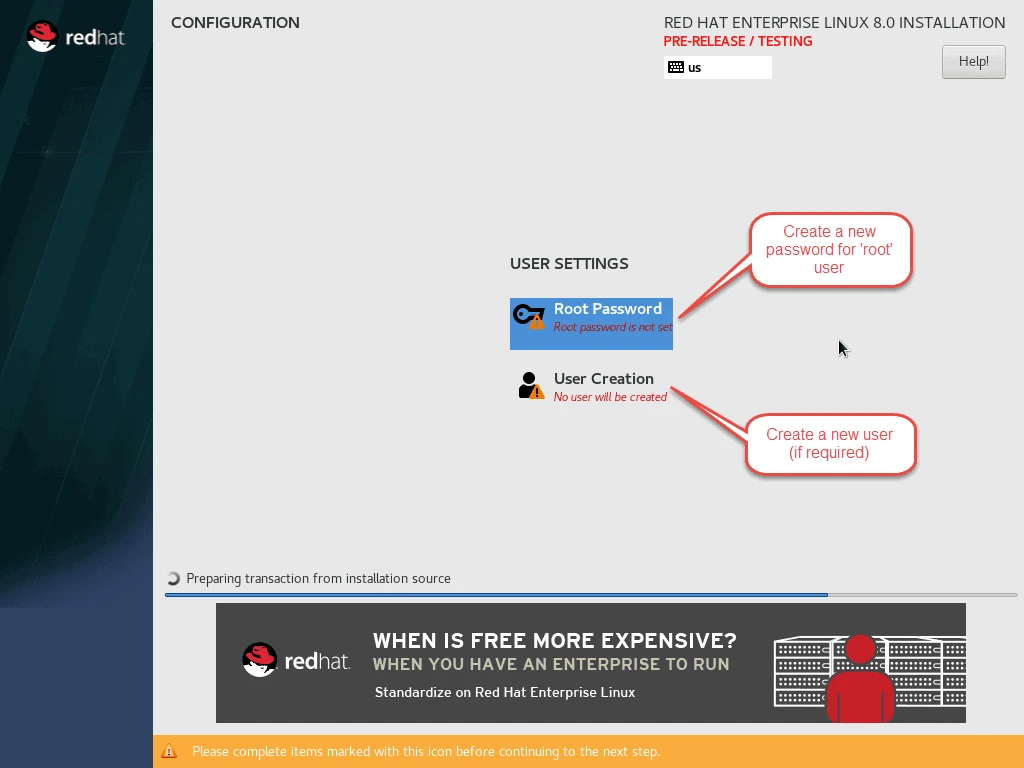
Finally start the installation and set the root user password.
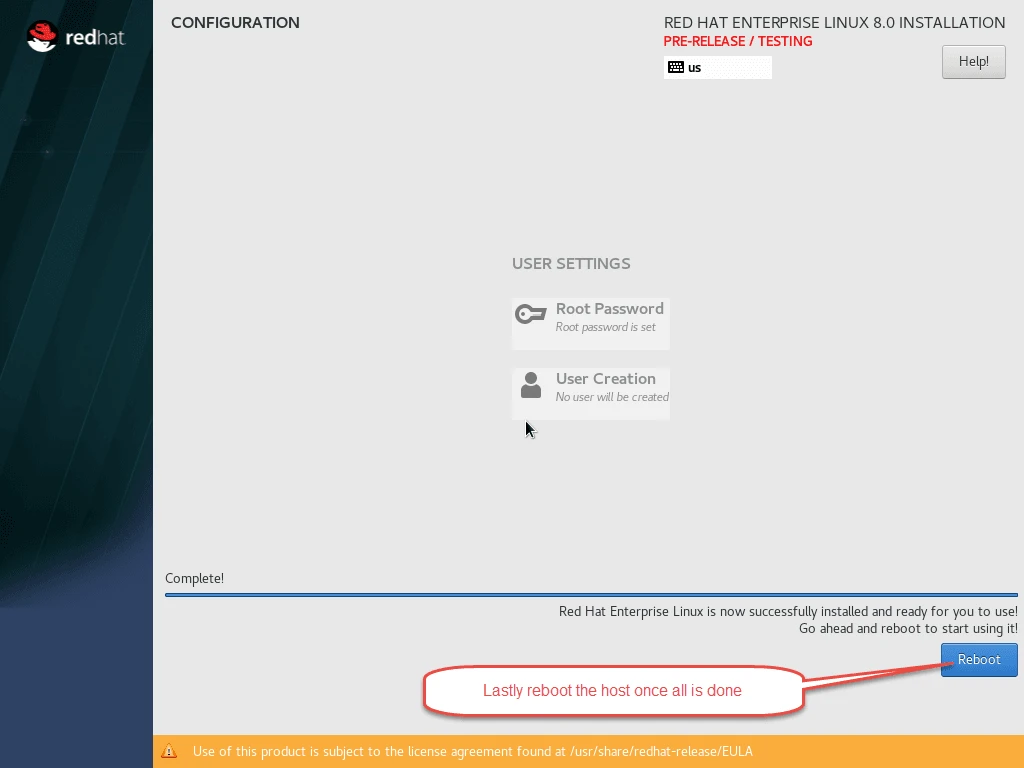
Once the installation is done, reboot the host.
Lastly I hope the steps from the article to install RHEL 8 Beta Linux was helpful. So, let me know your suggestions and feedback using the comment section.
