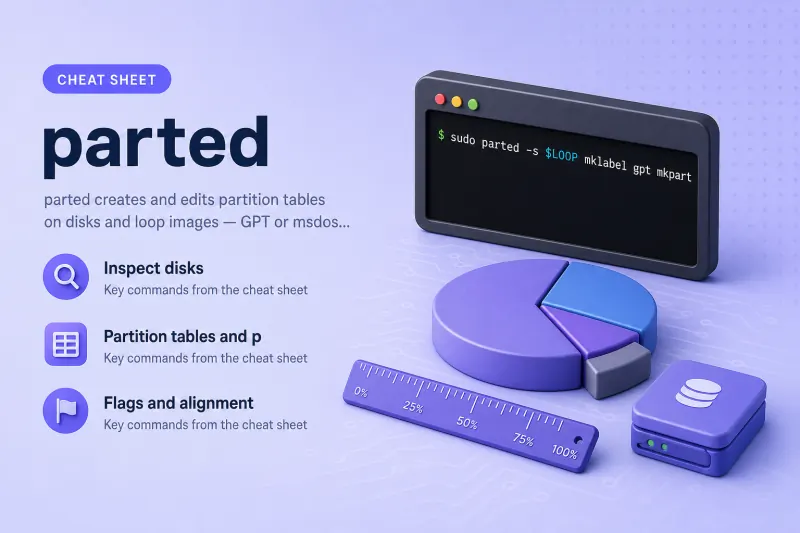
parted — quick reference
Inspect disks
| When to use | Command |
|---|---|
| List partition layout on every block device | sudo parted -l |
| Print one device in script-friendly columns | sudo parted -m /dev/sdX print |
| Print partition table as JSON | sudo parted -j /dev/sdX print |
| Show free space on a disk | sudo parted -s /dev/sdX unit MiB print free |
| Open interactive shell on a device | sudo parted /dev/sdX |
Partition tables and partitions
Script mode (-s) runs commands without prompts — use on loop images in /tmp for practice.
| When to use | Command |
|---|---|
| Create a GPT label (destructive) | sudo parted -s /dev/sdX mklabel gpt |
| Create an msdos (MBR) label | sudo parted -s /dev/sdX mklabel msdos |
| Add a primary partition with filesystem hint | sudo parted -s /dev/sdX mkpart primary ext4 1MiB 512MiB |
| Use percentages for start/end | sudo parted -s /dev/sdX mkpart primary 0% 50% |
| Add an extended partition (msdos) | sudo parted -s /dev/sdX mkpart extended 100MiB 200MiB |
| Add a logical partition inside extended | sudo parted -s /dev/sdX mkpart logical ext4 100MiB 150MiB |
| Delete partition number N | sudo parted -s /dev/sdX rm N |
| Resize partition N to a new end | sudo parted -s /dev/sdX resizepart N 1GiB |
Flags and alignment
| When to use | Command |
|---|---|
| Set the boot flag on partition 1 | sudo parted -s /dev/sdX set 1 boot on |
| Toggle a flag | sudo parted -s /dev/sdX toggle 1 boot |
| Check optimal alignment of partition N | sudo parted -s /dev/sdX align-check optimal N |
| Prefer optimal alignment for new partitions | sudo parted -s -a optimal /dev/sdX mklabel gpt |
| Set GPT partition name (GPT labels only) | sudo parted -s /dev/sdX name 1 data |
Script behaviour
| When to use | Command |
|---|---|
| Never prompt — fail or proceed in scripts | sudo parted -s ... |
| Auto-fix instead of abort when parted asks | sudo parted -s -f ... |
| Set default unit for the session | sudo parted -s /dev/sdX unit MiB print |
Help and version
| When to use | Command |
|---|---|
| Show options and built-in commands | parted --help |
| Show package version | parted --version |
parted — command syntax
Synopsis from parted --help on Ubuntu 25.04 (parted 3.6):
parted [OPTION]... [DEVICE [COMMAND [PARAMETERS]...]...]
Apply COMMANDs with PARAMETERS to DEVICE.  If no COMMAND(s) are given, run in
interactive mode.
parted edits in-memory partition metadata and writes it to the disk label. Creating or deleting partitions destroys data in the affected ranges. Practice on loop files from losetup before touching production disks.
parted — command examples
Essential GPT label and primary partition on a loop image
Safe lab pattern: image file → losetup → parted → rm image.
dd if=/dev/zero of=/tmp/part.img bs=1M count=128 status=none
LOOP=$(sudo losetup -f --show /tmp/part.img)
sudo parted -s $LOOP mklabel gpt mkpart primary ext4 1MiB 64MiB
sudo parted -s $LOOP print
Sample output:
Model: Loopback device (loopback)
Disk /dev/loop27: 134MB
Partition Table: gpt

Number  Start   End     Size    File system  Name     Flags
 1      1049kB  67.1MB  66.1MB               primary
Clean up:
sudo losetup -d $LOOP && rm -f /tmp/part.imgEssential List partitions on all block devices
-l is read-only and useful for inventory before resizing or cloning.
sudo parted -lOutput lists each disk model, size, partition table type, and partition rows. On busy servers the list is long — pipe to less or grep a device name.
Common Resize a partition and set the boot flag
resizepart changes the end position; ensure no filesystem extends past the new boundary without filesystem grow tools.
dd if=/dev/zero of=/tmp/resize.img bs=1M count=128 status=none
LOOP=$(sudo losetup -f --show /tmp/resize.img)
sudo parted -s $LOOP mklabel gpt mkpart primary 1MiB 64MiB
sudo parted -s $LOOP resizepart 1 96MiB
sudo parted -s $LOOP set 1 boot on
sudo parted -s $LOOP print
sudo losetup -d $LOOP && rm -f /tmp/resize.img
Sample flags column on GPT:
1 1049kB 101MB 99.6MB primary boot, espGPT EFI partitions may show both boot and esp when the EFI System Partition flag is set.
Common Delete a partition with rm
dd if=/dev/zero of=/tmp/rm.img bs=1M count=64 status=none
LOOP=$(sudo losetup -f --show /tmp/rm.img)
sudo parted -s $LOOP mklabel gpt mkpart primary 1MiB 32MiB mkpart primary 32MiB 48MiB
sudo parted -s $LOOP rm 2
sudo parted -s $LOOP print
sudo losetup -d $LOOP && rm -f /tmp/rm.img
Only partition 1 remains after rm 2.
Common msdos extended and logical partitions
MBR layouts need an extended container before logical partitions.
dd if=/dev/zero of=/tmp/msdos.img bs=1M count=256 status=none
LOOP=$(sudo losetup -f --show /tmp/msdos.img)
sudo parted -s $LOOP mklabel msdos mkpart primary ext2 1MiB 100MiB
sudo parted -s $LOOP mkpart extended 100MiB 200MiB
sudo parted -s $LOOP mkpart logical ext2 100MiB 150MiB
sudo parted -s $LOOP print
sudo losetup -d $LOOP && rm -f /tmp/msdos.img
If parted warns about the nearest manageable sector, answer Yes in interactive mode or adjust start/end by 1 MiB in script mode.
Common Machine-readable print — -m and -j
-m emits BYT; lines for parsers; -j emits JSON for modern tooling.
dd if=/dev/zero of=/tmp/m.img bs=1M count=64 status=none
LOOP=$(sudo losetup -f --show /tmp/m.img)
sudo parted -s $LOOP mklabel gpt mkpart primary 1MiB 32MiB
sudo parted -m $LOOP print
sudo losetup -d $LOOP && rm -f /tmp/m.img
Sample -m line:
BYT;
/dev/loop27:67MB:loopback:512:512:gpt:Loopback device:;
1:1049kB:33.6MB:32.5MB::primary:;
Common Show free space with unit MiB
dd if=/dev/zero of=/tmp/free.img bs=1M count=128 status=none
LOOP=$(sudo losetup -f --show /tmp/free.img)
sudo parted -s $LOOP mklabel gpt mkpart primary 1MiB 96MiB
sudo parted -s $LOOP unit MiB print free
sudo losetup -d $LOOP && rm -f /tmp/free.img
Sample free-space rows:
0.02MiB  1.00MiB  0.98MiB  Free Space
 1      1.00MiB  96.0MiB  95.0MiB               primary
        96.0MiB  128MiB   32.0MiB  Free Space
Advanced Alignment warning with -a optimal
On tiny loop images parted may warn that the partition is not optimally aligned — production disks above ~1 MiB alignment usually succeed silently.
dd if=/dev/zero of=/tmp/align.img bs=1M count=64 status=none
LOOP=$(sudo losetup -f --show /tmp/align.img)
sudo parted -s -a optimal $LOOP mklabel gpt mkpart primary 0% 50%
sudo parted -s $LOOP print
sudo losetup -d $LOOP && rm -f /tmp/align.img
Sample warning:
Warning: The resulting partition is not properly aligned for best performance: 34s % 2048s != 0sUse align-check optimal N after creation on real SSDs.
parted — when to use / when not
| Use parted when | Use something else when |
|---|---|
|
|
parted vs fdisk
| parted | fdisk | |
|---|---|---|
| Tables | GPT and msdos | GPT and DOS (build-dependent) |
| Resize | resizepart built in |
Not provided — delete/recreate or use other tools |
| Scripting | parted -s DEV cmd ... |
sfdisk, printf pipelines |
| Best for | GPT servers, grow/shrink boundaries | Quick MBR edits, familiar TUI |
Related commands
| Command | One line |
|---|---|
| parted | GPT/MBR partition editor (this page) |
| fdisk | Classic partition table editor |
| lsblk | Tree view of disks and partitions |
Browse the full index in our Linux commands reference.
parted — interview corner
When choose GPT over msdos with parted?
GPT supports large disks, many primary partitions, and UEFI boot entries. msdos is the MBR style — up to four primary slots and extended/logical gymnastics — common on legacy BIOS layouts.
A strong answer is:
"GPT for modern UEFI servers and disks over 2 TiB; msdos MBR for legacy BIOS or compatibility scenarios."
What does parted -s do?
-s (script mode) suppresses interactive questions — commands run as given. Pair with -f when you want parted to fix minor alignment prompts instead of aborting.
A strong answer is:
"-s is script mode — no prompts. I use parted -s DEVICE mklabel gpt mkpart ... in automation."
Does resizepart resize the filesystem?
No. resizepart only moves the partition boundary in the partition table. The filesystem inside may need resize2fs, xfs_growfs, or recreation if you shrink.
A strong answer is:
"resizepart edits the partition table only — I still grow or shrink the filesystem with the matching tool."
Does mkpart create a filesystem?
The optional FS-TYPE argument is a hint for interactive users — parted does not run mkfs. After mkpart, format with mke2fs or mkfs.ext4.
A strong answer is:
"mkpart only allocates partition space — I format separately with mkfs or mke2fs."
Why is parted dangerous on production disks?
mklabel wipes the old partition table; rm and overlapping mkpart ranges destroy data instantly. There is no undo — backups and parted -m print snapshots before changes are mandatory.
A strong answer is:
"mklabel and rm are destructive — I capture parted -m output and verify the device name before any write."
Troubleshooting
| Symptom | Likely cause | What to try |
|---|---|---|
Can't have overlapping partitions |
Start/end overlap | print free, adjust boundaries |
Partition doesn't exist |
Wrong number after prior edits | print and recount |
Unable to satisfy all constraints |
Size too small for label overhead | Shrink request or enlarge disk image |
Error: Partition(s) on ... are being used |
Mounted partition | umount or use a loop image |
| Alignment warnings on tiny images | Loop files under ~100 MiB | Expected in labs; use real disks for alignment tests |