lvchange — quick reference
Activation
| When to use | Command |
|---|---|
| Activate an LV (load device-mapper table) | sudo lvchange -ay myvg/mylv |
| Deactivate an LV | sudo lvchange -an myvg/mylv |
| Activate every LV in a VG | sudo lvchange -ay myvg |
| Reload metadata on an active LV | sudo lvchange --refresh myvg/mylv |
Access and layout
| When to use | Command |
|---|---|
| Set LV read-only | sudo lvchange -pr myvg/mylv |
| Restore read/write | sudo lvchange -prw myvg/mylv |
| Request contiguous extents | sudo lvchange -Cy myvg/mylv |
| Clear contiguous policy | sudo lvchange -Cn myvg/mylv |
| Set readahead sectors | sudo lvchange -r 256 myvg/mylv |
| Auto readahead | sudo lvchange -r auto myvg/mylv |
RAID, mirror, and thin (when present)
| When to use | Command |
|---|---|
| Resync a mirror or RAID LV | sudo lvchange --resync myvg/mylv |
| Check RAID parity | sudo lvchange --syncaction check myvg/mylv |
| Repair RAID discrepancies | sudo lvchange --syncaction repair myvg/mylv |
| Restart incomplete pvmove/lvconvert | sudo lvchange --poll y myvg/mylv |
| Thin pool discard zeroing | sudo lvchange -Z y myvg/thinpool |
Help and version
| When to use | Command |
|---|---|
| Show built-in usage | lvchange --help |
| Confirm attribute in output | sudo lvdisplay myvg/mylv |
lvchange — command syntax
Activation synopsis from lvchange --help on Ubuntu 25.04 (LVM 2.03.27):
lvchange
	[ -a|--activate y|n|ay ]
	( -C|--contiguous y|n,
	  -p|--permission rw|r,
	  -r|--readahead auto|none|Number,
	  ... )
	 VG|LV|Tag|Select ...
	[    --refresh ]
	[    --resync ]
	[    --poll y|n ]
lvchange updates in-memory device-mapper tables and on-disk metadata for supported attributes. Needs sudo.
lvchange — command examples
Essential Deactivate and reactivate an LV
Deactivation fails if # open is not zero — unmount first.
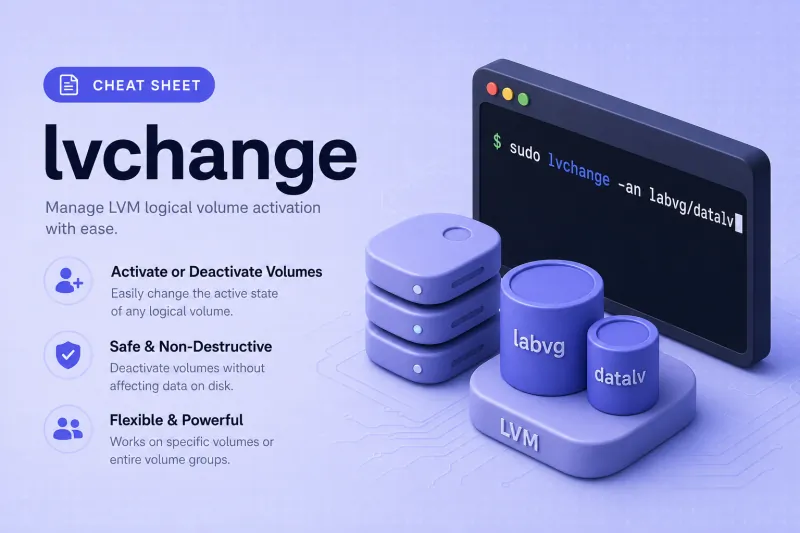
# practice VG labvg, LV datalv
sudo lvchange -an labvg/datalv
sudo lvs -o lv_name,lv_attr labvg/datalv
sudo lvchange -ay labvg/datalv
sudo lvs -o lv_name,lv_attr labvg/datalv
Sample output:
LV     Attr
  datalv -wi-a-----
  LV     Attr
  datalv -wi-a-----
In lv_attr, lowercase a in the fourth field means inactive; uppercase A means active (exact letter varies by LVM version — confirm with lvdisplay).
Essential Deactivate before lvremove
Clean removal path on lab LVs:
sudo umount /tmp/lvm-lab-mnt 2>/dev/null || true
sudo lvchange -an labvg/newdata
sudo lvremove -y labvg/newdata
Safer than lvremove -f on production because you confirm nothing holds the device open.
Common Switch an LV to read-only
Read-only blocks writes at the block layer — useful before backups or forensic copies.
sudo lvchange -pr labvg/datalv
sudo lvdisplay labvg/datalv | grep 'LV Write Access'
sudo lvchange -prw labvg/datalv
Sample output:
Logical volume labvg/datalv changed.
  LV Write Access        read only
  Logical volume labvg/datalv changed.
  LV Write Access        read/write
Common Set contiguous allocation on a linear LV
-Cy only succeeds when extents are already contiguous on one PV. Snapshot origins may reject the change.
sudo lvcreate -L 16M -n contlv labvg
sudo lvchange -Cy labvg/contlv
sudo lvdisplay labvg/contlv | grep Allocation
sudo lvchange -Cn labvg/contlv
Sample output:
Logical volume labvg/contlv changed.
  Allocation             contiguous
  Logical volume labvg/contlv changed.
On a snapshot origin you may see Command not permitted on LV — use a plain linear LV.
Common Refresh metadata after lvrename
After lvrename, reload the active device so kernel and udev see the new name.
sudo lvrename labvg datalv newdata
sudo lvchange --refresh labvg/newdata
sudo lvdisplay labvg/newdata | grep 'LV Path'
Sample output:
Renamed "datalv" to "newdata" in volume group "labvg"
  LV Path                /dev/labvg/newdata
Advanced Tune readahead sectors
Readahead hints help sequential read workloads. auto lets the kernel decide.
sudo lvchange -r 512 labvg/newdata
sudo lvdisplay labvg/newdata | grep -A1 'Read ahead'
sudo lvchange -r auto labvg/newdata
Sample output:
Logical volume labvg/newdata changed.
  Read ahead sectors     auto
  - currently set to     512
Advanced Resync mirror or RAID LVs
--resync forces a full mirror/RAID sync — only on LVs created with -m or --type raid*. On a plain linear LV the command is rejected:
sudo lvchange --resync myvg/mirrorlvRun during a maintenance window; I/O performance drops during resync.
lvchange — when to use / when not
| Use lvchange when | Use something else when |
|---|---|
|
lvchange vs vgchange
| lvchange | vgchange | |
|---|---|---|
| Scope | One or more LVs | Whole volume group |
| Typical use | Activation, permissions | Activate all LVs in VG, metadata |
Related commands
| Command | One line |
|---|---|
| lvchange | Change LV attributes (this page) |
| lvdisplay | Inspect current settings |
| lvremove | Delete an LV |
Browse the full index in our Linux commands reference.
lvchange — interview corner
How do you deactivate a logical volume?
sudo lvchange -an VG/LV — only when # open is zero (unmounted).
A strong answer is:
"lvchange -an after umount — if open count is non-zero, something still uses the device."
How is lvchange -pr different from mount -o ro?
-pr enforces read-only at the device-mapper layer. mount -o ro is filesystem-level — both can be combined for defense in depth.
A strong answer is:
"lvchange -pr is block-layer read-only; mount -ro is filesystem-level — I use both for backup windows when needed."
When is lvchange --refresh required?
After metadata-affecting operations (rename, certain cluster events) on an active LV so the running kernel reloads tables.
A strong answer is:
"After lvrename on an active LV, --refresh reloads device-mapper metadata without rebooting."
When does -Cy fail?
When extents are not already contiguous or the LV type forbids the change (some snapshot origins).
A strong answer is:
"-Cy fails if extents aren't contiguous or the LV type doesn't allow it — it's not a magic defragmenter."
What does lvchange --poll y do?
Restarts background operations such as interrupted pvmove or lvconvert transformations.
A strong answer is:
"--poll y resumes incomplete lvconvert/pvmove background work after a crash or reboot."
Troubleshooting
| Symptom | Likely cause | Fix |
|---|---|---|
Can't deactivate logical volume |
# open > 0 |
umount, stop services |
Command not permitted on LV |
Wrong LV type (snapshot, thin) | Use supported LV or different flag |
-Cy fails |
Non-contiguous layout | Recreate LV or accept inherit policy |
| Changes not visible | Stale udev | --refresh, dmsetup ls |