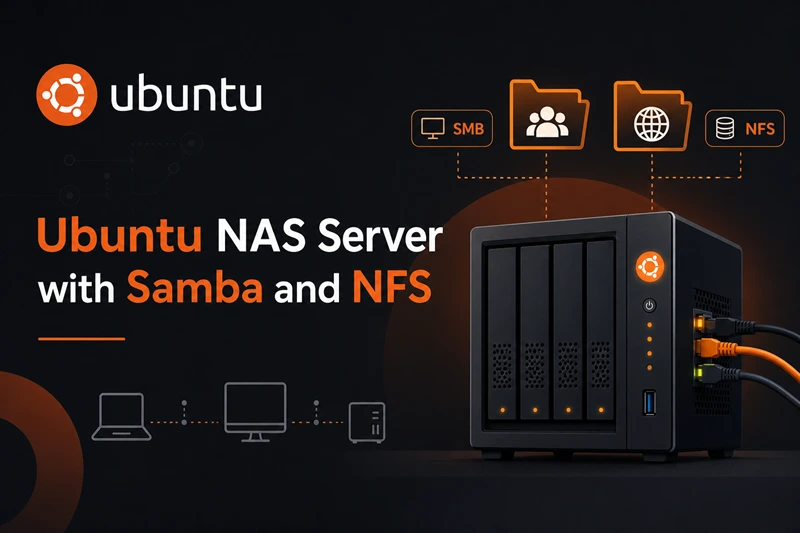
A NAS server on Ubuntu is a spare PC or VM that shares folders over the network—photos, backups, media—without proprietary NAS hardware. You install Samba for SMB/CIFS (what Windows calls a “network drive”) and NFS for Linux clients that want simpler permissions and good throughput on a home LAN.
This guide shows how to build that Linux NAS server on Ubuntu from scratch: storage under /srv/nas, authenticated Samba shares, a read-only guest share, NFS exports restricted to your subnet, firewall rules, and verification with real commands. I ran the full path on Ubuntu 25.04 with Samba 4.21.4 and NFS 2.8.2. For mounting shares from another machine, see how to mount a network drive on Ubuntu—this page is the server side.
Tested on: Ubuntu 25.04 (Plucky Puffin); kernel 6.14.0-37-generic.
Quick command summary
| Task | Command |
|---|---|
| Install NAS packages | sudo apt install -y samba nfs-kernel-server smbclient |
| Create data paths | sudo mkdir -p /srv/nas/data /srv/nas/public |
| Add Samba user | sudo useradd -m -s /usr/sbin/nologin nasuser then sudo smbpasswd -a nasuser |
| Validate Samba config | sudo testparm -s |
| Restart services | sudo systemctl restart smbd nmbd nfs-server |
| List SMB shares | smbclient -L //SERVER -U nasuser |
| List NFS exports | showmount -e SERVER |
| Open firewall (LAN) | sudo ufw allow OpenSSH then sudo ufw allow from 192.168.0.0/16 to any port 445 proto tcp |
Replace SERVER with your NAS hostname or LAN IP (for example 192.168.0.10), not 127.0.0.1 when testing from other computers.
Before you start
You need:
- Ubuntu 22.04 LTS, 24.04 LTS, or newer (Server or Desktop; I used Desktop 25.04).
- A dedicated data disk or partition for
/srv/naswhen possible—see check disk space on Linux before you commit terabytes. - A static IP or DHCP reservation so clients always reach the same address.
- sudo on the NAS host.
Ubuntu Desktop works as a home NAS; Ubuntu Server drops the GUI but follows the same Samba and NFS steps. Dedicated NAS operating systems add volume management and apps out of the box—Ubuntu trades that for flexibility and packages you already know.
Step 1: Install Samba and NFS server packages
sudo apt update
sudo apt install -y samba nfs-kernel-server smbclient
On my host:
Setting up samba (2:4.21.4+dfsg-1ubuntu3.5) ...
Created symlink ... smbd.service
Created symlink ... nmbd.service
Check versions:
apt-cache policy samba nfs-kernel-server | grep CandidateCandidate: 2:4.21.4+dfsg-1ubuntu3.5
Candidate: 1:2.8.2-2ubuntu1Step 2: Plan storage under /srv/nas
Create export directories on a disk with enough free space:
sudo mkdir -p /srv/nas/data /srv/nas/public
sudo chmod 2775 /srv/nas/data /srv/nas/public
For a private authenticated share, ownership must match the Samba account or writes fail with NT_STATUS_ACCESS_DENIED—that caught me on the first smbclient put test until I fixed permissions.
Mount a separate disk at /srv/nas in production (for example an ext4 volume in /etc/fstab). Using only the root filesystem works for a lab but is risky when / fills up.
Step 3: Create a Samba user
SMB credentials are separate from your Ubuntu login unless you sync them manually. Create a service account:
sudo useradd -m -s /usr/sbin/nologin nasuser
sudo smbpasswd -a nasuser
sudo smbpasswd -e nasuser
Enter a strong password when prompted. Clients use nasuser and this password—not your Ubuntu desktop password unless you set them the same on purpose.
Give the account ownership of the private data tree:
sudo chown -R nasuser:nasuser /srv/nas/dataStep 4: Configure Samba shares
Back up the default config, then append share definitions to /etc/samba/smb.conf:
sudo cp -a /etc/samba/smb.conf /etc/samba/smb.conf.bak.$(date +%F)
sudo tee -a /etc/samba/smb.conf <<'EOF'

[nas-private]
   path = /srv/nas/data
   browseable = yes
   read only = no
   guest ok = no
   valid users = nasuser
   create mask = 0664
   directory mask = 0775

[nas-public]
   path = /srv/nas/public
   browseable = yes
   read only = yes
   guest ok = yes
EOF
Validate syntax:
sudo testparm -sNear the end of the output you should see your shares:
[nas-private]
	path = /srv/nas/data
	read only = No
	valid users = nasuser

[nas-public]
	guest ok = Yes
	path = /srv/nas/public
Restart Samba:
sudo systemctl restart smbd nmbd
sudo systemctl enable smbd nmbd
systemctl is-active smbd nmbdactive
activeStep 5: Export NFS to your LAN
Edit /etc/exports and allow only your local subnet—adjust the CIDR to match your router:
echo '/srv/nas/data 192.168.0.0/24(rw,sync,no_subtree_check,no_root_squash)' | sudo tee -a /etc/exports
sudo exportfs -ra
sudo systemctl enable nfs-server
sudo systemctl restart nfs-server
List exports:
showmount -e localhostExport list for localhost:
/srv/nas/data 192.168.0.0/24no_root_squash lets root on trusted LAN clients write as root—convenient on a home lab, too loose for shared networks. Tighten options if the NAS sits on untrusted Wi‑Fi.
Step 6: Open the firewall (UFW)
If UFW is inactive, add rules before you enable it. Allow SSH first so you do not lock yourself out of a remote NAS:
sudo ufw allow OpenSSH comment 'SSH admin access'Replace 192.168.0.0/16 with your LAN subnet. Check the NAS address with hostname -I and your router’s DHCP range (common home nets use 192.168.0.0/24 or 192.168.1.0/24):
sudo ufw allow from 192.168.0.0/16 to any port 445 proto tcp comment 'Samba SMB'
sudo ufw allow from 192.168.0.0/16 to any port 139 proto tcp comment 'Samba NetBIOS'
sudo ufw allow from 192.168.0.0/16 to any port 2049 comment 'NFS'
sudo ufw enable
sudo ufw status numbered
On my test host after ufw enable:
Status: active

     To                         Action      From
     --                         ------      ----
[ 1] OpenSSH                    ALLOW IN    Anywhere                   # SSH admin access
[ 2] 445/tcp                    ALLOW IN    192.168.0.0/16             # Samba SMB
[ 3] 139/tcp                    ALLOW IN    192.168.0.0/16             # Samba NetBIOS
[ 4] 2049                       ALLOW IN    192.168.0.0/16             # NFS
[ 8] OpenSSH (v6)               ALLOW IN    Anywhere (v6)              # SSH admin access
Samba still answered on localhost after the firewall went active (smbclient -L //127.0.0.1 listed the shares). Traffic from addresses outside the allowed CIDR is dropped—adjust the subnet if clients cannot connect.
nfs-kernel-server 2.8.2, opening 2049/tcp and udp was enough in my test. If showmount fails through the firewall, add sudo ufw allow from 192.168.0.0/16 to any port 111 and retest.
Confirm listeners are still bound:
ss -tlnp | grep -E ':445|:139|:2049'LISTEN 0 50 0.0.0.0:445 0.0.0.0:*
LISTEN 0 50 0.0.0.0:139 0.0.0.0:*
LISTEN 0 64 0.0.0.0:2049 0.0.0.0:*Step 7: Verify from the NAS host
Seed a test file:
echo 'NAS lab ok' | sudo tee /srv/nas/data/welcome.txt
sudo chown nasuser:nasuser /srv/nas/data/welcome.txt
List SMB shares:
smbclient -L //127.0.0.1 -U nasuserSharename Type Comment
--------- ---- -------
nas-private Disk
nas-public DiskUpload through SMB (after ownership fix):
smbclient //127.0.0.1/nas-private -U nasuser -c 'put /etc/hostname smb-test-hostname.txt; ls'putting file /etc/hostname as \smb-test-hostname.txt
welcome.txt
smb-test-hostname.txtMount with CIFS locally (optional smoke test):
sudo mkdir -p /mnt/nas-test
sudo mount -t cifs //127.0.0.1/nas-private /mnt/nas-test \
  -o username=nasuser,password=YOUR_PASSWORD,vers=3.0,uid=$(id -u),gid=$(id -g)
df -hT /mnt/nas-test//127.0.0.1/nas-private cifs 58G 44G 15G 76% /mnt/nas-testMount NFS (from a client on the allowed subnet):
sudo mkdir -p /mnt/nas-nfs
sudo mount -t nfs NAS_IP:/srv/nas/data /mnt/nas-nfs
ls /mnt/nas-nfs
Use your NAS LAN address instead of 127.0.0.1 when testing from another PC.
Step 8: Connect clients
| Client | How to connect |
|---|---|
| Windows | File Explorer → \\NAS_IP\nas-private → sign in as nasuser |
| macOS | Finder → Go → Connect to Server → smb://NAS_IP/nas-private |
| Ubuntu GUI | Files → Other Locations → smb://NAS_IP/nas-private |
| Ubuntu CLI | sudo mount -t cifs //NAS_IP/nas-private /mnt/nas -o credentials=/root/.smbcredentials,vers=3.0 |
For permanent client mounts, credentials files, and fstab with _netdev, use the client mount guide linked at the top of this page.
Common pitfalls
| Issue | What goes wrong | Fix |
|---|---|---|
| Share name vs hostname | Clients use the PC name instead of the [share] block in smb.conf |
The share name is the bracketed name (nas-private), not the machine hostname |
| Wrong IP in fstab | 192.1.168.x typos or using 127.0.0.1 from other PCs |
Use the NAS LAN IP from hostname -I |
| SMB version mismatch | Old NAS firmware needs SMB1 | Prefer vers=3.0; avoid SMB1 unless a legacy device requires it |
NT_STATUS_ACCESS_DENIED on write |
Export path owned by root | sudo chown -R nasuser:nasuser /srv/nas/data |
| NFS mount hangs at boot | Server offline during boot | On clients, use _netdev and x-systemd.automount in fstab |
| Full root disk | Samba still runs but OS becomes unstable | Store data on a dedicated volume; monitor with df |
Optional next steps
- Automated snapshots:
timeshiftor BTRFS snapshots on the data volume. - Remote sync:
syncthingbetween your NAS and laptops (see must-have Ubuntu apps). - Malware scans on shares: periodic ClamAV sweeps when Windows clients use Samba (see does Ubuntu need antivirus?).
- Media serving: Jellyfin or Plex in Docker—outside the scope of basic Samba/NFS but common on Ubuntu home servers.
- Second disk mirror:
mdadmRAID1 or ZFS mirror for redundancy—not a backup by itself.
Remove the NAS services
sudo umount /mnt/nas-test /mnt/nas-nfs 2>/dev/null || true
sudo systemctl stop smbd nmbd nfs-server
sudo apt purge -y samba nfs-kernel-server
sudo rm -rf /srv/nas
# Restore smb.conf if you kept a .bak file
Troubleshooting
| Symptom | Likely cause | Fix |
|---|---|---|
testparm fails |
Syntax error in smb.conf | Run sudo testparm without -s to see the line number |
Shares missing in smbclient -L |
Stanzas inside wrong section | Put [nas-private] at the end of smb.conf, not inside [print$] |
exportfs: access denied |
Path not exported | Check /etc/exports; run sudo exportfs -rav |
Client mount error(13) |
Bad password or user | Test smbclient //NAS/nas-private -U nasuser%pass first |
NFS access denied by server |
Client IP outside export CIDR | Widen or fix the subnet in /etc/exports |
Job for smbd.service failed |
AppArmor or SELinux rare on Ubuntu | Check sudo journalctl -u smbd -n 30 |
References
- Ubuntu Server documentation
- Samba wiki
- Samba smb.conf(5) man page
- Ubuntu exports(5) man page
- Ubuntu UFW documentation
Summary
To run a NAS server on Ubuntu, install samba and nfs-kernel-server, create /srv/nas/data, add [nas-private] and optional guest shares to /etc/samba/smb.conf, enable users with smbpasswd, and export the same path in /etc/exports for your LAN subnet. Open 445 and 2049 in UFW, verify with testparm, smbclient, and showmount, then point Windows and Linux clients at \\SERVER\nas-private or smb://SERVER/nas-private. Keep data off the root disk, fix Unix ownership on the export path, and configure client fstab entries with _netdev on other machines.