
Overview on using Visual Studio Code with Node.js
Knowing how to use Node.js with Visual Studio Code is easy. All you do
is install your preferred Node.js version and
Visual Studio Code for your operating system or
kernel. Next, create or open a .js file with Visual Studio Code.
But if you want to be more comfortable building Node.js applications, you need to go an extra step in installing and customizing the tools for effective development.
This tutorial teaches you how to use Node.js with Visual Studio Code. It walks you through Node.js and Visual Studio Code installation, navigating the editor interface and settings, and using shortcuts and themes. Lastly, you will test your skills by building a simple web server.
Let's do this!
This section focuses on installing Node.js and Visual Studio Code on your operating system.
Step-1: Download and Install Node.js
We will download and install Node.js on our Ubuntu server. Let's start by inspecting what the Linux repositories have for us.
sudo apt-cache show node.jsInstall the default (lower) version of Node.js if you are comfortable with it. Otherwise follow these steps to install a higher version for your operating system.
Visit the Node.js website.
For Windows, click the link the LTS or current version and answer prompts to install Node.js on your system. For Linux and MacOS, you should proceed with the following steps to install your preferred Node.js version.
Below the link to the current version, click on Other Downloads.
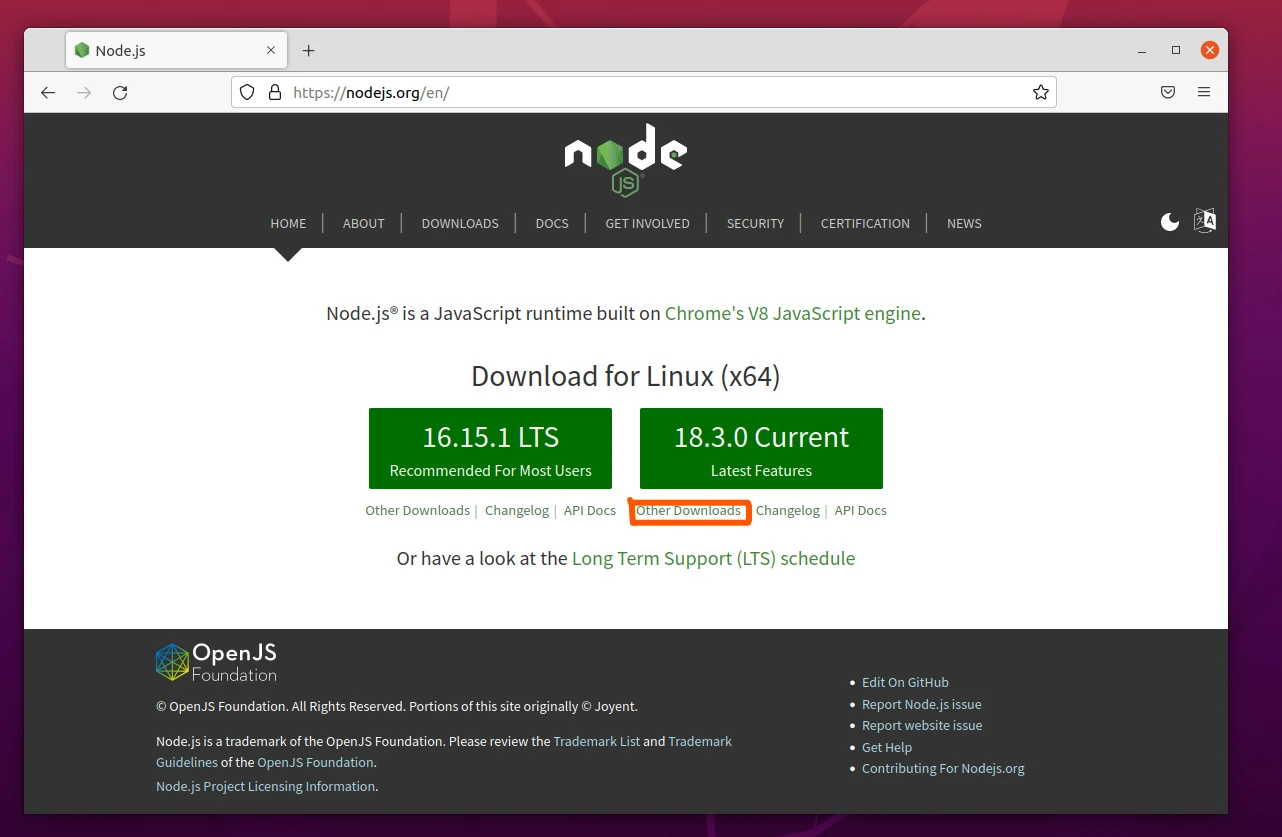
Scroll down the page to the links section. Choose the one written Installing Node.js via package manager.
![Using Node.js with Visual Studio Code [Step-by-Step]](/node-js-with-visual-studio-code/install-via-package-manager.webp)
Choose the installer for your operating system/kernel type. I am picking the option called Debian and Ubuntu based Linux distributions because I am installing Node.js on Ubuntu 20.04 machine.
![Using Node.js with Visual Studio Code [Step-by-Step]](/node-js-with-visual-studio-code/Ubuntu-based-distros.webp)
I then click on the link leading me to Node.js binary distributions repository.
![Using Node.js with Visual Studio Code [Step-by-Step]](/node-js-with-visual-studio-code/Nodejs-binary-distributions.webp)
Scroll down the page and copy your download command on the target version section. I am picking version 18 (v18.x) for Ubuntu.
![Using Node.js with Visual Studio Code [Step-by-Step]](/node-js-with-visual-studio-code/curl.webp)
Return to the terminal and run the command.
If curl is not found, install it first.
sudo apt install curlThen retry installing Node.js libraries.
curl -fsSL https://deb.nodesource.com/setup_current.x | sudo -E bash -Next, install the picked Node.js version.
sudo apt-get install -y node.js![Using Node.js with Visual Studio Code [Step-by-Step]](/node-js-with-visual-studio-code/install-Nodejs-1.webp)
Lastly, confirm your installation by checking the Node.js version.
node --versionLikewise, you can confirm npm installation (automatically installed
with Node.js) by checking its version.
npm --version![Using Node.js with Visual Studio Code [Step-by-Step]](/node-js-with-visual-studio-code/Node-version-2.webp)
Now that you have installed Node.js, let me show how to install Visual Studio Code on your system.
Step-2: Download and Install Visual Studio Code
Navigate to Visual Studio Code's website.
Installing on Windows and MacOS
Click on Download for Windows button. Likewise the website is intelligent enough to detect you have visited it with a Mac machine.
![Using Node.js with Visual Studio Code [Step-by-Step]](/node-js-with-visual-studio-code/download-for-windows.webp)
Visual Studio Code starts downloading once the download is complete. Answer the straightforward prompts to install the editor on your system.
Installing on Linux
Select the installation package for your distro type. I am choosing .deb because it suits my Ubuntu distribution.
![Using Node.js with Visual Studio Code [Step-by-Step]](/node-js-with-visual-studio-code/deb-package.webp)
Visual Studio Code is downloaded into your Downloads folder.
![Using Node.js with Visual Studio Code [Step-by-Step]](/node-js-with-visual-studio-code/vsc-downloads.webp)
Navigate to the Downloads folder to confirm the successful download.
cd Downloads
ls
Copy the downloaded file's name and install Visual studio using
dpkg.
# sudo dpkg -i [filename]
sudo dpkg -i code_1.67.2-1652812855_amd64.deb![Using Node.js with Visual Studio Code [Step-by-Step]](/node-js-with-visual-studio-code/install-Visual-Studio-Code-1.webp)
Now, Visual Studio Code should be available under the installed applications.
![Using Node.js with Visual Studio Code [Step-by-Step]](/node-js-with-visual-studio-code/vsc-installed.webp)
Now that we have installed both Node.js and Visual Studio Code let's see how to use Node.js with visual studio code.
Step-3: Configure Visual Studio Code to use Node.js
3.1 Open Visual Studio Code
You can open Visual Studio Code using many GUI ways, but the fastest way is through the terminal or Windows Command Prompt.
# Open an empty editor or reopen the previously closed file/folder
code

# Open the current folder
code .
3.2 Create a new file
You can create a file on the terminal and open it with Visual Studio Code. Alternatively, you can open an empty Visual Studio Code window, open the Explorer, and create a folder followed by a file.
![Using Node.js with Visual Studio Code [Step-by-Step]](/node-js-with-visual-studio-code/Explorer.webp)
Besides, you can click the File tab on the navigation menu, followed by New File.
![Using Node.js with Visual Studio Code [Step-by-Step]](/node-js-with-visual-studio-code/create-file-3.webp)
Let's create a file called server.js inside the test folder, then open
it with Visual Studio Code. Head over to your Terminal, create a folder,
and then open it with Visual Studio Code.
mkdir test
cd test
code .![Using Node.js with Visual Studio Code [Step-by-Step]](/node-js-with-visual-studio-code/open-a-folder.webp)
Hover over the folder name. A menu pops on the right side of the folder name. The first link creates a file, while the second one creates a folder. The third link refreshes the screen, while the last one collapses all the (sidebar) opened files and folders. Let's create the file using the first menu's link.
![Using Node.js with Visual Studio Code [Step-by-Step]](/node-js-with-visual-studio-code/file-create.webp)
3.3 Write your first javascript code
Let's write some JavaScript in the file.
console.log('How to use Node.js with visual studio code')Save the file using ctrl+s. And run it with Visual Studio Code's Terminal. There are many ways to toggle the Terminal.
You can use the main navigation links or shortcuts: ctrl+~ or ctrl+j
Note: command for Mac is the equivalence of the ctrl key for
Windows and Linux. So, it would be best to replace every ctrl
instance with the command if the given visual studio code shortcut fails
to work in Mac.
Now run the file with node.
node server.jsYou get the following output:
How to use Node.js with visual studio codeSimilarly, you can use the Visual Studio Code Terminal to install packages.
Step-4: Install additional packages on VSC
Let's install the following packages using the Terminal.
- express: Create a web server
- nodemon: Watch the server.
Before that, let's notify Node.js that we want to manage npm packages
by running npm init command.
npm init -y
npm i express nodemon![Using Node.js with Visual Studio Code [Step-by-Step]](/node-js-with-visual-studio-code/install-packages-4.webp)
Let's customize the package.json file to use nodemon, build the web
server and start it.
npm run devThen make a request using your browser as the client on PORT 3000.
![Using Node.js with Visual Studio Code [Step-by-Step]](/node-js-with-visual-studio-code/create-server.webp)
You can end a
process running on the terminal using the ctrl+c shortcut.
You must have realized that visual studio code is intelligent enough to detect we are writing JavaScript. It attempts to autocomplete statements for us.
![Using Node.js with Visual Studio Code [Step-by-Step]](/node-js-with-visual-studio-code/autocompletion.png.webp)
You probably wonder how I condensed the font size to accommodate more things or split the screen to accommodate the two files.
You can enlarge the font size by pressing the ctrl and + keys
simultaneously or minimize it using the ctrl and - keys. You can
split the screen by dragging one file to the top-right active corner of
another.
![Using Node.js with Visual Studio Code [Step-by-Step]](/node-js-with-visual-studio-code/split-screen.webp)
Here are more shortcuts and settings.
Step-5: Install extension packages on VSC
One of the main reasons programmers love Visual Studio Code is that you can build anything or use (almost) any programming language with it. It enables you to install extensions through its Extensions link on the sidebar.
All you do is click the Extensions link, search for a new or an installed extension then install or manage the extension.
![Using Node.js with Visual Studio Code [Step-by-Step]](/node-js-with-visual-studio-code/extensions-1.webp)
You can also manage extensions through the command palette, accessible through the View tab -> Command Palette
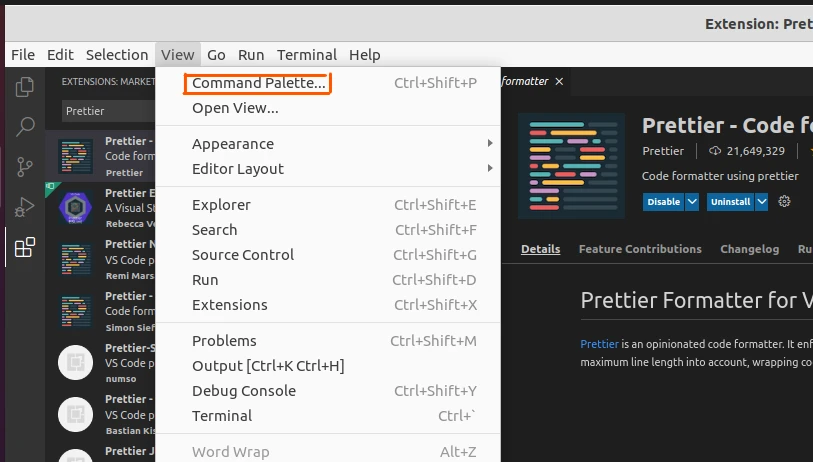
The command palette, also reachable via the ctrl+shift+p shortcut,
enables you to run commands.
Themes like Eva, One Dark Pro, Cobalt 2, and Material Theme change the appearance of the UI of your code editor. For example, let's install One Dark Pro, set its dark mode and see how the interface looks.
![Using Node.js with Visual Studio Code [Step-by-Step]](/node-js-with-visual-studio-code/install-theme.webp)
Additionally, you can install the Prettier extension for automatic
code format. Then open the server.js file to see the impact of themes
and extensions.
![Using Node.js with Visual Studio Code [Step-by-Step]](/node-js-with-visual-studio-code/new-look.webp)
The file has a (better) new look.
Lastly, you can close the editor or open another project.
Conclusion
Knowing how to use Node.js with Visual Studio Code starts by installing Node.js and the editor on your machine.
You should then learn how to manage files by navigating Visual Studio Code's interface. It would be helpful to know shortcuts and customize the editor for improved productivity.
