
In this tutorial, we will explore the concepts of Gates and Policies in Laravel, two powerful features designed to simplify the process of implementing authorization and access control in your applications. Laravel provides a robust and flexible authorization system that allows you to manage user permissions and roles, ensuring that only authorized users can perform specific actions or access certain resources.
Gates in Laravel provide a mechanism for defining simple, reusable authorization checks, while Policies are designed for managing permissions on a more granular level, typically for resource-based actions. Both Gates and Policies work seamlessly with Laravel's built-in middleware and Eloquent ORM, enabling you to create complex authorization rules and apply them across your application with ease.
Throughout this tutorial, we will guide you through the process of creating and using Gates and Policies in Laravel, discuss their benefits, and demonstrate how to apply these features to real-world scenarios. We will cover the process of defining Gates and Policies, registering them in the application, and integrating them with routes and controllers.
By the end of this tutorial, you will have a solid understanding of how to use Gates and Policies in Laravel to implement efficient and secure authorization systems in your applications, ensuring a safer and more reliable user experience.
Understanding Gates and Policies for Efficient Authorization in Laravel
In Laravel, authorization plays a crucial role in ensuring the security
and proper functioning of applications. Gates and Policies are two
essential features that help manage authorization efficiently. Gates are
defined in the app/providers/AuthServiceProvider.php file and decide
whether a client can perform an action using the Gate facade.
use Illuminate\Support\Facades\Gate;Gates are well-suited for controlling actions unrelated to specific resources or models. For instance, they can restrict access to the admin dashboard or prevent post deletion for users lacking the necessary permissions.
Policies, on the other hand, focus on organizing authorization logic
around resources or models. You can create a policy using the
php artisan make:policy <PolicyName> command. The resulting Policy
class is located in the app/Policies/<PolicyName>.php file. Policies
are ideal for authorizing actions related to resources or models,
ensuring that only users with the right permissions can perform those
actions.
You can write a gate using the Gate
facade's define method. The method takes two parameters:
Gate::define(<name>, <callback function>);The nameis an action that is
authorizable for a given user. The callback function receives an
instance of the User model as the first parameter and optional
parameters and returns a boolean result.
Here is an example.
<?php
...
    public function boot(): void
    {
        Gate::define('delete-blog', function (User $user, Blog $blog) {
            return $user->id === $blog->user_id;
        });
    }
...
We create a delete-blog action in the
boot() method of the app/providers/AuthServiceProvider.php file. The
callback function that receives User and Blog model instances
determines the action. In the above case, user can only delete a blog if
their id equals the id on the blog.
We could also create the action from a policy class.
Gate::define('delete-blog', [BlogPolicy::class, 'delete']);The above statement means the logic of
deleting the user lies in the delete method of the BlogPolicy
policy's class.
After creating a gate, you can use it to
authorize actions using the Gate facade's allows or denies
methods.
<?php
...
use Illuminate\Support\Facades\Gate;
class BlogController extends Controller
{
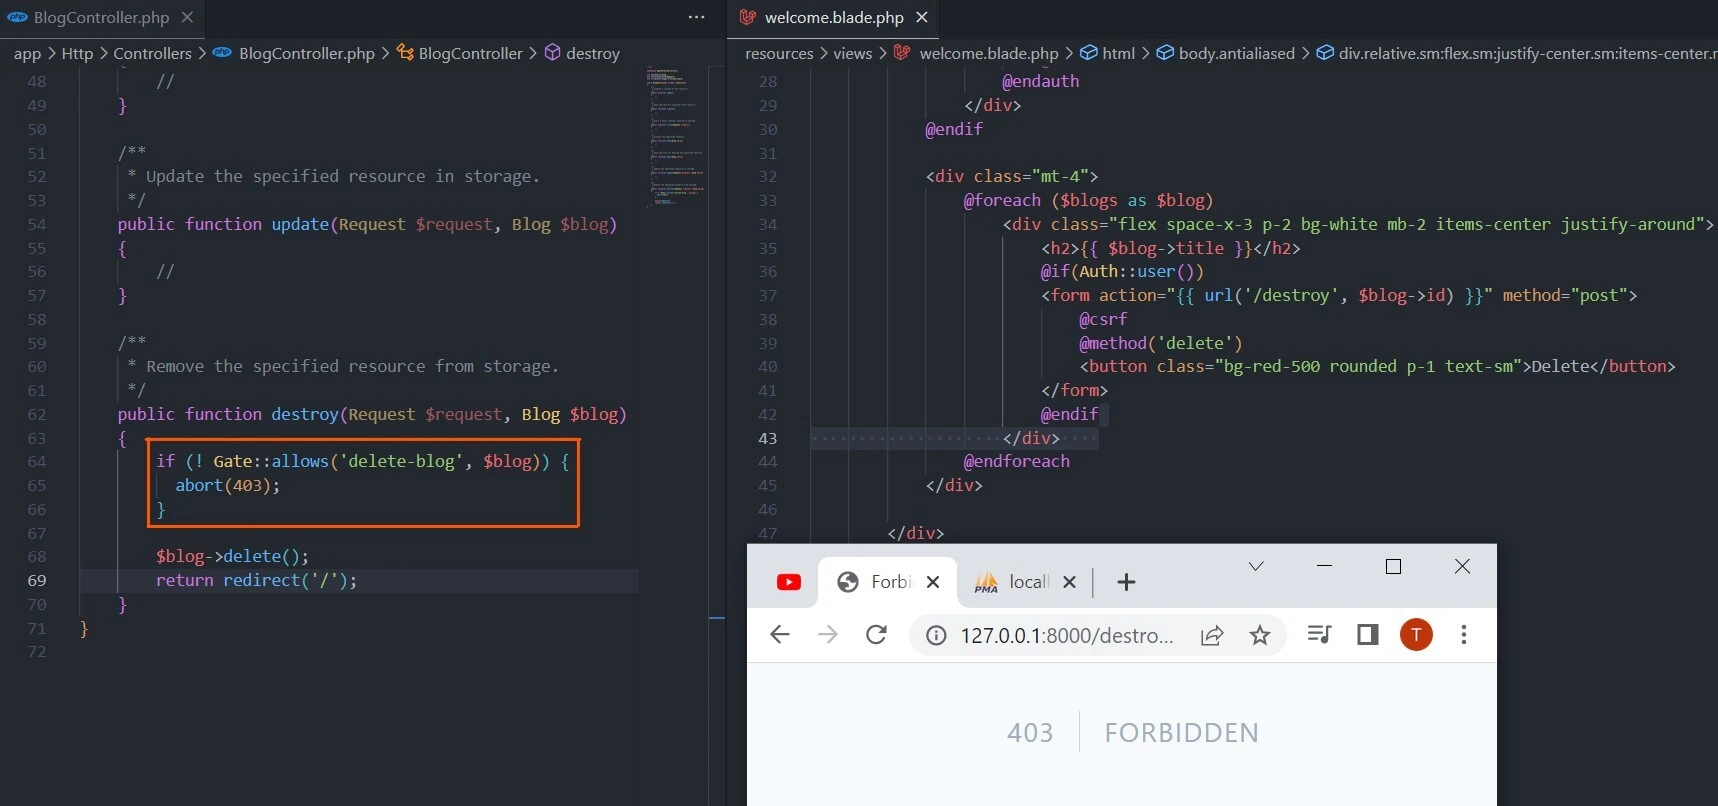
public function destroy(Request $request, Blog $blog)
{
if (! Gate::allows('delete-blog', $blog)) {
abort(403);
}
}
}We forbid the user from deleting a blog if
they are not ! authorized. As the name suggests, the allows method
grants permission.
We could also achieve the above code's
effect by excluding the not ! operator and replacing the allows with
the denies method.
Gate::denies('delete-blog', $blog)Apart from explicitly telling Laravel to
end the request with 403, you can let Laravel to attempt to authorize
the action or send an AuthorizationException exception. You can do
that using the authorize method.
Gate::authorize('delete-blog', $blog)An instance of the
AuthorizationException exception will be converted to the 403 HTTP
response. Besides, you can authorize multiple actions using any or
none methods.
// any
Gate::any(['delete-blog', 'update-blog'], $blog)
// none
Gate::none(['delete-blog', 'update-blog'], $blog)
You probably wonder why we did not passed
the user object during the authorization in the above methods. That is
because Laravel passes the authenticated user to the closure. However,
you can change the default behavior by passing another user other than
the authenticated one using the forUser method.
Gate::forUser($user)->allows('delete-blog', $blog)The allows method returns a single
boolean value even when the gate returns an authorization response.
However, you can use the inspect method to get the full authorization
response.
$response = Gate::inspect('delete-users');

if ($response->allowed()) {
    // action authorized
}
Lastly, you may intersect gate checks
using before or after methods. The before method precedes all
authorization checks, while the after method runs after all other
authorization checks.
Here is an example.
Gate::before(function (User $user, string $ability) {
    if ($user->isAdministrator()) {
        return true;
    }
});
The before method grants all abilities
to the specified user.
Example - How to use Laravel Policies
A policy is often tied to a model. For
example, a BlogPolicy wraps around a Blog model to control who can
create, read, update, or delete a resource. Each controller method,
which mostly has the same name as the policy method, maps to the policy
method.
| Controller Method | Policy Method |
|---|---|
| index | viewAny |
| show | view |
| create | create |
| store | create |
| edit | update |
| update | update |
| destroy | delete |
Each policy method is referred to as an ability. Each ability returns a boolean value.
Like models, policies are created with the artisan command. You can create an empty policy,
php artisan make:policy BlogPolicyor one with methods for performing actions on to the target model.
php artisan make:policy BlogPolicy --model=BlogAfter that, you need to inform Laravel to
use the policy when authorizing actions. You do that by registering the
policy in the App\Providers\AuthServiceProvider.php file's policies
property.
<?php
...
use App\Models\Blog;
use App\Policies\BlogPolicy;

class AuthServiceProvider extends ServiceProvider
{
...
    protected $policies = [
        Blog::class => BlogPolicy::class,
    ];
 ...
}
Now you can add authorization methods. For example, you can check if the user can delete the specified blog.
<?php

namespace App\Policies;

use App\Models\Blog;
use App\Models\User;

class PostPolicy
{
    public function delete(User $user, Blog $blog): bool
    {
        return $user->id === $blog->user_id;
    }
}
The delete method checks if the given
user created the blog before letting the user delete it. You can combine
the policy with a method from the Response class to return a detailed
response.
// in app/Policies/BlogPolicy.php
...
public function delete(User $user, Blog $blog): Response
{
    return $user->id === $blog->user_id
                ? Response::allow()
                : Response::deny('You can only delete your post');
}
The delete method checks if the blog's
user_id column matches the corresponding foreign key on the users
table. It authorizes the delete action using the Response class'
allow() method. Otherwise, it returns a detailed message with the
reason for denying the action. You can replace the deny() with
denyWithStatus(404) or denyAsNotFound() methods to hide a resource
via 404 HTTP response.
return $user->id === $blog->user_id ? Response::allow() : Response::denyAsNotFound();Besides, you can create a policy from a
user instance only. For example, you may only allow users to create
posts if they have a writer
role.
public function create(User $user): bool
{
    return $user->role == 'writer';
}
You can<a href="https://laravel.com/docs/10.x/authorization#authorizing-actions-using-policies" class="editor-rtfLink" target="_blank" rel="noopener"
authorize resources with policies via the
Usermodel, Controller helpers, or Blade templates. For instance, theUsermodel hascanandcannotmethods that receive the intended action and model before authorizing a resource.
// in app/Http/Controllers/BlogController.php
<?php
...
public function destroy(Request $request, Blog $blog)
{
if ($request->user()->cannot('delete', $blog)) {
abort(403);
}
// delete the post
}
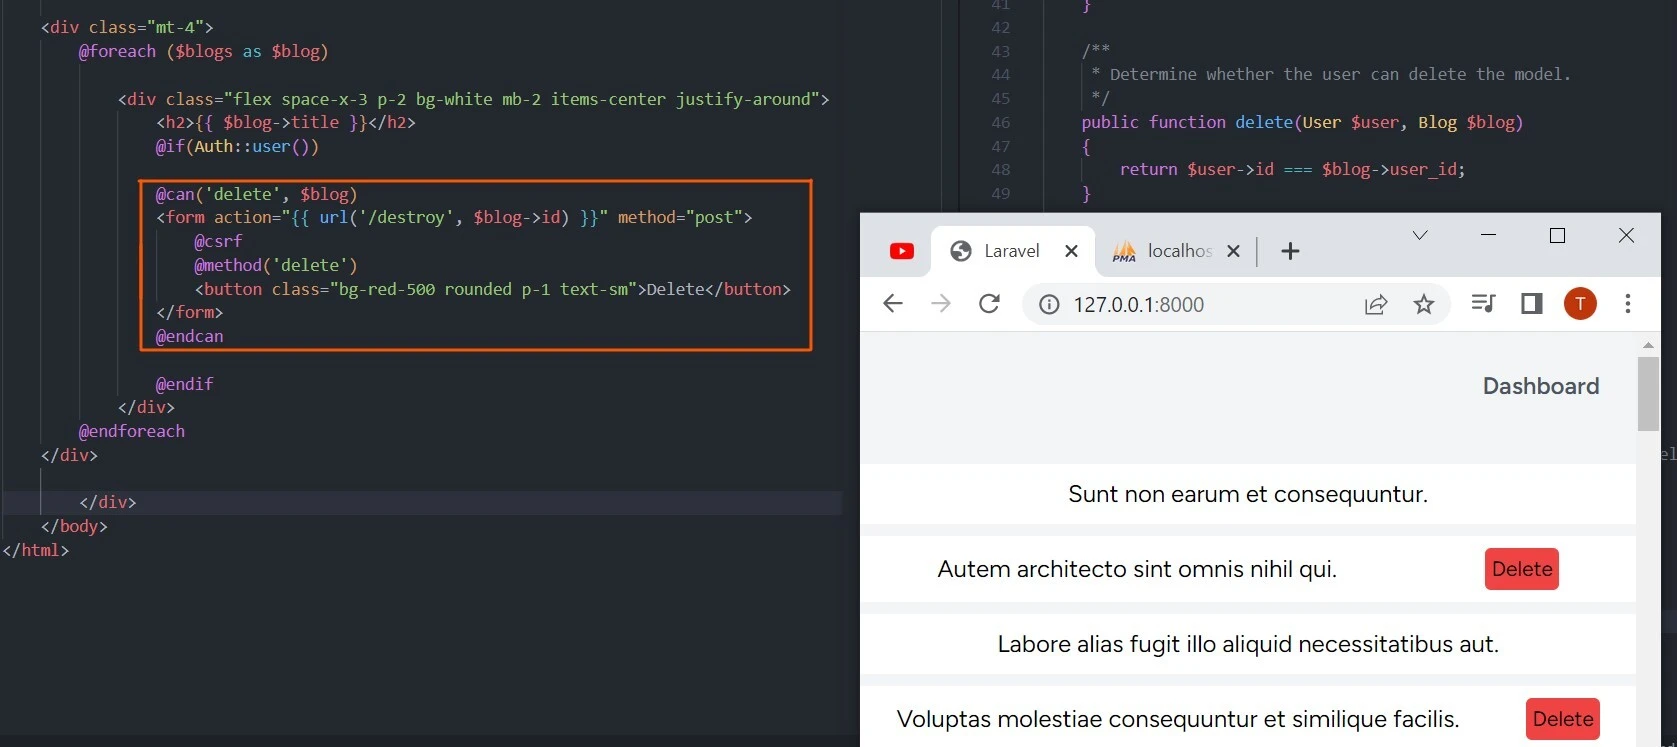
...Similarly, you can use Blade templates to
determine the viewable resource using the policies with @can or
@cannot derivatives.
@can('delete', $blog)
    <button><a href="{{ route('/destroy', $blog) }}">Delete</a></button>
@endcan
Laravel checks if the authenticated user can delete a blog before showing them the delete button.
Summary
In this tutorial, we discussed the concepts of Gates and Policies in Laravel, which are crucial for implementing efficient and secure authorization systems in applications. Authorization plays a vital role in determining whether a client is allowed to access or use specific resources or perform certain actions. Gates and Policies in Laravel offer a robust and flexible way to manage authorization and access control.
Gates are used for defining simple, reusable authorization checks that
are not tied to specific resources or models. They are defined in the
app/providers/AuthServiceProvider.php file and use the Gate facade.
Gates are ideal for controlling actions such as restricting access to an
admin dashboard or preventing post deletion based on user permissions.
Policies, in contrast, focus on organizing authorization logic around
resources or models. They are created using the
php artisan make:policy <PolicyName> command, resulting in a Policy
class located in the app/Policies/<PolicyName>.php file. Policies are
primarily used for authorizing actions related to resources or models,
ensuring that only users with the right permissions can perform those
actions.
By understanding how to use Gates and Policies in Laravel, developers can build complex and efficient authorization systems that ensure the security and proper functioning of their applications. These features provide a powerful and flexible approach to managing authorization, ultimately leading to a safer and more reliable user experience.
