This tutorial will explore Laravel Eager Loading, addressing the N+1 query problem, defining Eager Loading, its benefits, and how to use it for optimizing database queries in Laravel applications for improved performance.
Overview of Laravel and Eager Loading
Laravel is a robust PHP framework designed for the development of web applications following the model-view-controller (MVC) architectural pattern. It offers a clean, elegant syntax that aims to make web development both enjoyable and expressive. Laravel is known for its advanced features like Eloquent ORM, middleware, blade templating engine, and security mechanisms, making it highly popular among developers for building sophisticated applications efficiently.
Eager Loading is a feature provided by Laravel's Eloquent ORM to solve the problem of the N+1 query issue. It allows for the pre-loading of related database records at the time of querying the main model, which significantly optimizes performance by reducing the number of queries executed against the database. This is particularly useful in applications with complex data models where multiple relationships exist between models.
Understanding the N+1 Query Problem
The N+1 query problem occurs when an application makes one query to retrieve the primary entities (N) and then iterates over these entities to make an additional query for each one to fetch related data (1). This results in a total of N+1 database queries, which can severely degrade performance as the number of entities grows. This problem is common in ORM technologies and can lead to significant overhead in data fetching operations, especially in web applications that deal with complex data models and relationships.
What is Eager Loading?
Eager Loading is Laravel's solution to the N+1 query problem. It allows
developers to specify which related models should be loaded alongside
the primary model in a single query. This is done using the with
method provided by Eloquent, which intelligently constructs a query to
fetch all related data in an optimized way. The significance of Eager
Loading lies in its ability to improve application performance by
reducing the number of queries made to the database, thus speeding up
the data retrieval process and enhancing the overall user experience.
Eager Loading is a crucial technique in developing efficient Laravel
applications, especially those that require working with complex data
relationships.
Below are examples to illustrate Laravel queries with and without Eager Loading to understand the syntax difference:
Without Eager Loading
In this scenario, each time a related model is accessed, a new database query is executed, leading to the N+1 query problem.
$posts = Post::all();
foreach ($posts as $post) {
    // This will execute a new query for each post to retrieve its author
    echo $post->author->name;
}
Without Eager Loading, if you have 10 posts, this code would execute 1 query to get all posts and then 10 additional queries to fetch each post's author, totaling 11 queries.
With Eager Loading
Eager Loading pre-loads the relationships specified in a single query, significantly reducing the number of queries to the database.
$posts = Post::with('author')->get();
foreach ($posts as $post) {
    // The author is already loaded, no additional query is executed
    echo $post->author->name;
}
With Eager Loading, only 2 queries are executed regardless of the number of posts: 1 to get all posts and another to get all authors of these posts at once.
Check Performance Impact with and without Laravel Eager Loading
Let us demonstrate the performance improvement which we get when using foreach loop with and without eager loading in Laravel. In this section we will setup a new project where we will create some tables and add some dummy data. Later we will try to access those tables using foreach loop and observe the difference when running the same query with and without eager loading.
I already have installed Laravel and created a MariaDB instance which I will use to integrate my project from this tutorial.
1. Create a new Laravel Project
We will create a new project inside our /opt/projects directory where
we are storing all our projects to demonstrate all other topics which
you can see on the left menu.
sudo mkdir -p /opt/projects
sudo chmod 777 /opt/projects
cd /opt/projects
composer create-project --prefer-dist laravel/laravel eagerLoadingExample
This command downloads the Laravel framework and sets up a new project for you.
Navigate to your project directory
cd eagerLoadingExample2. Configure Your Database
Edit the .env file in your project root to configure your database
settings. Here's an example configuration from my environment:
DB_CONNECTION=mysql
DB_HOST=127.0.0.1
DB_PORT=3306
DB_DATABASE=my_laravel_db
DB_USERNAME=user1
DB_PASSWORD=Passw0rd
3. Create Models and Migrations
For this example, let's say we have two models: Post and Comment.
Each post can have many comments. We'll create these models and their
migrations with
the following commands:
php artisan make:model Post -m
php artisan make:model Comment -m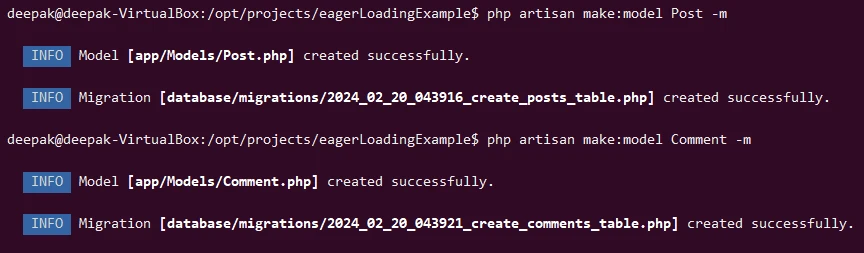
Next, define the database schema in the migration files located in
database/migrations. Here's an example schema for both:
Update database/migrations/2024_02_20_043916_create_posts_table.php:
Schema::create('posts', function (Blueprint $table) {
    $table->id();
    $table->string('title');
    $table->text('body');
    $table->timestamps();
});
Update
database/migrations/2024_02_20_043921_create_comments_table.php:
Schema::create('comments', function (Blueprint $table) {
    $table->id();
    $table->foreignId('post_id')->constrained()->onDelete('cascade');
    $table->text('body');
    $table->timestamps();
});
4. Define Relationships
In the Post model, define a relationship to Comment inside
app/Models/Post.php:
<?php

namespace App\Models;

use Illuminate\Database\Eloquent\Factories\HasFactory;
use Illuminate\Database\Eloquent\Model;

class Post extends Model
{
    use HasFactory;
    public function comments()
    {
        return $this->hasMany(Comment::class);
    }
}
And in the Comment model, define a relationship to Post in
app/Models/Comment.php:
<?php

namespace App\Models;

use Illuminate\Database\Eloquent\Factories\HasFactory;
use Illuminate\Database\Eloquent\Model;

class Comment extends Model
{
    use HasFactory;
    public function post()
    {
        return $this->belongsTo(Post::class);
    }
}
5. Perform Migration
Run the migrations with:
php artisan migrate
6. Seed the Database (Optional)
You may want to seed your database with fake data to test eager loading.
Laravel uses factories to generate test data for your models. If you
don't already have factories for your Post and Comment models, you
can create them using Artisan commands.
php artisan make:factory PostFactory --model=Post
php artisan make:factory CommentFactory --model=Comment
After running these commands, you'll find the new factory files in the
database/factories directory.
Open each factory file and define the model's default state. Use Faker to generate dummy data for each attribute.
For example, inside database/factories/PostFactory.php:
namespace Database\Factories;

use Illuminate\Database\Eloquent\Factories\Factory;
use App\Models\Post;

class PostFactory extends Factory
{
    protected $model = Post::class;

    public function definition()
    {
        return [
            'title' => $this->faker->sentence,
            'body' => $this->faker->paragraph,
        ];
    }
}
And inside database/factories/CommentFactory.php:
namespace Database\Factories;

use Illuminate\Database\Eloquent\Factories\Factory;
use App\Models\Comment;

class CommentFactory extends Factory
{
    protected $model = Comment::class;

    public function definition()
    {
        return [
            'post_id' => \App\Models\Post::factory(),
            'body' => $this->faker->text,
        ];
    }
}
Create a seeder that uses these factories to populate your database with
Post and Comment records.
php artisan make:seeder PostAndCommentSeederThis will create a seeder file in database/seeders.

Open the PostAndCommentSeeder.php file and use the factories to create
records. For example:
<?php

namespace Database\Seeders;

use Illuminate\Database\Console\Seeds\WithoutModelEvents;
use Illuminate\Database\Seeder;

class PostAndCommentSeeder extends Seeder
{
    /**
     * Run the database seeds.
     */
    public function run()
    {
        \App\Models\Post::factory(10) // Create 10 posts
            ->has(\App\Models\Comment::factory()->count(5)) // Each post will have 5 comments
            ->create();
    }
}
This seeder creates 10 posts, each with 5 comments. Finally, run the seeder via Artisan:
php artisan db:seed --class=PostAndCommentSeederThis command tells Laravel to execute your PostAndCommentSeeder, which
in turn generates the posts and comments in your database.
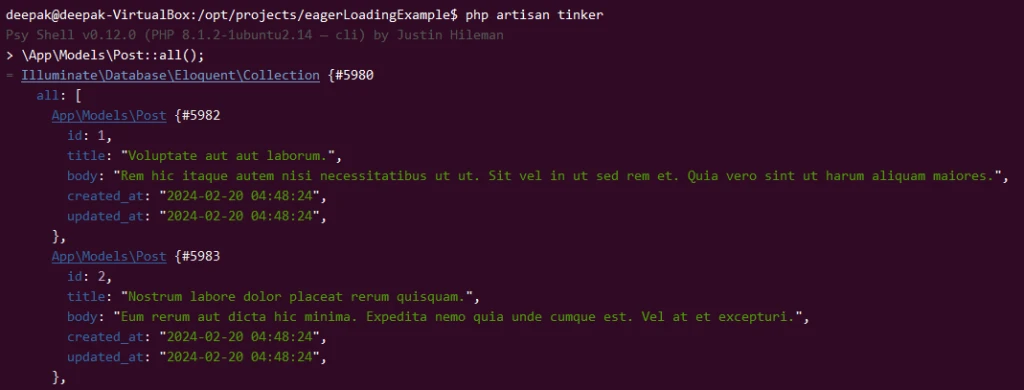
We can use Laravel Tinker to check if the database seeding was successful. From your project's root directory, run:
php artisan tinkerOnce in Tinker, you can execute
Eloquent queries to fetch data from your models. For example, to check if
your Post and Comment models have been populated, you can run:
\App\Models\Post::all();This command retrieves all posts. If you see a collection of Post
models outputted, your seeding was successful for the Post table.
Similarly, to check for comments, you can run:
\App\Models\Comment::all();This retrieves all comments. Again, seeing a collection of Comment
models means your seeding was successful for the Comment table.
When you're done, you can exit Tinker by pressing CTRL + D or typing
exit.
7. Create Routes
Create a route to fetch posts without eager loading comments using
routes/web.php in your Laravel project directory:
use Illuminate\Support\Facades\DB;
use App\Models\Post;

Route::get('/test-loading', function () {
    DB::enableQueryLog(); // Start logging queries

    // Fetch posts without eager loading
    $posts = Post::all();
    foreach ($posts as $post) {
        echo $post->comments->count() . ' comments<br>';
    }

    // Log and reset after non-eager loading
    $log = DB::getQueryLog();
    echo 'Queries executed without eager loading: ' . count($log) . "<br>";
    DB::flushQueryLog(); // Resetting query log

    // Fetch posts with eager loading
    $posts = Post::with('comments')->get();
    foreach ($posts as $post) {
        echo $post->comments->count() . ' comments<br>';
    }

    // Review query log with eager loading
    $log = DB::getQueryLog();
    echo 'Queries executed with eager loading: ' . count($log) . "<br>";
});
This route function is designed to highlight the performance differences between fetching data with and without eager loading in Laravel, by:
- Tracking SQL Queries: Initiating query logging to monitor and compare the number of database queries executed in each scenario.
- Comparing Fetch Methods: First, fetching posts without eager loading results in a higher number of queries (N+1 problem), as it executes an additional query for each post to count comments. Then, resetting the log and fetching posts with eager loading significantly reduces the number of queries, as it preloads comments in a single additional query.
- Demonstrating Efficiency: By displaying the total number of queries executed in each approach, it directly shows how eager loading improves performance by reducing the number of database interactions required to fetch related data.
8. Run Your Application
Make sure your Laravel application is running. If it's not, you can
start it using the Artisan command php artisan serve from your
terminal. This command will start a development server for you to test
your application.
Open a web browser and navigate to the route you've defined. If you're
using the default Laravel development server, the URL will likely be
something like http://localhost:8000/test-loading.
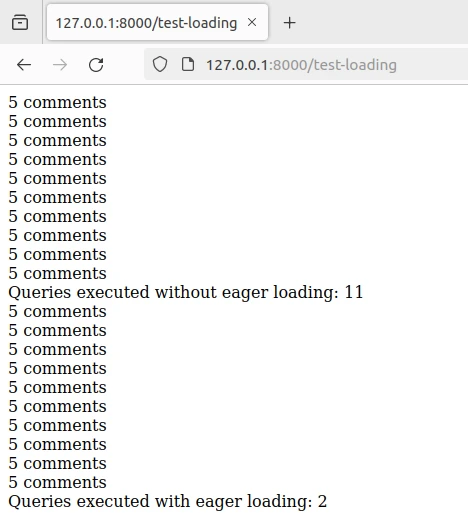
9. Observe the Output
On accessing the route, your browser should display the number of comments for each post and the total number of queries executed with and without eager loading.
10. Analyzing the Result
- Without Eager Loading - 11 queries executed: This indicates
that for each post retrieved by
Post::all();, an additional query was executed to count its comments when accessed via$post->comments->count(). With 10 posts, this results in 10 additional queries after the initial query to fetch the posts, totaling 11 queries. - With Eager Loading - 2 queries executed: By using
Post::with('comments')->get();, Laravel preloads the comments for all retrieved posts in a single query. This means only one query to fetch the posts and one additional query to fetch all their comments, regardless of the number of posts. This dramatically reduces the number of queries to just 2, showcasing eager loading's effectiveness in optimizing database interactions.
This comparison clearly demonstrates why eager loading is essential for optimizing database interactions in applications dealing with relational data. Eager loading ensures that related models are loaded in advance, in the most efficient manner possible, reducing the overall number of queries and, consequently, the load on your database.
Advanced Eager Loading Options
Advanced Eager Loading in Laravel expands upon the basic concept of Eager Loading to enhance the efficiency and flexibility of database queries, particularly when working with complex data relationships.
1. Nested Eager Loading
Nested eager loading allows you to load relationships of relationships, which is particularly useful for deeply nested data structures. This is done by specifying the nested relationships using the "dot" syntax.
For instance, if an Author has many Posts, and each Post has many
Comments, you can eager load all the posts for an author and all
comments for each post like this:
$authors = Author::with('posts.comments')->get();2. Eager Loading Constraints
Laravel also allows you to apply constraints to the eager loading query,
enabling you to filter the related data that is loaded. This is done by
passing a closure to the with method that adds conditions to the eager
loading query.
For example, to only load comments that have been approved:
$posts = Post::with(['comments' => function ($query) {
    $query->where('approved', true);
}])->get();
3. Eager Loading at a Later Stage
Sometimes, you may decide to eager load a relationship after the initial
query has been made. Laravel provides the load method to accomplish
this. The load method works similarly to the with method but is used
on an existing model instance or collection.
For example, if you initially fetch a post without its comments and decide later to load them:
$post = Post::find(1);
// Deciding to load comments later
$post->load('comments');
Eager Loading Multiple Relationships
1. Use the with Method for Multiple Relationships
To eager load multiple relationships, you can pass an array of
relationship names to the with method. This approach is
straightforward and ensures that all specified relationships are loaded
in just a few queries instead of one query per relationship per model.
$users = User::with(['posts', 'comments', 'profile'])->get();This line of code will load the users along with their posts, comments, and profile in a significantly reduced number of queries.
2. Specify Nested Relationships
When you need to load relationships of relationships, you can use "dot" notation. This is particularly useful for deeply nested structures, ensuring that you're not only optimizing the top-level model queries but also the related models' queries.
$books = Book::with('author.contacts', 'publisher')->get();Here, for each book, Laravel will load the associated author and the author's contacts, as well as the publisher, in an optimized manner.
3. Conditional Eager Loading
Sometimes, you might not need to load all related models in every scenario. Laravel allows you to conditionally eager load relationships based on various conditions, which can further optimize performance.
$query = User::query();

if (condition to load posts) {
    $query->with('posts');
}

if (condition to load profile) {
    $query->with('profile');
}

$users = $query->get();
This conditional loading ensures that additional data is only fetched when necessary.
4. Eager Load Constraints
Applying constraints to eager loading queries can help you filter the
loaded relationships, ensuring that only relevant data is fetched. This
is done by providing a closure to the with method, allowing you to add
conditions to the related model queries.
$users = User::with(['posts' => function ($query) {
    $query->where('status', 'published');
}])->get();
This will load all users and their published posts, excluding any posts that do not meet the condition.
5. Utilizing load Method for Conditional Eager Loading
In scenarios where you might decide to eager load relationships after
the initial model has been retrieved, you can use the load method on
an existing model instance or collection.
$user = User::find($id);

// Based on some condition, eager load additional relationships
if (needsPosts) {
    $user->load('posts');
}
This approach offers flexibility, allowing you to dynamically decide which relationships to load based on runtime conditions.
Summary
Eager Loading in Laravel is a pivotal feature designed to enhance the efficiency and performance of applications by addressing the N+1 query problem. Through the strategic pre-loading of related data, Laravel developers can significantly reduce the number of database queries, thereby improving application response times and overall user experience. Here's a summary of the key points discussed:
- Understanding the N+1 Query Problem: This issue arises when an application executes one query to retrieve the main entities and then additional queries for each entity to fetch related data. Eager Loading effectively mitigates this problem by loading related data in a single query.
- What is Eager Loading? It's a technique provided by Laravel's Eloquent ORM that allows developers to specify which related models should be loaded together with the initial query. This optimization reduces the number of database queries, thus enhancing performance.
- Techniques for Eager Loading: We covered how to eager load multiple relationships, apply constraints to eager loading queries for more refined data fetching, and perform nested eager loading for deep relationship structures.
- Eager Loading at a Later Stage: Laravel also supports the dynamic addition of eager loading after the initial model retrieval, offering flexibility in how and when related data is loaded based on runtime conditions.
