A self-signed certificate is one you sign with your own private key instead of a public Certificate Authority (CA). Browsers and phones will still warn that it is untrusted, but TLS encryption works—ideal for local development, internal APIs, lab Kubernetes clusters, and staging hosts that never face the public internet.
This guide shows how to generate a self-signed SSL certificate with OpenSSL: the one-line command most people copy from Stack Overflow, SAN entries for localhost and IP addresses, RSA and EC keys, passphrase-protected keys, and the two-step CSR path when you need more control. I ran every command on Ubuntu 25.04 with OpenSSL 3.4.1 and kept sample output below. If openssl is missing, install it first with Install OpenSSL on Ubuntu.
Tested on: Ubuntu 25.04 (Plucky Puffin); kernel 6.14.0-37-generic; OpenSSL 3.4.1.
Quick answer: one command with SAN (recommended)
Modern clients require a Subject Alternative Name (SAN). This single command creates an unencrypted 2048-bit RSA key, a one-year certificate, and SAN entries for localhost and 127.0.0.1:
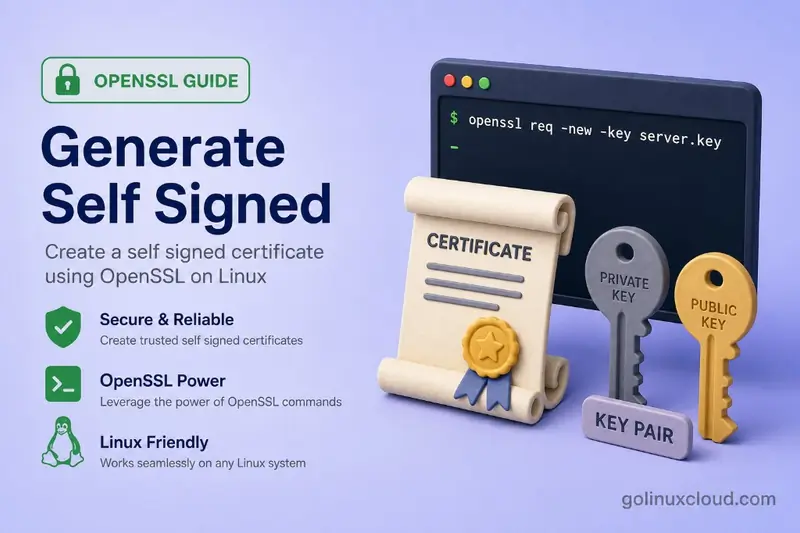
openssl req -x509 -newkey rsa:2048 -noenc \
  -keyout selfsigned.key -out selfsigned.crt \
  -days 365 \
  -subj "/CN=localhost" \
  -addext "subjectAltName=DNS:localhost,IP:127.0.0.1"
Confirm the SAN was written:
openssl x509 -in selfsigned.crt -noout -subject -ext subjectAltNamesubject=CN=localhost
X509v3 Subject Alternative Name:
DNS:localhost, IP Address:127.0.0.1Use selfsigned.key and selfsigned.crt (or rename to .pem) in nginx, Apache, or your app’s TLS settings.
When self-signed is the right choice
| Use self-signed | Use a CA-signed cert instead |
|---|---|
localhost / dev machines |
Public websites and customer-facing HTTPS |
Internal .local / .internal hostnames |
Email (SMTP/IMAP) on the internet |
| Temporary load-test endpoints | Mobile apps distributed to app stores |
| mTLS lab before you build a private CA | Anything that must pass browser trust without warnings |
Self-signed certs encrypt traffic but do not prove identity to clients. For a private PKI with a real root CA, see the OpenSSL tutorial hub.
Generate for a hostname, multiple DNS names, and an IP
Replace the example names and IP with yours. This uses 4096-bit RSA and standard TLS server extensions:
openssl req -x509 -newkey rsa:4096 -noenc \
  -keyout server.key -out server.crt \
  -days 365 \
  -subj "/C=US/ST=California/O=DevLab/CN=dev.internal" \
  -addext "basicConstraints=critical,CA:FALSE" \
  -addext "keyUsage=critical,digitalSignature,keyEncipherment" \
  -addext "extendedKeyUsage=serverAuth" \
  -addext "subjectAltName=DNS:dev.internal,DNS:dev.local,IP:192.168.1.50"
Check the SAN block:
X509v3 Subject Alternative Name:
    DNS:dev.internal, DNS:dev.local, IP Address:192.168.1.50
For a wildcard in SAN (lab only):
-addext "subjectAltName=DNS:example.test,DNS:*.example.test"Two-step method: private key, CSR, then sign
Use this when you submit a CSR to a CA later, or when you want the key generated separately from signing.
1. Create the private key
openssl genpkey -algorithm RSA -out mykey.pem2. Create a CSR with SAN
openssl req -new -key mykey.pem -out mycsr.csr \
  -subj "/CN=app.example.test" \
  -addext "subjectAltName=DNS:app.example.test"
3. Self-sign the CSR
openssl x509 -req -days 365 -in mycsr.csr -signkey mykey.pem -out cert.pem \
  -copy_extensions copyall
On success OpenSSL prints Certificate request self-signature ok. Verify dates:
openssl x509 -in cert.pem -noout -dates -subjectnotBefore=Jul 2 04:29:00 2026 GMT
notAfter=Jul 2 04:29:00 2027 GMT
subject=CN=app.example.testThe -copy_extensions copyall flag copies SAN from the CSR into the certificate—without it, SAN from -addext on the CSR can be dropped at sign time.
Encrypted private key (passphrase)
Services like nginx cannot start if the key prompts for a password on every reload. Use encryption only when you accept manual unlock or have a secrets manager.
Prompt for password interactively:
openssl genrsa -aes256 -out secure.key -passout stdin
openssl req -x509 -new -key secure.key -out secure.crt -days 365 -passin stdin \
  -subj "/CN=secure.internal" \
  -addext "subjectAltName=DNS:secure.internal"
Use an environment variable (avoid password in shell history):
export KEYPASS='YourStrongPassword'
openssl genrsa -aes256 -out secure.key -passout env:KEYPASS
openssl req -x509 -new -key secure.key -out secure.crt -days 365 -passin env:KEYPASS \
  -subj "/CN=secure.internal" \
  -addext "subjectAltName=DNS:secure.internal"
unset KEYPASS
Password file (chmod 600, delete after use):
echo 'YourStrongPassword' > /tmp/keypass.txt
chmod 600 /tmp/keypass.txt
openssl genrsa -aes256 -out secure.key -passout file:/tmp/keypass.txt
openssl req -x509 -new -key secure.key -out secure.crt -days 365 \
  -passin file:/tmp/keypass.txt \
  -subj "/CN=secure.internal" \
  -addext "subjectAltName=DNS:secure.internal"
shred -u /tmp/keypass.txt
For unattended nginx, prefer -noenc and lock down file permissions (chmod 600 server.key).
ECDSA and Ed25519 keys
Elliptic curve (ECDSA, prime256v1 / P-256) — smaller keys, fast handshakes:
openssl req -x509 -newkey ec:<(openssl ecparam -name prime256v1) -noenc \
  -keyout ec.key -out ec.crt -days 365 \
  -subj "/CN=ec.example.test" \
  -addext "subjectAltName=DNS:ec.example.test"
Ed25519 (OpenSSL 1.1.1+):
openssl req -x509 -newkey ed25519 -noenc \
  -keyout ed25519.key -out ed25519.crt -days 365 \
  -subj "/CN=ed.example.test" \
  -addext "subjectAltName=DNS:ed.example.test"
Inspect the public key type:
Public Key Algorithm: id-ecPublicKey
Public Key Algorithm: ED25519
More ECC examples live in Generate ECC certificate with OpenSSL.
Config file method (OpenSSL before 1.1.1 or complex SAN)
When -addext is unavailable, define SAN in a small config file:
cat > san.cnf <<'EOF'
[ req ]
distinguished_name = req_dn
prompt = no
x509_extensions = v3_req

[ req_dn ]
CN = config.example.test

[ v3_req ]
basicConstraints = CA:FALSE
keyUsage = digitalSignature, keyEncipherment
extendedKeyUsage = serverAuth
subjectAltName = @alt

[ alt ]
DNS.1 = config.example.test
DNS.2 = www.config.example.test
IP.1 = 10.0.0.5
EOF

openssl req -x509 -newkey rsa:2048 -noenc \
  -keyout cfg.key -out cfg.crt -days 365 -config san.cnf
Verify:
openssl x509 -in cfg.crt -noout -ext subjectAltNameX509v3 Subject Alternative Name:
DNS:config.example.test, DNS:www.config.example.test, IP Address:10.0.0.5Key size, hash, and validity
| Flag | Typical value | Notes |
|---|---|---|
-newkey rsa:2048 |
Dev / internal | Minimum widely accepted today |
-newkey rsa:4096 |
Higher security margin | Slower handshakes; common in guides |
-sha256 |
Default on OpenSSL 3.x | Explicit on older stacks: add to req or x509 |
-days 365 |
One year | Match your renewal calendar |
Longer RSA keys do not fix browser trust warnings—only a CA-signed or locally trusted cert does.
Verify the certificate and key match
Before you configure a web server, confirm the files belong together:
openssl x509 -noout -modulus -in selfsigned.crt | openssl md5
openssl rsa  -noout -modulus -in selfsigned.key | openssl md5
Matching MD5(stdin)= lines mean the pair is valid:
MD5(stdin)= 4c6fc12e1341dc7936947ed47cd41d56
MD5(stdin)= 4c6fc12e1341dc7936947ed47cd41d56
Full decode (dates, issuer, extensions):
openssl x509 -in selfsigned.crt -text -nooutSee View certificate with OpenSSL for chain and remote server checks.
Test TLS after you configure a service:
openssl s_client -connect localhost:443 -servername localhost </dev/null 2>/dev/null | \
  openssl x509 -noout -subject -dates
Use the certificate with nginx
Minimal server block after files are in /etc/nginx/ssl/:
server {
    listen 443 ssl;
    server_name dev.internal;

    ssl_certificate     /etc/nginx/ssl/server.crt;
    ssl_certificate_key /etc/nginx/ssl/server.key;
}
Reload nginx and test. Step-by-step install details: Install SSL certificate on Nginx.
Export PKCS#12 (.pfx) for Windows or Java
Some tools want a single password-protected bundle:
openssl pkcs12 -export -out cert.pfx \
  -inkey selfsigned.key -in selfsigned.crt \
  -passout pass:exportpass
Import cert.pfx on Windows with the export password. Delete the file when finished on shared systems.
Troubleshooting
| Symptom | Cause | Fix |
|---|---|---|
Browser shows NET::ERR_CERT_AUTHORITY_INVALID |
Self-signed, not a bug | Expected; import to local trust store for dev, or use a CA cert |
Certificate lacks subjectAltName |
CN-only cert | Regenerate with -addext subjectAltName=... |
nginx SSL_CTX_use_PrivateKey_file fails |
Key/cert mismatch or encrypted key | Compare modulus MD5; use -noenc or provide passphrase in nginx |
unable to load Private Key |
Wrong file or format | Ensure PEM headers BEGIN PRIVATE KEY / BEGIN RSA PRIVATE KEY |
-addext unknown option |
OpenSSL older than 1.1.1 | Use the config file method above |
TLS works with openssl s_client but not browser |
Missing SAN for that hostname | Add every DNS name the browser uses to SAN |
References
Summary
The fastest path on OpenSSL 1.1.1 and 3.x is openssl req -x509 -newkey rsa:2048 -noenc -keyout key.pem -out cert.pem -days 365 -subj "/CN=hostname" -addext "subjectAltName=DNS:hostname,IP:127.0.0.1". Always include SAN—CN alone breaks modern browsers. Use the two-step CSR flow when you need -copy_extensions copyall or plan to switch to a CA later; use -noenc for nginx and -aes256 only when a human unlocks the key. EC and Ed25519 work with the same -x509 pattern. After generation, verify with openssl x509 -text and matching modulus hashes, then point nginx or your app at the .crt and .key files. For public sites, replace self-signed files with CA-issued certificates; for lab renewals, see renew self-signed certificate.
