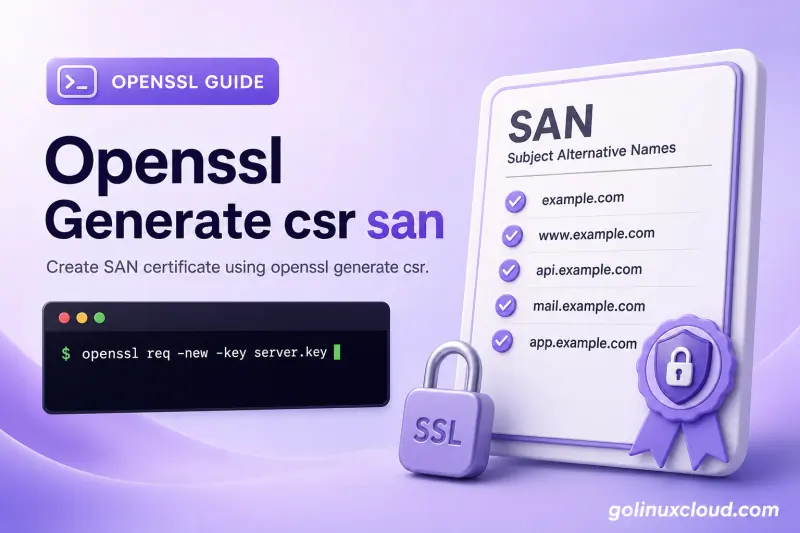
In this article we will learn the steps to create SAN Certificate using openssl generate csr with san command line and openssl sign csr with subject alternative name.
In the previous article where we created server and client certificates using openssl. we ended up with a situation where if we use a different server name then the client server TCP handshake fails. To fix this we have two approaches
- Create separate server certificates for every other IP Address or Hostname which can be expensive
- Create SAN certificates (Subject Alternative Name)
Just to recap our exercise, earlier when we tried to connect to our webserver
using IP Address instead of hostname then we received
"curl: (51) SSL: certificate subject name 'centos8-3' does not match target host name '10.10.10.17'"
because we had created our client certificate using centos8-3 as the
Common Name for client.csr
The example below transfers data with curl over HTTP(S); the curl command is a quick reference for flags and syntax.
[root@centos8-1 tls]# curl --key private/client.key.pem  --cert certs/client.cert.pem --cacert intermediate/certs/ca-chain-bundle.cert.pem  https://10.10.10.17:8443 -v
* Rebuilt URL to: https://10.10.10.17:8443/
*   Trying 10.10.10.17...
* TCP_NODELAY set
* Connected to 10.10.10.17 (10.10.10.17) port 8443 (#0)
* ALPN, offering h2
* ALPN, offering http/1.1
* successfully set certificate verify locations:
*   CAfile: intermediate/certs/ca-chain-bundle.cert.pem
  CApath: none
* TLSv1.3 (OUT), TLS handshake, Client hello (1):
* TLSv1.3 (IN), TLS handshake, Server hello (2):
* TLSv1.3 (IN), TLS handshake, [no content] (0):
* TLSv1.3 (IN), TLS handshake, Encrypted Extensions (8):
* TLSv1.3 (IN), TLS handshake, [no content] (0):
* TLSv1.3 (IN), TLS handshake, Certificate (11):
* TLSv1.3 (IN), TLS handshake, [no content] (0):
* TLSv1.3 (IN), TLS handshake, CERT verify (15):
* TLSv1.3 (IN), TLS handshake, [no content] (0):
* TLSv1.3 (IN), TLS handshake, Finished (20):
* TLSv1.3 (OUT), TLS change cipher, Change cipher spec (1):
* TLSv1.3 (OUT), TLS handshake, [no content] (0):
* TLSv1.3 (OUT), TLS handshake, Finished (20):
* SSL connection using TLSv1.3 / TLS_AES_256_GCM_SHA384
* ALPN, server accepted to use http/1.1
* Server certificate:
*  subject: C=IN; ST=Some-State; L=BANGALORE; O=GoLinuxCloud; CN=centos8-3
*  start date: Apr  9 01:49:53 2020 GMT
*  expire date: Apr  9 01:49:53 2021 GMT
* SSL: certificate subject name 'centos8-3' does not match target host name '10.10.10.17'
* Closing connection 0
* TLSv1.3 (OUT), TLS alert, [no content] (0):
* TLSv1.3 (OUT), TLS alert, close notify (256):
curl: (51) SSL: certificate subject name 'centos8-3' does not match target host name '10.10.10.17'
What is SAN Certificate?
- A (Subject Alternative Name) SAN certificate can be used on multiple domain names, for example, abc.com or xyz.com, where the domain names are completely different, but they can use the same certificate.
- SAN can have multiple common names associated with the certificate.
- This is useful when the server runs multiple services and therefore will use multiple names.
- For example, I could have a SAN certificate for my Exchange server
that holds the names
mail.golinuxcloud.comandserver.golinuxcloud.com. - Without the use of a SAN certificate, I would need to purchase multiple single common name certificates.
- We define a list of IP Address, DNS values which will be used as Common Name for certificate validation when we create CSR using openssl.
Configure openssl x509 extension to create SAN certificate
- Before we create SAN certificate we need to add some more values to our openssl x509 extensions list. We must openssl generate csr with san command line using this external configuration file.
- Here we have added a new field subjectAtlName, with a key value of
@alt_names. - Next under
[alt_names], I will provide the complete list of IP Address and DNS name which the server certificate should resolve when validating a client request. - So with
subjectAltNameinstead of defining single Common Name, now we can define a whole list of hostnames for which our server certificate will be valid.
[root@centos8-1 certs]# cat server_cert_ext.cnf
basicConstraints = CA:FALSE
nsCertType = server
nsComment = "OpenSSL Generated Server Certificate"
subjectKeyIdentifier = hash
authorityKeyIdentifier = keyid,issuer:always
keyUsage = critical, digitalSignature, keyEncipherment
extendedKeyUsage = serverAuth
subjectAltName = @alt_names

[alt_names]
IP.1 = 10.10.10.13
IP.2 = 10.10.10.14
IP.3 = 10.10.10.17
IP.4 = 192.168.43.104
DNS.1 = centos8-3.example.com
Generate server private key
You can ignore this step if you already have a private key. For the sake of demonstration I am creating a new server private key.
[root@centos8-1 certs]# openssl genrsa -out server.key.pem 4096
Generating RSA private key, 4096 bit long modulus (2 primes)
.................................................++++
..................................................................................................++++
e is 65537 (0x010001)
Openssl Generate CSR with SAN command line
Now to create SAN certificate we must generate a new CSR i.e. Certificate Signing Request which we will use in next step with openssl generate csr with san command line.
[root@centos8-1 certs]# openssl req -new -key server.key.pem -out server.csr
You are about to be asked to enter information that will be incorporated
into your certificate request.
What you are about to enter is what is called a Distinguished Name or a DN.
There are quite a few fields but you can leave some blank
For some fields there will be a default value,
If you enter '.', the field will be left blank.
-----
Country Name (2 letter code) [XX]:IN
State or Province Name (full name) []:Karnataka
Locality Name (eg, city) [Default City]:Bengaluru
Organization Name (eg, company) [Default Company Ltd]:R&D
Organizational Unit Name (eg, section) []:GoLinuxCloud
Common Name (eg, your name or your server's hostname) []:centos8-3
Email Address []:

Please enter the following 'extra' attributes
to be sent with your certificate request
A challenge password []:
An optional company name []:
Openssl sign CSR with Subject Alternative Name
- Next use the
server.csrto sign the server certificate with-extfile <filename>using Subject Alternative Names to create SAN certificate - I am using my CA Certificate Chain and CA key from my previous article to issue the server certificate
- The server certificate will be valid of 365 days and with sha256 algorithm
- Since our CA key is encrypted with passphrase, I have used
-passinto provide the passphrase, If I do not use this argument then the command will prompt for input passphrase. - In this command using openssl x509 we create SAN certificate
server.cert.pem
[root@centos8-1 certs]# openssl x509 -req -in server.csr -passin file:mypass.enc -CA /root/tls/intermediate/certs/ca-chain-bundle.cert.pem -CAkey /root/tls/intermediate/private/intermediate.cakey.pem -out server.cert.pem -CAcreateserial -days 365 -sha256 -extfile server_cert_ext.cnf
Signature ok
subject=C = IN, ST = Karnataka, L = Bengaluru, O = R&D, OU = GoLinuxCloud, CN = centos8-3
Getting CA Private Key
Openssl verify certificate content
After you create SAN certificate, next you can check the content of your server certificate to make sure openssl sign CSR with Subject Alternative Name was successful.
[root@centos8-1 certs]# openssl x509  -noout -text -in server.cert.pem
Certificate:
    Data:
        Version: 3 (0x2)
        Serial Number:
            56:d5:17:9f:23:72:0b:36:5c:e3:be:1f:39:d1:df:48:9b:7e:90:2f
        Signature Algorithm: sha256WithRSAEncryption
        Issuer: C = IN, ST = Some-State, O = GoLinuxCloud, CN = centos8-1 Intermediate CA, emailAddress = [email protected]
        Validity
            Not Before: Apr 11 07:45:22 2020 GMT
            Not After : Apr 11 07:45:22 2021 GMT
        Subject: C = IN, ST = Karnataka, L = Bengaluru, O = R&D, OU = GoLinuxCloud, CN = centos8-3
        Subject Public Key Info:
            Public Key Algorithm: rsaEncryption
                RSA Public-Key: (4096 bit)
        <Output trimmed>
        X509v3 extensions:
            X509v3 Basic Constraints:
                CA:FALSE
            Netscape Cert Type:
                SSL Server
            Netscape Comment:
                OpenSSL Generated Server Certificate
            X509v3 Subject Key Identifier:
                8F:35:1C:97:4E:2E:E7:E9:EC:FA:FD:BD:97:EB:0A:07:F9:21:98:70
            X509v3 Authority Key Identifier:
                keyid:16:23:DF:95:23:76:04:4E:1D:2D:3E:35:52:0B:BD:8E:28:57:1B:9E
                DirName:/C=IN/ST=Some-State/L=BANGALORE/O=GoLinuxCloud/CN=centos8-1/[email protected]
                serial:01

            X509v3 Key Usage: critical
                Digital Signature, Key Encipherment
            X509v3 Extended Key Usage:
                TLS Web Server Authentication
            X509v3 Subject Alternative Name:
                IP Address:10.10.10.13, IP Address:10.10.10.14, IP Address:10.10.10.17, IP Address:192.168.43.104, DNS:centos8-3.example.com
            <Output trimmed>
As you see we can see our Subject Alternative Names, which we had provided using our configuration file with openssl generate csr with san command line.
Arrange all the server certificates for client authentication
We will overwrite our existing server certificates from previous article on our web server. We are using scp to copy files from one server to another but you can choose any other tool to transfer the certificates securely over the network
[root@centos8-1 certs]# scp server.key.pem server.cert.pem /root/tls/intermediate/certs/ca-chain-bundle.cert.pem    centos8-3:/etc/httpd/conf.d/certs/
root@centos8-3's password:
server.key.pem                                                                                    100% 3243     4.2MB/s   00:00
server.cert.pem                                                                                   100% 2508     3.5MB/s   00:00
ca-chain-bundle.cert.pem                                                                          100% 4240     5.3MB/s   00:00
Next restart httpd service to activate the changes
Control the running service with systemctl start, stop, or restart; see the systemctl command for try-restart and dependency behavior.
[root@centos8-3 ~]# systemctl restart httpdVerify Client Server TCP handshake
Now we will use one of IP Address from the Subject Alternative Names we
provided with openssl generate csr with san command line to connect to
our webserver on centos8-3 along with the client certificates details.
[root@centos8-1 certs]# curl --key client.key.pem  --cert client.cert.pem --cacert /root/tls/intermediate/certs/ca-chain-bundle.cert.pem  https://10.10.10.17:8443 -v
* Rebuilt URL to: https://10.10.10.17:8443/
*   Trying 10.10.10.17...
* TCP_NODELAY set
* Connected to 10.10.10.17 (10.10.10.17) port 8443 (#0)
* ALPN, offering h2
* ALPN, offering http/1.1
* successfully set certificate verify locations:
*   CAfile: /root/tls/intermediate/certs/ca-chain-bundle.cert.pem
  CApath: none
* TLSv1.3 (OUT), TLS handshake, Client hello (1):
* TLSv1.3 (IN), TLS handshake, Server hello (2):
* TLSv1.3 (IN), TLS handshake, [no content] (0):
* TLSv1.3 (IN), TLS handshake, Encrypted Extensions (8):
* TLSv1.3 (IN), TLS handshake, [no content] (0):
* TLSv1.3 (IN), TLS handshake, Certificate (11):
* TLSv1.3 (IN), TLS handshake, [no content] (0):
* TLSv1.3 (IN), TLS handshake, CERT verify (15):
* TLSv1.3 (IN), TLS handshake, [no content] (0):
* TLSv1.3 (IN), TLS handshake, Finished (20):
* TLSv1.3 (OUT), TLS change cipher, Change cipher spec (1):
* TLSv1.3 (OUT), TLS handshake, [no content] (0):
* TLSv1.3 (OUT), TLS handshake, Finished (20):
* SSL connection using TLSv1.3 / TLS_AES_256_GCM_SHA384
* ALPN, server accepted to use http/1.1
* Server certificate:
*  subject: C=IN; ST=Karnataka; L=Bengaluru; O=R&D; OU=GoLinuxCloud; CN=centos8-3
*  start date: Apr 11 07:45:22 2020 GMT
*  expire date: Apr 11 07:45:22 2021 GMT
*  subjectAltName: host "10.10.10.17" matched cert's IP address!
*  issuer: C=IN; ST=Some-State; O=GoLinuxCloud; CN=centos8-1 Intermediate CA; [email protected]
*  SSL certificate verify ok.
* TLSv1.3 (OUT), TLS app data, [no content] (0):
> GET / HTTP/1.1
> Host: 10.10.10.17:8443
> User-Agent: curl/7.61.1
> Accept: */*
>
* TLSv1.3 (IN), TLS handshake, [no content] (0):
* TLSv1.3 (IN), TLS handshake, Newsession Ticket (4):
* TLSv1.3 (IN), TLS handshake, [no content] (0):
* TLSv1.3 (IN), TLS handshake, Newsession Ticket (4):
* TLSv1.3 (IN), TLS app data, [no content] (0):
< HTTP/1.1 200 OK
< Date: Sat, 11 Apr 2020 07:46:16 GMT
< Server: Apache/2.4.37 (centos) OpenSSL/1.1.1c
< Last-Modified: Fri, 31 Jan 2020 17:29:35 GMT
< ETag: "29-59d72ead47e18"
< Accept-Ranges: bytes
< Content-Length: 41
< Content-Type: text/html; charset=UTF-8
<
* Connection #0 to host 10.10.10.17 left intact
Welcome at the Ansible managed web server
So this time the server client authentication was successful even with IP Address as what we had provided in our SAN certificate using openssl generate csr with san command line.
Lastly I hope the steps from the article to create SAN certificate using openssl generate csr with san command line and openssl sign csr with subject alternative name on Linux was helpful. So, let me know your suggestions and feedback using the comment section.
