
In this tutorial, we will learn about Amazon Cognito. First, we will have a quick overview of the Amazon Cognito User Pool. We will also learn about Amazon Cognito Identity Pool. After that, we will learn to create a User Pool and Identity Pool. But before moving ahead let's see what Amazon Cognito is
Amazon Cognito
Amazon Cognito provides authentication, authorization, and user management for your web and mobile apps. Your users can sign in directly with a user name and password, or through a third party such as Facebook, Amazon, Google or Apple.
The two main components of Amazon Cognito are user pools and identity pools. Let's see both of them one by one.
Amazon Cognito User Pool
The following points give a brief overview of User Pools.
- A user pool is a user directory in Amazon Cognito.
- It provides sign-up and sign-in services.
- It provides a built-in, customizable web UI through which users can sign in.
- With a user pool, users can sign in to the web or mobile applications through Amazon Cognito. Users can also sign in through social identity providers like Google, Facebook, Amazon, or Apple, and through SAML identity providers.
- All members of the user pool have a directory profile that you can access through a Software Development Kit (SDK) whether users sign in directly or through a third party.
- It also provides security features such as multi-factor authentication (MFA), checks for compromised credentials, account takeover protection, and phone and email verification.
- It provides customized workflows and user migration through AWS Lambda triggers.
- When users log in with a Cognito user pool, they get back a JSON web token.
Amazon Cognito Identity Pool
The following points give a brief overview of Identity Pools.
- It enables you to create unique identities and assign permissions for users.
- It can have users in an Amazon Cognito user pool.
- It can include users who authenticate with external identity providers such as Facebook, Google, Apple, or a SAML-based identity provider.
- It can include users authenticated via our own existing authentication process.
- Identity pools also allow for unauthenticated guest access.
- With an identity pool, we can obtain temporary AWS credentials through the STS service with permissions we define to directly access other AWS services or to access resources through Amazon API Gateway.
Now let's get started with the implementation!
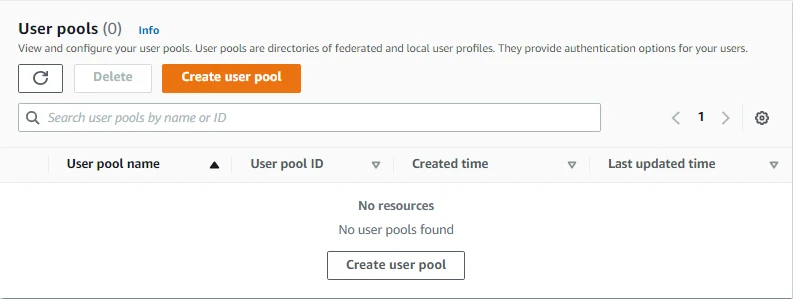
Create User Pool
First, we will log in to our AWS account then type Cognito under the Services tab. After that, we will click on Create user pool.
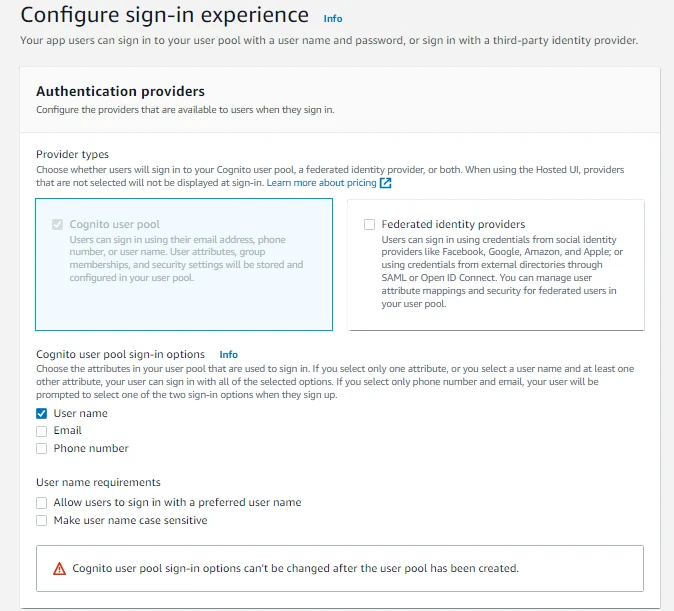
Step 1 : Configure sign-in experience
The first step is the configuration of sign-in experience of users. We can configure Amazon Cognito such that users can sign in with their email address, phone number, or user name. Here we will select User name then we will click on Next.
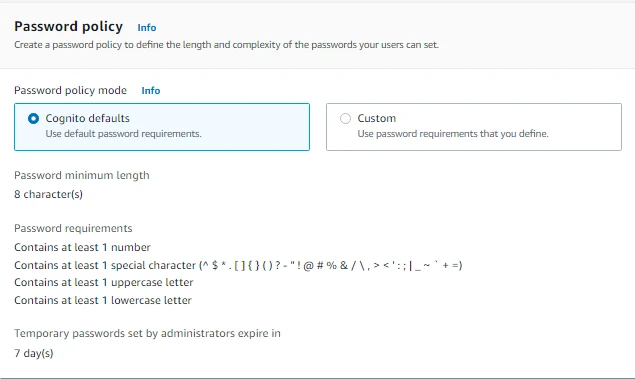
Step 2 : Configure security requirements
Here we will configure security requirements. For Password policy, we can either select Cognito defaults or we can select Custom and configure our own password requirements. Here we will select Cognito defaults.
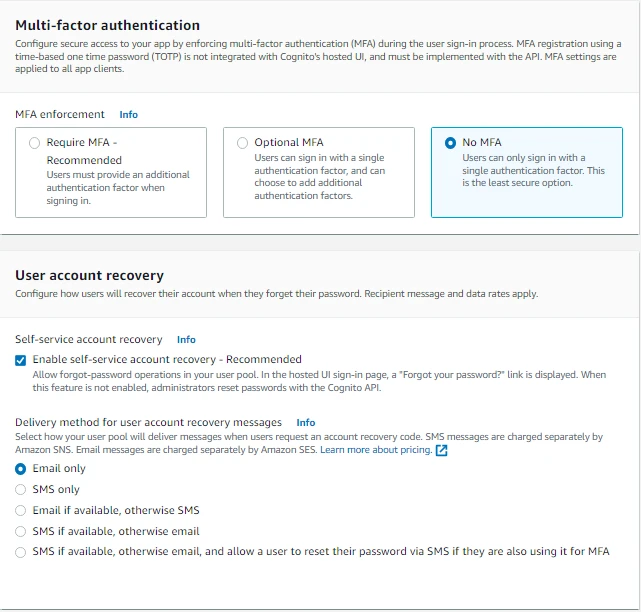
We can also configure secure access to our application by enforcing multi-factor authentication. But for now, we will select No MFA. Note that this is the least secure option. We can also configure how users will recover their accounts when they forget their passwords. Then we will click on Next.
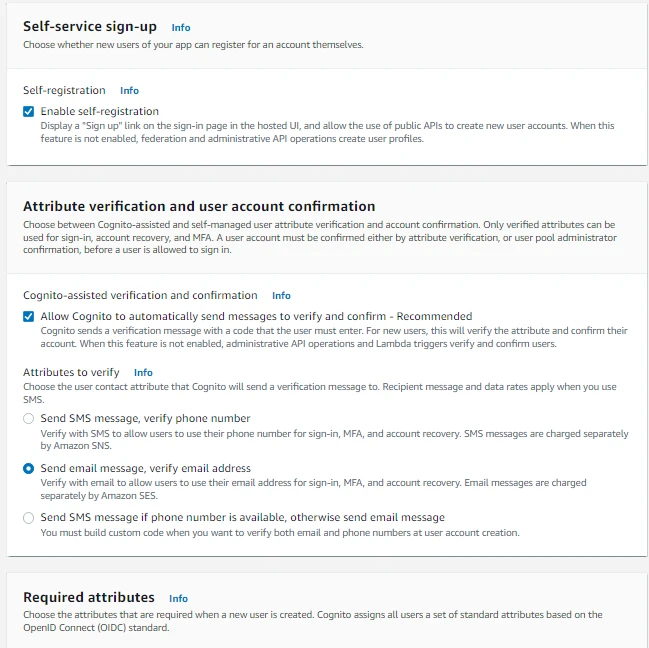
Step 3 : Configure sign-up experience
Here we can configure which attributes should be required or optional during the user sign-up flow. We can also configure how new users will verify their identities when signing up. For now, we will leave the configurations to default. Here self-registration is enabled which means that new users of our app can register for an account themselves.
We have allowed Cognito to automatically send messages to verify and confirm the identity of a user which means that Cognito will send a verification message with a code that the user must enter. Here we can also choose the user contact attribute that Cognito will send a verification message to. We can also choose the attributes that are required when a new user is created. We can also personalize the sign-up experience by adding up to 50 custom attributes. After that, we will click on Next.
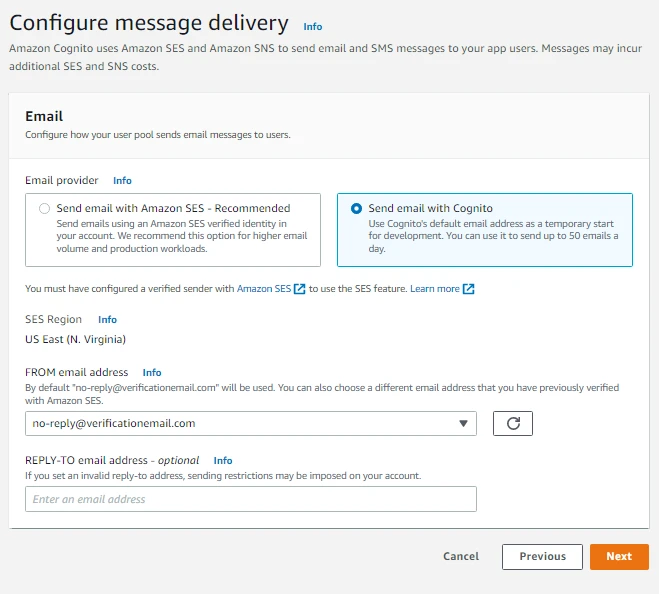
Step 4 : Configure message delivery
Here we can configure how our user pool sends email messages to users. In Email Provider, we will select Send email with Cognito which means that we will be using Cognito's default email address as a temporary start for development. We can use it to send up to 50 emails a day. Then we will click on Next.
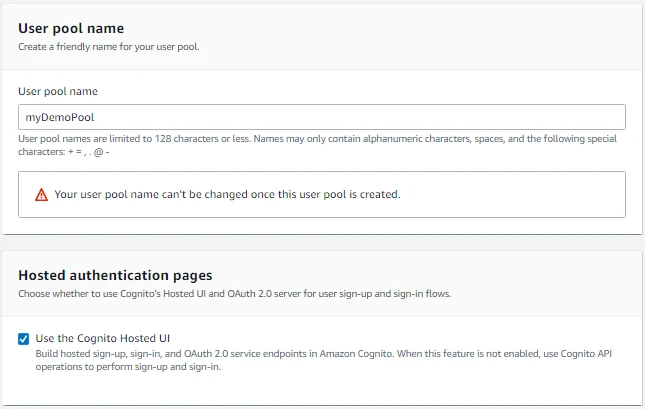
Step 5 : Integrate your app
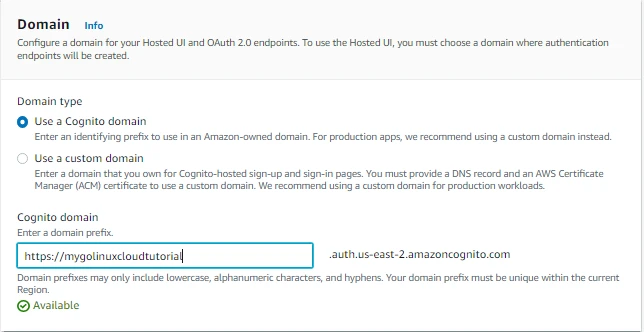
Here we can set up app integration for our user pool with Cognito's built-in authentication and authorization flows. First, we will provide the User pool name i.e. myDemoPool. In Hosted authentication pages, we will select Use the Cognito Hosted UI which means that we will be using Cognito’s Hosted UI and OAuth 2.0 server for user sign-up and sign-in flows. In Domain we will configure a domain for your Hosted UI and OAuth 2.0 endpoints. In Domain Type, we will select Use a Cognito domain and then enter a domain prefix.
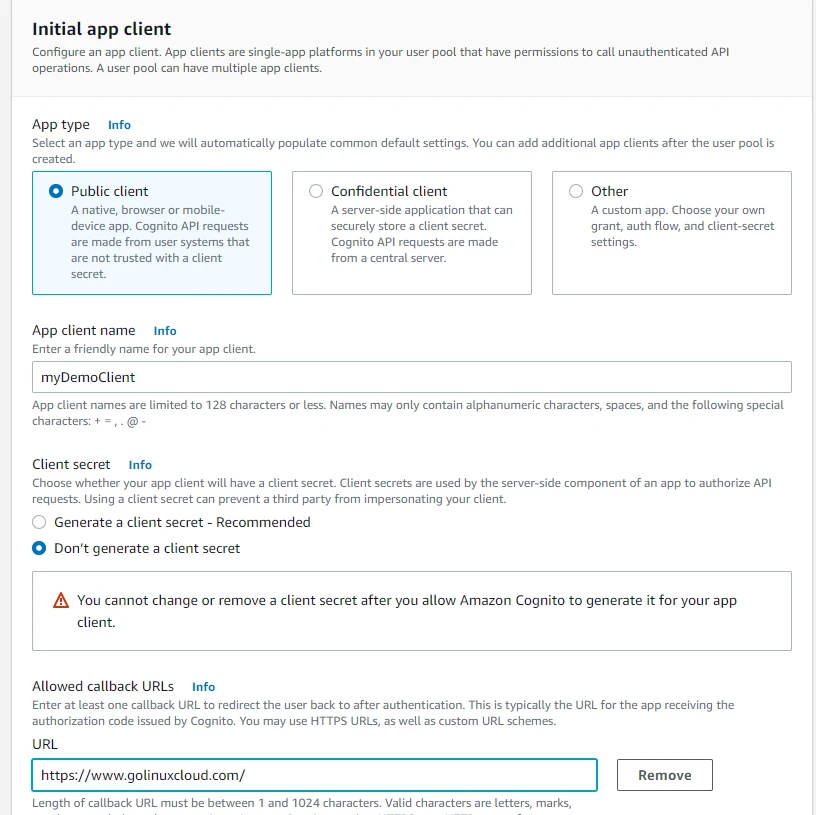
In Initial app client, we will configure an app client. App clients are single-app platforms in our user pool that have permissions to call unauthenticated API operations. Our App type will be Public client. A user pool can have multiple app clients. Here we will provide App client name i.e. myDemoClient.
In Allowed callback URLs, we will have to enter at least one callback URL to redirect the user after authentication. We will provide the URL where we want to be redirected after successful login i.e. GoLinuxCloud home page. In Advanced app client settings, we can do configurations related to authentication flows, OAuth 2.0 Grant Types, and OIDC scopes. We will leave them to default for now. The values are populated according to the selections we made earlier.
In Attribute read and write permissions, we can choose the standard and custom attributes this app can read and write. Amazon Cognito user pools can have multiple app clients. For example, a user pool can have one app client that handles personal identifying information (PII) for your users, and a separate app client that only handles user authentication. When we set attribute read and write permissions, we can control which attributes an app client can access and modify. For now, we will leave them to default. Then we will click on Next.
Step 6 : Review and create
In the final step, we will review our selections and then click on Create user pool.

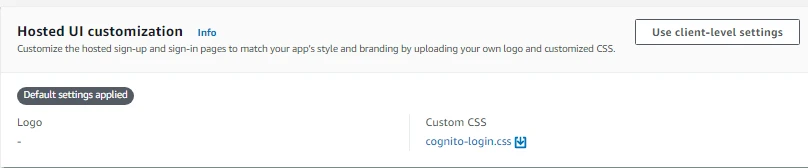
Hosted UI Customization
Now let's customize the UI. First, we will click on our newly created user pool. Then we will click on App integration tab. After that in Hosted UI Customization, we will click on Edit.
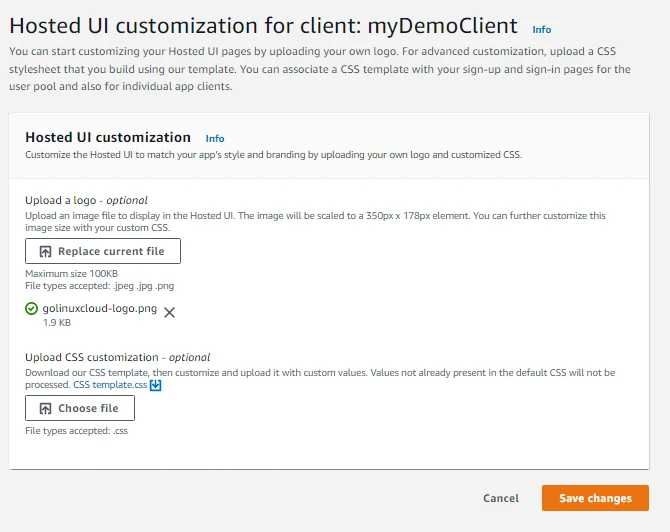
Here we will upload a logo and click on Save changes.
Testing
Now let's do some testing. We will click on our App Client under App integration. Then we will click on View Hosted UI in Hosted UI. This is what our sign-in page looks like. Here first we will click on Sign up.
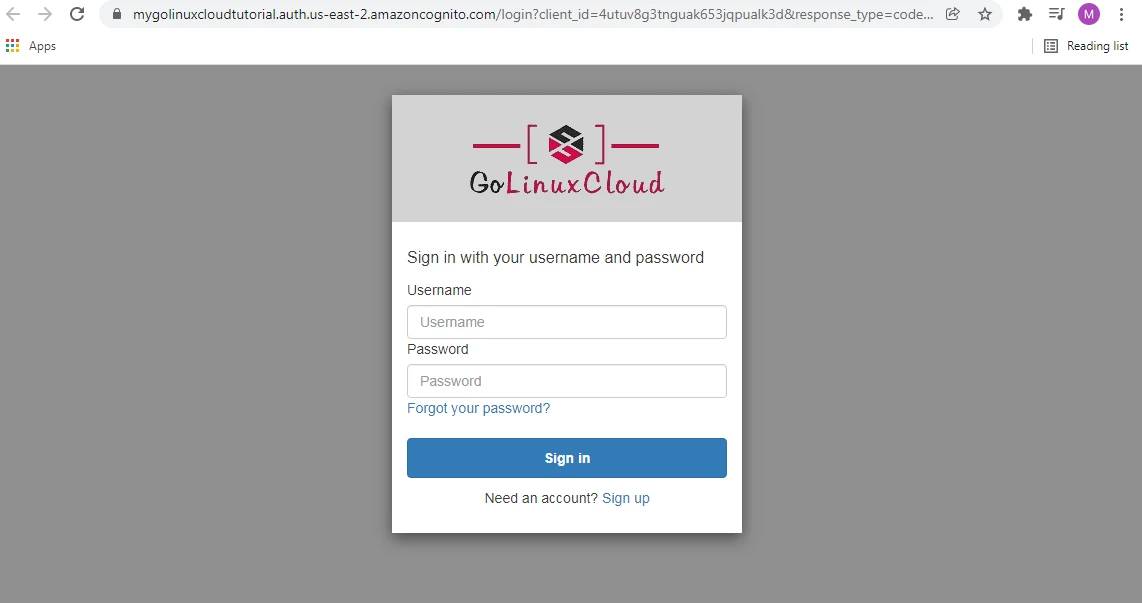
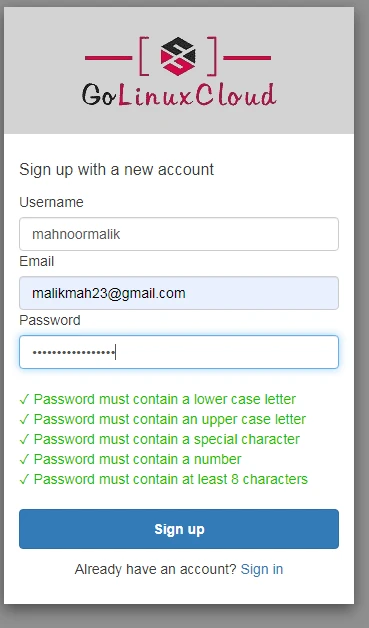
Here we will provide the Username, email, and password. Then click on Sign up.
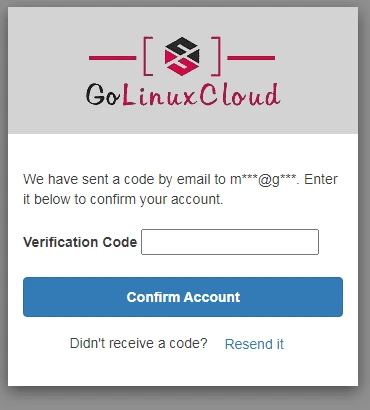
We will enter the verification code received on our email address and click on Confirm Account. Now we will be redirected to the GoLinuxCloud website as we wanted to be redirected to this website after successful authentication.
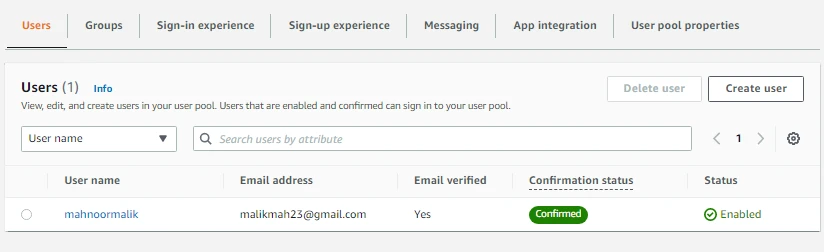
Here we can see our newly created user in the Users tab.
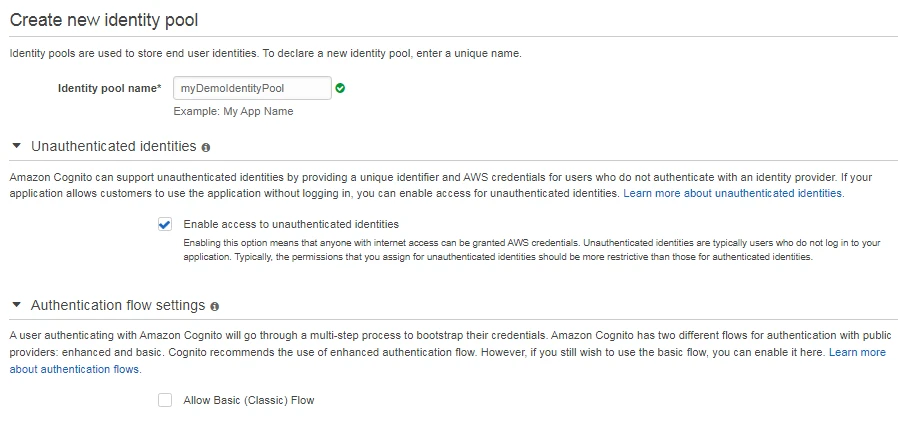
Create Identity Pool
From the left pane of Amazon Cognito, we will click on Federated Identities. Here we will provide Identity pool name i.e. my DemoIdentityPool. Under Unauthenticated identities, we will select Enable access to unauthenticated identities which means we will be allowing guest users to use our app. Enabling this option means that anyone with internet access can be granted AWS credentials. Unauthenticated identities are typically users who do not log in to our application.
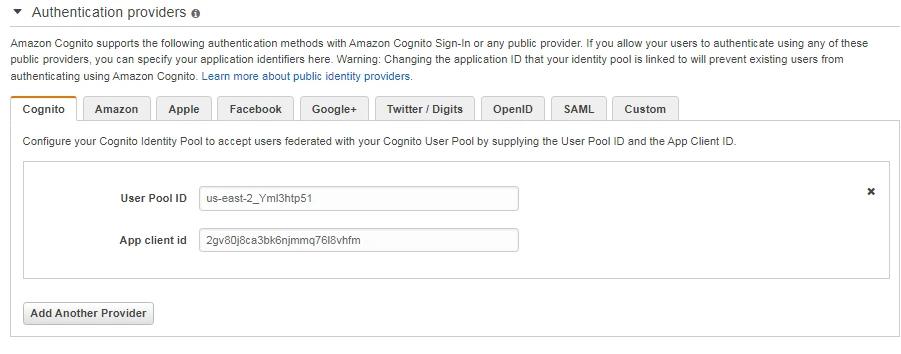
Typically, the permissions that we assign for unauthenticated identities should be more restrictive than those for authenticated identities. Under Authentication providers, we will provide the User Pool ID and App client ID from the user pool we created earlier. We are configuring our Cognito Identity Pool to accept users federated with our Cognito User Pool by supplying the User Pool ID and the App Client ID.
We can find the User Pool ID under User Pool overview. For App Client ID, we will go to the App Integration tab then click on our App client name under App client list, and then we can find App client ID under App Client information. Then we will click on Create pool.
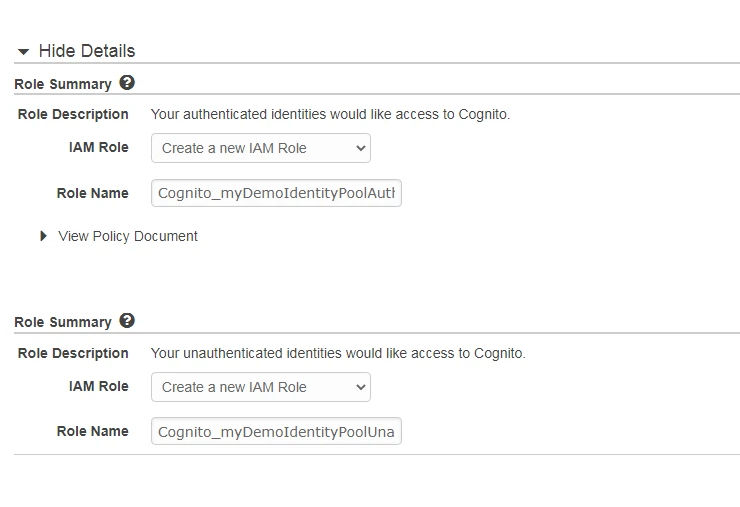
Role
Before we can begin using our new Amazon Cognito identity pool, we must assign one or more IAM roles to determine the level of access we want our application end users to have to your AWS resources. Identity pools define two types of identities: authenticated and unauthenticated. Each can be assigned their own role in IAM.
Authenticated identities belong to users who are authenticated by a public login provider (Amazon Cognito user pools, Facebook, Google, SAML, or any OpenID Connect Providers) or a developer provider (your own backend authentication process), while unauthenticated identities typically belong to guest users. Here two roles will be created one for authenticated identities and the other for unauthenticated identities. We can also edit the Policy Document associated with each role. For now, we will leave everything to default and click on Allow.
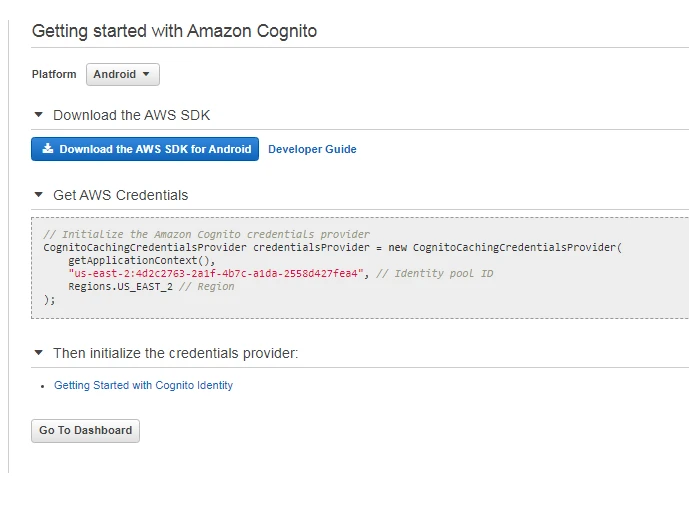
Now we will be redirected to the following screen. To get started with the identity pool, we need to download SDK. Here we have options for different platforms.
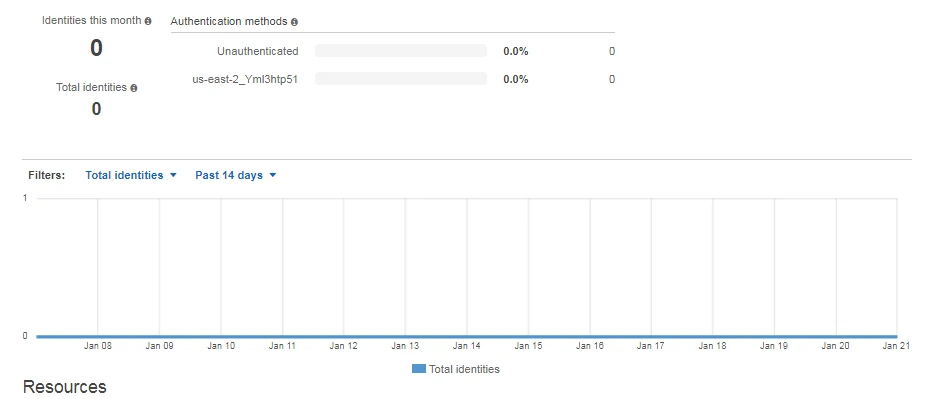
Now from the left pane, we will click on Dashboard. It provides details such as the approximate number of new identities who have registered with our identity pool from the beginning of the current month. It also displays the approximate number of new identities registered within the identity pool since it was created. It also gives the breakdown of the authentication methods chosen by our end users.
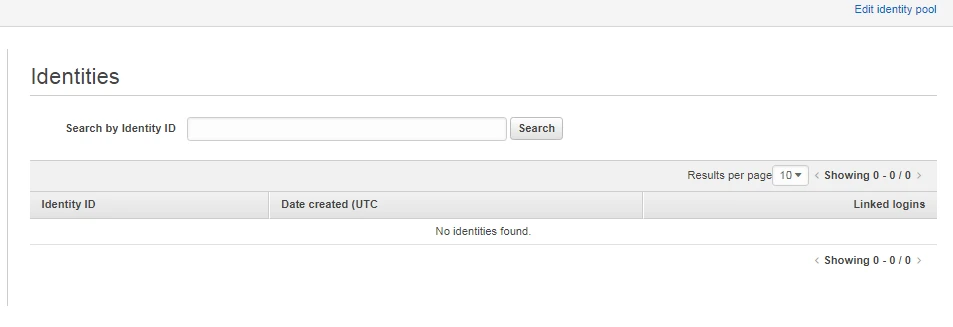
Now from the left pane, we will click on Identity browser. Here we can search by Identity ID after the user logs in.
Conclusion
With this, we have come to the end of our tutorial. In this tutorial, we learned about Amazon Cognito and its two main components i.e. user pool and identity pool. First, we created a User Pool then we customized the UI a bit and after that, we tested our implementation of the Amazon Cognito User Pool. In the end, we also walked through the process of creation of Amazon Cognito Identity Pool.
Stay tuned for some more informative tutorials coming ahead. Feel free to leave any feedback and queries in the comments section
Happy learning!