
In this tutorial, we will be deploying an application using AWS Elastic Beanstalk. First, we will explore different deployment policies available in AWS Elastic Beanstalk. Then we will learn to create environments using AWS Elastic Beanstalk. After that, we will configure a deployment policy of our choice and then see what happens behind the scenes. But before moving ahead let's see what AWS Elastic Beanstalk is.
AWS Elastic Beanstalk overview
Following is a quick overview of AWS Elastic Beanstalk.
- We can quickly deploy and manage applications in the AWS Cloud using Elastic Beanstalk without having to learn about the infrastructure that runs those applications.
- Using AWS Elastic Beanstalk, we simply upload our application and Elastic Beanstalk automatically handles the details of capacity provisioning, load balancing, scaling, and application health monitoring. Note that it reduces management complexity without restricting choice or control.
- AWS Elastic Beanstalk supports applications developed in Go, Java, .NET, Node.js, PHP, Python, and Ruby. When we deploy our application, Elastic Beanstalk builds the selected supported platform version and provisions one or more AWS resources, such as Amazon EC2 instances, to run our application.
Deployment Policies
In AWS Elastic Beanstalk, the Application deployments section of the Rolling updates and deployments page has the following options for application deployments:
- In All at once deployment, the new version of the application is deployed to all instances simultaneously. All instances in your environment are out of service for a short time while the deployment occurs.
- In Rolling deployment, the new version of the application is deployed in batches. Each batch is taken out of service during the deployment phase, reducing your environment's capacity by the number of instances in a batch. We will do a hands-on on rolling deployment later in this tutorial.
- In Rolling with additional batch deployment, the new version of the application is deployed in batches, but first, a new batch of instances is launched to ensure full capacity during the deployment process.
- In Immutable deployment, the new version of the application is deployed to a fresh group of instances by performing an immutable update.
- In Traffic splitting deployment, the new version of the application is deployed to a fresh group of instances and temporarily split incoming client traffic between the existing application version and the new one.
Creating Application
First, we will go to the Services tab and type Elastic Beanstalk, then we will click on Create Application.

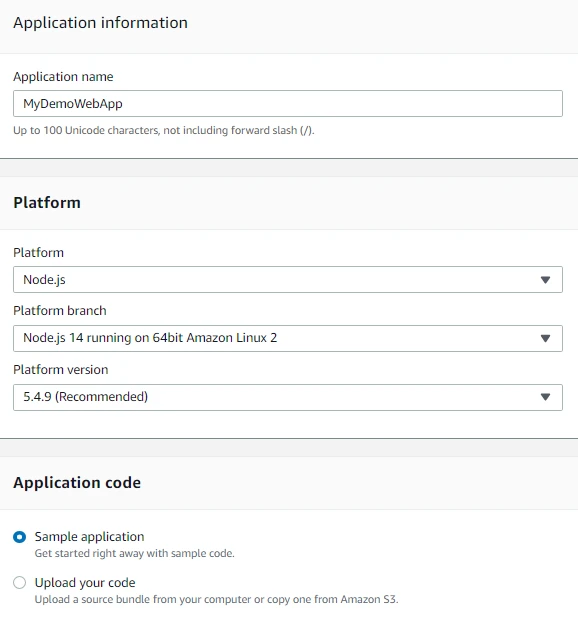
Here we will provide the Application name i.e MyDemoWebApp. Then we will select Platform i.e. Node.js and then we will select Platform branch i.e. Node.js 14 running on 64bit Amazon Linux 2. We also have other Platform options available that include .NET core on Linux, .NET on Windows Server, Docker, GlassFish, Go. Java, PHP, Python, Ruby, and Tomcat. Then we will select the Platform version i.e. 5.4.9. After that in the Application code, we will select Sample application then we will click on Create application.
Note that if we select Sample Application we can start right with a sample code provided by AWS in Node.js. You must have noticed that there is a Configure more options button available on the page. Let's see what it offers.
Configure more options
If we click on Configure more options, we can select configuration presets that match our requirements or we can choose Custom Configuration to unset recommended values and use the service's default values. The following options can be configured.
- Here we get the option of changing our Platform version.
- We can specify which proxy server will be used for client connections.
- We can enable X-ray daemon.
- We can configure the instances in our environment to upload rotated logs to Amazon S3.
- We can configure the instances in our environment to stream logs to CloudWatch Logs.
- We can define environment properties that will be passed in the application.
- We can modify configurations related to Root volume, Instance metadata service, and EC2 security groups.
- We can configure the compute capacity of our environment and auto-scaling settings to optimize the number of instances used.
- We can modify Load Balancer related configurations.
- We can modify rolling updates and deployment-related configurations.
- We can also modify Security, Monitoring, and Platform updates related configurations.
- We can also modify configurations related to Notifications, Network, and Tags.
- We can also add an RDS SQL database integrated with our environment.

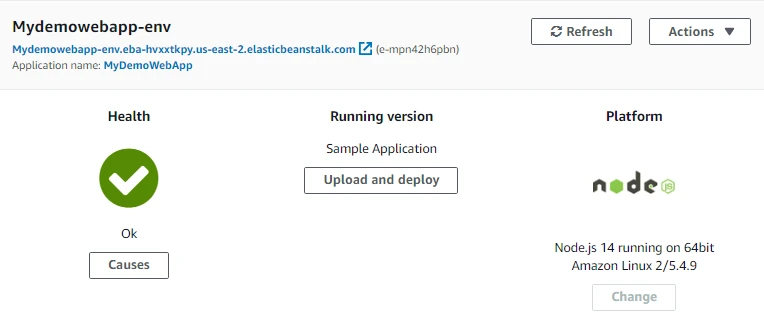
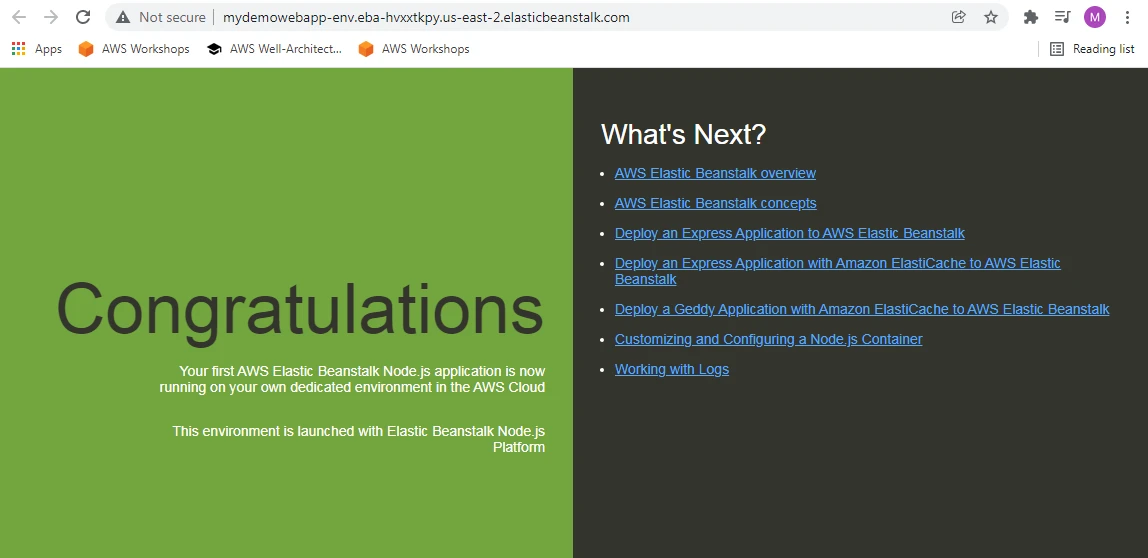
Here we can see our application running with Health status OK. We will click on the URL shown below and check whether our website with sample code is working properly or not.
This is our website up and running!
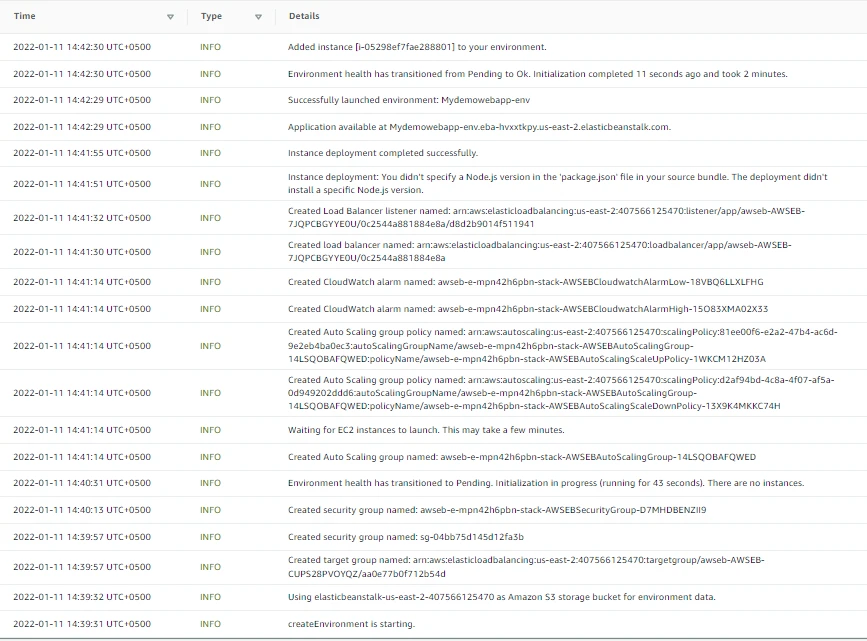
From the left pane when we click on Events under our environment, we can see what are the different events that happened on deploying an application using Elastic Beanstalk. AWS Elastic Beanstalk handles each and everything for us behind the scenes.
Creating Second Environment
Now we have an application with a single environment. Note that an AWS Elastic Beanstalk environment is a collection of AWS resources running an application version. We can deploy multiple environments when we need to run multiple versions of an application. Now we will create one more environment for our application. Let's say the first environment was our development environment and the second environment will be our production environment. Here we will click on Create a new environment.

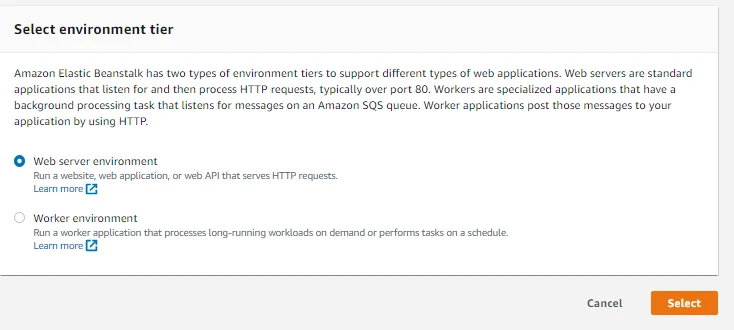
Here we will select the environment tier. Web server environment lets us run website, web applications, or web API that serves HTTP requests whereas Worker environment lets us run a worker application that processes long-running workloads on-demand or performs tasks on a schedule. We will select Web server environment for now.
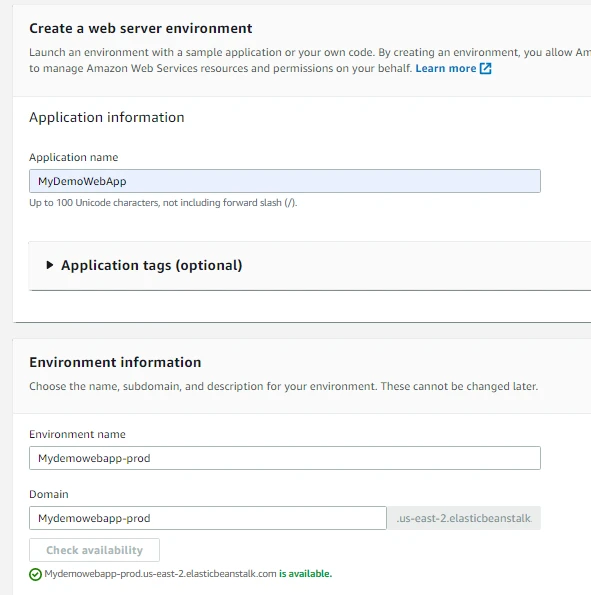
Here we will provide the environment name i.e. Mydemowebapp-prod. Then we will provide the Domain and check for availability. Then we will do Platform related configurations as we did earlier and then select Sample Code. After that, we will click on More Configurations to explore deployment-related options. First in the configuration presets we will select Custom Configuration. After that under Capacity, we will click Edit. Then we will set the minimum no of instances to be 2 in the AutoScaling Group and then hit Save.
Configuring Deployment Policy
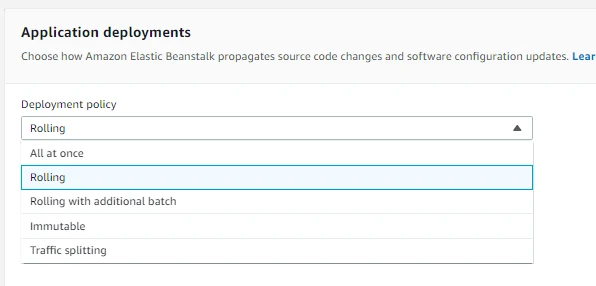
Currently, the default Deployment policy is All at once. We will click on Edit.

We will select Rolling Deployment Policy for our future deployments.
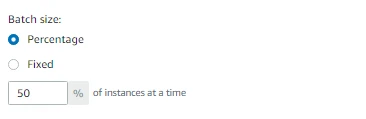
Then we will provide the Batch size i.e the size of the set of instances to deploy in each batch. For that, we will either choose Percentage to configure a percentage of the total number of EC2 instances in the Auto Scaling group or choose Fixed to configure a fixed number of instances. We will choose Percentage and set it to 50%. Now we will hit Save. We will leave the rest of the configurations to default. Then we will click on Create Environment.
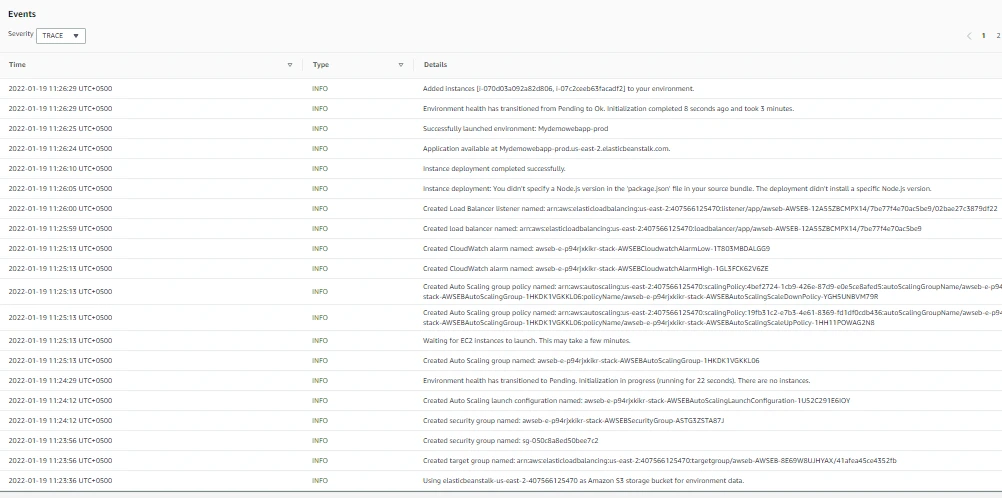
Now we can view the events happening after clicking on Events from the left pane.
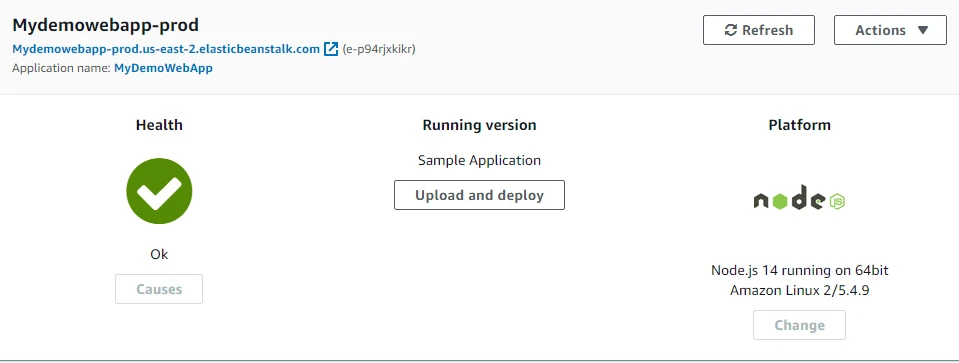
Here we can see our production environment up and running with Health status OK.
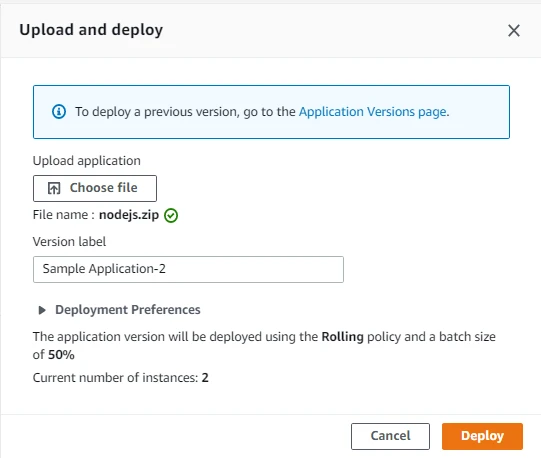
Now let's upload to the production environment and see how rolling deployment happens. We will click on Upload and Deploy. Then we will choose the application file from our PC. Note that we can get the sample project written in Node.js from the AWS website. Here we can see that the application will be deployed using the Rolling policy and a batch size of 50% with 2 instances currently running. Now we will click on Deploy.
Here we can see the events happening on our Rolling Deployment. It can be clearly seen that the deployment has been done batch-wise.

Conclusion
With this, we have come to the end of our tutorial. In this tutorial, we learned about deploying an application using AWS Elastic Beanstalk. First, we had a quick overview of AWS Elastic Beanstalk. Then we explored different deployment policies available in AWS Elastic Beanstalk. Then we learned to create environments and in the end, we configured the Rolling deployment policy for our Elastic Beanstalk environment.
Stay tuned for some more informative tutorials coming ahead. Feel free to leave any feedback in the comments section.
Happy learning!