![AWS Amplify Tutorial | Deploy S3 Website [100% Working]](/aws-amplify-tutorial/aws_amplify-800w.webp)
Hello learners, today we will be learning how to deploy website with AWS Amplify and redirect it to our own custom domain. Websites being the prime source of information is the most important element of the Internet in the times we are living now and having a website of our own is always a perk.
Here are the brief steps we will follow to create a Website using AWS Amplify
- Purchase a domain using any domain provider
- Configure custom domain using Route53
- Host your code on Github/Bitbucket
- Configure the application on Amplify
Overview on Aws Amplify
AWS Amplify is a set of purpose-built tools and features that lets front end devs and mobile developers quickly build full stack applications on AWS. Amplify can easily connect to many features of AWS like S3 , Cognito and more. Amplify also has its own CLI through which backend applications can be deployed fast and easy.You can build various kinds of applications starting from backend data model to a static website.
Overview on Route53
Amazon Route 53 is basically a highly available DNS Service that deals with resolving domain names and subdomains to Numeric IP addresses. Custom domains can be easily configured to Route53 and the users can also buy the domains directly from Route53 for their own use. The Price is reasonable and is depended on the number of Hosted Zones , Aliases , Traffic Flow to www and others..
How does AWS Amplify work
AWS Amplify can be thought of as a library that lets user develop serverless applications in the cloud. It is a full stack platform that is combination of both client side and server side code. It can be divided into 3 major components
- UI
- Libraries
- CLI
All 3 components work together to manage the software development life cycle.
Requirements
- A custom domain from any domain provider
- AWS Account (Free Tier can be used)
- Github repo with your code
- Have little knowledge about DNS records.
Step 1 : Buy Domain from Freenom
- First , go to www.freenom.com
- Enter the domain name you need in the availability bar but always remember to use TLD’s such as .ml, .tk and .ga since they are free of cost. Select the domain and click on Checkout. We have selected lovecoding*.tk*domain
- Provide the term for which you would like to use the domain.
- Enter your email address in the email address field and click on the link you receive in your email to verify the email address and create an account in freenom with your first name , last name and all the profile details.
- After you have completed filling all the required details during the verification of email address , you will be given an Order Confirmation and you can from now login to your freenom account to view your domain you bought . You can navigate to the below link to see the domain you have bought
Step 2 : Configuring Custom Domain using Route53
1. Go toRoute53in AWS and Click onCreate Hosted Zone

2. In the Hosted zone configuration section, Enter the domain name you have bought in the “Domain Name” and select the type asPublic Hosted Zonesince we want the traffic routed through the Internet.
3.Two DNS records will get created in the Hosted Zone. Click on the NS Record and copy all the 4 DNS Servers in Value field.
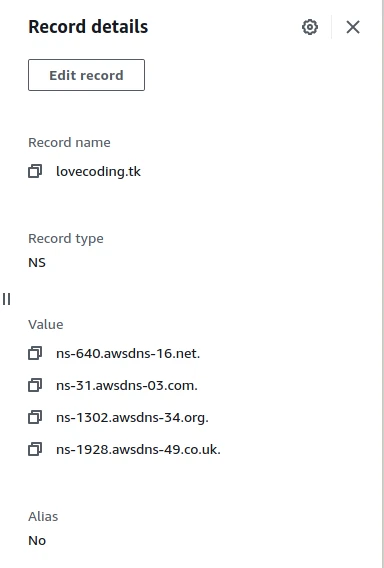
4. Now go to Freenom and under the domain , click on Nameservers and paste the nameservers from the DNS record there.
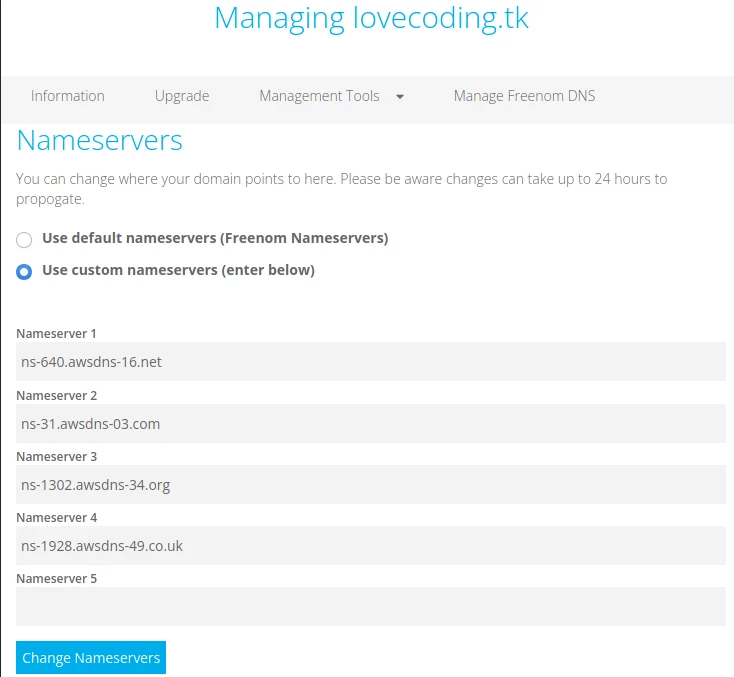
5.We have now successfully configured the Custom Domain to Route53.
Step 3 : Create a repository with your code
1.Go to Github/Bitbucket and create a repository
2.Upload your application code in your repository
3.Here is the sample html code I am using for my application
<!DOCTYPE html>
  <html>
    <head>
        <title>
           Basic Web page
        </title>
    </head>
    <body>
        <h1>Hello World!</h1>
    </body>
  </html>
4.Now that we have the code ready in our repository , we can get our hands dirty with AWS Amplify.
Step 4 : Deploy the code with Amplify
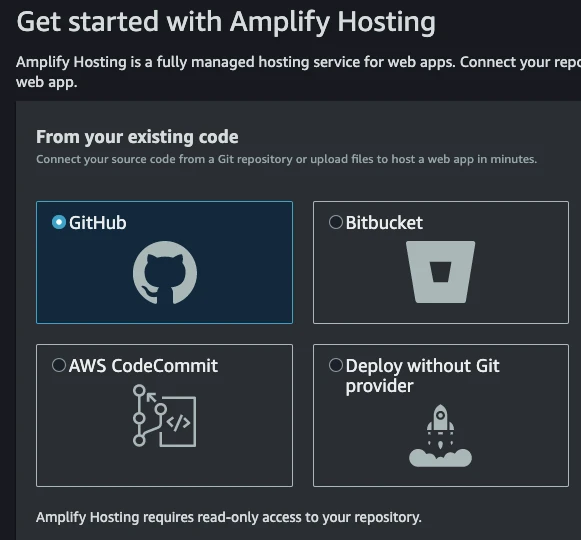
1.Go to Amplify in AWS and click on Create new app
2.After clicking on create new app, select Github as your source.
3.Click on next and login to your Github and select the repository your code is available in.
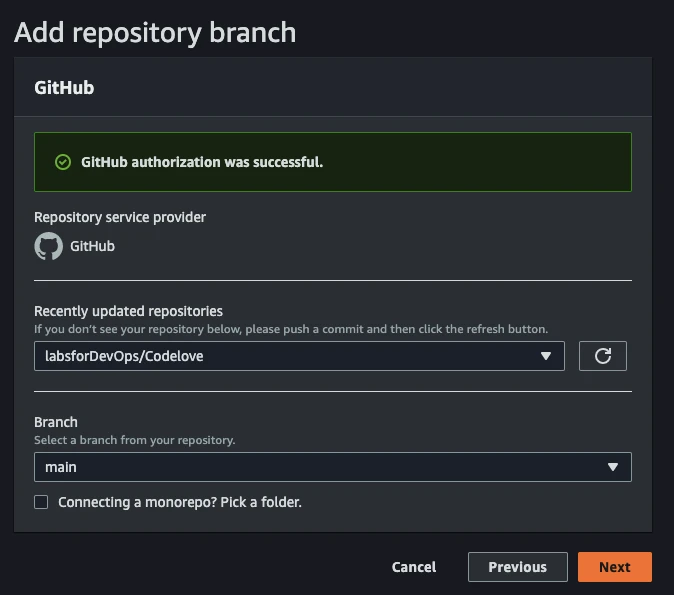
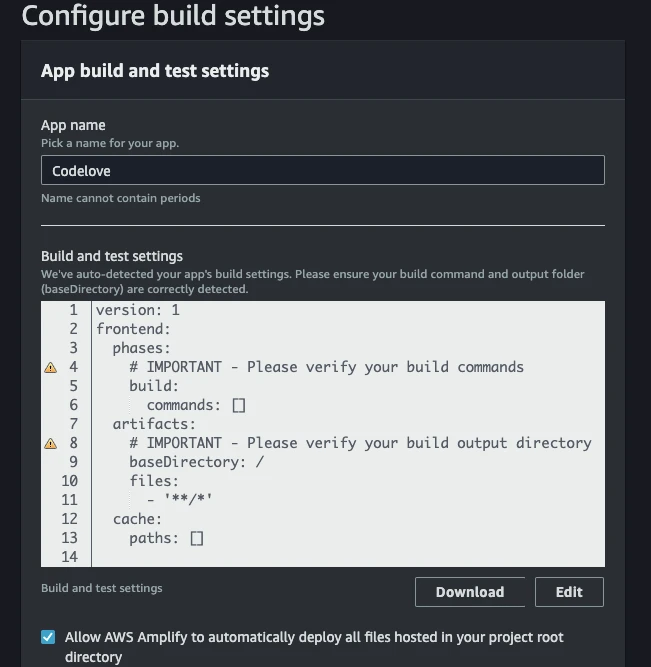
3.Click on Next to review your build settings and accept AWS to deploy your code. I am using a simple html code so I don't have to edit my build settings, but if you are going to use Amplify for your production/staging environment then make sure to edit your build settings as you need.
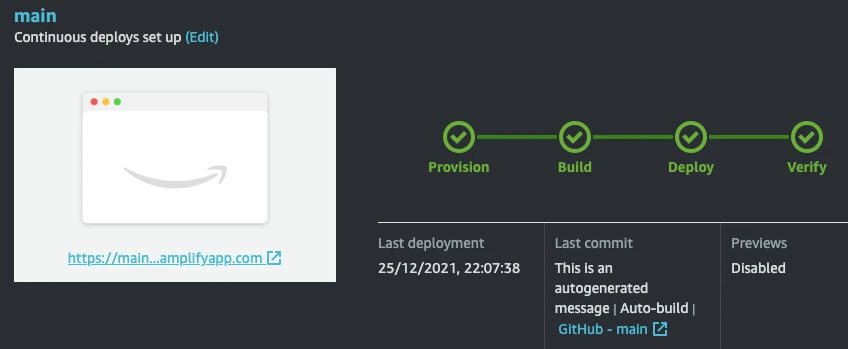
4.Click on Next and wait for the code to get deployed.
Step 5 : Configure custom domain with Amplify
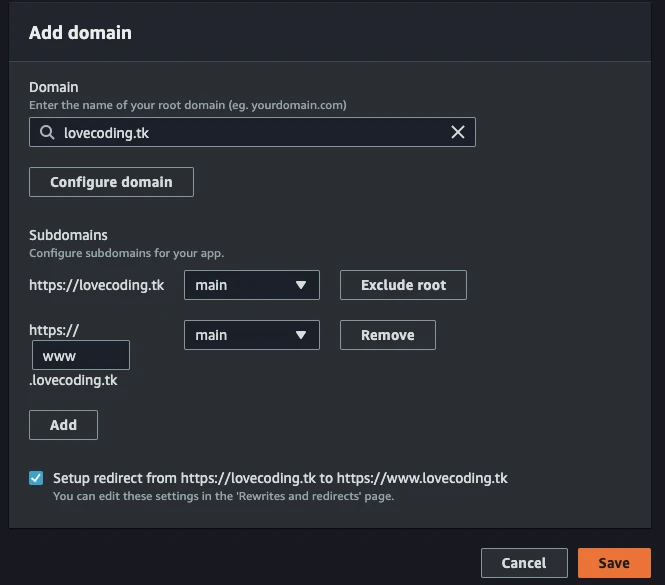
1. Go to domain management , choose your domain and click on Configure domain.
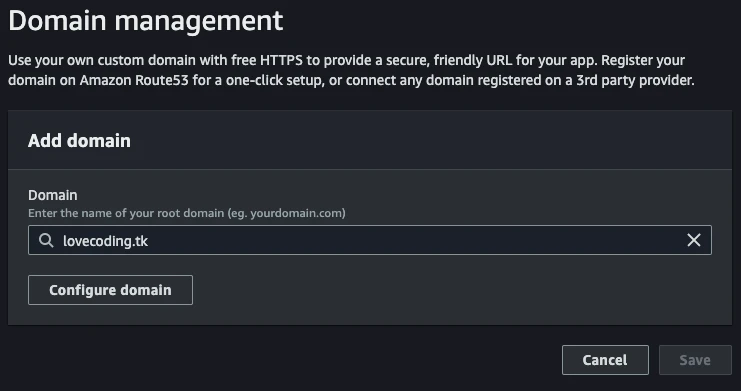
2. After selecting your domain and selecting setup redirect , click on save.
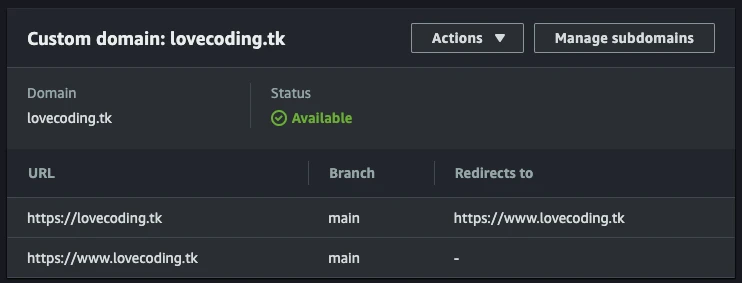
3.Now wait for the SSL to be issued by the AWS ACM and the further verification of the domain. You should be able to see the below image after about 10 minutes.
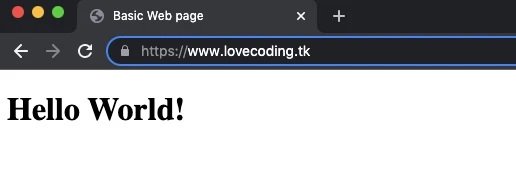
4.Since the domain is now properly configured with Amplify , you can now visit your domain and see the result.
Conclusion
In this article, we have learnt how we can very easily deploy a free website with AWS Amplify. You can use Amplify for many kinds of purposes starting from frontend to backend and with it's many amazing features is a must to know tool if you are a AWS Solutions Architect.If you are just getting started in Cloud , then please checkout other articles on our website.Please let us know if you encounter any issues in the comments below.