![Azure File Share Explained [Tutorial With Examples]](/azure-file-share/azure_file_share-800w.webp)
Azure Files v/s Blob Storage
Azure Files is a sub-service underneath the Storage Service that is made available to us when we create a storage account. But in contrast to providing us an object-based storage solution like we have with Azure Blob, Azure Files provides us a fully managed Azure file share service from our storage accounts in the Azure cloud. File storage offers shared storage for applications using the industry standard SMB protocol. Microsoft Azure virtual machines and cloud services can share file data across application components via mounted shares, and on-premises applications can also access file data in the share. Applications running in Azure virtual machines or cloud services can mount a file storage share to access file data, just as a desktop application would mount a typical SMB share. Any number of Azure virtual machines or roles can mount and access the File storage share simultaneously.
Here are some distinguishing features of Azure File Share over other Azure Storage solutions.
- Azure files are true directory objects. Azure blobs are a flat namespace.
- Azure files are accessed through file shares. Azure blobs are accessed through a container.
- Azure files provide shared access across multiple virtual machines. Azure disks are exclusive to a single virtual machine.
- Azure Files offers fully managed file shares in the cloud that are accessible via the industry standard Server Message Block (SMB) protocol.
- Azure File shares can be mounted concurrently by cloud or on-premises deployments of Windows, Linux, and macOS.
Common uses of Azure File Storage
Given below are some of the common uses of a file storage solution.
- Replace and supplement: Azure Files can be used to completely
replace or supplement traditional
on-premises file servers or NAS devices. - **Access anywhere:**Popular operating systems such as Windows, macOS, and Linux can directly mount Azure File shares wherever they are in the world.
- Lift and shift: Azure Files makes it easy to “lift and shift” applications to the cloud that expect a file share to store file application or user data.
- **Azure File Sync:**Azure File shares can also be replicated with Azure File Sync to Windows Servers, either on-premises or in the cloud, for performance and distributed caching of the data where it's being used.
- Shared applications: Storing shared application settings, for example in configuration files.
- **Diagnostic data:**Storing diagnostic data such as logs, metrics, and crash dumps in a shared location.
- Tools and utilities: Storing tools and utilities needed for developing or administering Azure virtual machines or cloud services.
Components of Azure Files
The below illustration is used to represent the different components that form the Azure File Share service.
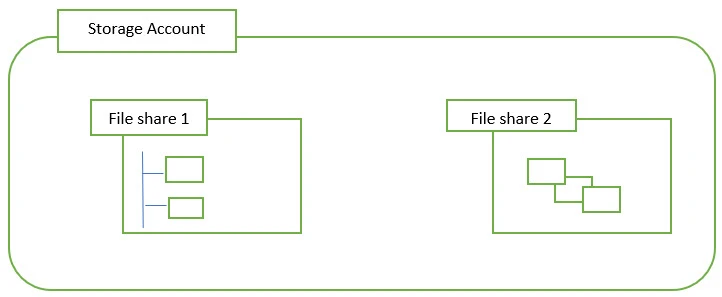
- Azure Files: This is a sub-service of Azure Storage Accounts
- File Share: A file share is the file structure we are going to be connecting to when we actually map or connect to that file share.
- Files and folders: These exist inside of this file share that are
going to be shared over the network using the file share.
We could have multiple file shares created within the file service inside our Azure storage account.
Azure Files Connectivity options
We have some different connectivity options available to us depending on whether we're accessing our file shares either internally or externally. In this context, accessing it internally or externally implies the Azure region where our storage account exists, where the file share exists.
- Internal connectivity: This implies that the clients accessing the file share are within the Azure cloud itself. Here we have the ability to use REST, SMB 2.1 and SMB 3.0.
- External connectivity: In this scenario, the client machines accessing the file shares are located in a different cloud environment or could also reside on premises. We only have the option of using REST and SMB 3.0 in this case because SMB 2.1 doesn't provide the encryption which is required for connecting externally to ensure the safety of the data.
In terms of security, data encrypted at rest by default within our storage accounts and we have access to secure data transfer over HTTPS for data that is in transit. This allows us to protect our data, whether it's at rest or in transit inside of our Azure Files.
Creating an Azure File Share
To create a file share, we need to have a storage account already created. If you’re not familiar with the process of creating a storage account, you may please refer to our earlier article where we demonstrated the creation of a storage account as a pre-requisite for provisioning blob storage.
Step-1: Create Azure File Share
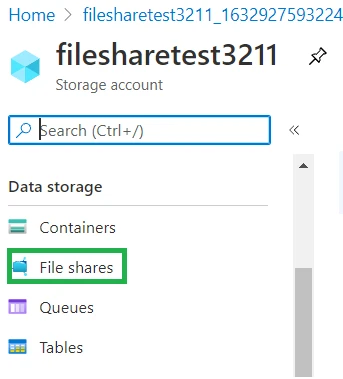
To begin, the file share creation process we need to navigate to the Storage Account home page in the Azure portal, select the storage account and we’d like to use and click on it.
From the storage account management page, we need to click on File shares from the Data Storage section.
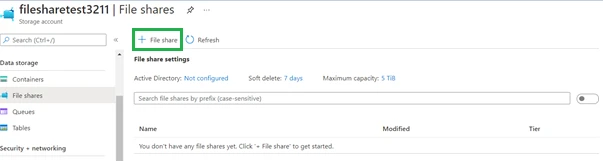
Under the File Shares page, we’ll click on the + File Share button to create a new Azure file share.
Step-2: Define Storage Tier for Azure File Share
Clicking this option will open the below Menu for us where we need to type a name for the file share, we are creating and also specify a storage tier. We’ve selected the transaction optimized tier. Other options include premium, hot and cold depending on the purpose for which the share is likely to be used.
That being said, transaction optimized is the most common use case.

Once we’ve provided the name for our share and selected the tier, we’ll click on the Create button at the bottom of the page. Our share should now be visible in the file shares section.

Step-3: Update File Share Quota
During the share creation time, the maximum quota of 5TB was set. We could reduce that if we want a share of a smaller size.
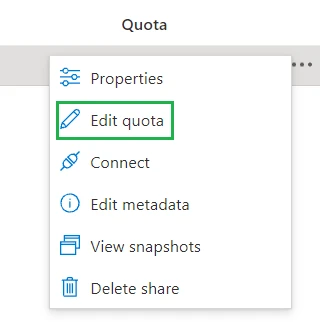
To modify the quota, click on the three dots towards the right of the Quota value and select Edit quota.
Doing so will open up a new window where we could specify a new quota size. Here we’ve specified 10GB.
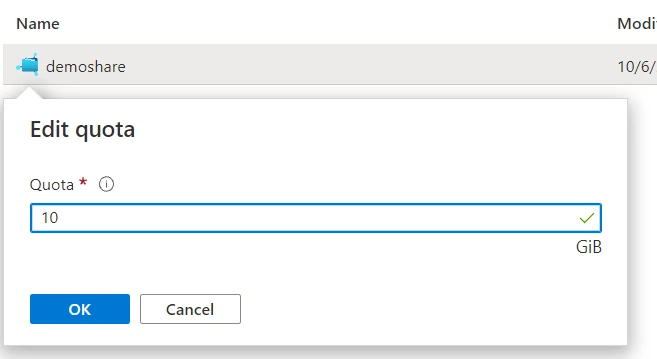
Specify the quota size you wish to have for the share and click on ok. The quota should now be update to 10G as shown below.

Step-4: Add content into the Azure File Share
Now that our share has been created, we’ll populate it with some content. To do so we’ll first click on the share name. On this page click on Add directory to create a new folder/directory inside the file share.

Provide a name for the directory and click ok.
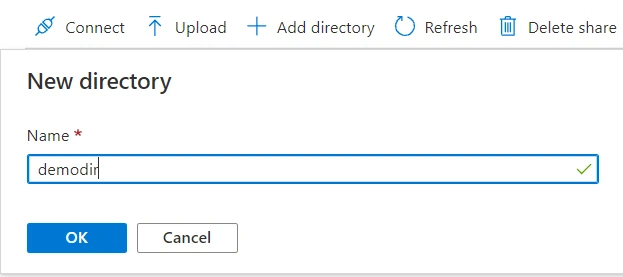
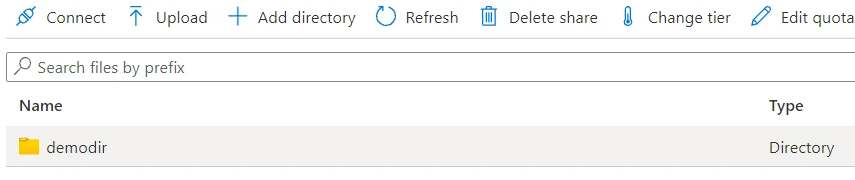
This creates the new directory inside our file share.
We are now going to upload a file to this directory. To do so, click on the directory name and over there click on the upload button to upload a file to this directory inside the file share.
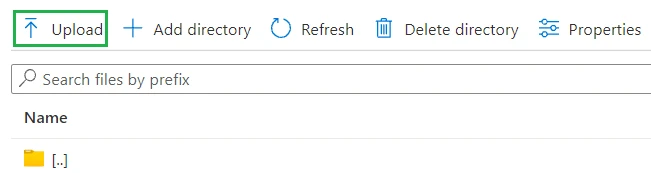
Browse your system for a file to upload and once selected click on the upload button.
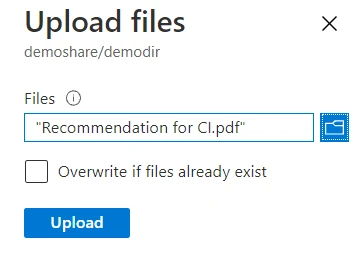
The file upload should take a few seconds to complete after which the file should be visible inside the directory.

Mount Azure File Share on Linux Server
Our File share has been successfully created and populated with some content. We’ll now mount this on a Linux server. To do so, we’ll navigate back to the File Share page and click on the Connect button.
This will open a page with instructions on how to mount the share for different operating system types. Since we will use Linux, we’ll have a look at the instructions for Linux.

We are going to mount the Azure File Share that we create onto a Linux virtual machine that resides inside the Azure cloud. We’ll quickly create a Linux Virtual machine using the Azure CLI.
Inside the Azure CLI, we’ll assign the resource group name to a variable.
cloud@Azure:~$ rg=$(az group list --query [].name -o tsv)

cloud@Azure:~$ echo $rg
1-c5320bb6- demo-rg

cloud@Azure:~$
We will now use the az vm create command to create a new Ubuntu
virtual machine.
cloud@Azure:~$ az vm create --resource-group $rg --name fileshare-demo-vm --image UbuntuLTS --admin-username clouddemo --generate-ssh-keys
SSH key files '/home/cloud/.ssh/id_rsa' and '/home/cloud/.ssh/id_rsa.pub' have been generated under ~/.ssh to allow SSH access to the VM. If using machines without permanent storage, back up your keys to a safe location.
It is recommended to use parameter "--public-ip-sku Standard" to create new VM with Standard public IP. Please note that the default public IP used for VM creation will bechanged from Basic to Standard in the future.
- Running ..
This is going to take a few minutes to provision. Once the VM is created, we’ll query the public IP address of the virtual machine to connect to it.
cloud@Azure:~$ az vm show -d --resource-group $rg --name fileshare-demo-vm --query publicIps
"70.37.92.162"
cloud@Azure:~$
Let us now connect to our virtual machine via the ssh keys that we generated and mount the share following the connect instructions.
Connect with an identity file using ssh -i; the ssh command shows key permissions, usernames, and EC2-style logins.
cloud@Azure:~/.ssh$ ssh -i id_rsa [email protected]
Welcome to Ubuntu 18.04.6 LTS (GNU/Linux 5.4.0-1059-azure x86_64)
clouddemo@fileshare-demo-vm:~$
We will execute the instructions for mounting the Azure file share on Linux. There instructions were displayed when we clicked on the Connect button for the File share.
clouddemo@fileshare-demo-vm:~$ sudo mkdir /mnt/demoshare
clouddemo@fileshare-demo-vm:~$ if [ ! -d "/etc/smbcredentials" ]; then
> sudo mkdir /etc/smbcredentials
> fi
clouddemo@fileshare-demo-vm:~$ if [ ! -f "/etc/smbcredentials/filehsaretest3211.cred" ]; then
> sudo bash -c 'echo "username=filehsaretest3211" >> /etc/smbcredentials/filehsaretest3211.cred'
> sudo bash -c 'echo "password=pFqLPxB+wjxLKfp/4Gc/u9TXrY254e8Lg+4AlJtQ/93OWSk564W3nIy4zrNfPhrRQqGC01ThAsSZAhgkso4YjQ==" >> /etc/smbcredentials/filehsaretest3211.cred'
> fi
clouddemo@fileshare-demo-vm:~$ sudo chmod 600 /etc/smbcredentials/filehsaretest3211.cred
clouddemo@fileshare-demo-vm:~$
clouddemo@fileshare-demo-vm:~$ sudo bash -c 'echo "//filehsaretest3211.file.core.windows.net/demoshare /mnt/demoshare cifs nofail,vers=3.0,credentials=/etc/smbcredentials/filehsaretest3211.cred,dir_mode=0777,file_mode=0777,serverino" >>/etc/fstab'
clouddemo@fileshare-demo-vm:~$ sudo mount -t cifs //filehsaretest3211.file.core.windows.net/demoshare /mnt/demoshare -o vers=3.0,credentials=/etc/smbcredentials/filehsaretest3211.cred,dir_mode=0777,file_mode=0777,serverino
clouddemo@fileshare-demo-vm:~$
Since we did not receive any error, let’s check if the share has been mounted.
Check mount-point usage and filesystem types with df; the df and du covers -h, -T, and filtering pseudo-filesystems.
clouddemo@fileshare-demo-vm:~$ df -hTP /mnt/demoshare/
Filesystem Type Size Used Avail Use% Mounted on
//filehsaretest3211.file.core.windows.net/demoshare cifs 10G 128K 10G 1% /mnt/demoshare
clouddemo@fileshare-demo-vm:~$
The share has indeed been mounted and also has the content that we uploaded.
clouddemo@fileshare-demo-vm:~$ ls -ltr /mnt/demoshare/demodir/
total 110
-rwxrwxrwx 1 root root 112573 Oct 6 10:10 'Recommendation for CI.pdf'
clouddemo@fileshare-demo-vm:~$
Summary
Azure Files is a completely managed file share that you can mount just like any SMB file share. That means existing applications that use network attached storage (NAS) devices or SMB file shares can use Azure Files without any special tooling, and if you have multiple applications that need to access the same share, that will work with Azure Files, too.
To further solidify our knowledge, we demonstrated practically how to create an Azure File Share and then mount it on a Linux virtual machine inside the Azure cloud.
References
We referred the official documentation for Microsoft Azure for writing this article. Links to the documentation for the Azure Files sections have been provided below for further reading.
Store and
share files in your app with Azure Files
What is
Azure Files?