OpenLDAP has various configuration options for creating a replicated directory. The LDAP Sync protocol allows a client to maintain a synchronized copy of a DIT fragment. The LDAP Sync operation is defined as a set of controls and other protocol elements which extend the LDAP search operation. When any attribute value in a replicated object is changed on the provider, each consumer fetches and processes the changed object, including both the changed and unchanged attribute values, during replication.
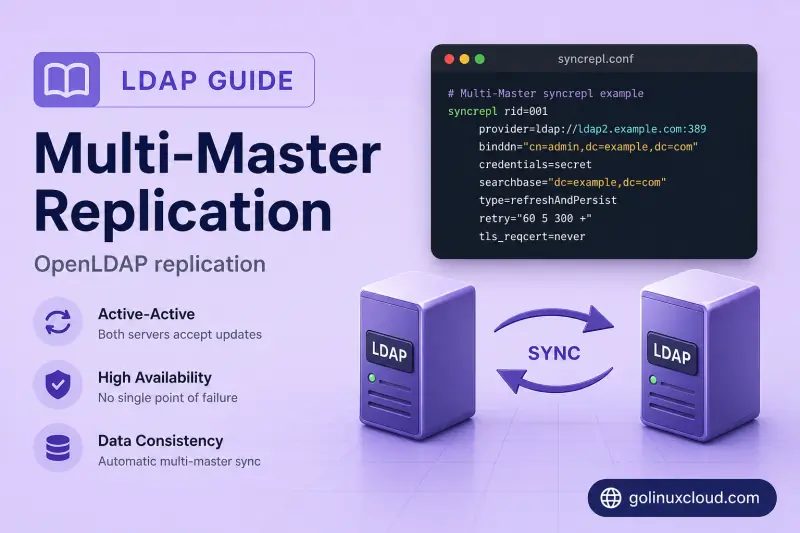
Multi-master replication is a replication technique using Syncrepl to replicate data to multiple provider ("Provider") Directory servers. Under the Multi-master OpenLDAP configuration, all the nodes are writable. Where the network traffic and write load spread across all the servers, the same as for single-provider.
Benefits of Multi-Master Replication in OpenLDAP
The following are the benefits of Multi-master replication:
- If one master node fails, the other nodes still accept the connections and changes.
- Multi-master replication avoids single point of failure
- Under Multi-master replication, we can place the servers on different locations and networks. This helps if one network area fails, the other will still serve the services.
- It is good for the High availability of LDAP services.c
Lab Environment
LDAP master Server1 (Read and Write):
OS: Rocky Linux 9.4 (Blue Onyx)
Hostname : server1.example.com
IP Address: 10.10.1.17
LDAP master Server2 (Read and Write):
OS: Rocky Linux 9.4 (Blue Onyx)
Hostname : server2.example.com
IP Address: 10.10.1.22
I have updated my /etc/hosts file with the following content as I
would be using FQDN to interact with both master nodes.
10.10.1.17 server1 server1.example.com
10.10.1.22 server2 server2.example.com
Step-1: Install and Configure OpenLDAP on all Master Nodes
Since I have already written a detailed article to Configure OpenLDAP on Rocky Linux 8, so I will be very brief with the installation and configuration steps here and we will focus more on setting up multi master replication.
You can skip this step if you already have functional LDAP Server.
Install OpenLDAP on both server1 and server2:
Package installs and updates in this section use dnf command.
dnf config-manager --set-enabled plus
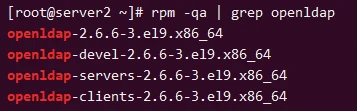
dnf install openldap-servers openldap-clients -yVerify the installed rpm:
List installed packages with rpm -qa; the rpm command explains query filters and piping into grep.
rpm -qa | grep openldap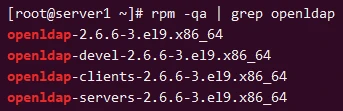
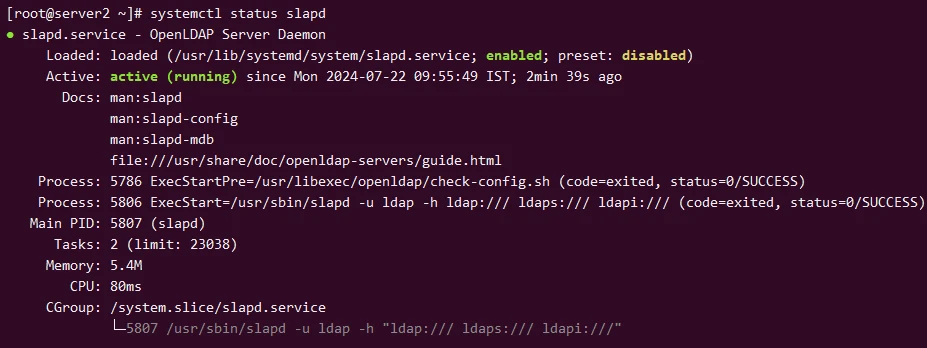
Start and enable the OpenLDAP service on both server1 and server2:
Enable or disable the unit at boot with systemctl enable; the systemctl command documents enable --now, symlinks under /etc/systemd/system, and masks.
systemctl enable slapd --now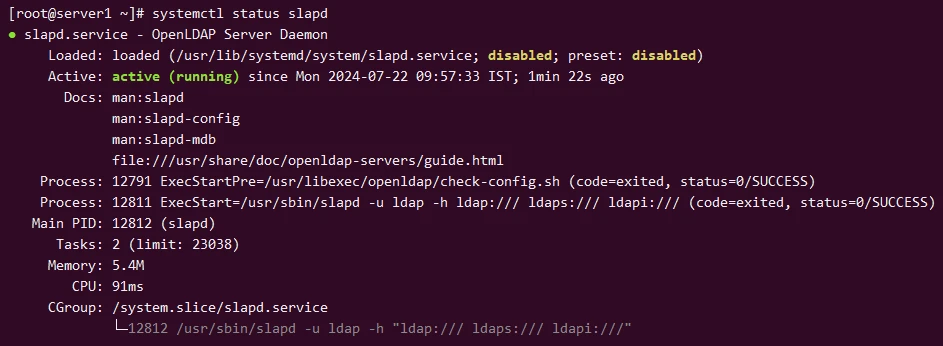
Generate a password hash on both server1 and server2:
slappasswd
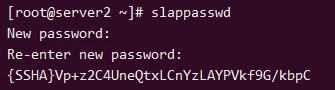
Note the generated password hash. This will be used in the configuration in next step.
Create an initial configuration file for the LDAP directory. Save the
following content in a file named init.ldif:
dn: olcDatabase={2}mdb,cn=config
changetype: modify
replace: olcSuffix
olcSuffix: dc=example,dc=com

dn: olcDatabase={2}mdb,cn=config
changetype: modify
replace: olcRootDN
olcRootDN: cn=admin,dc=example,dc=com

dn: olcDatabase={2}mdb,cn=config
changetype: modify
replace: olcRootPW
olcRootPW: <hashed password>
The olcRootPW should be in this format
olcRootPW: {SSHA}Vp+z2C4UneQtxLCnYzLAYPVkf9G/kbpC. Apply the initial
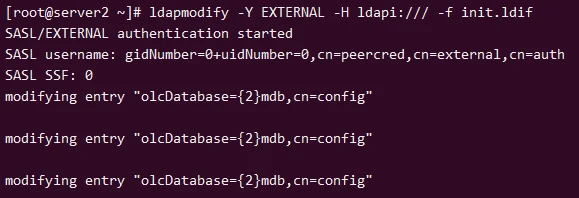
configuration:
ldapmodify -Y EXTERNAL -H ldapi:/// -f init.ldif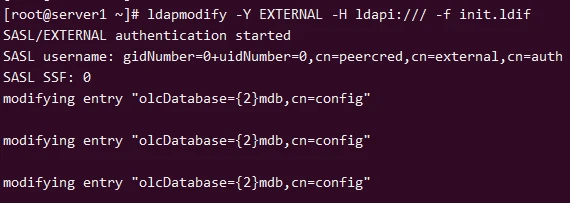
ldap_modify: No such object (32) matched DN: cn=config, then you can
execute ldapsearch -Q -LLL -Y EXTERNAL -H ldapi:/// -b cn=config dn to
list all configuration entries.
We will import only the basic required schemas
likecosine.ldif,nis.ldif,inetorgperson.ldif on both servers.
ldapadd -Y EXTERNAL -H ldapi:/// -f /etc/openldap/schema/cosine.ldif
ldapadd -Y EXTERNAL -H ldapi:/// -f /etc/openldap/schema/nis.ldif
ldapadd -Y EXTERNAL -H ldapi:/// -f /etc/openldap/schema/inetorgperson.ldif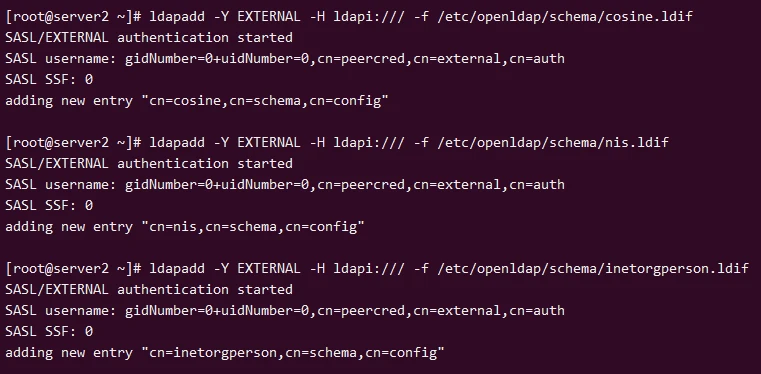
Next we will add base and OU where we can create and add users on both
servers. Create add-base.ldif and add following content:
dn: dc=example,dc=com
objectClass: top
objectClass: dcObject
objectClass: organization
o: Example Organization
dc: example
Add the base DN:
ldapadd -x -D "cn=admin,dc=example,dc=com" -W -f add-base.ldifCreate the LDIF file add-ou.ldif for the OU:
dn: ou=People,dc=example,dc=com
objectClass: organizationalUnit
ou: People
Add the OU to the LDAP directory:
ldapadd -x -D "cn=admin,dc=example,dc=com" -W -f add-ou.ldifStep-2: Enable Required Modules for Replication
Multi-master replication in OpenLDAP requires specific modules to be enabled to ensure data consistency and to facilitate proper replication between multiple servers. Here's why each module is essential:
- syncprov Module: This module provides the syncrepl (synchronous replication) provider functionality, enabling the OpenLDAP server to support replication.
- accesslog Module: This module keeps a log of changes to the LDAP directory. It is crucial for conflict resolution and auditing changes during replication.
Create a file named enable_modules.ldif with the following content to
enable the syncprov and accesslog modules:
dn: cn=module{0},cn=config
changetype: modify
add: olcModuleLoad
olcModuleLoad: syncprov.la
olcModuleLoad: accesslog.la
Apply this using
ldapmodify -Y EXTERNAL -H ldapi:/// -f enable_modules.ldifWhen I tried to load this config, I was getting:
SASL/EXTERNAL authentication started
SASL username: gidNumber=0+uidNumber=0,cn=peercred,cn=external,cn=auth
SASL SSF: 0
modifying entry "olcDatabase={1}mdb,cn=config"
ldap_modify: No such object (32)
   matched DN: cn=config
When I checked further, it seems cn=module{0},cn=config entry does not
exist. So I first checked my configuration:
ldapsearch -Q -LLL -Y EXTERNAL -H ldapi:/// -b cn=config dn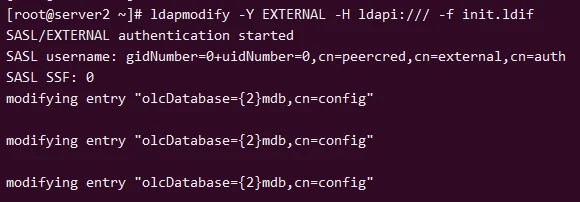
It appears there isn't an entry for cn=module{0},cn=config by default.
We will need to create the module configuration entry before adding the
required modules. You can skip this step if you already have modules
field:
Create a file named add_module_entry.ldif with the following content:
dn: cn=module{0},cn=config
objectClass: olcModuleList
cn: module{0}
On both server1 and server2:
ldapadd -Y EXTERNAL -H ldapi:/// -f add_module_entry.ldif

Now, let's re-execute our modify LDIF to enabled modules for replication on both server1 and server2:
ldapmodify -Y EXTERNAL -H ldapi:/// -f enable_modules.ldif

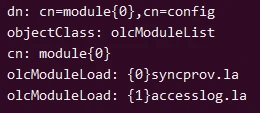
Let's verify if the modules are enabled properly on both servers:
ldapsearch -Q -LLL -Y EXTERNAL -H ldapi:/// -b cn=config "(&(objectClass=olcModuleList)(olcModuleLoad=*))"You should see something like this on both servers:
Step-3: Configure Accesslog Database
The accesslog database in OpenLDAP is used primarily for logging changes made to the directory. The accesslog database logs all modifications (additions, deletions, updates) to the directory.
To configure the accesslog database, create a file named
accesslog.ldif with the following content:
dn: olcDatabase={3}mdb,cn=config
objectClass: olcDatabaseConfig
objectClass: olcMdbConfig
olcDatabase: {3}mdb
olcDbDirectory: /var/lib/ldap/accesslog
olcSuffix: cn=accesslog
olcRootDN: cn=admin,cn=accesslog
olcRootPW: <hashed_password>
olcDbIndex: default eq
olcDbIndex: entryCSN,entryUUID eq
Replace <hashed_password> with the password hash generated previously
for individual servers.
On both server1 and server2:
Ownership changes in this section use chown command syntax.
mkdir -p /var/lib/ldap/accesslog
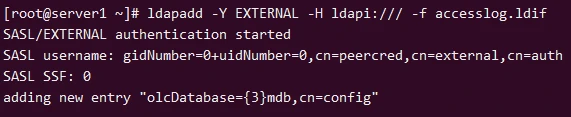
chown ldap:ldap /var/lib/ldap/accesslog
ldapadd -Y EXTERNAL -H ldapi:/// -f accesslog.ldifSample Output:
Step-4: Configure Multi-Master Replication
Create a replication configuration file named replication.ldif with
the following content (Update the credentials field):
Important parameters:
- olcServerID - Specify an integer ID from 0 to 4095 for this server (limited to 3 hexadecimal digits). These IDs are required when using multi-master replication, and each master must have a unique ID.
- provider - specify another LDAP server's URI. For example, the above script has the provider set to ldapmaster2.example.com which is the second server's host address. So, when you are running the same file in ldapmaster2, you need to use the provider ldapmaster1.example.com
- binddn - The bindDN DN is basically the credential you are using to authenticate against an LDAP.. In the example, we have used the admin user 'Manager' for authentication. We can use the same on both servers.
- credentials - Password for the binddn user in plain text format.
- rid - (Replica ID) is a unique 3-digit that identifies the replica. Each consumer should have at least one rid
On server1:
# Define a unique server ID for server1
dn: cn=config
changetype: modify
replace: olcServerID
olcServerID: 1

# Add the syncprov overlay for the {2}mdb database
dn: olcOverlay=syncprov,olcDatabase={2}mdb,cn=config
changetype: add
objectClass: olcOverlayConfig
objectClass: olcSyncProvConfig
olcOverlay: syncprov

# Configure syncrepl for replication and enable mirrormode
dn: olcDatabase={2}mdb,cn=config
changetype: modify
add: olcSyncRepl
olcSyncRepl: rid=002
  provider=ldap://server2.example.com
  bindmethod=simple
  binddn="cn=admin,dc=example,dc=com"
  credentials=<server2_password_in_plain_text>
  searchbase="dc=example,dc=com"
  scope=sub
  schemachecking=on
  type=refreshAndPersist
  retry="30 5 300 3"
  interval=00:00:05:00
-
add: olcMirrorMode
olcMirrorMode: TRUE

dn: olcOverlay=syncprov,olcDatabase={3}mdb,cn=config
changetype: add
objectClass: olcOverlayConfig
objectClass: olcSyncProvConfig
olcOverlay: syncprov
Apply the replication configuration:
ldapmodify -Y EXTERNAL -H ldapi:/// -f replication.ldif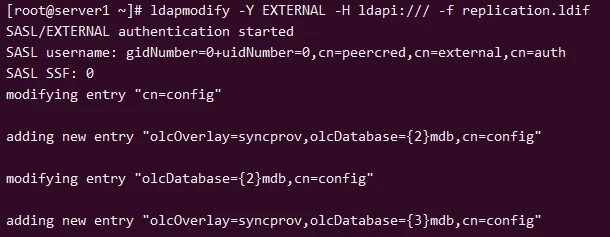
On server2:
# Define a unique server ID for server2
dn: cn=config
changetype: modify
replace: olcServerID
olcServerID: 2

# Add the syncprov overlay for the {2}mdb database
dn: olcOverlay=syncprov,olcDatabase={2}mdb,cn=config
changetype: add
objectClass: olcOverlayConfig
objectClass: olcSyncProvConfig
olcOverlay: syncprov

# Configure syncrepl for replication and enable mirrormode
dn: olcDatabase={2}mdb,cn=config
changetype: modify
add: olcSyncRepl
olcSyncRepl: rid=001
  provider=ldap://server1.example.com
  bindmethod=simple
  binddn="cn=admin,dc=example,dc=com"
  credentials=<server1_password_in_plain_text>
  searchbase="dc=example,dc=com"
  scope=sub
  schemachecking=on
  type=refreshAndPersist
  retry="30 5 300 3"
  interval=00:00:05:00
-
add: olcMirrorMode
olcMirrorMode: TRUE

dn: olcOverlay=syncprov,olcDatabase={3}mdb,cn=config
changetype: add
objectClass: olcOverlayConfig
objectClass: olcSyncProvConfig
olcOverlay: syncprov
Apply the replication configuration:
ldapmodify -Y EXTERNAL -H ldapi:/// -f replication.ldif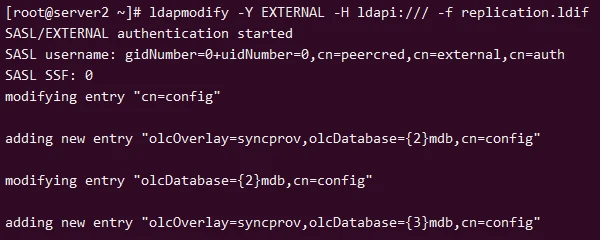
Restart LDAP service on both servers:
systemctl restart slapdStep-5: Configure Firewall
Ensure that the firewall allows LDAP traffic.
On both server1 and server2:
Allow the bundled service with firewall-cmd --add-service; see the firewalld for http, https, and custom service definitions.
firewall-cmd --add-service=ldap --permanent
firewall-cmd --reload
Step-6: Test the Configuration
We are done with the multi-master configuration, let's create one user in server1 and this user should be also accessible in server2. Please refer to the article to manage users in OpenLDAP: Managing User accounts to the OpenLDAP Server
We will use the following testuser2.ldif file to create a user on
server1 only:
dn: uid=testuser2,ou=people,dc=example,dc=com
objectClass: top
objectClass: person
objectClass: organizationalPerson
objectClass: inetOrgPerson
uid: testuser2
cn: Test User 2
sn: User2
userPassword: {SSHA}5en6G6MezRroT3XKqkdPO3pC5jvM5hDR
Add testuser2:
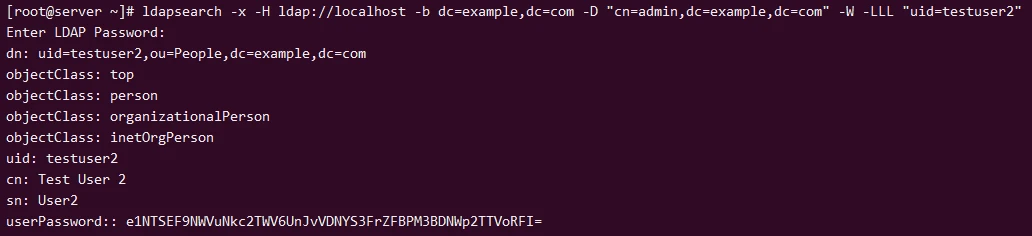
ldapadd -x -D "cn=admin,dc=example,dc=com" -W -f testuser2.ldifNow search for this user on both servers using:
ldapsearch -x -H ldap://localhost -b dc=example,dc=com -D "cn=admin,dc=example,dc=com" -W -LLL "uid=testuser2"On server1:
On server2:
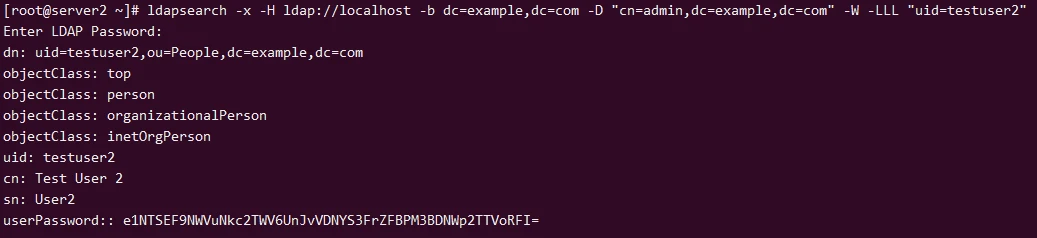
As you can see, we created testuser2 only on server1 but due to multi-replication the user is accessible on both LDAP servers.
Step-7: Verify mater replication status
Unfortunately there is no single command which can give us the replication status of LDAP server but still there some methods which can be used to make sure the replication is working properly.
On each server, run:
ldapsearch -x -LLL -H ldap://localhost -b dc=example,dc=com contextCSN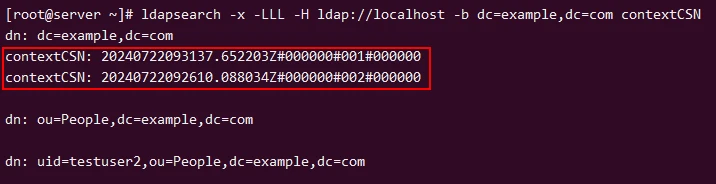
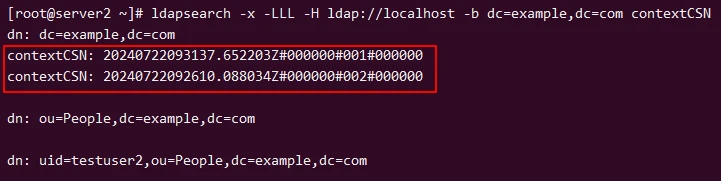
Compare the contextCSN values from all servers. They should match if
replication is working correctly.
Alternatively you can execute following command on all servers:
ldapsearch -Q -LLL -Y EXTERNAL -H ldapi:/// -b "olcDatabase={2}mdb,cn=config" olcSyncreplSample Output
dn: olcDatabase={2}mdb,cn=config
olcSyncrepl: {0}rid=001 provider=ldap://server1.example.com bindmethod=simple
 binddn="cn=admin,dc=example,dc=com" credentials=yt_xk39B searchbase="dc=examp
 le,dc=com" scope=sub schemachecking=on type=refreshAndPersist retry="30 5 300
  3" interval=00:00:05:00

dn: olcOverlay={0}syncprov,olcDatabase={2}mdb,cn=config
This should list the olcSyncrepl configurations directly.
Troubleshooting any issues
You can use journalctl to check for ay relevant logs which can give you a hint for the cause of failure:
journalctl -u slapd -fFor example in my case due to wrong credentials I was getting this error:
DN="cn=admin,dc=example,dc=com" ldap_sasl_bind_s failed (49)
Jul 22 14:34:37 server2.example.com slapd[28369]: do_syncrepl: rid=001 rc 49 retrying (3 retries left)
In this tutorial we have successfully configure multi-master replication in OpenLDAP using 2 servers. You can repeat the same and add more replication servers as per your requirement.
