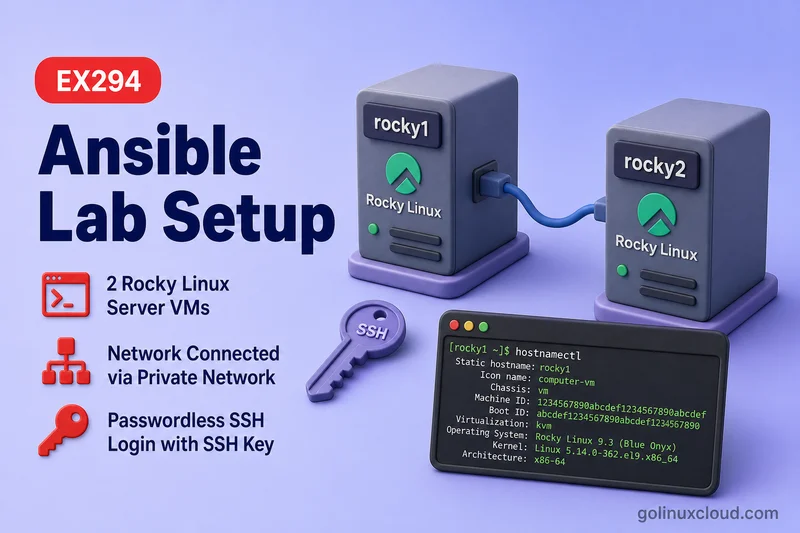
In this lesson you build a two-node EX294 lab on Rocky Linux 10: rocky1 as the control node and rocky2 as the first managed node. You will fix hostnames, teach both VMs to resolve each other without DNS, create the ansible user, copy SSH keys, and prove passwordless sudo works—the same SSH and privilege-escalation groundwork Red Hat expects for EX294.
We stop before installing Ansible. Once ssh rocky2 and sudo -n work from the ansible account, you move on to install ansible-core on rocky1.
If you have not skimmed the syllabus yet, read the RHCE EX294 exam objectives first so you know where this lab fits in the course.
Tested on: Rocky Linux 10.2 (Red Quartz); kernel 6.12.0-211.16.1.el10_2.0.1.x86_64.
~/ansible-project, inventory group lab, and playbooks in playbooks/. Use your own host names and paths if yours differ.
Lab topology
| Role | Hostname | Host-only IP | Purpose |
|---|---|---|---|
| Control node | rocky1 |
192.168.56.108 |
Where you install Ansible later; SSH originates here |
| Managed node | rocky2 |
192.168.56.109 |
Target host for automation practice |
Both VMs also use a NAT adapter for outbound internet (10.0.2.15 in this write-up) so you can run dnf install and pull container images. Ansible traffic between rocky1 and rocky2 should use the host-only addresses in the table—not the NAT side. If your VMs only have one adapter today, add a host-only NIC with Oracle VirtualBox network adapter setup.
If your host-only address changes after a reboot, pin it with a static address using nmcli on Rocky Linux and RHEL or a DHCP reservation in VirtualBox. Nothing annoys beginners faster than inventory that pointed at yesterday’s IP.
Why this lab uses host-only networking
Each VM has two network paths, and they do different jobs. NAT gives you internet; host-only gives you a private lane between lab nodes that does not depend on your home router.
When you run ip -4 addr, it is common to see 10.0.2.15 on both machines. That is VirtualBox NAT—not the network Ansible should use. Look for the 192.168.56.x address on the host-only interface and put that in /etc/hosts and inventory.
Prerequisites
You need two Rocky Linux 10 VMs on the same host-only subnet (2 GB RAM each is fine to start), root SSH or console access on both, and outbound network on rocky1 for the Ansible install in the next lesson. If root SSH is disabled, run the remote steps from the rocky2 console until the ansible user and key are in place.
The Ansible tutorial hub shows the full course order if you want the big picture.
Step 1: Set static hostnames
Fresh installs often answer to localhost.localdomain. EX294-style inventory expects real hostnames, so set rocky1 on the control node and rocky2 on the managed node.
On rocky1 (control):
sudo hostnamectl set-hostname rocky1
hostname
Sample output:
rocky1The short hostname should match what you will put in inventory.
On rocky2 (managed)—from rocky1 if root SSH already works. The first connection accepts the host key once:
ssh -o StrictHostKeyChecking=accept-new [email protected] 'hostnamectl set-hostname rocky2 && hostname'Sample output:
rocky2The managed node should answer with its new hostname, not localhost.
Confirm the static hostname on the control node:
hostnamectl status | head -3Sample output:
Static hostname: rocky1
       Icon name: computer-vm
         Chassis: vm 🖴
The Static hostname line should read rocky1, not localhost.localdomain.
Step 2: Add lab entries to /etc/hosts
Ansible and SSH are easier when rocky1 and rocky2 resolve without DNS. Add the same block on both nodes—the short names are for daily use; the ex294.lab FQDNs give you practice with fully qualified patterns later.
On rocky1:
sudo tee -a /etc/hosts <<'EOF'
# EX294 Ansible lab
192.168.56.108 rocky1.ex294.lab rocky1
192.168.56.109 rocky2.ex294.lab rocky2
EOF
If you already added these entries earlier, edit /etc/hosts instead of appending duplicates.
Copy the same block to rocky2:
ssh [email protected] "tee -a /etc/hosts" <<'EOF'
# EX294 Ansible lab
192.168.56.108 rocky1.ex294.lab rocky1
192.168.56.109 rocky2.ex294.lab rocky2
EOF
Verify IPv4 resolution from rocky1:
getent ahostsv4 rocky1 rocky2Sample output:
192.168.56.108  STREAM rocky1.ex294.lab
192.168.56.108  DGRAM
192.168.56.108  RAW
192.168.56.109  STREAM rocky2.ex294.lab
192.168.56.109  DGRAM
192.168.56.109  RAW
Each name should resolve to the host-only address from the topology table.
Check the host-only interface on the control node (adapter name may differ; look for the 192.168.56.x address—the ip command guide shows how to read ip addr output):
ip -4 addr show enp0s8Sample output:
3: enp0s8: <BROADCAST,MULTICAST,UP,LOWER_UP> mtu 1500 qdisc fq_codel state UP group default qlen 1000
    altname enx0800277ba8b0
    inet 192.168.56.108/24 brd 192.168.56.255 scope global dynamic noprefixroute enp0s8
       valid_lft 86387sec preferred_lft 86387sec
Look for inet 192.168.56.108/24 on the host-only NIC (adapter name may differ).
Confirm the managed node uses the same host-only subnet (adapter name may differ):
ssh [email protected] "ip -4 addr | grep 192.168.56"Sample output:
inet 192.168.56.109/24 brd 192.168.56.255 scope global dynamic noprefixroute enp0s8rocky2 should show 192.168.56.109 on the same 192.168.56.0/24 subnet.
Step 3: Create the ansible user on both nodes
Use the same local account on the control and managed nodes so SSH and become feel like the exam. Create the user on rocky1 first, then repeat on rocky2.
On rocky1 as root:
sudo useradd -m -s /bin/bash ansible
id ansible
Sample output:
uid=1001(ansible) gid=1001(ansible) groups=1001(ansible)Repeat on rocky2:
ssh [email protected] 'useradd -m -s /bin/bash ansible && id ansible'Sample output:
uid=1001(ansible) gid=1001(ansible) groups=1001(ansible)The numeric UID does not have to be 1001 on every system, but the account name must be ansible on both nodes.
Step 4: Generate SSH keys on the control node
Log in as ansible on rocky1 and create an Ed25519 key. This lab uses an empty passphrase so you are not prompted during practice—use a passphrase on anything that faces a real network.
sudo su - ansible
ssh-keygen -t ed25519 -N "" -f ~/.ssh/id_ed25519 -C "ansible@rocky1"
ls -la ~/.ssh/
Sample output:
Generating public/private ed25519 key pair.
Your identification has been saved in /home/ansible/.ssh/id_ed25519
Your public key has been saved in /home/ansible/.ssh/id_ed25519.pub
The key fingerprint is:
SHA256:4QeJ5OEoF67Rs3Q7hmx+LlkMzhMjDvRWsnj0nlco6ZM ansible@rocky1
...
total 16
drwx------. 2 ansible ansible 4096 Jul  6 22:43 .
drwx------. 3 ansible ansible 4096 Jul  6 22:43 ..
-rw-------. 1 ansible ansible  411 Jul  6 22:43 id_ed25519
-rw-r--r--. 1 ansible ansible   96 Jul  6 22:43 id_ed25519.pub
The private key should be mode 600 and the .ssh directory mode 700.
Deploy the public key to rocky2. As root on rocky1, create ~/.ssh on the managed node before you append authorized_keys—the copy fails if that directory does not exist. Fix permissions and SELinux context while you are there.
exit   # leave the ansible shell if you used sudo su -
install -d -m 700 -o ansible -g ansible /home/ansible/.ssh
ssh [email protected] \
  'install -d -m 700 -o ansible -g ansible /home/ansible/.ssh'
cat /home/ansible/.ssh/id_ed25519.pub | ssh [email protected] \
  'cat >> /home/ansible/.ssh/authorized_keys'
ssh [email protected] \
  'chown ansible:ansible /home/ansible/.ssh/authorized_keys && chmod 600 /home/ansible/.ssh/authorized_keys'
ssh [email protected] 'restorecon -Rv /home/ansible/.ssh'
On SELinux-enforcing hosts, restorecon fixes context on manually created .ssh files. The command may print nothing when contexts are already correct.
Alternative: if the ansible user has a password on the managed node, run ssh-copy-id rocky2 from the ansible account on rocky1. When you cannot deploy keys at all, Ansible still reaches managed nodes with --ask-pass—see use Ansible with password.
Step 5: Configure passwordless sudo
EX294 tasks assume you SSH as a normal user and escalate with become, not as root. Give the ansible user passwordless sudo through a drop-in file so you never edit /etc/sudoers directly.
NOPASSWD: ALL is lab and exam convenience only—it lets you practice become without password prompts. In production environments, prefer least-privilege sudo (specific commands or roles) instead of passwordless full root access for automation accounts.
On rocky1:
echo 'ansible ALL=(ALL) NOPASSWD: ALL' | sudo tee /etc/sudoers.d/ansible
sudo chmod 440 /etc/sudoers.d/ansible
sudo visudo -cf /etc/sudoers.d/ansible
Sample output:
ansible ALL=(ALL) NOPASSWD: ALL
/etc/sudoers.d/ansible: parsed OK
parsed OK means visudo accepts the syntax—safe to rely on this file.
On rocky2:
ssh [email protected] "echo 'ansible ALL=(ALL) NOPASSWD: ALL' > /etc/sudoers.d/ansible && chmod 440 /etc/sudoers.d/ansible && visudo -cf /etc/sudoers.d/ansible"Sample output:
/etc/sudoers.d/ansible: parsed OKStep 6: Confirm managed-node packages
Managed nodes need Python 3 and sshd—Ansible connects over SSH and runs most modules through Python on the target. On Rocky Linux 10 both packages are usually already there; verify before you assume.
On rocky1:
rpm -q python3 openssh-serverSample output on rocky1:
python3-3.12.13-2.el10_2.x86_64
openssh-server-9.9p1-23.el10_2.rocky.0.1.x86_64
Both packages must be present on every managed node before you install Ansible on the control node.
Check rocky2 remotely:
ssh [email protected] 'rpm -q python3 openssh-server'Sample output:
python3-3.12.13-2.el10_2.x86_64
openssh-server-9.9p1-23.el10_2.rocky.0.1.x86_64
If either package is missing, install it on the managed node:
ssh [email protected] 'dnf install -y python3 openssh-server && systemctl enable --now sshd'Step 7: Verify lab connectivity
Become the ansible user on rocky1 and walk through four quick checks: SSH to rocky2 without a password, sudo -n on the managed node, Python on both sides, and sshd running. If any step fails, fix it now—Ansible will not magically work around broken SSH or sudo.
sudo su - ansible
ssh -o BatchMode=yes rocky2 hostname
Sample output:
rocky2BatchMode=yes fails immediately if SSH would ask for a password—exactly what you want before installing Ansible.
Privilege escalation on the managed node should work without asking for a password—the -n flag fails immediately if sudo would prompt:
ssh rocky2 'sudo -n whoami'Sample output:
rootThat confirms passwordless sudo on rocky2—the pattern EX294 playbooks use with become.
Python needs to be available where modules will run:
ssh rocky2 'python3 --version'
python3 --version
Sample output:
Python 3.12.13
Python 3.12.13
The same Python major version on control and managed nodes avoids surprises when modules execute remotely.
Finally, confirm sshd is active on both nodes:
systemctl is-active sshd
ssh rocky2 'systemctl is-active sshd'
Sample output:
active
active
When all four checks pass, your lab is ready for the Ansible install on rocky1.
Checkpoint: what is ready
| Check | Expected result |
|---|---|
| Hostnames | rocky1 and rocky2 |
| Name resolution | getent ahostsv4 rocky2 returns 192.168.56.109 |
SSH as ansible |
ssh rocky2 hostname without a password prompt |
| Sudo | ssh rocky2 'sudo -n whoami' prints root |
| Python 3 | python3 --version works on both nodes |
| Ansible installed | Not yet—that is the next lesson |
Troubleshooting
| Symptom | Likely cause | Fix |
|---|---|---|
ssh rocky2 asks for a password |
Public key not in authorized_keys |
Re-run Step 4; confirm ~/.ssh permissions are 700 and authorized_keys is 600 |
sudo: a password is required |
Missing or wrong sudoers drop-in | Recreate /etc/sudoers.d/ansible; run visudo -cf before saving |
Could not resolve hostname rocky2 |
/etc/hosts missing on one node |
Add the lab block from Step 2 on both VMs |
Connection refused on SSH |
sshd stopped or firewall |
systemctl enable --now sshd; for lab-only testing, firewall-cmd --add-service=ssh if needed |
| SSH key exists but login still fails | Wrong SELinux context on .ssh files |
Run restorecon -Rv /home/ansible/.ssh on the managed node |
| Wrong node answers SSH | Duplicate host keys or wrong IP | Verify ip -4 addr on host-only NIC; ping 192.168.56.109 from rocky1 |
What comes next
- Install ansible-core and ansible-navigator on
rocky1. - Create project
ansible.cfgand inventory (see ansible.cfg guide and inventory files). - Run
ansible-navigator/ansible-playbookagainstrocky2.
References
- Red Hat EX294 exam objectives (official)
- Ansible managed node requirements
- RHCE EX294 study plan
Summary
Your EX294 lab is ready when rocky1 and rocky2 have matching hostnames and /etc/hosts entries, the ansible user exists on both nodes with keys from the control node, and ssh rocky2 'sudo -n whoami' prints root without prompting. Install Ansible on rocky1 next, then build inventory and your first playbooks.