
In this article I will share the steps to add or remove labels to worker nodes in Kubernetes cluster. This article assumes that you are already familiar with the concept of labels and selectors used in Kubernetes.
Lab Environment
I will be using my multi-node cluster which I had created during the starting of this entire
tutorial to demonstrate this article. This cluster contains two worker
nodes and one control plane node. So we will add and remove labels on
these worker nodes and deploy pods using nodeSelector.
List assigned labels on the node
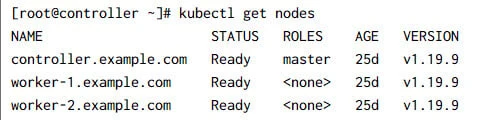
We use kubectl get nodes to list the available nodes in the cluster.
Additionally we can use --show-labels arguments to also list the
assigned labels to individual nodes in the cluster.
[root@controller ~]# kubectl get nodes --show-labels
NAME                     STATUS   ROLES    AGE   VERSION   LABELS
controller.example.com   Ready    master   25d   v1.19.9   beta.kubernetes.io/arch=amd64,beta.kubernetes.io/os=linux,kubernetes.io/arch=amd64,kubernetes.io/hostname=controller.example.com,kubernetes.io/os=linux,node-role.kubernetes.io/master=
worker-1.example.com     Ready    <none>   25d   v1.19.9   beta.kubernetes.io/arch=amd64,beta.kubernetes.io/os=linux,kubernetes.io/arch=amd64,kubernetes.io/hostname=worker-1.example.com,kubernetes.io/os=linux
worker-2.example.com     Ready    <none>   25d   v1.19.9   beta.kubernetes.io/arch=amd64,beta.kubernetes.io/os=linux,kubernetes.io/arch=amd64,kubernetes.io/hostname=worker-2.example.com,kubernetes.io/os=linux
Here you can see, now we have one additional field "LABELS" which shows the labels which are applied to individual nodes.
Add label to a node
To add a label, we can use kubectl label nodes command in the
following syntax:
kubectl label nodes <your-node-name> <label>
For example if we want to apply label as "color: blue" to
worker-2.example node then this can applied using:
[root@controller ~]# kubectl label nodes worker-2.example.com color=blue
node/worker-2.example.com labeled
You can verify the respective worker node and the applied label:

Deploy a pod on specific node
Now we will utilise the label which we specified in the previous example to deploy a pod. By default when you create a Pod, it can be created on any of the available worker nodes. But using node labels and selectors, we can control this behaviour.
So in this example, we will create a deployment where the replica pods
must be deployed only on the nodes with label "color: blue". Following
is our YAML file to create the deployment:
[root@controller ~]# cat nginx-deploy.yaml
apiVersion: apps/v1
kind: Deployment
metadata:
  labels:
    ## This label is applied to the Deployment
    type: dev
  name: nginx-deploy
spec:
  replicas: 1
  selector:
     matchLabels:
        ## This label is used to match the Pod to create replicas
        type: dev
  template:
    metadata:
      labels:
        ## This label is applied to the Pod
        type: dev
    spec:
      containers:
      - image: nginx
        name: nginx
        ports:
        - containerPort: 80
      nodeSelector:
        ## This label is used to deploy the pod on matching nodes
        color: blue
Let's create this deployment:
[root@controller ~]# kubectl create -f nginx-deploy.yaml
deployment.apps/nginx-deploy created
As you can see the pod from our deployment is deployed on worker-2
node because that is the only node with label color: blue:
[root@controller ~]# kubectl get pods -o wide
NAME                            READY   STATUS              RESTARTS   AGE     IP             NODE                   NOMINATED NODE   READINESS GATES
nginx-deploy-6d8d787fb7-xxbn4   0/1     ContainerCreating   0          24s     <none>         worker-2.example.com   <none>           <none>
sidecar-pod-1                   2/2     Running             2          7d      10.0.142.159   worker-1.example.com   <none>           <none>
sidecar-pod-2                   2/2     Running             2          7d      10.0.142.160   worker-1.example.com   <none>           <none>
So every time the pod is restarted or terminated, it will always start
on worker-2 node.
Remove label from a node
Use the following syntax to remove a label from a node:
kubectl label node <nodename> <labelname>-
As you can notice, we use the same command but with a minus sign with
the label name. For example to remove the label color: blue from
worker-2 node, we will use:
[root@controller ~]# kubectl label node worker-2.example.com color-
node/worker-2.example.com not labeled
You can verify the same, here the command output should be blank:
~]# kubectl get nodes --show-labels | grep color
But this wouldn't mean that
your existing pod would be terminated which we created in our
example. It will continue to function, although if the pod is terminated
then another pod would not be
created unless it finds a node with label color: blue.
Let us verify this theory by deleting the deployment pod replica:
[root@controller ~]# kubectl delete pod nginx-deploy-6d8d787fb7-xxbn4
pod "nginx-deploy-6d8d787fb7-xxbn4" deleted
Now check if a new pod was created:
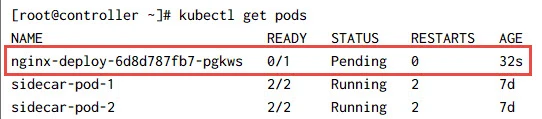
So a pod was created as our deployment expects a single replica to be
always there but since the pod fails to find a node with label
color: blue, the pod container is not yet created.
Let us assign this label to worker-1 node this time:
[root@controller ~]# kubectl label node worker-1.example.com color=blue
node/worker-1.example.com labeled
Now you can see the container is getting created on
worker-1.example.com because we applied the label color: blue
[root@controller ~]# kubectl get pods -o wide
NAME                            READY   STATUS              RESTARTS   AGE     IP             NODE                   NOMINATED NODE   READINESS GATES
nginx-deploy-6d8d787fb7-pgkws   0/1     ContainerCreating   0          2m39s   <none>         worker-1.example.com   <none>           <none>
sidecar-pod-1                   2/2     Running             2          7d      10.0.142.159   worker-1.example.com   <none>           <none>
sidecar-pod-2                   2/2     Running             2          7d      10.0.142.160   worker-1.example.com   <none>           <none>
What's Next
You should learn about DaemonSets which is used to deploy node specific pods. In this case if you remove a label from the node then the pod deployed on this specific node will be terminated.
Summary
In this article we learned about node labels, add or remove labels from the nodes in a Kubernetes Cluster. Labels and label selectors should be used to organize pods and easily perform operations on multiple pods at once. You can use node labels and selectors to schedule pods only to nodes that have certain features.
