What is SecurityContext in Kubernetes
Kubernetes SecurityContext is used to define privilege and access control settings for Pods and Containers. It helps you control how a container runs, what Linux capabilities it can use, whether it can run as root, and how it interacts with mounted volumes.
SecurityContext plays an important role in Kubernetes security hardening because containers run on shared worker nodes. Without proper restrictions, a compromised container may gain unnecessary privileges on the host system.
Using SecurityContext, you can:
- Run containers as non-root users
- Control filesystem permissions
- Restrict Linux capabilities
- Prevent privilege escalation
- Use read-only root filesystems
- Configure secure access to shared volumes
SecurityContext can be configured at both Pod level and Container level depending on your requirements.
Pod SecurityContext vs Container SecurityContext
Kubernetes allows SecurityContext configuration at two different levels:
- Pod SecurityContext
- Container SecurityContext
Pod-level SecurityContext applies default security settings to all containers inside the Pod.
Example:
apiVersion: v1
kind: Pod
metadata:
  name: pod-securitycontext-demo
spec:
  securityContext:
    runAsUser: 1001
    fsGroup: 2000

  containers:
    - name: nginx
      image: nginx
In this example:
- All containers run as UID 1001
- Mounted volumes use group ID 2000
Container-level SecurityContext overrides Pod-level settings for that specific container.
Example:
apiVersion: v1
kind: Pod
metadata:
  name: container-securitycontext-demo
spec:
  securityContext:
    runAsUser: 1001

  containers:
    - name: nginx
      image: nginx
      securityContext:
        runAsUser: 2000
Here:
- Pod default UID is 1001
- nginx container overrides it and runs as UID 2000
Use Pod SecurityContext for common defaults and Container SecurityContext when individual containers need different permissions.
Why SecurityContext Matters for Container Security
By default, containers may run with more privileges than required. This increases security risks if an application becomes compromised.
For example:
- Running as root can allow privilege escalation
- Writable root filesystems can be abused by attackers
- Excess Linux capabilities increase attack surface
- Privileged containers can access host resources
SecurityContext helps enforce the principle of least privilege.
A properly hardened container should:
- Run as non-root
- Drop unnecessary capabilities
- Prevent privilege escalation
- Use read-only filesystems whenever possible
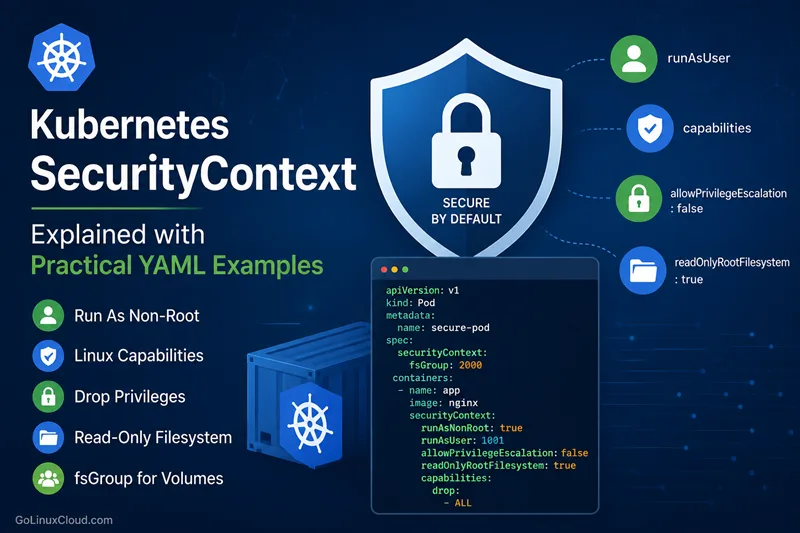
Example of a hardened SecurityContext:
securityContext:
  runAsNonRoot: true
  runAsUser: 10001
  allowPrivilegeEscalation: false
  readOnlyRootFilesystem: true

  capabilities:
    drop:
      - ALL
This configuration significantly reduces container privileges and is considered a Kubernetes security best practice.
Kubernetes SecurityContext Options Reference
| SecurityContext Field | Level | Purpose | Common Use Case |
|---|---|---|---|
| runAsUser | Pod / Container | Run container with specific Linux UID | Run application as non-root user |
| runAsGroup | Pod / Container | Set primary Linux GID | Control group ownership |
| runAsNonRoot | Pod / Container | Prevent container from running as root | Container hardening |
| fsGroup | Pod | Assign group ownership to mounted volumes | Persistent Volume permissions |
| fsGroupChangePolicy | Pod | Control how Kubernetes changes volume ownership | Improve large volume mount performance |
| supplementalGroups | Pod | Add additional Linux groups | Shared storage access |
| seLinuxOptions | Pod / Container | Configure SELinux labels | SELinux-enabled clusters |
| seccompProfile | Pod / Container | Restrict Linux syscalls | Reduce kernel attack surface |
| appArmorProfile | Pod / Container | Apply AppArmor security profile | Mandatory access control |
| capabilities.add | Container | Add Linux capabilities | NET_ADMIN, SYS_TIME |
| capabilities.drop | Container | Remove Linux capabilities | drop: ["ALL"] hardening |
| privileged | Container | Enable privileged container mode | Low-level debugging |
| allowPrivilegeEscalation | Container | Prevent privilege escalation | Harden application containers |
| readOnlyRootFilesystem | Container | Make root filesystem read-only | Prevent filesystem tampering |
| procMount | Container | Control /proc mount behavior |
Advanced debugging |
| windowsOptions | Pod / Container | Configure Windows container settings | Windows workloads |
| hostPID | Pod | Share host PID namespace | Debugging host processes |
| hostIPC | Pod | Share host IPC namespace | Specialized system workloads |
| hostNetwork | Pod | Use host network namespace | Network appliances |
| sysctls | Pod | Configure Linux kernel parameters | Performance tuning |
| privileged: true | Container | Grant almost unrestricted host access | Rare debugging scenarios |
Commonly Used SecurityContext Settings
The following SecurityContext settings are most commonly used in production Kubernetes environments:
| Setting | Recommended Value |
|---|---|
| runAsNonRoot | true |
| allowPrivilegeEscalation | false |
| readOnlyRootFilesystem | true |
| capabilities.drop | ["ALL"] |
| privileged | false |
Example Hardened SecurityContext
The following example demonstrates a production-style Kubernetes SecurityContext configuration that combines multiple security hardening settings.
This example includes:
- Non-root container execution
- Disabled privilege escalation
- Read-only root filesystem
- Dropped Linux capabilities
- Specific capability addition
- fsGroup for shared volume access
- Writable temporary storage using
emptyDir
apiVersion: v1
kind: Pod
metadata:
  name: complete-securitycontext-demo

spec:
  securityContext:
    fsGroup: 2000

  containers:
    - name: nginx
      image: nginx:latest

      ports:
        - containerPort: 80

      securityContext:
        runAsNonRoot: true
        runAsUser: 1001
        runAsGroup: 3000

        allowPrivilegeEscalation: false

        readOnlyRootFilesystem: true

        capabilities:
          drop:
            - ALL

          add:
            - NET_BIND_SERVICE

      volumeMounts:
        - name: temp-storage
          mountPath: /tmp

        - name: cache-storage
          mountPath: /var/cache/nginx

  volumes:
    - name: temp-storage
      emptyDir: {}

    - name: cache-storage
      emptyDir: {}
You can deploy the Pod:
kubectl apply -f securitycontext-demo.yamlVerify Pod status:
kubectl get podsVerify running user:
kubectl exec -it complete-securitycontext-demo -- idVerify mounted filesystem permissions:
kubectl exec -it complete-securitycontext-demo -- ls -ld /tmpCommon SecurityContext Settings Explained
Kubernetes SecurityContext provides multiple settings to control how containers behave at runtime. The most commonly used settings include user permissions, filesystem access, privilege controls, and Linux capabilities.
Understanding these settings is important for building secure Kubernetes workloads.
runAsUser and runAsGroup
The runAsUser setting defines the Linux user ID (UID) used to run the container process.
The runAsGroup setting defines the primary Linux group ID (GID).
Example:
apiVersion: v1
kind: Pod
metadata:
  name: runasuser-demo
spec:
  containers:
    - name: nginx
      image: nginx

      securityContext:
        runAsUser: 1001
        runAsGroup: 3000
In this example:
- Container runs with UID 1001
- Primary group becomes GID 3000
This is commonly used to avoid running containers as root.
You can verify the running user inside the container:
kubectl exec -it runasuser-demo -- idExample output:
uid=1001 gid=3000 groups=3000Using non-root users improves Kubernetes container security and is recommended for production workloads.
fsGroup
The fsGroup setting controls group ownership for mounted volumes inside a Pod.
This is especially useful when:
- Multiple containers share the same volume
- Applications require write access to persistent volumes
- Non-root containers need filesystem permissions
Example:
apiVersion: v1
kind: Pod
metadata:
  name: fsgroup-demo
spec:
  securityContext:
    fsGroup: 2000

  containers:
    - name: nginx
      image: nginx
      volumeMounts:
        - name: data
          mountPath: /data

  volumes:
    - name: data
      emptyDir: {}
Kubernetes automatically changes group ownership of mounted volumes to GID 2000.
This helps solve common permission denied errors when using Persistent Volumes with non-root containers.
You can verify permissions:
kubectl exec -it fsgroup-demo -- ls -ld /dataExample output:
drwxrwsrwx 2 root 2000 4096 May 17 10:00 /datareadOnlyRootFilesystem
The readOnlyRootFilesystem setting prevents containers from modifying the root filesystem.
This improves container security because attackers cannot easily modify binaries, install packages, or write malicious files.
Example:
securityContext:
  readOnlyRootFilesystem: true
Example Pod:
apiVersion: v1
kind: Pod
metadata:
  name: readonly-rootfs-demo
spec:
  containers:
    - name: nginx
      image: nginx

      securityContext:
        readOnlyRootFilesystem: true
With this configuration:
- Root filesystem becomes read-only
- Temporary writable storage must use mounted volumes
Applications that need write access should use:
emptyDir- Persistent Volumes
- tmpfs mounts
This setting is commonly used in hardened Kubernetes environments.
allowPrivilegeEscalation
The allowPrivilegeEscalation setting controls whether a process can gain additional privileges during runtime.
Setting it to false prevents applications from using mechanisms such as setuid binaries to elevate privileges.
Example:
securityContext:
  allowPrivilegeEscalation: false
Complete example:
apiVersion: v1
kind: Pod
metadata:
  name: privilege-escalation-demo
spec:
  containers:
    - name: nginx
      image: nginx

      securityContext:
        allowPrivilegeEscalation: false
This setting is important for reducing container escape risks and improving workload isolation.
In production Kubernetes clusters, disabling privilege escalation is considered a strong security best practice.
Linux Capabilities in Kubernetes
Linux capabilities allow containers to perform specific privileged operations without giving full root access. Instead of running an entire container as privileged, Kubernetes lets you selectively grant only the capabilities required by the application.
This follows the principle of least privilege and improves container security.
Capabilities are configured using the securityContext.capabilities field.
Example:
securityContext:
  capabilities:
    add:
      - NET_ADMIN
In Kubernetes, capabilities are configured at the container level because different containers inside the same Pod may require different privileges.
Common Linux capabilities include:
| Capability | Purpose |
|---|---|
| NET_ADMIN | Network administration operations |
| SYS_TIME | Change system clock |
| SYS_ADMIN | Broad system administration privileges |
| NET_RAW | Raw socket access |
| CHOWN | Change file ownership |
| DAC_OVERRIDE | Bypass file permission checks |
You can both add required capabilities and drop unnecessary ones to harden container security.
Add Linux Capabilities
The capabilities.add field is used to grant additional Linux capabilities to a container.
This is useful when applications need limited privileged operations without enabling full privileged mode.
Example:
apiVersion: v1
kind: Pod
metadata:
  name: add-capabilities-demo
spec:
  containers:
    - name: ubuntu
      image: ubuntu

      command:
        - sleep
        - "3600"

      securityContext:
        capabilities:
          add:
            - NET_ADMIN
            - SYS_TIME
In this example:
NET_ADMINallows network-related operationsSYS_TIMEallows changing system time
You can verify capabilities inside the container:
kubectl exec -it add-capabilities-demo -- capsh --printExample output:
Current: = cap_net_admin,cap_sys_time+epOnly add capabilities that are absolutely required by the application.
Adding excessive capabilities increases security risks.
Drop Linux Capabilities
The capabilities.drop field removes Linux capabilities from a container.
Dropping unnecessary capabilities reduces attack surface and improves workload isolation.
Example:
apiVersion: v1
kind: Pod
metadata:
  name: drop-capabilities-demo
spec:
  containers:
    - name: nginx
      image: nginx

      securityContext:
        capabilities:
          drop:
            - NET_RAW
            - SYS_CHROOT
In this example:
NET_RAWremoval prevents raw socket operationsSYS_CHROOTremoval restricts filesystem isolation operations
Containers often start with several default capabilities. Removing unused capabilities is considered a Kubernetes security best practice.
You can inspect capabilities using:
kubectl exec -it drop-capabilities-demo -- capsh --printWhy drop: ["ALL"] is Recommended
One of the most recommended Kubernetes hardening practices is to drop all Linux capabilities by default and then add back only the capabilities required by the application.
Example:
securityContext:
  capabilities:
    drop:
      - ALL
This approach minimizes the container attack surface.
Complete example:
apiVersion: v1
kind: Pod
metadata:
  name: hardened-container
spec:
  containers:
    - name: nginx
      image: nginx

      securityContext:
        allowPrivilegeEscalation: false
        readOnlyRootFilesystem: true

        capabilities:
          drop:
            - ALL
Benefits of dropping all capabilities:
- Prevents unnecessary privileged operations
- Reduces risk of container escape
- Limits kernel-level access
- Improves compliance with security standards
If the application later requires specific capabilities, you can explicitly add them back.
Example:
securityContext:
  capabilities:
    drop:
      - ALL

    add:
      - NET_BIND_SERVICE
This is safer than allowing all default capabilities.
NET_ADMIN vs SYS_ADMIN Examples
NET_ADMIN and SYS_ADMIN are two commonly discussed Linux capabilities in Kubernetes, but they have very different security implications.
NET_ADMIN provides network administration privileges.
Example use cases:
- Configure iptables
- Modify routing tables
- Manage network interfaces
Example:
apiVersion: v1
kind: Pod
metadata:
  name: netadmin-demo
spec:
  containers:
    - name: ubuntu
      image: ubuntu

      command:
        - sleep
        - "3600"

      securityContext:
        capabilities:
          add:
            - NET_ADMIN
This capability is commonly used by:
- VPN containers
- Service mesh sidecars
- Network troubleshooting tools
SYS_ADMIN is much more powerful and should be avoided whenever possible.
It provides broad administrative access to the Linux kernel and is often considered close to privileged mode.
Example:
apiVersion: v1
kind: Pod
metadata:
  name: sysadmin-demo
spec:
  containers:
    - name: ubuntu
      image: ubuntu

      command:
        - sleep
        - "3600"

      securityContext:
        capabilities:
          add:
            - SYS_ADMIN
SYS_ADMIN can allow operations such as:
- Mounting filesystems
- Namespace manipulation
- Kernel administration tasks
Because of its broad permissions, many Kubernetes security policies restrict or completely block SYS_ADMIN.
Best practice recommendations:
- Prefer specific capabilities like
NET_ADMIN - Avoid
SYS_ADMINunless absolutely required - Never use privileged mode if capabilities are sufficient
- Combine capability restrictions with
allowPrivilegeEscalation: false
Using minimal capabilities helps improve Kubernetes workload security and reduces exposure to container escape vulnerabilities.
Real-World SecurityContext Examples
Run Container as Non-Root User
Running containers as root increases security risks because a compromised container may gain elevated privileges on the host system.
Kubernetes allows you to run containers as non-root users using runAsUser and runAsNonRoot.
Example:
apiVersion: v1
kind: Pod
metadata:
  name: nonroot-demo
spec:
  containers:
    - name: nginx
      image: nginx

      securityContext:
        runAsNonRoot: true
        runAsUser: 1001
In this example:
- Container cannot run as root
- Process runs using UID 1001
You can verify the running user:
kubectl exec -it nonroot-demo -- idExample output:
uid=1001 gid=0(root) groups=0(root)This configuration is commonly used for:
- Web applications
- API services
- Stateless microservices
- Security-hardened containers
Some container images may fail if they expect root permissions. In such cases, the Docker image itself may need modification.
Mount Shared Volume with fsGroup
Applications using Persistent Volumes often encounter permission denied errors when running as non-root users.
The fsGroup setting allows Kubernetes to automatically assign group ownership to mounted volumes.
Example:
apiVersion: v1
kind: Pod
metadata:
  name: fsgroup-shared-volume
spec:
  securityContext:
    fsGroup: 2000

  containers:
    - name: app
      image: busybox

      command:
        - sh
        - -c
        - "echo hello > /data/test.txt && sleep 3600"

      volumeMounts:
        - name: shared-data
          mountPath: /data

  volumes:
    - name: shared-data
      emptyDir: {}
In this example:
- Mounted volume receives group ownership 2000
- Non-root applications can write to the volume
Verify permissions:
kubectl exec -it fsgroup-shared-volume -- ls -ld /dataExample output:
drwxrwsrwx 2 root 2000 4096 May 17 10:00 /dataThis approach is commonly used for:
- Database containers
- Shared application storage
- Log directories
- Persistent Volumes in StatefulSets
Restrict Privileges Using Capabilities
Instead of running fully privileged containers, Kubernetes allows you to grant only the required Linux capabilities.
This reduces attack surface while still allowing applications to perform specific privileged operations.
Example:
apiVersion: v1
kind: Pod
metadata:
  name: capabilities-demo
spec:
  containers:
    - name: ubuntu
      image: ubuntu

      command:
        - sleep
        - "3600"

      securityContext:
        allowPrivilegeEscalation: false

        capabilities:
          drop:
            - ALL

          add:
            - NET_ADMIN
In this example:
- All default capabilities are removed
- Only
NET_ADMINis added back - Privilege escalation is disabled
This is significantly safer than enabling privileged mode.
Common use cases:
- Network troubleshooting tools
- VPN applications
- Service mesh components
- Applications managing iptables or routing
Verify capabilities:
kubectl exec -it capabilities-demo -- capsh --printExample output:
Current: = cap_net_admin+epThis follows Kubernetes container hardening best practices.
Enable Privileged Container for Debugging
Privileged containers receive almost unrestricted access to the host system.
This should generally be avoided in production environments because it bypasses many container isolation mechanisms.
However, privileged mode is sometimes temporarily required for debugging or low-level system operations.
Example:
apiVersion: v1
kind: Pod
metadata:
  name: privileged-debug-demo
spec:
  containers:
    - name: debugger
      image: ubuntu

      command:
        - sleep
        - "3600"

      securityContext:
        privileged: true
With privileged: true:
- Container gains extended kernel access
- Device access restrictions are relaxed
- Many Linux capabilities become available
You can verify privileged behavior:
kubectl exec -it privileged-debug-demo -- ip linkSecurity recommendations:
- Avoid privileged containers in production
- Use specific Linux capabilities instead whenever possible
- Restrict privileged Pods using Pod Security Standards or Admission Controllers
Use Read-Only Root Filesystem
A writable root filesystem allows attackers to modify binaries, install malware, or create malicious scripts inside the container.
Using readOnlyRootFilesystem helps prevent such modifications.
Example:
apiVersion: v1
kind: Pod
metadata:
  name: readonly-rootfs-demo
spec:
  containers:
    - name: nginx
      image: nginx

      securityContext:
        readOnlyRootFilesystem: true
With this configuration:
- Root filesystem becomes immutable
- Container cannot modify system files
- Malware persistence becomes more difficult
Applications needing writable storage should use mounted volumes.
Example using writable temporary storage:
apiVersion: v1
kind: Pod
metadata:
  name: readonly-rootfs-volume-demo
spec:
  containers:
    - name: nginx
      image: nginx

      securityContext:
        readOnlyRootFilesystem: true

      volumeMounts:
        - name: temp-storage
          mountPath: /tmp

  volumes:
    - name: temp-storage
      emptyDir: {}
This pattern is commonly used in:
- Financial applications
- Regulated environments
- Security-sensitive workloads
- Production Kubernetes clusters with hardened policies
Combining read-only filesystems with non-root users and dropped capabilities provides stronger container isolation and better Kubernetes security.
SecurityContext for Stateful Applications
Stateful applications in Kubernetes often require additional SecurityContext configuration because they interact with Persistent Volumes, shared storage, initialization scripts, and filesystem permissions.
Applications such as databases, message brokers, and storage services commonly run as non-root users while still needing write access to mounted volumes.
Improper SecurityContext settings can lead to issues such as:
- Permission denied errors
- Failed volume mounts
- Database startup failures
- Inability to write logs or temporary files
The following examples demonstrate common SecurityContext patterns used with stateful workloads.
Database Containers with Persistent Volumes
Database containers frequently store data inside Persistent Volumes. When running databases as non-root users, filesystem ownership becomes important.
The fsGroup setting helps Kubernetes automatically assign group permissions to mounted storage.
Example PostgreSQL Pod:
apiVersion: v1
kind: Pod
metadata:
  name: postgres-securitycontext
spec:
  securityContext:
    fsGroup: 2000

  containers:
    - name: postgres
      image: postgres:16

      env:
        - name: POSTGRES_PASSWORD
          value: mysecretpassword

      securityContext:
        runAsNonRoot: true
        runAsUser: 1001
        allowPrivilegeEscalation: false

      volumeMounts:
        - name: postgres-data
          mountPath: /var/lib/postgresql/data

  volumes:
    - name: postgres-data
      persistentVolumeClaim:
        claimName: postgres-pvc
In this example:
- Database runs as non-root user 1001
- Persistent Volume receives group ownership 2000
- Privilege escalation is disabled
This helps prevent permission issues when PostgreSQL writes database files to the Persistent Volume.
You can verify ownership:
kubectl exec -it postgres-securitycontext -- ls -ld /var/lib/postgresql/dataExample output:
drwxrwsrwx 2 root 2000 4096 May 17 10:00 /var/lib/postgresql/dataInit Containers Requiring Elevated Permissions
Some applications require initialization steps before the main container starts.
Common examples include:
- Changing volume ownership
- Creating directories
- Updating permissions
- Downloading configuration files
Instead of running the main application container with elevated privileges, Kubernetes allows you to use an Init Container with temporary elevated permissions.
Example:
apiVersion: v1
kind: Pod
metadata:
  name: initcontainer-securitycontext
spec:
  initContainers:
    - name: volume-permission-fix
      image: busybox

      command:
        - sh
        - -c
        - "chown -R 1001:1001 /data"

      securityContext:
        runAsUser: 0

      volumeMounts:
        - name: app-data
          mountPath: /data

  containers:
    - name: app
      image: nginx

      securityContext:
        runAsNonRoot: true
        runAsUser: 1001
        allowPrivilegeEscalation: false

      volumeMounts:
        - name: app-data
          mountPath: /data

  volumes:
    - name: app-data
      persistentVolumeClaim:
        claimName: app-pvc
In this example:
- Init Container temporarily runs as root
- Ownership of mounted storage is updated
- Main application container runs securely as non-root user
This approach is safer than running the entire application with elevated privileges.
Benefits of using Init Containers for permission fixes:
- Reduces attack surface
- Limits root access duration
- Keeps application containers hardened
- Improves Kubernetes security compliance
Best practices:
- Use root only in Init Containers when absolutely necessary
- Keep Init Container logic minimal
- Avoid privileged mode unless required
- Use
allowPrivilegeEscalation: falsefor application containers
This pattern is widely used in production Kubernetes clusters for secure initialization of stateful workloads.
SecurityContext Best Practices
Avoid Running Containers as Root
By default, many container images run as the root user. If an attacker compromises such a container, they may gain elevated privileges inside the container and potentially abuse kernel vulnerabilities to escape isolation boundaries.
Running containers as non-root users significantly improves Kubernetes workload security.
Recommended example:
apiVersion: v1
kind: Pod
metadata:
  name: nonroot-bestpractice
spec:
  containers:
    - name: nginx
      image: nginx

      securityContext:
        runAsNonRoot: true
        runAsUser: 1001
        allowPrivilegeEscalation: false
In this example:
- Container cannot run as root
- Process runs using UID 1001
- Privilege escalation is disabled
Verify the running user:
kubectl exec -it nonroot-bestpractice -- idExample output:
uid=1001 gid=0(root) groups=0(root)Best practice recommendations:
- Always use
runAsNonRoot: true - Use dedicated application users
- Avoid UID 0 unless absolutely required
- Use minimal container images
Some applications may require Docker image modifications to support non-root execution properly.
Use drop: ["ALL"] by Default
Containers often receive several default Linux capabilities even when they are unnecessary.
Dropping all capabilities and selectively adding back only required capabilities is one of the most effective Kubernetes container hardening practices.
Recommended example:
securityContext:
  capabilities:
    drop:
      - ALL
Complete hardened example:
apiVersion: v1
kind: Pod
metadata:
  name: drop-all-bestpractice
spec:
  containers:
    - name: nginx
      image: nginx

      securityContext:
        runAsNonRoot: true
        allowPrivilegeEscalation: false
        readOnlyRootFilesystem: true

        capabilities:
          drop:
            - ALL
Benefits of dropping all capabilities:
- Minimizes kernel-level access
- Reduces attack surface
- Prevents unnecessary privileged operations
- Improves container isolation
If specific capabilities are required, explicitly add only those capabilities.
Example:
securityContext:
  capabilities:
    drop:
      - ALL

    add:
      - NET_BIND_SERVICE
This is much safer than relying on default capability sets.
Prefer Specific Capabilities Instead of Privileged Mode
Using privileged: true gives containers almost unrestricted access to the host system.
Privileged containers can:
- Access host devices
- Modify kernel parameters
- Interact with host namespaces
- Bypass many container isolation protections
Example of privileged container:
securityContext:
  privileged: true
This should generally be avoided in production Kubernetes environments.
Instead, use specific Linux capabilities required by the application.
Example using NET_ADMIN instead of privileged mode:
apiVersion: v1
kind: Pod
metadata:
  name: capabilities-bestpractice
spec:
  containers:
    - name: ubuntu
      image: ubuntu

      command:
        - sleep
        - "3600"

      securityContext:
        allowPrivilegeEscalation: false

        capabilities:
          drop:
            - ALL

          add:
            - NET_ADMIN
This approach provides:
- Better workload isolation
- Reduced security risks
- Fine-grained privilege control
- Improved compliance with Kubernetes security policies
Recommended approach:
| Configuration | Security Level |
|---|---|
| privileged: true | High Risk |
| Specific capabilities | Moderate Risk |
| drop: ["ALL"] | Most Secure |
Best practice recommendations:
- Avoid privileged containers whenever possible
- Use capabilities for granular permission control
- Regularly audit SecurityContext settings
- Combine capability restrictions with:
runAsNonRootallowPrivilegeEscalation: falsereadOnlyRootFilesystem: true
A hardened SecurityContext configuration greatly improves Kubernetes cluster security and reduces the impact of compromised containers.
Frequently Asked Questions
1. What is SecurityContext in Kubernetes?
2. What is fsGroup in Kubernetes?
3. What does drop ALL capabilities mean in Kubernetes?
4. What is the difference between privileged containers and Linux capabilities?
5. Why should containers avoid running as root?
Summary
Kubernetes SecurityContext helps control how containers run inside a Pod by defining user permissions, filesystem access, Linux capabilities, and privilege restrictions.
Using SecurityContext properly improves container isolation and reduces security risks in Kubernetes environments.
In this guide, you learned how to:
- Run containers as non-root users
- Configure
runAsUser,runAsGroup, andfsGroup - Use Linux capabilities safely
- Drop unnecessary capabilities using
drop: ["ALL"] - Disable privilege escalation
- Use read-only root filesystems
- Configure SecurityContext for stateful applications
- Avoid privileged containers whenever possible
A hardened Kubernetes workload should typically include:
securityContext:
  runAsNonRoot: true
  allowPrivilegeEscalation: false
  readOnlyRootFilesystem: true

  capabilities:
    drop:
      - ALL
SecurityContext should be combined with other Kubernetes security features such as:
- Pod Security Standards
- Network Policies
- RBAC
- Seccomp Profiles
- Admission Controllers
Following these best practices helps build more secure and production-ready Kubernetes applications.
Official Documentation
- Kubernetes Security Context Documentation
- Linux Capabilities Documentation
- Kubernetes Pod Security Standards
- Kubernetes Seccomp Documentation
- Kubernetes Pod Security Admission
