When working with Git repositories, you may encounter the error "error: cannot open .git/FETCH_HEAD: permission denied", especially during operations like git pull or git fetch. This error usually occurs when the current user does not have the necessary permissions to read or write files inside the .git directory. If you're new to remote operations, see how git fetch and git pull work.
In most cases, the issue is related to incorrect ownership, improper file permissions, or repositories previously accessed using sudo. The following quick fixes and reference table help diagnose and resolve the problem quickly.
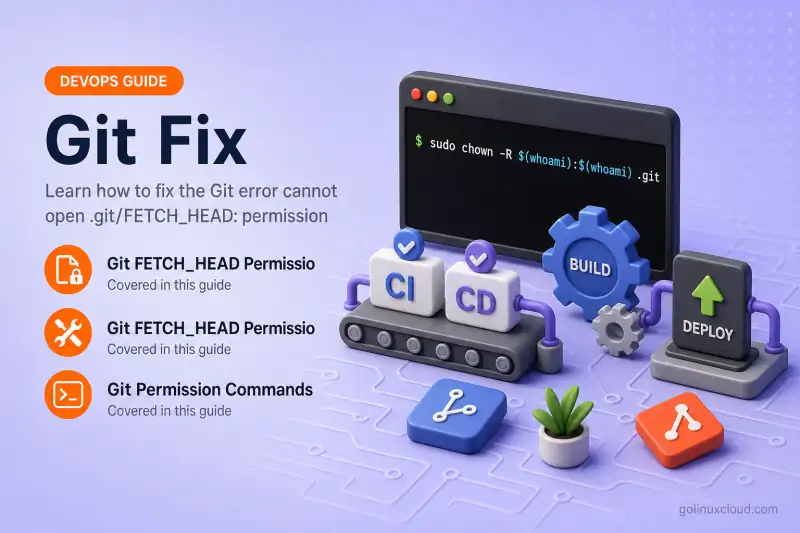
Git FETCH_HEAD Permission Denied - Quick Fix
Fix using chown command
If the repository files are owned by another user (often root due to running Git with sudo), update the ownership of the repository. This issue commonly occurs after incorrect usage of git config or running Git with elevated privileges:
sudo chown -R $(whoami):$(whoami) .gitThis ensures the current user owns all files in the .git directory.
Fix using chmod command
Sometimes the file exists but lacks write permission.
chmod +rw .git/FETCH_HEADIf multiple files inside .git have incorrect permissions, you may adjust the directory recursively:
chmod -R u+rw .gitFix ownership after using sudo with Git
Running Git commands with sudo can change repository ownership to root. To restore correct ownership for the entire repository:
sudo chown -R $(whoami):$(whoami) .This resets ownership of all repository files to the current user.
Fix read-only filesystem errors
If the repository is on a read-only filesystem, Git cannot update .git/FETCH_HEAD.
Check filesystem status:
mount | grep "on /"If the filesystem is read-only, remount it with write permissions:
sudo mount -o remount,rw /Verify fix using git pull or git fetch
After correcting ownership and permissions, verify the fix by running git fetch or git pull:
git fetchor
git pullIf no errors appear, the repository permissions have been successfully corrected.
Git FETCH_HEAD Permission Denied - Quick Reference Table
Most common error causes
| Cause | Description |
|---|---|
| Incorrect repository ownership | Repository owned by another user such as root |
| Missing file permissions | User lacks read/write access to .git/FETCH_HEAD |
| Running Git with sudo | Ownership changed to root after elevated commands |
| Read-only filesystem | Filesystem mounted without write permissions |
Commands to fix ownership issues
| Command | Purpose |
|---|---|
sudo chown -R $(whoami):$(whoami) .git |
Fix ownership of Git metadata directory |
sudo chown -R $(whoami):$(whoami) . |
Fix ownership of entire repository |
ls -la .git |
Verify ownership and permissions |
Commands to fix permission issues
| Command | Purpose |
|---|---|
chmod +rw .git/FETCH_HEAD |
Grant read/write permission to FETCH_HEAD |
chmod -R u+rw .git |
Restore read/write access to Git directory |
ls -l .git/FETCH_HEAD |
Verify file permissions |
Commands to diagnose repository problems
| Command | Purpose |
|---|---|
git status |
Check repository state |
ls -la .git |
Inspect permissions and ownership |
Git Permission Commands Cheat Sheet
Repository ownership commands
| Command | Purpose |
|---|---|
sudo chown -R $(whoami):$(whoami) .git |
Fix ownership of Git metadata directory |
sudo chown -R $(whoami):$(whoami) . |
Fix ownership of entire repository |
ls -la .git |
Verify ownership and permissions |
Git permission troubleshooting commands
| Command | Purpose |
|---|---|
chmod +rw .git/FETCH_HEAD |
Allow read/write access to FETCH_HEAD |
chmod -R u+rw .git |
Restore user permissions for Git directory |
git fetch |
Regenerate FETCH_HEAD file |
Git repository reset commands
| Command | Purpose |
|---|---|
rm -f .git/FETCH_HEAD |
Delete corrupted FETCH_HEAD file |
Filesystem permission verification commands
| Command | Purpose |
|---|---|
id |
Show current user ID and group ID |
ls -l .git/FETCH_HEAD |
Inspect file permissions |
mount |
Check filesystem mount status |
dmesg |
Detect filesystem or disk errors |
Understanding the Error: Cannot Open .git/FETCH_HEAD Permission Denied
What is the FETCH_HEAD file in Git
The FETCH_HEAD file is created by Git inside the .git/ directory whenever you run commands like git fetch or git pull. It temporarily stores references to the latest commits fetched from the remote repository.
Git uses this file to determine which remote branches were fetched and which commits should be merged or checked out.
Typical location:
.git/FETCH_HEADIf Git cannot read or write this file, operations such as git pull, git fetch, or git merge may fail with a permission denied error.
When Git creates or updates FETCH_HEAD
The FETCH_HEAD file is updated whenever Git retrieves updates from a remote repository.
Examples of commands that update the file:
git fetch
git pull
git fetch origin
git pull origin main
During these operations, Git writes metadata about fetched commits into .git/FETCH_HEAD. If the file cannot be modified due to permission issues, the operation fails.
Why permission denied errors occur
This error usually happens when the current user does not have sufficient access to modify files in the .git directory.
Common causes include:
- Repository files owned by another user (often root)
- Running Git commands previously using sudo
- Incorrect file permissions on
.git/FETCH_HEAD - Repository stored on read-only filesystem
- Volume permission issues in Docker containers
- UID/GID mismatch on NFS or network storage
Because Git must update repository metadata frequently, incorrect permissions inside .git can easily break normal operations.
When the error appears during git pull or git fetch
Most users encounter this error while running:
git pullor
git fetchDuring these commands Git attempts to update the .git/FETCH_HEAD file. If it cannot open or modify the file, the following error appears:
error: cannot open '.git/FETCH_HEAD': Permission deniedThis indicates that Git cannot write repository metadata due to permission restrictions.
Repository Ownership Changed by sudo
Why running git with sudo breaks permissions
Running Git commands using sudo can change ownership of repository files to the root user, especially when running commands like git pull. Once this happens, the normal user account may lose write access to files inside the repository.
For example:
sudo git pullThis command may cause .git files to become owned by root, preventing normal Git operations.
Detect repository ownership mismatch
You can check repository ownership using:
ls -la .gitIf the files are owned by root or another user, the output may look like:
drwxr-xr-x root root .gitThis indicates a permission mismatch.
Fix repository ownership recursively
To restore ownership to the current user, run:
sudo chown -R $(whoami):$(whoami) .This command updates ownership of the entire repository, including the .git directory.
After correcting ownership, Git commands like git fetch and git pull should work normally.
Incorrect File Permissions in .git Directory
Check permissions for FETCH_HEAD file
To inspect permissions of the problematic file:
ls -l .git/FETCH_HEADExample problematic output:
-r--r--r-- 1 user user FETCH_HEADIn this case, the file lacks write permissions.
Fix permissions using chmod
Grant read and write permissions to the file:
chmod +rw .git/FETCH_HEADIf multiple files inside .git are affected, you may update permissions recursively:
chmod -R u+rw .gitVerify repository access after permission changes
After fixing permissions, test Git operations:
git fetchor
git pullIf the command runs without errors, the permission issue has been resolved.
SELinux Blocking Git Access to FETCH_HEAD
How SELinux can cause Git permission denied errors
On systems with SELinux enabled (such as RHEL, Rocky Linux, AlmaLinux, or Fedora), Git operations may fail even when file permissions appear correct.
SELinux enforces additional security policies that restrict how processes access files. If the .git directory or repository files have incorrect security contexts, Git may fail to update .git/FETCH_HEAD.
Example error:
error: cannot open '.git/FETCH_HEAD': Permission deniedCheck SELinux status
First verify whether SELinux is active on the system:
getenforcePossible output:
EnforcingIf SELinux is enforcing policies, it may block Git from modifying repository files.
Identify SELinux permission denials
Check audit logs for SELinux denials:
sudo ausearch -m avc -ts recentYou can also check using journalctl:
sudo journalctl | grep SELinuxThese logs help confirm whether SELinux policies are blocking Git operations.
Fix SELinux context for Git repository
Restore the correct security context for the repository directory:
sudo restorecon -R -v .This command resets SELinux labels to their default values.
If the repository is located in a custom directory, you may also update the context manually:
sudo chcon -R -t user_home_t .Temporarily test with SELinux permissive mode
To confirm whether SELinux is the cause, temporarily switch to permissive mode:
sudo setenforce 0Then retry the Git command:
git fetchIf the command succeeds, SELinux policies are likely blocking the repository access.
Re-enable enforcement afterward:
sudo setenforce 1Read-Only File System Error in Git
Identify read-only filesystem issue
Sometimes the repository is located on a filesystem mounted in read-only mode.
You may see errors like:
error: cannot open '.git/FETCH_HEAD': Read-only file systemTo check filesystem status:
mount | grep "on /"Fix read-only mount problems
If the filesystem was remounted as read-only due to disk errors or system issues, investigate system logs:
dmesg | grep -i filesystemResolving disk errors may require filesystem checks or system reboot.
Remount filesystem with write permissions
To remount a filesystem as writable:
sudo mount -o remount,rw /Replace / with the appropriate mount point if the repository is located on another partition.
Git Repository Inside Docker Container
Why Docker volume permissions cause FETCH_HEAD errors
When using Git inside Docker containers, the repository is often mounted as a volume. If the container user does not match the host filesystem user, permission conflicts may occur.
Example docker-compose volume:
volumes:
  - ./repo:/app
If the container user cannot write to /app/.git, Git operations may fail.
Fix permissions for mounted Git volumes
Ensure that the mounted directory has correct ownership:
sudo chown -R 1000:1000 ./repoReplace 1000 with the UID used inside the container.
You may also run the container with the same UID as the host user.
Correct Dockerfile ownership configuration
If the repository is copied into the container image, adjust ownership in the Dockerfile:
RUN chown -R appuser:appuser /appThis ensures that the container user can modify repository files and update .git/FETCH_HEAD successfully.
Git Repository on NFS or Network Storage
How NFS user ID mismatch causes permission errors
When a Git repository is stored on Network File System (NFS) storage, permission errors may occur if the user IDs (UID) and group IDs (GID) between the NFS server and client do not match.
Git operations like git fetch or git pull require write access to .git/FETCH_HEAD. If the NFS server maps users differently, the client user may not have permission to modify the file.
This often happens in shared development environments or network-mounted home directories.
Fix UID and GID mapping for NFS repositories
Ensure that the same UID and GID are used on both the NFS server and client machines.
Check user IDs:
idExample output:
uid=1000(user) gid=1000(user)If mismatched, update the NFS server configuration or adjust user IDs to ensure consistent ownership across systems.
Update NFS export configuration for Git access
The NFS export configuration should allow proper read and write permissions.
Example /etc/exports entry:
/path/to/repo *(rw,sync,no_root_squash)After modifying exports, reload the configuration:
sudo exportfs -raThen remount the NFS share on the client system.
Git Repository Used in CI/CD Pipelines
Permission issues in Jenkins or GitLab runners
In CI/CD environments like Jenkins, GitLab CI, or GitHub Actions, permission errors may occur if the build runner executes jobs under a different user than the repository owner.
This can cause failures when updating .git/FETCH_HEAD.
Example error during pipeline execution:
error: cannot open '.git/FETCH_HEAD': Permission deniedFix workspace ownership in CI environments
Ensure that the workspace directory is owned by the runner user.
Example fix:
sudo chown -R $(whoami):$(whoami) $WORKSPACEIn container-based runners, ensure the container user matches the workspace ownership.
Reset Git repository permissions in pipelines
Sometimes pipelines reuse cached repositories with incorrect permissions.
Reset permissions before running Git commands, or restore repository state using git reset:
chmod -R u+rw .gitor reinitialize the repository:
git reset --hardThis ensures Git metadata can be updated correctly during pipeline execution.
FETCH_HEAD Locked or Corrupted
Detect corrupted FETCH_HEAD file
If the .git/FETCH_HEAD file becomes corrupted or locked due to interrupted operations, Git may fail when trying to update it.
Check the file:
ls -l .git/FETCH_HEADIf the file appears empty, corrupted, or locked by another process, it may need to be regenerated.
Safely delete FETCH_HEAD file
The FETCH_HEAD file can safely be deleted because Git will recreate it during the next fetch operation. You can also clean unwanted files using git clean.
rm -f .git/FETCH_HEADDeleting this file does not affect repository history.
Regenerate FETCH_HEAD using git fetch
After deleting the file, regenerate it by fetching from the remote repository:
git fetchGit will automatically recreate .git/FETCH_HEAD with updated references.
Advanced Git Troubleshooting for FETCH_HEAD Errors
Check repository permissions using ls -la
Inspect ownership and permissions inside the .git directory:
ls -la .gitLook for files owned by root or another user, which may prevent Git from updating repository metadata.
Diagnose Git repository health
Verify repository integrity using:
git fsckThis command checks for corrupted objects or repository issues.
You can also verify git repository configuration:
git config --listReset repository metadata safely
If permission issues persist, reset repository metadata and working tree:
git reset --hard
git clean -fd
These commands restore the working directory to a clean state.
Frequently Asked Questions
1. What causes the error 'cannot open .git/FETCH_HEAD: permission denied' in Git?
2. How do I fix the Git error cannot open .git/FETCH_HEAD permission denied?
sudo chown -R $(whoami):$(whoami) . to restore ownership and chmod +rw .git/FETCH_HEAD to allow Git to update the file. After that, verify the fix by running git fetch or git pull.3. Why does git pull show FETCH_HEAD permission denied?
4. Can I delete the FETCH_HEAD file in Git?
rm -f .git/FETCH_HEAD. Git will recreate it automatically during the next git fetch operation.5. Does running Git with sudo cause FETCH_HEAD permission errors?
sudo chown -R $(whoami):$(whoami) . if this occurs.6. Why does FETCH_HEAD permission error occur in Docker or CI pipelines?
Summary
The "error: cannot open .git/FETCH_HEAD: permission denied" error usually occurs when Git cannot update repository metadata due to incorrect ownership or permission settings. This commonly happens after running Git commands with sudo, using repositories on network storage, working inside Docker containers, or running Git within CI/CD pipelines.
Resolving the issue typically involves correcting repository ownership, restoring file permissions in the .git directory, or regenerating the FETCH_HEAD file. In more complex environments such as NFS storage, containers, or automated pipelines, additional configuration may be required to ensure consistent user permissions.
By understanding the root cause and applying the appropriate fix, you can restore normal Git operations and prevent similar permission issues in future workflows. For more troubleshooting scenarios, see Git FETCH_HEAD permission denied fixes.
