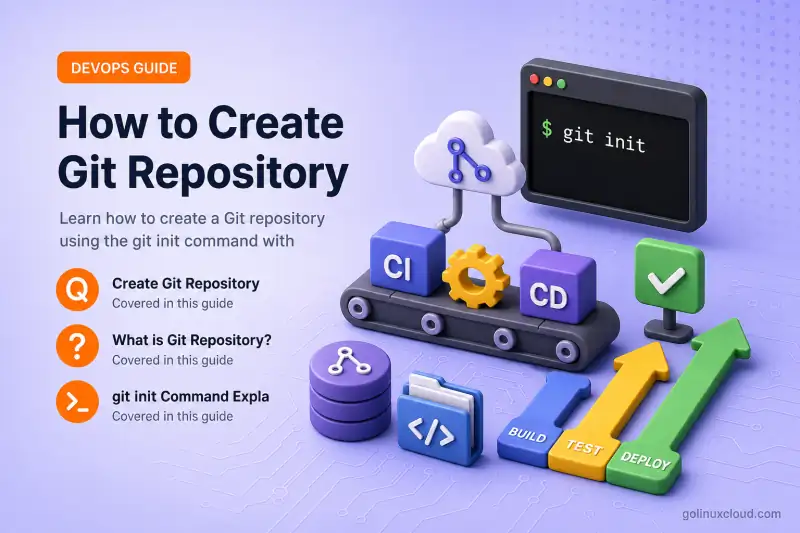
Git create repository


Written by - Deepak Prasad

In this tutorial we will create our first git project (Repository).


Step-1: Enable git auto-complete

When you start typing a command or an argument to a command, Git has a helpful auto-completion feature (if enabled) that can do two things:

  • Provide valid values for the commands or arguments that could complete the text you're typing—if there is more than one valid option.
  • Automatically complete the command or argument that you're typing—if there is only one valid option.

The first one is for a command. If you type git c and then press the TAB key, nothing happens because there's more than one command that starts with c.

If you press the TAB key a second time (before typing anything else in between), Git helpfully displays all of the commands that start with c. In this case, it also scrolls that list up and leaves you at a prompt where you can continue typing the chosen command.

deepak@ubuntu:~$ git c<TAB><TAB>
checkout      cherry        cherry-pick   citool        clean         clone         commit        config

Now auto-complete is by default enabled for most of the distributions but if it is not enabled for you then you can manually enable this feature. Download the respective script from https://github.com/git/git/tree/master/contrib/completion

For example, to enable auto-completion in bash you can download git-completion.bash file. Next source this file and add into your .bashrc file (create the file if needed):

$ source ~/git-completion.bash

To enable this for all the users in your system, you can place the downloaded script inside /etc/bash_completion.d.


Step-2: Git create repository

I'll move on to setting up a local environment. Recall that a local environment consists of the three levels I discussed in the previous tutorial: working directory, staging area, and local repository.

There are two ways to get a local environment for use with Git:

  • Creating a new environment from a set of existing files in a local directory, via the git init command
  • Seeding a local environment by copying an existing remote repository, via the git clone command

We will cover git clone in the next tutorial.

First let me create a new project directory.

deepak@ubuntu:~$ mkdir first_git_project

Next we will initialize this directory to setup our git repository. Before running git init, you should be at the top level of the tree you want to put under Git control.

deepak@ubuntu:~$ git init first_git_project/
hint: Using 'master' as the name for the initial branch. This default branch name
hint: is subject to change. To configure the initial branch name to use in all
hint: of your new repositories, which will suppress this warning, call:
hint: 
hint: 	git config --global init.defaultBranch <name>
hint: 
hint: Names commonly chosen instead of 'master' are 'main', 'trunk' and
hint: 'development'. The just-created branch can be renamed via this command:
hint: 
hint: 	git branch -m <name>
Initialized empty Git repository in /home/deepak/first_git_project/.git/


What's in the Git Repository

Whether the local environment is created by a git init or git clone command, the structure within the .git subdirectory is the same. Essentially, a Git repository is a content-addressable data store. That is, you put something into the repository, Git calculates a hash value (SHA1) for the content, and you can then use that value later to get something out.

NOTE:
Don’t Edit .git. Never edit any files in the .git directory. It can corrupt the whole repository

Here is an outline of a .git repository on /home/deepak/first_git_project/.

deepak@ubuntu:~$ tree first_git_project/.git/
first_git_project/.git/
├── branches
├── config
├── description
├── HEAD
├── hooks
│   ├── applypatch-msg.sample
│   ├── commit-msg.sample
│   ├── fsmonitor-watchman.sample
│   ├── post-update.sample
│   ├── pre-applypatch.sample
│   ├── pre-commit.sample
│   ├── pre-merge-commit.sample
│   ├── prepare-commit-msg.sample
│   ├── pre-push.sample
│   ├── pre-rebase.sample
│   ├── pre-receive.sample
│   ├── push-to-checkout.sample
│   └── update.sample
├── info
│   └── exclude
├── objects
│   ├── info
│   └── pack
└── refs
    ├── heads
    └── tags

9 directories, 17 files

Here,

  • The HEAD file keeps track of which branch the user is currently working with.
  • The description file is used by GitWeb, a browser application to view Git repositories.
  • The config file is the local repository's configuration file.
  • The object and pack directories are the areas where content is actually stored.


Step-3: Configure Git Server Environment

Next we will configure our git environment with some basic and important parameters. But before that you must be familiar with different configuration scope available with git:

  • System: Configuration at the system level means that a configuration value applies to all repositories on a given system (machine) unless it's overridden at a lower level. These settings apply regardless of the particular user. To ensure that a configuration value applies at the system level, you specify the --system option for the config command, as in git config --system core.autocrlf true.
  • Global: Configuration at the global level implies that a configuration value applies to all of the repositories for a particular user, unless overridden at the local level. Unless you need repository-specific settings, this is the most common level for users to work with because it saves the effort of having to set values for each repository.
  • Local: Setting a configuration value at the local level means that the setting only applies in the context of that one repository. This can be useful in cases where you need to specify unique settings that are particular to one repository. It can also be useful if you need to temporarily override a higher-level setting. For example, git config --local core.autocrlf true


Set User Name and Email Address

One of the first things that you need to configure in Git is who you are, in terms of the username and e-mail address. Git expects you to set these two values, regardless of what interface or version of Git you use.

deepak@ubuntu:~/first_git_project$ git config --global user.name "Deepak Prasad"
deepak@ubuntu:~/first_git_project$ git config --global user.email "admin@golinuxcloud.com"


Set default editor

You can set the editor to the editor of your choice either by changing the $EDITOR environment variable or with the core.editor configuration target,

deepak@ubuntu:~/first_git_project$ git config --global core.editor vim


Rebase and Merge Setup

By default, when performing git pull, a merge commit will be created if the history of the local branch has diverged from the remote one. However, to avoid all these merge commits, a repository can be configured so it will default to rebase instead of merging when doing git pull.

pull.rebase: This configuration, when set to true, will pull to rebase the current branch on top of the fetched one when performing a git pull. It can also be set to preserve so that the local merge commit will not be flattened in the rebase, by passing --preserve-merges to git rebase. The default value is false as the configuration is not set. To set this option in your local repository, run the following command:

deepak@ubuntu:~/first_git_project$ git config pull.rebase true

branch.autosetuprebase: When this configuration is set to always, any new branch created with git branch or git checkout that tracks another branch will be set up to pull to rebase (instead of merge).

To set this option for all the new branches regardless of tracking remote or local branches, run the following command:

deepak@ubuntu:~/first_git_project$ git config branch.autosetuprebase always


Setup autocorrect

This configuration is useful when you get tired of messages like the following one just because you made a typo on the keyboard:

deepak@ubuntu:~/first_git_project$ git statis
git: 'statis' is not a git command. See 'git --help'.

Did you mean this?
        status

By setting the configuration to help.autocorrect, you can control how Git will behave when you accidentally send a typo to it. By default, the value is 0 and it means to list the possible options similar to the input (if statis is given status will be shown). A negative value means to immediately execute the corresponding command. A positive value means to wait the given number of deciseconds (0.1 sec) before running the command, (so there is some amount of time to cancel it). If several commands can be deduced from the text entered, nothing will happen.

Setting the value to half a second gives you some time to cancel a wrong command, as follows:

deepak@ubuntu:~/first_git_project$ git config help.autocorrect 5
deepak@ubuntu:~/first_git_project$ git statis
WARNING: You called a Git command named 'statis', which does not exist.
Continuing under the assumption that you meant 'status'
in 0.5 seconds automatically...
# On branch master
# Changes to be committed:
#   (use "git reset HEAD ..." to unstage)
#
#       modified:   another-file.txt
#


Undo a Configuration Setting

Occasionally, you may need to remove a user setting at a particular level. Git provides the unset option for this, and it's pretty straightforward:

$ git config --unset <other options> <value to remove>


List configuration settings

To list all the configuration settings applied to a project you can use following command:

deepak@ubuntu:~/first_git_project$ git config --list
user.name=Deepak Prasad
user.email=admin@golinuxcloud.com
core.editor=vim
core.repositoryformatversion=0
core.filemode=true
core.bare=false
core.logallrefupdates=true
pull.rebase=true
branch.autosetuprebase=always
help.autocorrect=5

To list the configuration settings based on their scope, you can define the scope name. For example to list all the git configuration applied to local scope:

deepak@ubuntu:~/first_git_project$ git config --local --list
core.repositoryformatversion=0
core.filemode=true
core.bare=false
core.logallrefupdates=true
pull.rebase=true
branch.autosetuprebase=always

To check the git configuration from global scope:

deepak@ubuntu:~/first_git_project$ git config --global --list
user.name=Deepak Prasad
user.email=admin@golinuxcloud.com
core.editor=vim


Step-4: Create your first git commit

We will create some new files inside our git repository:

deepak@ubuntu:~/first_git_project$ touch file1 file2

Here if you check the git status, you can see the newly added files are marked as untracked. Git doesn’t track all files in a repository. You can explicitly tell Git which files to track and which to ignore.

deepak@ubuntu:~/first_git_project$ git status
On branch master

No commits yet

Untracked files:
  (use "git add <file>..." to include in what will be committed)
	file1
	file2

nothing added to commit but untracked files present (use "git add" to track)

In order to track these files, we run the following command:

deepak@ubuntu:~/first_git_project$ git add file1 file2

As an alternative, you can simply run the following:

git add .

The . (period) is an alias for the current directory. Running git add . tells Git to track the current directory, as well as any files or subdirectories within the current directory.

Now that we’ve set our new files to be tracked by Git, let’s check the status of the repository again:

deepak@ubuntu:~/first_git_project$ git status
On branch master

No commits yet

Changes to be committed:
  (use "git rm --cached <file>..." to unstage)
	new file:   file1
	new file:   file2

Now we are ready to commit our changes in the local repository:

deepak@ubuntu:~/first_git_project$ git commit -m "My first commit"
[master (root-commit) b5e5d85] My first commit
 2 files changed, 0 insertions(+), 0 deletions(-)
 create mode 100644 file1
 create mode 100644 file2

The -m option specifies that you’re going to add a message within the command. (The message is the text in quotes after -m: "My First Commit".) Alternatively, you can just run git commit, and a text editor will open up and ask you to enter a commit message.


Notice the string b5e5d85 shown in the code above (second line). It’s the hash of the commit, or its identity. A hash is a unique, identifying signature for each commit, generated automatically by Git. You may also use the Unique ID to get more details of the commit:

deepak@ubuntu:~/first_git_project$ git show b5e5d85
commit b5e5d851243a1c5ab18b9df14582f248ab8694a0 (HEAD -> master)
Author: Deepak Prasad <admin@golinuxcloud.com>
Date:   Tue Jul 13 08:57:08 2021 +0530

    My first commit

diff --git a/file1 b/file1
new file mode 100644
index 0000000..e69de29
diff --git a/file2 b/file2
new file mode 100644
index 0000000..e69de29


Step-5: Check Commit History

Here we have done only a single commit, but if there are multiple commits then you can also refer the commit history for this project:

deepak@ubuntu:~/first_git_project$ git log
commit b5e5d851243a1c5ab18b9df14582f248ab8694a0 (HEAD -> master)
Author: Deepak Prasad <admin@golinuxcloud.com>
Date:   Tue Jul 13 08:57:08 2021 +0530

    My first commit

The history shows the list of commits, each with a unique hash, an author, a timestamp and a commit message.


Summary

In this git tutorial we covered following topics:

  • Create git repository
  • Understand the purpose of .git folder in any git respository
  • Configure git environment
  • Commit new changes to the git repository
  • View the commit history


Further Readings

git-init Documentation

Views: 2

Deepak Prasad

He is the founder of GoLinuxCloud and brings over a decade of expertise in Linux, Python, Go, Laravel, DevOps, Kubernetes, Git, Shell scripting, OpenShift, AWS, Networking, and Security. With extensive experience, he excels in various domains, from development to DevOps, Networking, and Security, ensuring robust and efficient solutions for diverse projects. You can reach out to him on his LinkedIn profile or join on Facebook page.

Categories GIT

Can't find what you're searching for? Let us assist you.

Enter your query below, and we'll provide instant results tailored to your needs.

If my articles on GoLinuxCloud has helped you, kindly consider buying me a coffee as a token of appreciation.

Buy GoLinuxCloud a Coffee

For any other feedbacks or questions you can send mail to admin@golinuxcloud.com

Thank You for your support!!

Leave a Comment