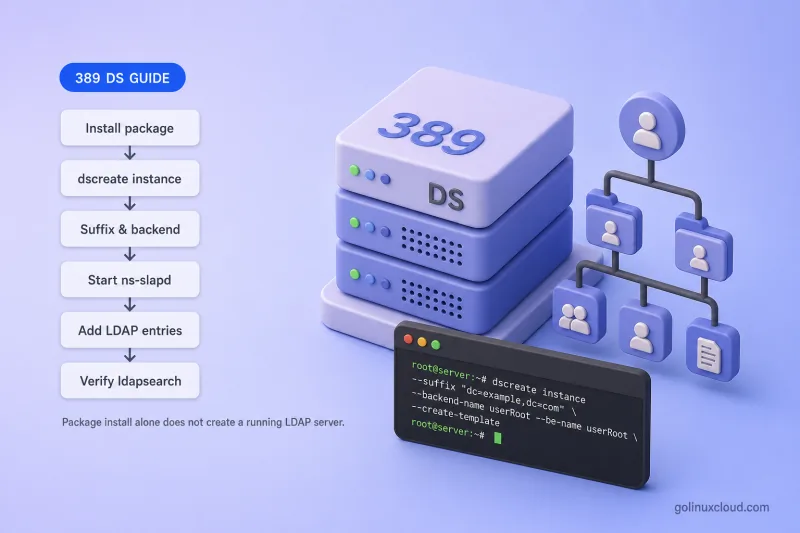
Installing 389 Directory Server is more than running dnf install. The package gives you the binaries and admin tools, but nothing listens on port 389 until you create an instance with dscreate, attach a suffix and backend, and verify that LDAP actually works. In this guide I'll walk you through that on a single lab host so you end up with a clean directory tree, ready for users, groups, ACIs, and TLS in the chapters that follow.
Before you start:
- 389 Directory Server architecture — helpful if instance, suffix, and backend still sound like the same thing
- LDAP and OpenLDAP basics — LDAP vocabulary from the OpenLDAP tutorial when terms are new to you
- OpenLDAP vs 389 Directory Server — when you're choosing a server or planning a migration
- A Linux host with root or sudo command access, a resolvable FQDN, and ports
389and636free
Tested on: Rocky Linux 10.2; 389 Directory Server 3.2.0.
By the end you should have:
- The
389-ds-basepackage installed - A named instance (
ldap1on my lab host) - Suffix
dc=example,dc=comon backenduserroot - A running
ns-slapdlistener you can query locally ou=People,ou=Groups, andou=ServiceAccountsunder the suffix- A clear picture of what you'll harden later (TLS, remote binds, production certificates)
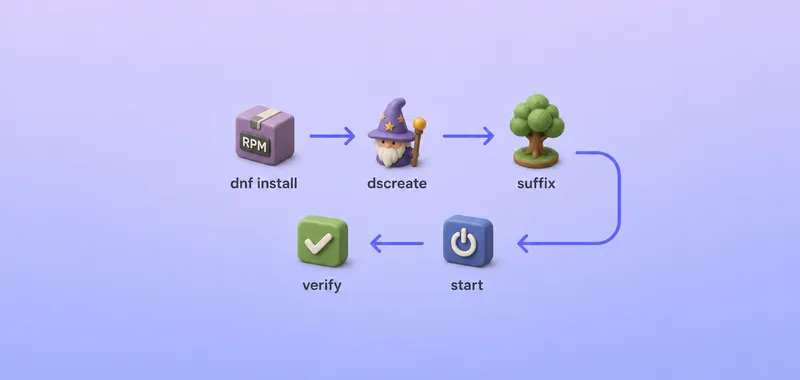
The diagram shows the order we'll follow in this guide: install the package, run dscreate, set up the suffix, start the service, then verify with LDAP tools. Installing 389-ds-base alone does not give you a working LDAP server. The instance creation step is what actually brings ns-slapd online.
Understand packages, instances, suffixes and backends
Before you install anything, it helps to separate a few terms that people often use interchangeably in conversation but mean different things in 389 Directory Server:
| Term | Meaning |
|---|---|
| Package | Installs 389 Directory Server binaries and administration tools |
| Instance | Independently running ns-slapd server configuration |
| Instance name | Identifies the service, files, database, and logs |
| Suffix | Root DN of the directory data, such as dc=example,dc=com |
| Backend | Connects the suffix to its database and indexes |
| Directory Manager | Privileged administrative bind identity |
| LDAP port | Unencrypted or StartTLS-capable LDAP endpoint |
| LDAPS port | LDAP endpoint secured with TLS from connection start |
You install the package once on a host. From there you can create one or more instances. Each instance is a separate ns-slapd process with its own configuration, logs, and database files. Inside an instance you attach one or more suffix backends; each backend holds the LDAP entries that live under its suffix DN.
One installed package
    └── One or more instances
         └── One or more suffix backends
              └── LDAP entries
If you want the fuller picture of how listeners, plug-ins, and request flow fit together, see 389 Directory Server architecture.
Plan the Directory Server environment
Write down the values in the table below before you run dscreate. The instance name is fixed at creation time; you cannot rename it later without rebuilding the instance. Once chosen, it appears everywhere the instance is referenced:
- systemd unit:
dirsrv@ldap1 - configuration directory:
slapd-ldap1 - log paths under
/var/log/dirsrv/slapd-ldap1/
You can add or remove suffix backends later with dsconf, but changing a suffix DN that already holds data is a migration project. It is not something you fix with a quick rename.
| Setting | Example |
|---|---|
| Server FQDN | ldap1.example.com |
| Instance name | ldap1 |
| Directory Manager DN | cn=Directory Manager |
| Suffix | dc=example,dc=com |
| Backend name | userroot |
| LDAP port | 389 |
| LDAPS port | 636 |
| People container | ou=People,dc=example,dc=com |
| Groups container | ou=Groups,dc=example,dc=com |
Four names often trip people up on a first install:
- Instance name — the local identifier you pass to
dsctl, that appears in paths and indirsrv@INSTANCE. It does not have to match the hostname. - Hostname (FQDN) — the name the network and TLS certificates care about. This is what you set as
full_machine_nameduring installation. - Suffix — the LDAP namespace your applications search under, such as
dc=example,dc=com. - Directory Manager — the privileged bind DN for administration. It is not a normal user entry in the tree.
Run the checks below on the host where you plan to install.
Check hostname and FQDN
Start with the system hostname. On systemd hosts, I'll use hostnamectl for the static name and OS summary:
hostnamectlSample output:
Static hostname: ldap1.example.com
Operating System: Rocky Linux 10.2 (Red Quartz)
Kernel: Linux 6.12.0-211.28.1.el10_2.x86_64
Then confirm the fully qualified domain name the system reports:
hostname -fSample output:
ldap1.example.comThat FQDN should match full_machine_name in your INF file, or the hostname you enter when dscreate interactive asks for it. If hostname -f returns something unexpected, fix hostname configuration before you proceed. dscreate validates that the name resolves.
Confirm the hostname resolves to a reachable address
389 Directory Server checks that the hostname you provide during installation actually resolves. The same name is reused later by:
- LDAP clients connecting to the instance
- Replication partners (in later chapters)
- TLS certificate hostname validation
It needs to point at an address other hosts can reach. Mapping the name only to the local machine is not enough.
In a lab you may not have DNS for ldap1.example.com and instead add a line to /etc/hosts. That approach works, but be careful how you verify it. Commands such as ping or getent hosts ldap1.example.com may answer from DNS and skip your /etc/hosts entry:
getent -s files hosts ldap1.example.comreads the files database directly, which is what you want when confirming a hosts-file mapping
To confirm what is in the hosts file itself, run:
getent -s files hosts ldap1.example.com192.0.2.10 ldap1.example.com ldap1You want an IP address that represents how clients on the network reach this server. A common lab mistake is mapping the FQDN only to 127.0.0.1:
- Local
ldapsearchagainstlocalhostmay still work - Remote LDAP clients will fail to connect
- Hostname checks against the server certificate will break once you move beyond loopback testing
Confirm time sync and free ports
Accurate system time matters once you enable TLS and replication. Check that NTP is active:
timedatectlSystem clock synchronized: yes
NTP service: activeBefore you run dscreate, confirm the host is ready:
- Ports
389and636are not already in use by another service - Enough disk space is available for the LMDB database
- You can run commands as root or via sudo
If the machine name does not resolve, dscreate stops during validation with an error rather than leaving you with a half-configured instance.
Install the 389 Directory Server package
Package names differ between distributions. Service units, firewall tools, SELinux policies, and default paths can differ too. Verify the commands on your target release before you follow them in production. Once the tools are installed, the rest of this guide uses the same 389 Directory Server product commands on any distribution that ships an equivalent version.
Tested package installation
On my Rocky Linux 10.2 lab host I installed the base package with the dnf command:
dnf install -y 389-ds-baseIf the package is already installed, dnf reports that there is nothing to do and exits successfully.
The Cockpit web interface module is optional. I have not used it in this tutorial series, but you can install it if you prefer a browser-based UI for basic instance management:
dnf install -y cockpit-389-dsAfter installation, confirm the base package is present. On RPM-based systems it helps to note the full NEVRA string with rpm so you know exactly which 389 DS release you are working with:
rpm -q 389-ds-baseSample output:
389-ds-base-3.2.0-8.el10_2.x86_64The version segment before the release tag (3.2.0) is the 389 Directory Server release this article targets.
dscreate does not provide a --version flag. Instead, list its subcommands to confirm the tool is available:
dscreate -hSample output:
usage: dscreate [-h] [-v] [-j]
                {from-file,interactive,create-template,ds-root} ...
The dscreate help output lists several subcommands. The ones that matter for this guide:
from-fileandinteractive— the two instance-creation methods covered in the next sectioncreate-template— documented in the dscreate INF file referenceds-root— prepares a private environment for non-root instances; not used for a standard system-wide install like this one
Confirm the local instance management tool is available as well:
dsctl -hSample output:
usage: dsctl [-h] [-v] [-j] [-l]
             [instance]
             {restart,start,stop,status,remove,db2index,db2bak,...}
You will use dsctl -l to list instances and status, start, and stop in the verification and service management sections below.
Package availability on other distributions
Install the package your distribution provides, then check the installed version before you follow any guidance that assumes 389 DS 3.x behaviour.
| Distribution family | Package and note |
|---|---|
| Fedora and Enterprise Linux family | 389-ds-base; version and repository vary |
| Debian and Ubuntu | 389-ds-base; older releases may provide 2.x |
| SLES 15 / openSUSE Leap 15.x | 389-ds; verify availability for the exact release |
| Other distributions | Check the distribution repository or upstream build guidance |
Repository versions vary. Older Ubuntu releases may still ship 389 DS 2.x, while newer distributions provide 3.x. Version 3.0 changed the default backend for newly created instances from Berkeley DB to LMDB.
Inspect the 389 Directory Server administration tools
The 389-ds-base package installs four CLI tools that cover most day-one administration work:
| Tool | Use in this course |
|---|---|
dscreate |
Create a new instance |
dsctl |
Start, stop, inspect, back up, and maintain a local instance |
dsconf |
Configure a running Directory Server instance |
dsidm |
Manage users, groups, and other directory entries |
You install the package once per host. After that, dscreate can create multiple independently named instances on the same machine if your design calls for it.
Create the Directory Server instance
You can create the instance using an INF file or through the interactive installer. Choose either method. I have documented both below, and each example creates an instance named ldap1 on my lab host.
- INF file — when I rebuild labs regularly, automate installs, or want a reviewed configuration stored in version control
- Interactive — when I am walking through a first install or standing up a one-off server and prefer answering prompts to editing a file
Interactive mode covers the core settings in the installer prompts:
- Hostname and instance name
- LDAP and LDAPS ports
- Self-signed certificate creation
- Directory Manager credentials
INF mode exposes additional options and supports fully unattended installation.
Method 1: Create the instance with an INF file
Save a minimal INF file for the lab instance. A few INF conventions apply before you edit the file:
- Backend section pattern —
[backend-BACKEND_NAME]; the[backend-userroot]section below creates backenduserroot - This guide — one minimal lab INF only; not every
dscreateoption - Full reference —
dscreate create-template, every parameter, multiple[backend-*]sections, and version-sensitive options: dscreate INF file reference
The INF file can contain the Directory Manager password in plain text. I'll set mode 600 with the chmod command before I add credentials:
chmod 600 /root/ldap1.infHere is the minimal configuration I'll use for this lab:
[general]
config_version = 2
full_machine_name = ldap1.example.com
start = True

[slapd]
instance_name = ldap1
root_dn = cn=Directory Manager
root_password = REPLACE_WITH_A_STRONG_PASSWORD
port = 389
secure_port = 636
self_sign_cert = True

[backend-userroot]
suffix = dc=example,dc=com
create_suffix_entry = True
sample_entries = no
The key settings in this INF file:
full_machine_name— hostname that resolves on the server (the value you verified in the planning section)instance_name— short name passed todsctl, the systemd unit (dirsrv@ldap1), and paths such as/etc/dirsrv/slapd-ldap1sample_entries = no— starts with an empty tree; later guides add only the entries you create deliberately
The backend section creates suffix dc=example,dc=com.
Create the instance from the INF file:
dscreate from-file /root/ldap1.infSample output:
Starting installation ...
Validate installation settings ...
Create file system structures ...
Create self-signed certificate database ...
Perform SELinux labeling ...
Create database backend: dc=example,dc=com ...
Perform post-installation tasks ...
Completed installation for instance: slapd-ldap1
Method 2: Create the instance interactively
Start the interactive installer:
dscreate interactiveThe installer prints a banner and then asks for hostname, instance name, ports, whether to create a self-signed certificate, Directory Manager credentials, database type, suffix, and whether to load sample data. Press Enter to accept a value shown in square brackets. Prompt wording can differ slightly between releases.
The transcript below is from my Rocky Linux 10.2 with 389 Directory Server 3.2.0 lab. I have omitted the password prompt lines from the sample output. The installer asks for the password twice:
Install Directory Server (interactive mode)
===========================================

Enter system's hostname [ldap1.example.com]: ldap1.example.com

Enter the instance name [ldap1]: ldap1

Enter port number [389]: 389

Create self-signed certificate database [yes]: yes

Enter secure port number [636]: 636

Enter Directory Manager DN [cn=Directory Manager]: cn=Directory Manager

Choose whether mdb or bdb is used. [mdb]: mdb

Enter the lmdb database size [2.6 GB]:

Enter the database suffix (or enter "none" to skip) [dc=ldap1,dc=example,dc=com]: dc=example,dc=com

Create sample entries in the suffix [no]: no

Create just the top suffix entry [no]: yes

Do you want to start the instance after the installation? [yes]: yes

Are you ready to install? [no]: yes
Starting installation ...
Validate installation settings ...
Create file system structures ...
Create self-signed certificate database ...
Perform SELinux labeling ...
Create database backend: dc=example,dc=com ...
Perform post-installation tasks ...
Completed installation for instance: slapd-ldap1
On 389 DS 3.2.0, interactive mode can match the INF example above when you watch these defaults:
- Backend name — creates
userrootautomatically; there is no separate prompt for the backend name - Suffix — override the hostname-derived default (
dc=ldap1,dc=example,dc=com) when it does not match your planned namespace - Sample entries — choose
no - Top suffix entry — choose
yesso only the suffix DN is created, matchingcreate_suffix_entry = Truein the INF file
When either method finishes with Completed installation for instance: slapd-ldap1, continue with verification in the next section.
Verify the instance configuration and listeners
After dscreate completes, confirm that the instance exists, the service is running, and the listeners you expect are open.
List instances and check service status
List the Directory Server instances registered on this host:
dsctl -lSample output:
slapd-ldap1If another Directory Server instance already exists on the host, dsctl -l lists it on additional lines. The slapd- prefix in the output is normal; dsctl commands use the short instance name (ldap1).
Check whether the instance is running:
dsctl ldap1 statusInstance "ldap1" is runningThe operating-system service name follows the instance name. You can inspect the unit with systemctl:
systemctl status dirsrv@ldap1● [email protected] - 389 Directory Server ldap1.
Active: active (running)
Status: "slapd started: Ready to process requests"
Main PID: 13251 (ns-slapd)These names refer to the same instance in different contexts:
Instance name: ldap1
Service:       dirsrv@ldap1
Configuration: slapd-ldap1
Process:       ns-slapd
You can also confirm the ns-slapd process directly with the ps command:
ps -ef | grep '[n]s-slapd'dirsrv 13251 1 ... /usr/sbin/ns-slapd -D /etc/dirsrv/slapd-ldap1 -i /run/dirsrv/slapd-ldap1.pidConfirm listeners and suffix configuration
Check that the instance is listening on the LDAP and LDAPS ports you configured. Listener checks use ss on modern distributions:
ss -lntp | grep -E ':389|:636'LISTEN 0 128 *:636 *:* users:(("ns-slapd",pid=13251,fd=9))
LISTEN 0 128 *:389 *:* users:(("ns-slapd",pid=13251,fd=8))For this lab instance, both listeners are bound on all interfaces. In production you may restrict which interfaces accept connections.
List the suffixes attached to the instance:
dsconf ldap1 backend suffix listSample output:
dc=example,dc=com (userroot)The suffix and backend name in parentheses should match the values from your INF file or interactive answers.
Inspect the backend configuration entry:
dsconf ldap1 backend suffix get userrootdn: cn=userroot,cn=ldbm database,cn=plugins,cn=config
nsslapd-suffix: dc=example,dc=com
nsslapd-state: backendThe nsslapd-state: backend line confirms the suffix is attached to an active database backend, not merely defined in configuration.
Confirm which database implementation the instance uses rather than assuming it from the package version alone:
dsconf ldap1 backend config get | grep nsslapd-backend-implementnsslapd-backend-implement: mdbOn 389 Directory Server 3.x, the backend implementation reported by dsconf means:
mdb— LMDB (default on new 3.x instances)bdb— Berkeley DB (common on older 2.x instances)
You can review part of the server configuration as well:
dsconf ldap1 config getThis command prints cn=config attributes such as log paths, access control state, and listener settings. On a new instance, confirm that nsslapd-accesslog points at /var/log/dirsrv/slapd-ldap1/access.
Instance file locations
These paths are useful when you need to find configuration, data, or logs for instance ldap1:
| Purpose | Typical path |
|---|---|
| Instance configuration | /etc/dirsrv/slapd-ldap1/ |
| Database | /var/lib/dirsrv/slapd-ldap1/db/ |
| Logs | /var/log/dirsrv/slapd-ldap1/ |
| Runtime files | /run/dirsrv/ |
| systemd service | [email protected] |
Do not manually edit database files under /var/lib/dirsrv/ or change dse.ldif while the instance is running.
Test the LDAP suffix with ldapsearch
A base-level ldapsearch command against the suffix is the quickest way to prove that LDAP is working end to end on the local host:
ldapsearch -x -H ldap://localhost:389 -D "cn=Directory Manager" -W -b "dc=example,dc=com" -s base| Option | Purpose |
|---|---|
-x |
Use simple authentication |
-H |
LDAP server URI |
-D |
Bind DN |
-W |
Prompt for the password interactively |
-b |
Search base |
-s base |
Return only the suffix entry itself |
Expected result:
dn: dc=example,dc=com
objectClass: top
objectClass: domain
dc: example
When this search succeeds, you have confirmed:
- The instance is running
- The LDAP port is reachable
- The Directory Manager bind works
- The backend exists
- The suffix entry was created during installation
Avoid putting -w password on the command line in articles, scripts, or shell history. That exposes the password to other users through process listings and leaves it in command history.
Create the initial directory structure
With the suffix in place, I'll add three organizational units (People, Groups, and ServiceAccounts) so later guides have standard containers to work with. Save the following LDIF:
dn: ou=People,dc=example,dc=com
objectClass: top
objectClass: organizationalUnit
ou: People

dn: ou=Groups,dc=example,dc=com
objectClass: top
objectClass: organizationalUnit
ou: Groups

dn: ou=ServiceAccounts,dc=example,dc=com
objectClass: top
objectClass: organizationalUnit
ou: ServiceAccounts
Add the entries to the directory with ldapadd:
ldapadd -x -H ldap://localhost:389 -D "cn=Directory Manager" -W -f initial-dit.ldifadding new entry "ou=People,dc=example,dc=com"
adding new entry "ou=Groups,dc=example,dc=com"
adding new entry "ou=ServiceAccounts,dc=example,dc=com"Each adding new entry line confirms that one organizational unit was accepted.
Verify that all three containers are present:
ldapsearch -x -H ldap://localhost:389 -D "cn=Directory Manager" -W -b "dc=example,dc=com" "(objectClass=organizationalUnit)" dndn: ou=People,dc=example,dc=com
dn: ou=Groups,dc=example,dc=com
dn: ou=ServiceAccounts,dc=example,dc=comThe ldapsearch output should list all three organizational units. With those containers in place, the initial directory layout is ready. This section stops at organizational units. Actual user and group entries are covered in Manage users and groups.
Configure network access carefully
Whether remote hosts can reach your Directory Server depends on two separate decisions:
- Which network interfaces the instance listens on.
- Which ports the operating-system firewall allows through.
Opening the firewall does not by itself make LDAP safe for production. You still need TLS before credentials cross an untrusted network. For a lab where another host needs to connect, open the LDAP ports with firewalld on RHEL-family hosts:
firewall-cmd --permanent --add-service=ldap
firewall-cmd --permanent --add-service=ldaps
firewall-cmd --reload| Port | Protocol |
|---|---|
| 389 | LDAP or LDAP upgraded with StartTLS |
| 636 | LDAPS |
The self-signed certificate created during instance setup is sufficient for local inspection and lab testing. Production deployments need properly issued certificates from a CA. That process is covered in the dedicated TLS chapter.
Manage the Directory Server service
For day-to-day start and stop operations I'll reach for dsctl because it works in terms of the instance name rather than the systemd unit string. Check the current state before you change it:
dsctl ldap1 statusSample output:
Instance "ldap1" is runningStop the instance:
dsctl ldap1 stopSample output:
Instance "ldap1" has been stoppedStart it again:
dsctl ldap1 startSample output:
Instance "ldap1" has been startedEach message confirms that the requested transition completed.
You can control the same process through systemd when that fits your workflow:
systemctl restart dirsrv@ldap1The command exits silently when the unit reloads successfully.
Which tool to reach for:
dsctl— offline maintenance: backup, restore, import, index rebuildingdsconf— online configuration and task operations on a running instancesystemctl— coordinating a host reboot or bouncing several services together
A complete backup and restore procedure is covered in backup and restore.
Roll back a lab instance
If a test install fails or you want to reclaim disk space, you can remove the instance entirely. Back up first if there is anything in the directory you might need later. db2bak is an offline operation and fails while ns-slapd is still running.
Stop the instance before taking an offline backup:
dsctl ldap1 stopConfirm the instance is stopped:
dsctl ldap1 statusInstance "ldap1" is not runningCreate the backup:
dsctl ldap1 db2bakdb2bak successfulCopy the resulting backup outside the instance tree before you remove anything. For off-host storage, use the scp command or rsync command. By default, db2bak writes inside the instance data hierarchy using a timestamped directory name:
install -d -m 0700 /var/backups/dirsrv/ldap1
cp -a /var/lib/dirsrv/slapd-ldap1/bak/. /var/backups/dirsrv/ldap1/
You may see a directory name similar to:
ldap1-2026-07-15T13:35:28.351638Current 389 Directory Server backups bundle more than database files. A timestamped db2bak directory typically includes:
- The database archive
- Instance configuration files under
config_files/ - The certificate database
- Custom schema
Restoring the database files alone does not automatically restore those configuration artifacts, so copy them back manually when you rebuild the instance or recover on another host. The dedicated backup and restore chapter covers the complete recovery procedure.
Because the cp -a command above copies the complete bak directory, it preserves both the database archive and its config_files content. Before removing the instance, verify that the external copy contains what you expect:
find /var/backups/dirsrv/ldap1 -type d -name config_files -printSample output:
/var/backups/dirsrv/ldap1/ldap1-2026-07-15T14:19:28.611834/config_filesThat path confirms the backup bundle includes configuration and certificate material alongside the database archive. It is not just LDIF database files.
Do not run dsctl ldap1 remove --do-it until the backup is stored somewhere safe. Anything left under the instance directory can be deleted along with the instance.
Remove the lab instance when you are ready:
dsctl ldap1 remove --do-itThis command deletes the instance configuration, database files, and logs. Use it only on lab systems you are finished with.
Review logs and troubleshoot installation
When an instance fails to start after dscreate, check service logs first, then verify file permissions and SELinux file contexts if labeling was applied during installation.
| Symptom | Likely cause | Fix |
|---|---|---|
dscreate reports the instance already exists |
A previous install left slapd-ldap1 on disk |
Run dsctl -l, inspect the existing instance, and remove the test instance with dsctl ldap1 remove --do-it if you intend to recreate it |
| FQDN cannot be resolved | DNS or /etc/hosts is missing the name in full_machine_name |
Run hostname -f and getent -s files hosts ldap1.example.com, fix DNS or hosts, then recreate the instance |
| Port 389 or 636 already in use | Another LDAP server or Directory Server instance owns the port | Run ss -lntp | grep -E ':389|:636' and stop or reconfigure the conflicting service |
| Instance fails to start | SELinux labeling, permissions, or invalid INF settings | Run dsctl ldap1 status, then journalctl -u dirsrv@ldap1 and review /var/log/dirsrv/slapd-ldap1/errors |
| LDAP bind fails | Wrong bind DN, password, URI, or instance stopped | Confirm spelling, use -W instead of -w, verify the instance is running, and match LDAP vs LDAPS in the URI |
| Suffix search returns no entries | Suffix entry was not created | Confirm create_suffix_entry = True was set before dscreate from-file ran; check with dsconf ldap1 backend suffix list |
When bind failures persist, compare your bind DN against the root_dn value in the INF file. Confirm you are connecting to the instance you created, not a different LDAP server running on the same host.
Installation verification checklist
Before you move on to the next chapter, confirm the following:
389-ds-baseis installeddscreate,dsctl,dsconf, anddsidmare available on the PATH- The instance appears in
dsctl -l dirsrv@ldap1is runningns-slapdis listening on the expected ports- The
userrootbackend exists and reportsnsslapd-backend-implement: mdbon 389 DS 3.x - The suffix is
dc=example,dc=com - A base-level suffix search succeeds
- The initial organizational units exist
- The errors log shows no unresolved startup failures
- You are not planning to expose remote simple binds over plain LDAP in production without TLS protection
What's Next
- Create an instance with a dscreate INF file — automate instance creation for labs and CI
- Suffixes and backends — add or inspect directory suffixes
- Manage users and groups — populate the suffix with
dsidm
References
- 389 Directory Server 3.2.0 release notes
- 389 Directory Server — install how-to
- Red Hat Directory Server 13 — setting up an instance using the command line
Summary
Installing the 389-ds-base package gives you the software, but a usable Directory Server deployment still needs a named instance, an active backend, a directory suffix, and verified LDAP access. With the listeners confirmed and organizational units in place, you have a clean foundation for users, groups, password policies, security settings, and replication in the chapters that follow.